Classic White Kitchen Reveal
 Happy friday friends! Jacqueline here. It’s been awhile since I’ve shared a room reveal with you guys. My last reveal was Luca’s nursery, which was almost a year ago. The kitchen has been on our list since purchasing the house four and a half years ago, and to be honest- it’s been a work in progress ever since. Actually…the kitchen has pretty much been finished (minus the floors) for the past two years. We basically did everything backwards and finished the floors last, which I don’t really suggest. After wrapping up the tile and shopping for some updated kitchen accessories, I’m thrilled to say, it’s totally finished! Although it is a small space, we finally have a kitchen we’re proud of and love spending time in. I’ll be spilling all the details on the project, including scary before photos and sources, in today’s post. I hope you guys love the space just as much as we do!

As always, let’s start with a before image! First of all, please excuse the grainy before photos- these were from the house listing and they are all we have. As you can see, we pretty much changed everything except the cabinetry.
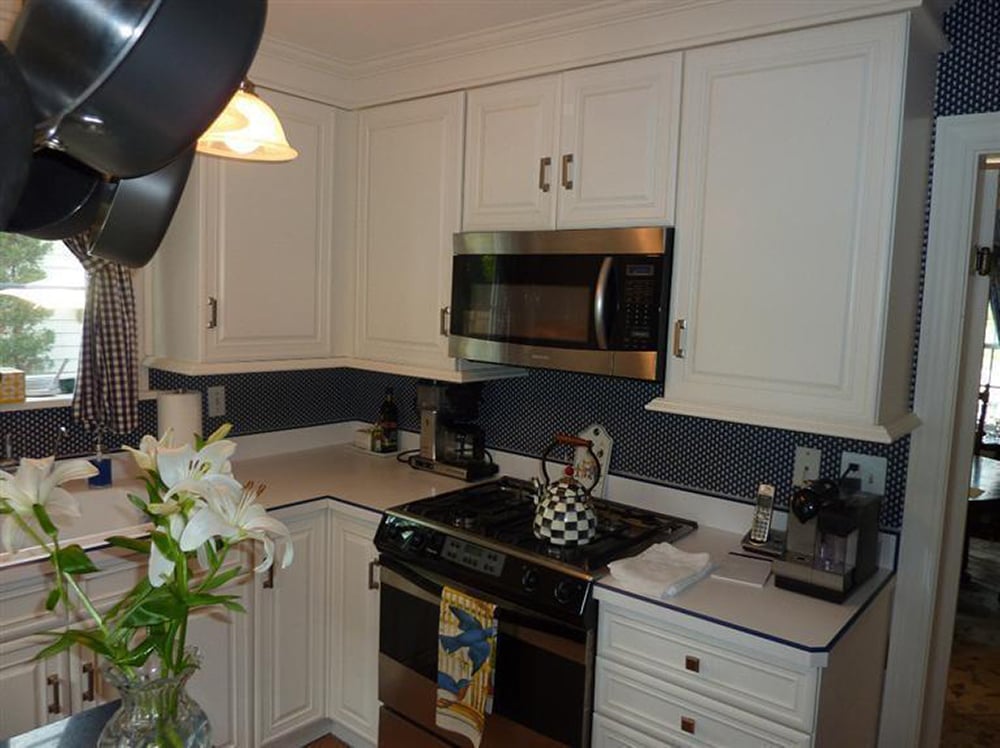 Believe it or not, the kitchen had recently been updated when we bought the house and the cabinets were in great shape. They may not be our preferred style, but we couldn’t swallow spending money to replace cabinets that were in perfect working condition (and solid, sturdy cabinets at that). So, we decided to live with them and swap out the hardware (remember this brass kitchen cabinetry hardware post from awhile ago?).
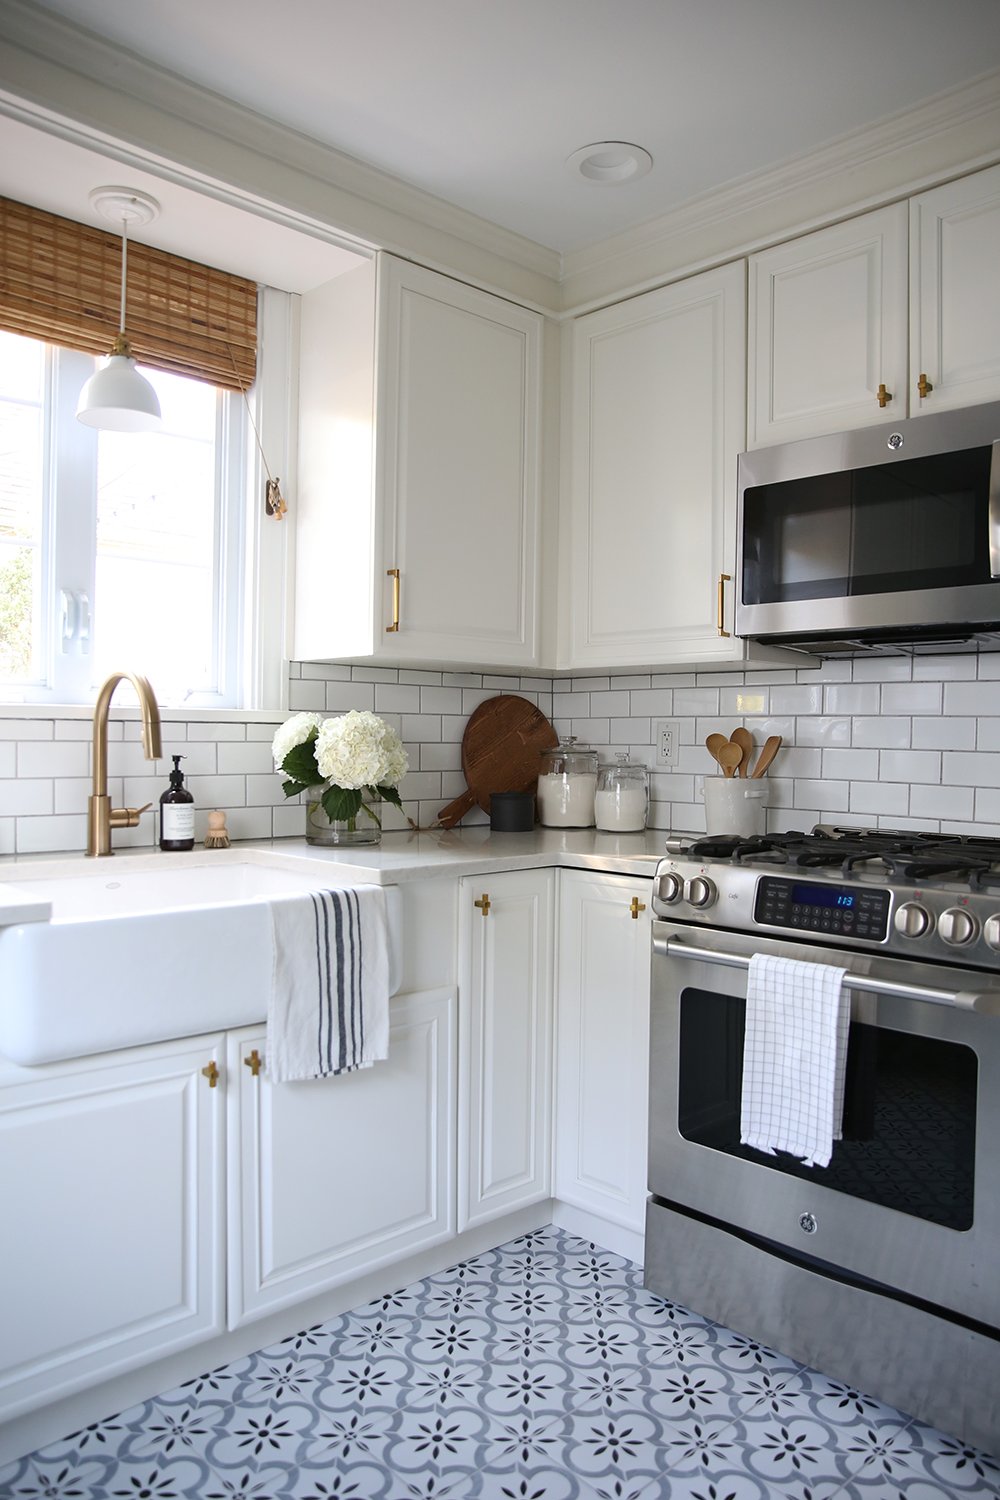 Today, it’s much more reflective of my personal aesthetic. Simple, clean, and classic- with the perfect amount of personality within the patterned floor tile.
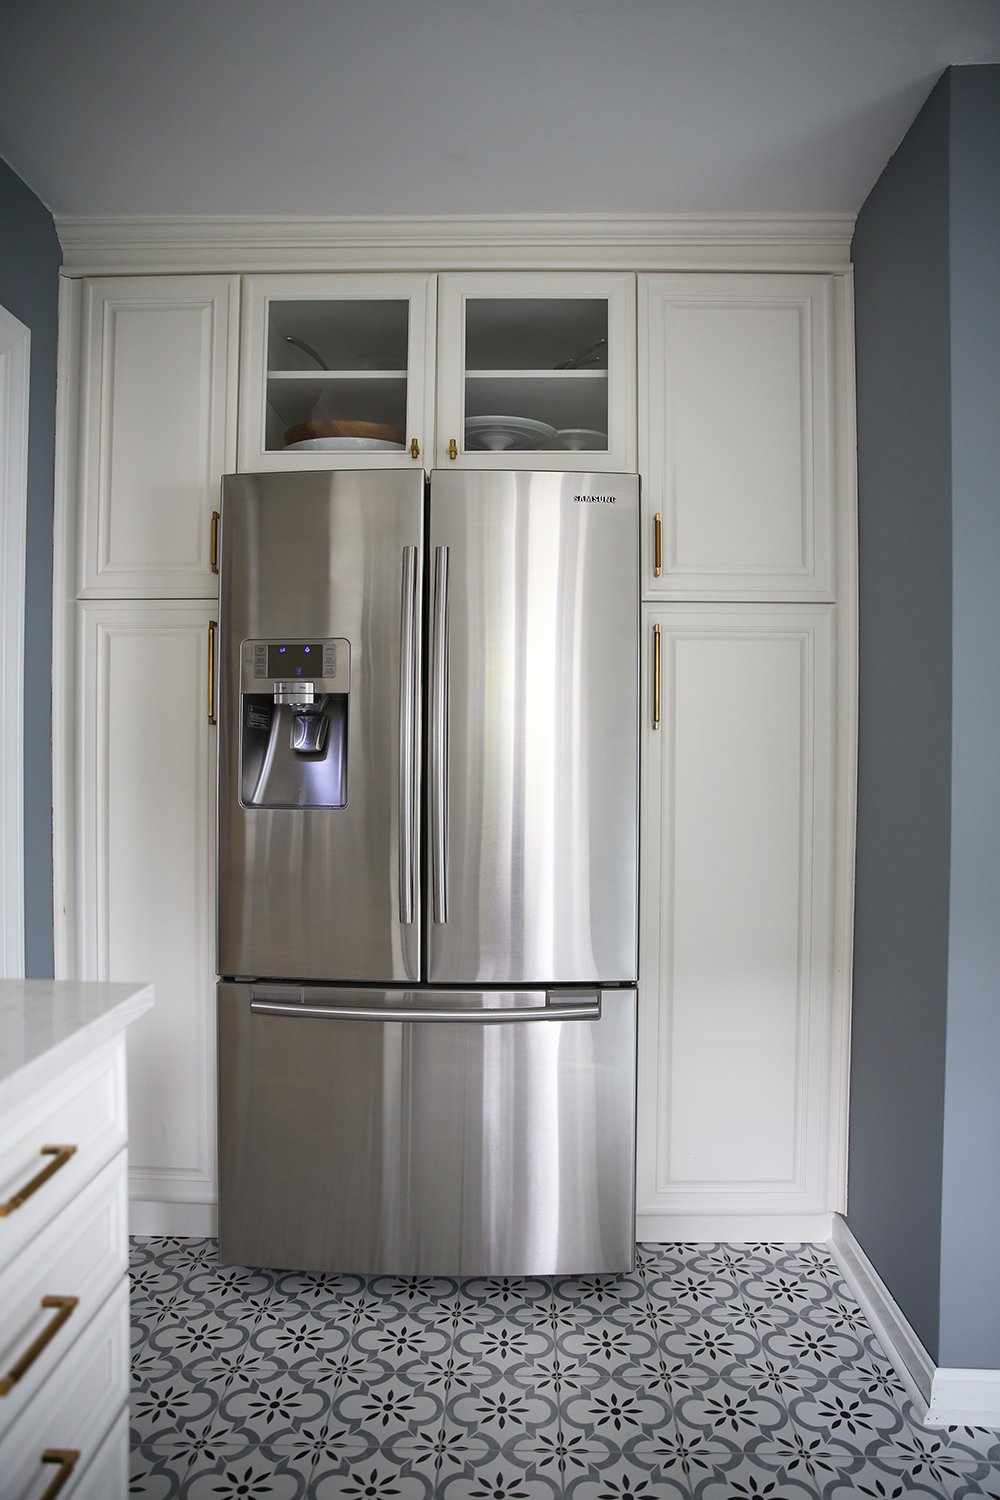
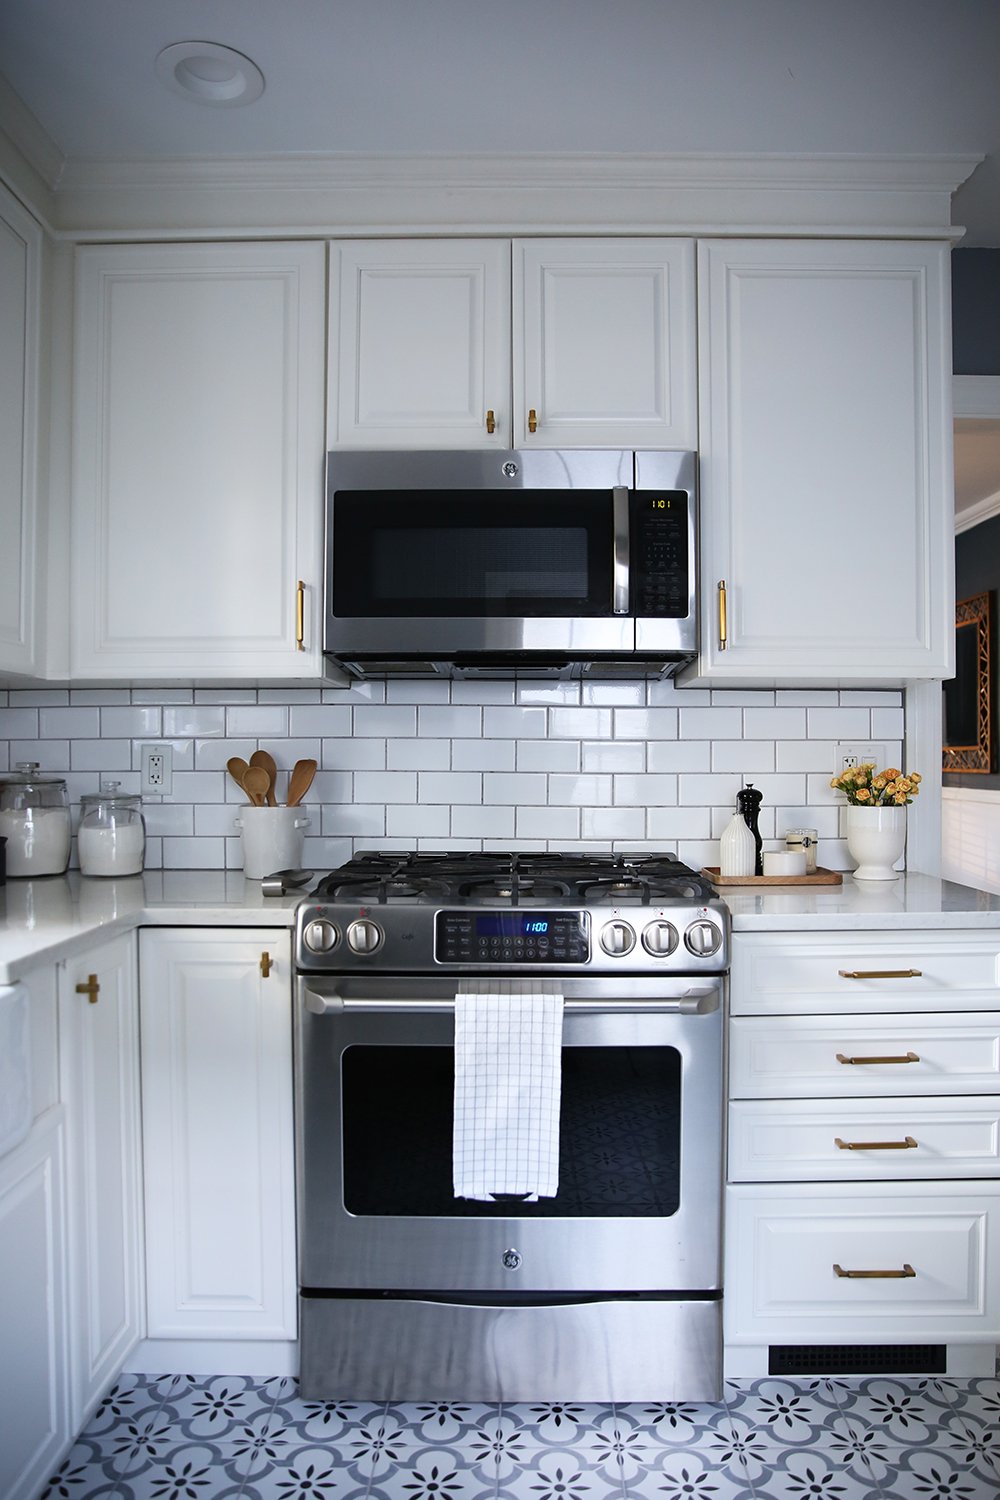
 The refrigerator was also new and it’s the only appliance we kept from the original kitchen. When it came time to replace the others, we decided to stick with stainless for a cohesive look.
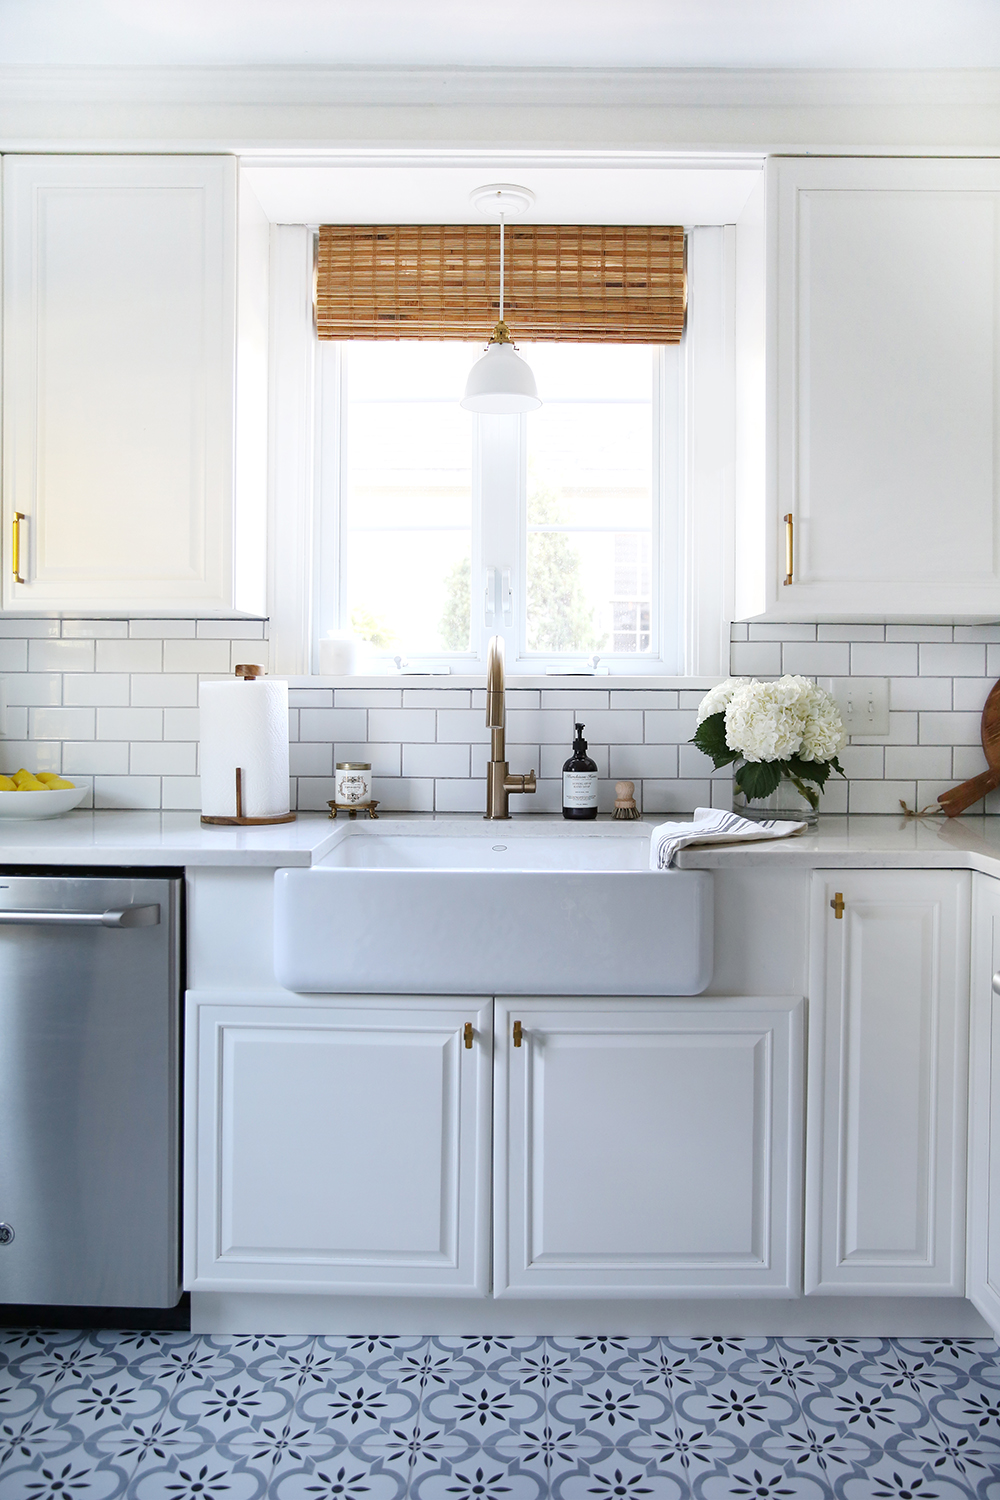
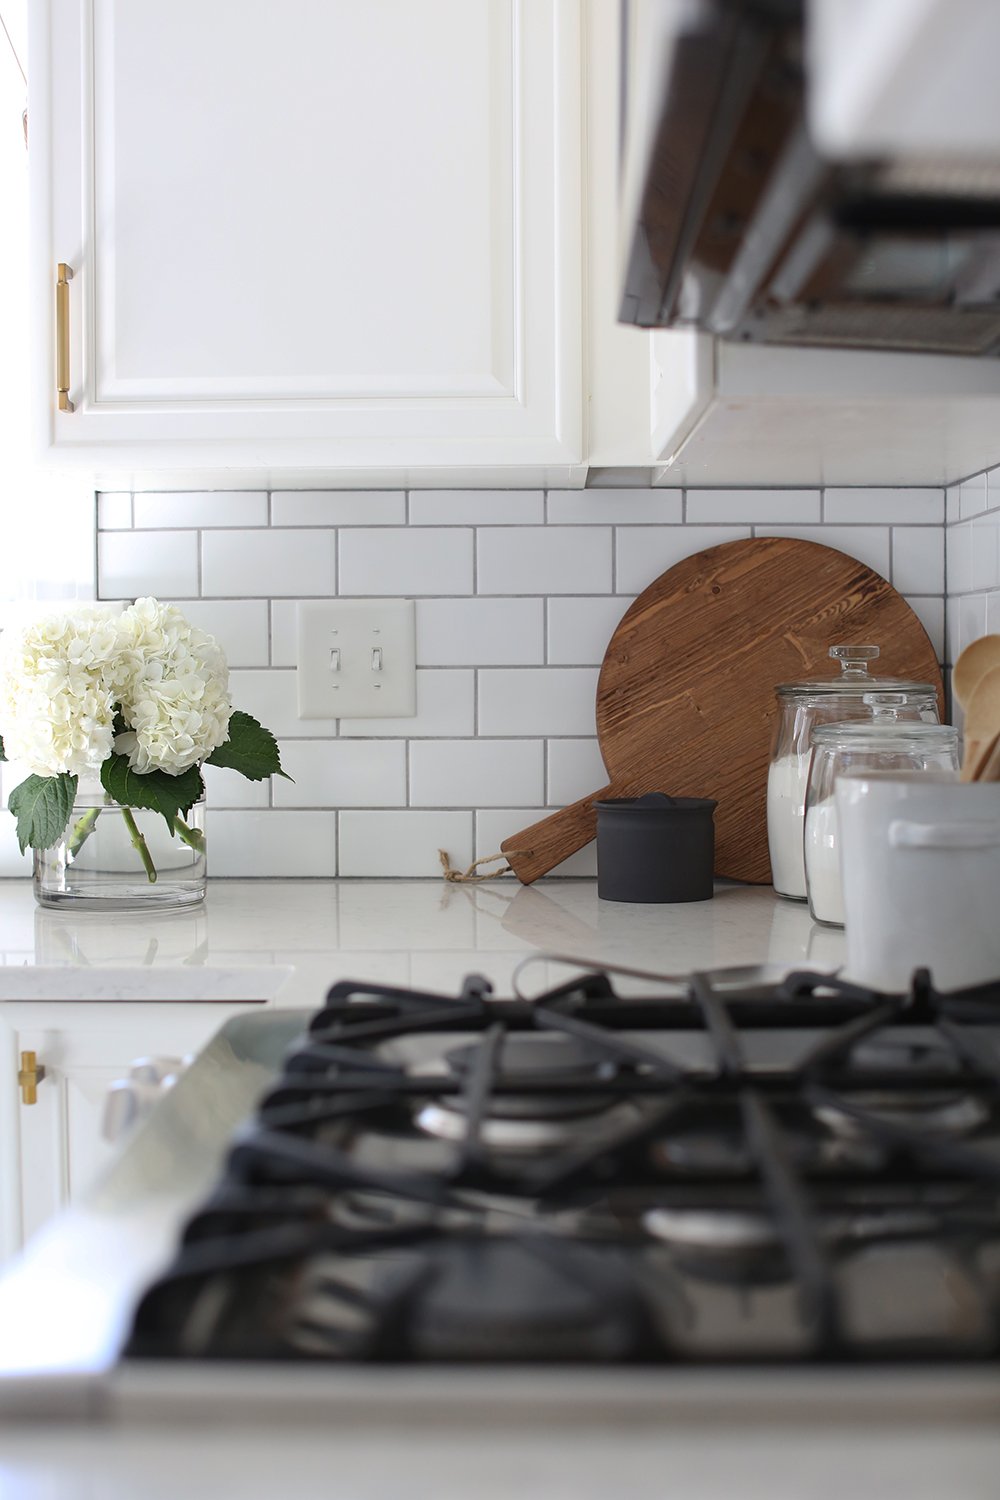
 One of the very first projects we tackled was removing wallpaper from the walls. Tip: wallpaper should never be used behind an oven range. I don’t know why the previous homeowners did this, but my husband spent hours scraping it off of the wall behind the range after it had basically been plastered to the wall from heat and grease escaping the stove. We opted for a classic white subway tile backsplash instead. It has been much easier to clean and is also more functional for a kitchen, obviously.
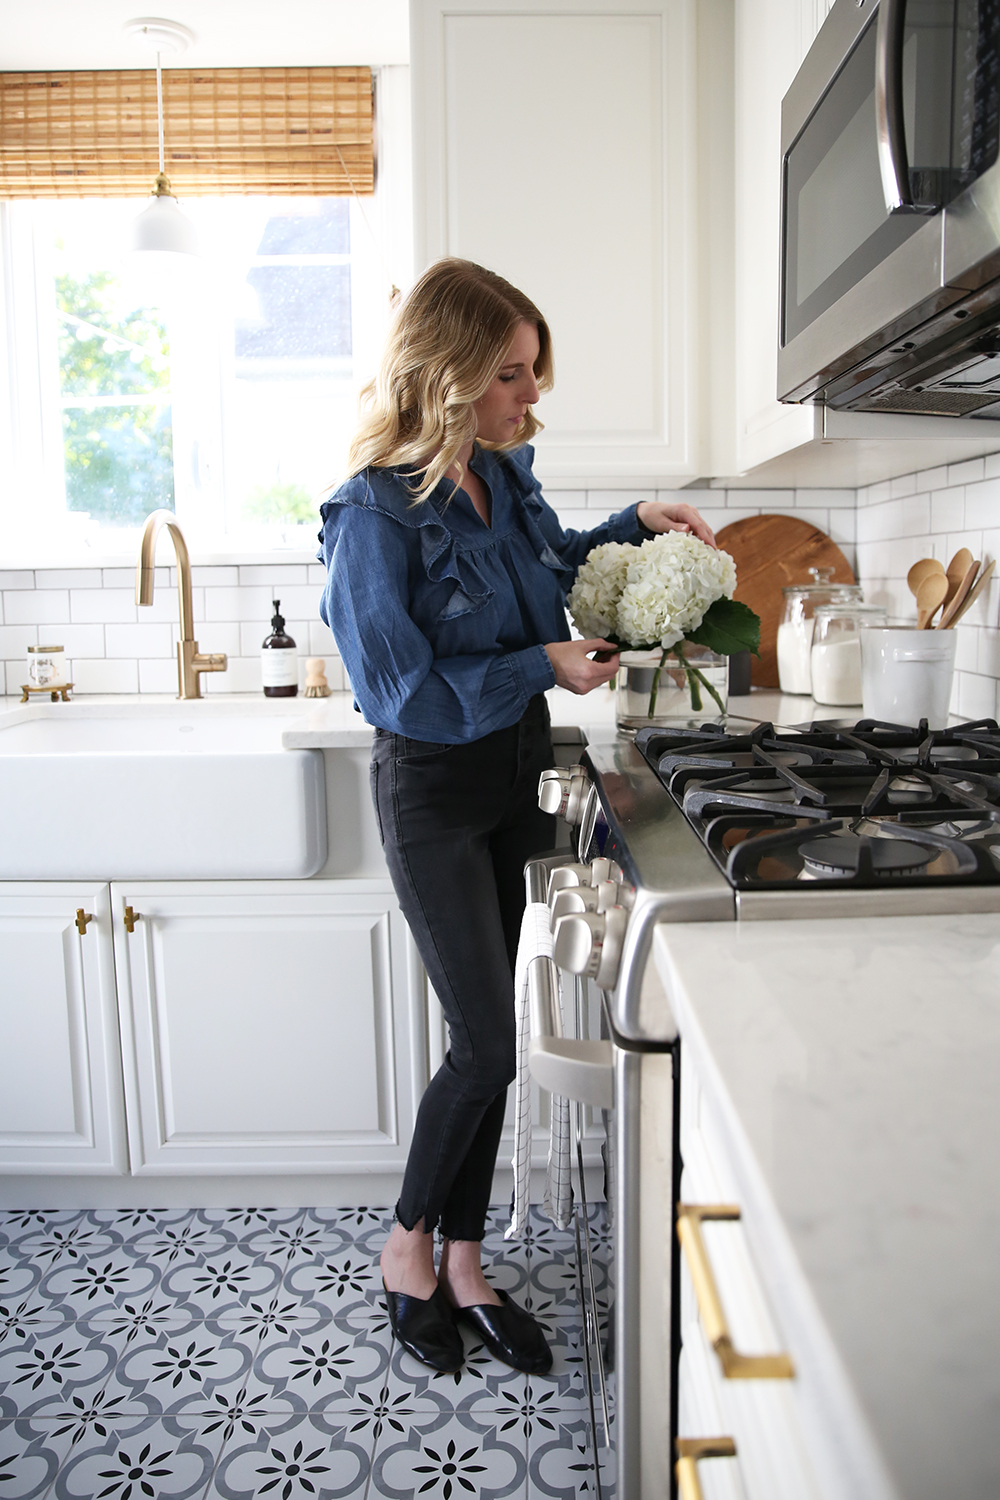
 Next, we installed a new sink, countertops, and brass faucet (the same one Sarah used in this tuxedo kitchen renovation).
 We have loved the single basin under mount farmhouse sink and quartz countertops! The countertops were one of the items we did not DIY- we used Lowes to install those and they did a wonderful job.
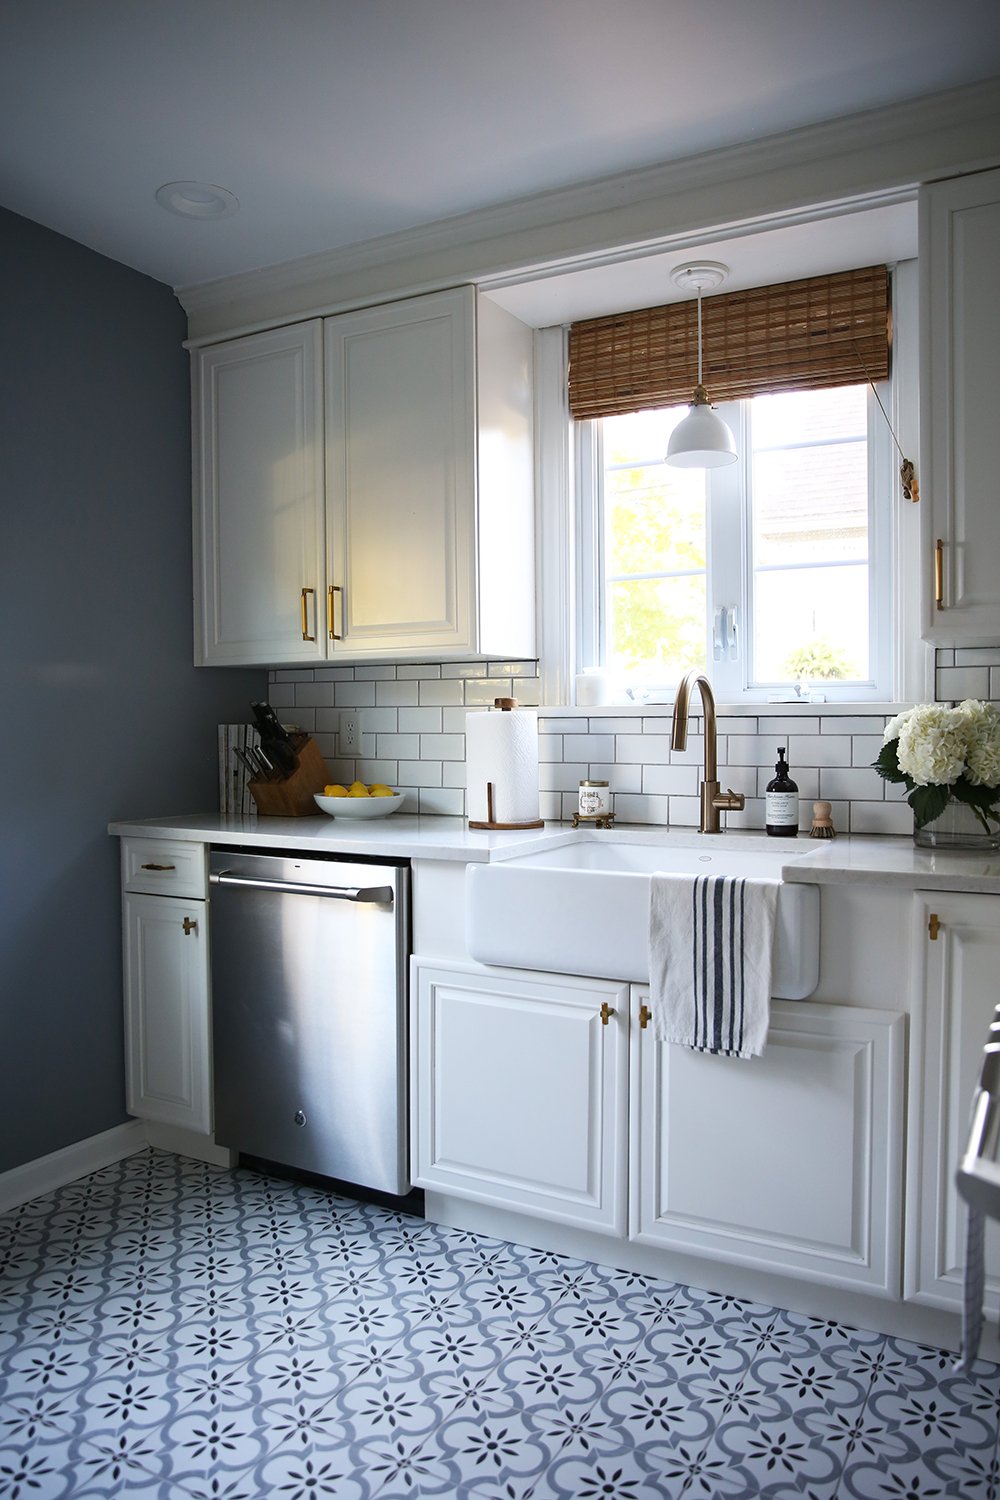
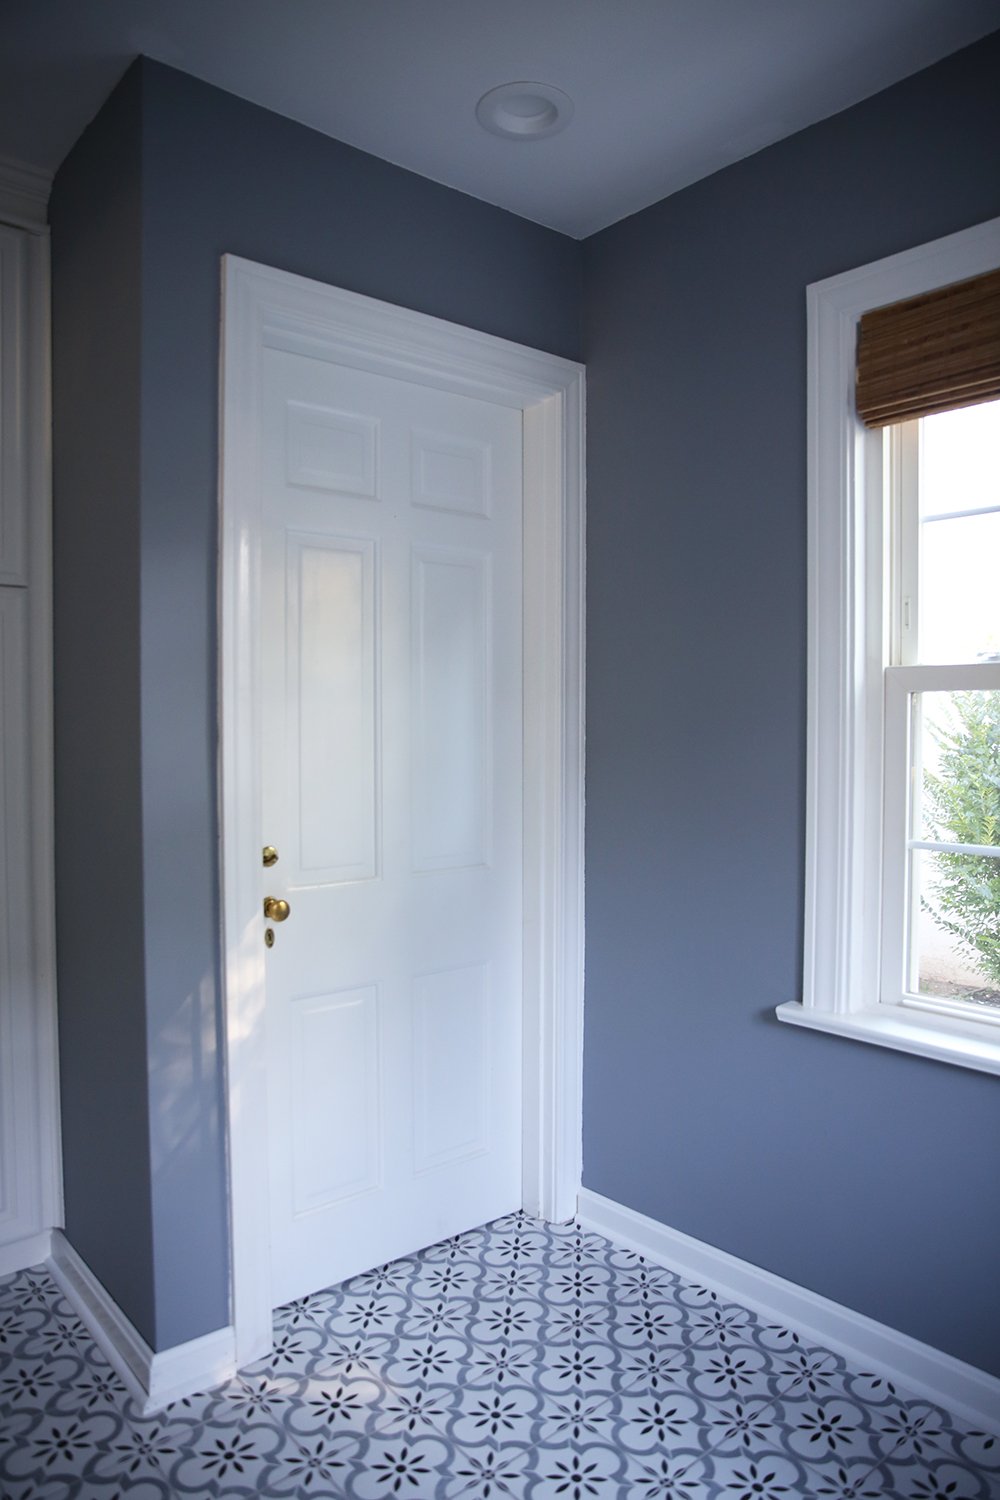
The patterned floor tiles were the icing on the cake in this room. I love how they pull everything together (remember the awful terra-cotta tile I shared on Instagram stories?). After having the floor tile installed we decided to go darker on the walls. With the white cabinets, countertops, and backsplash, the room needed some contrast. We chose Sherwin Williams Steely Grey. I usually lean toward light, bright spaces, but in this instance- I’m loving the darker walls and how they compliment the hue in the floor tile.
 Speaking of patterned floor tile, if you’re on the hunt for your own… check out this giant roundup that Sarah compiled- they’re all very affordable options! She also has a patterned floor in her kitchen.
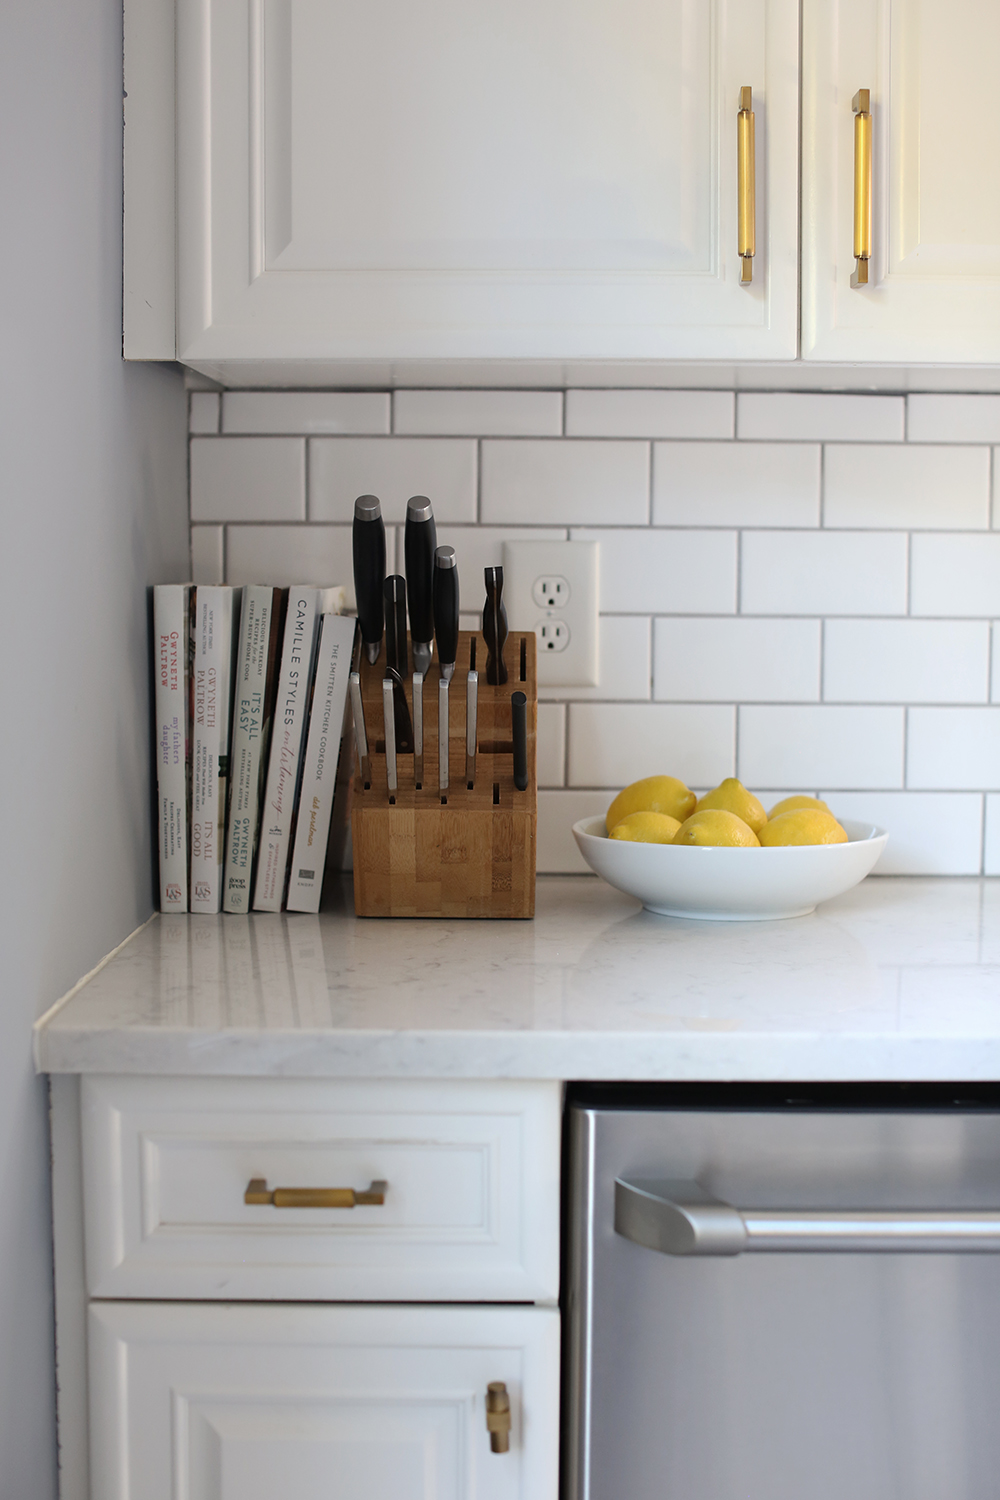
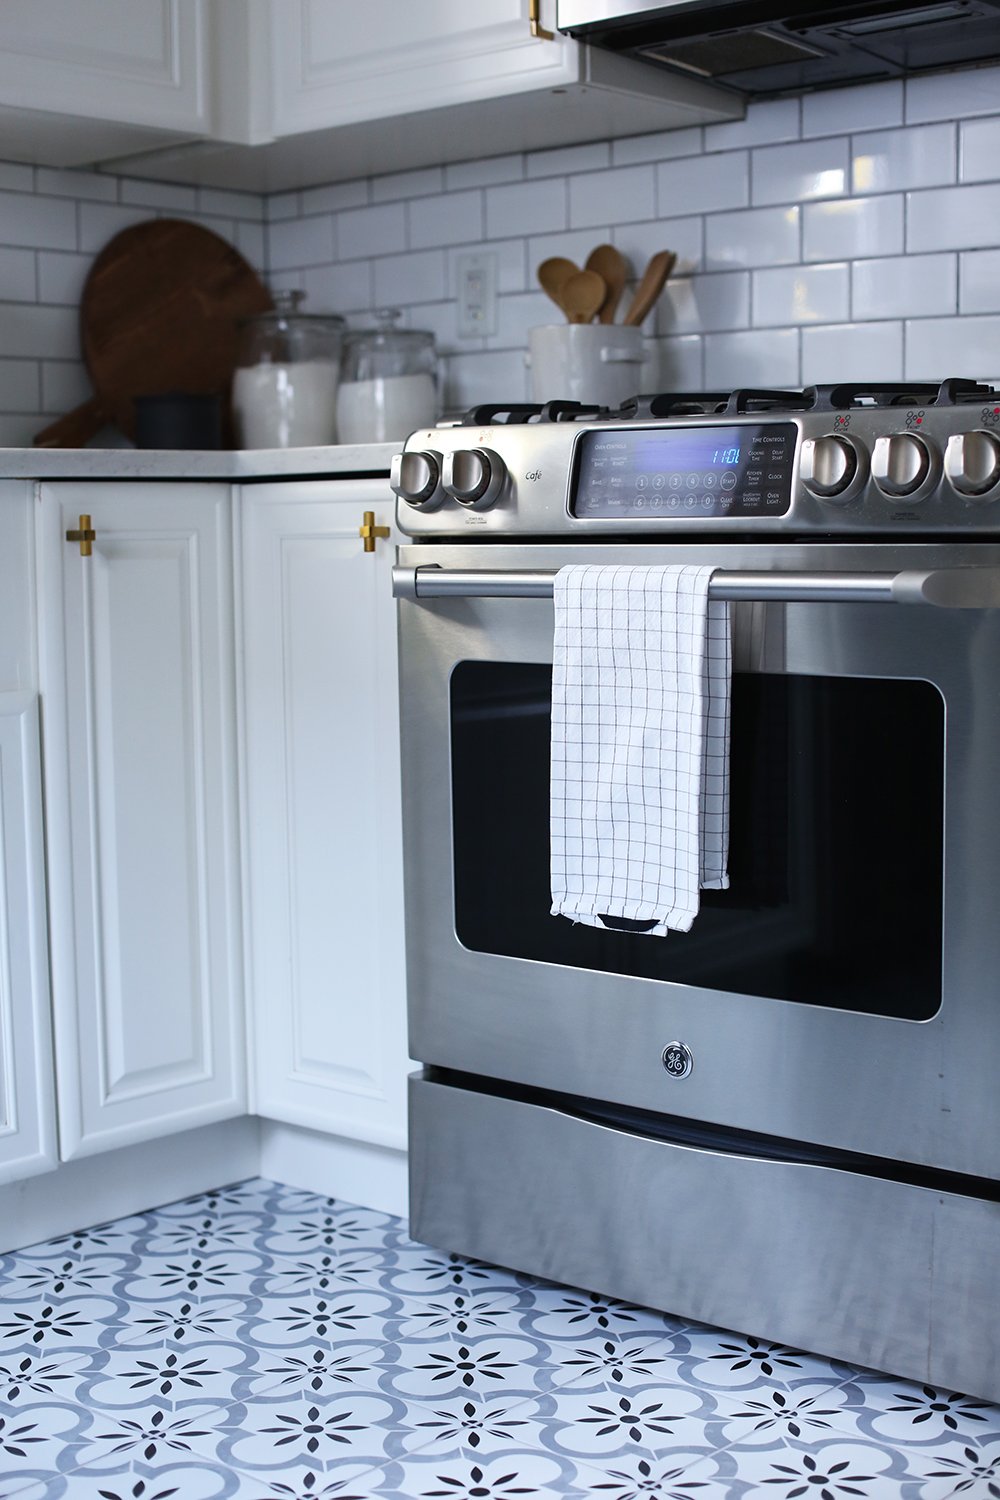 I also switched out some of our kitchen decor- the canisters, utensil holder, and a simple wooden tray to gather cooking supplies like salt, pepper and olive oil.
 Although I sometimes struggle with the in-between unfinished phase, it can be fun to make a space feel different by doing something as simple as swapping out decor or accessories. If you’re ever in a funk with a space in your home and can’t afford to renovate right away, try trading something small in the space and see how it changes your view of the room!

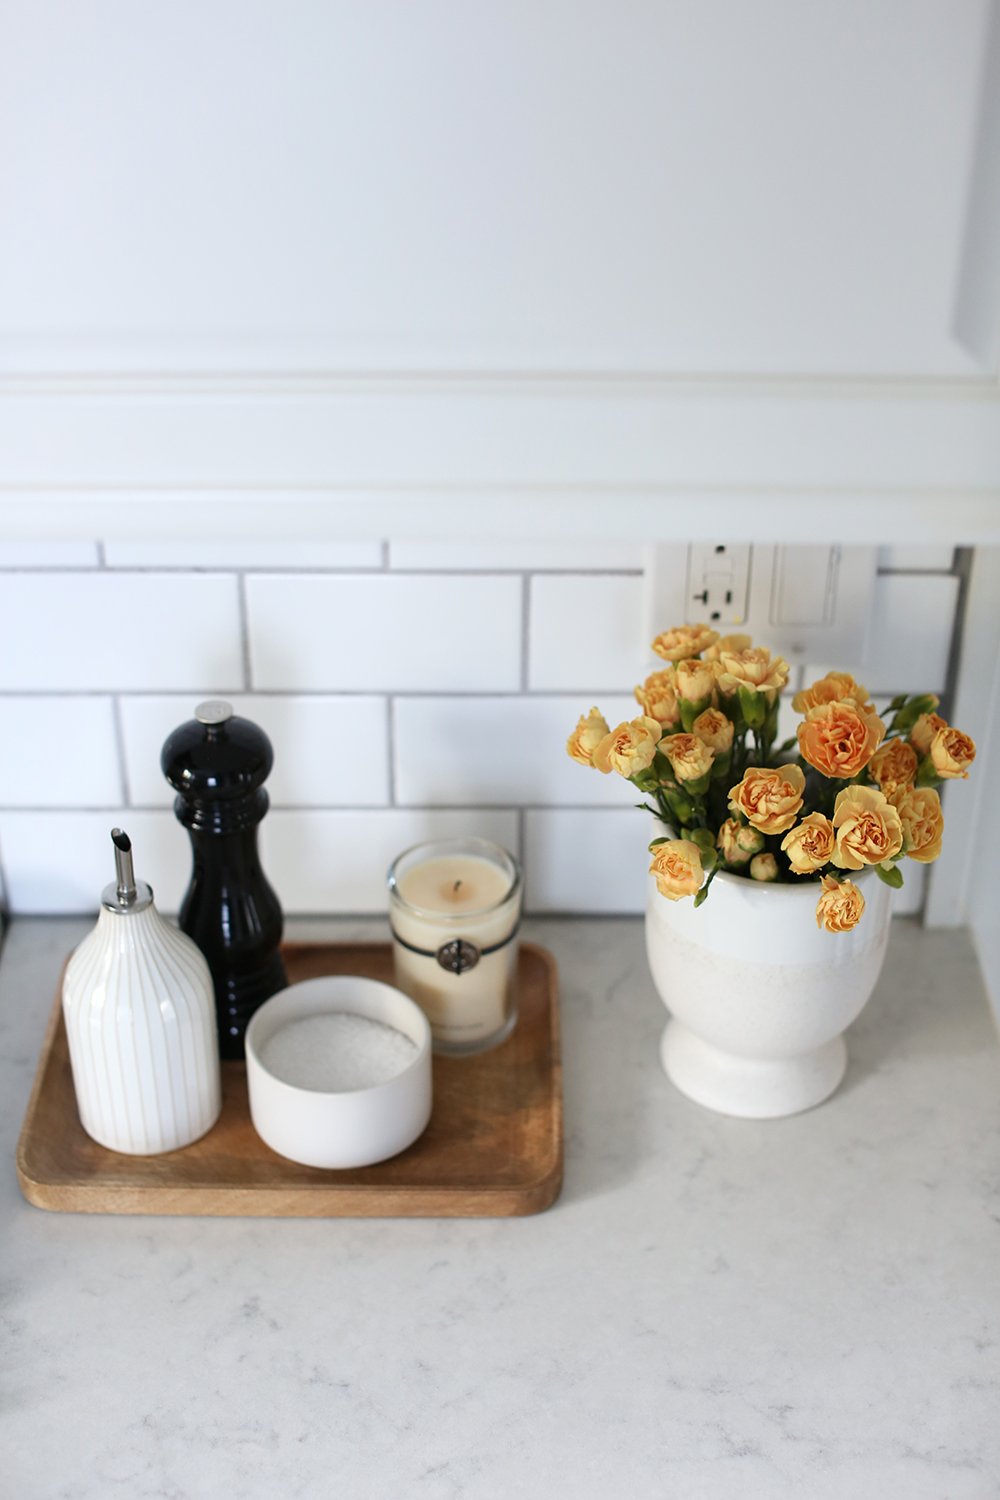 Another pro tip: keep cooking ingredients out on the countertop, right by the stove for easy access when cooking… fresh flowers also create a nice view!
 I haven’t always loved being in our kitchen, but I have to say…it’s definitely growing on me! I find myself gravitating towards this room more often now and I’m happier to spend time cooking and cleaning here. Next on the list is our powder room, which we’re getting started on right away.
Click directly on the sources to shop below.

01: brass faucet // 02: subway tile // 03: pendant light // 04: farmhouse sink // 05: bristle brush // 06: hand soap // 07: roman shade // 08: sherwin-williams steely gray // 09: large cabinet pull // 10: medium cabinet pull // 11: cabinet knob // 12: patterned floor tile // 13: utensil holder // 14: black canister // 15: round bread board // 16: large market jar // 17: small market jar // 18: quartz countertop // 19: knife block // 20: fringe tea towel // 21: stoneware bowl // 22: pepper mill // 23: footed candle holder // 24: pumpkin candle // 25: wood tray // 26: oil set // 27: serving bowl // 28: dishwasher // 29: grid tea towels // 30: range // 31: refrigerator
What is your favorite part of the kitchen? I’d love to hear your thoughts in the comments below!