Entryway Renovation : Before Images & Demo
 Exciting news! We started demo on the entryway and things are already moving right along. I need to bring everyone up to speed! I took some photos and videos, but haven’t posted anything yet- mostly because I was signed off dealing with my health and trying to feel better this past month. However, I’m eager to show you what we’ve got cooking and catch everyone up today. Click through for the first real post of our entryway renovation… it’s packed with before images, updated plans, and a little bit of demo- including some interesting 90’s wallpaper!
BEFORE IMAGES
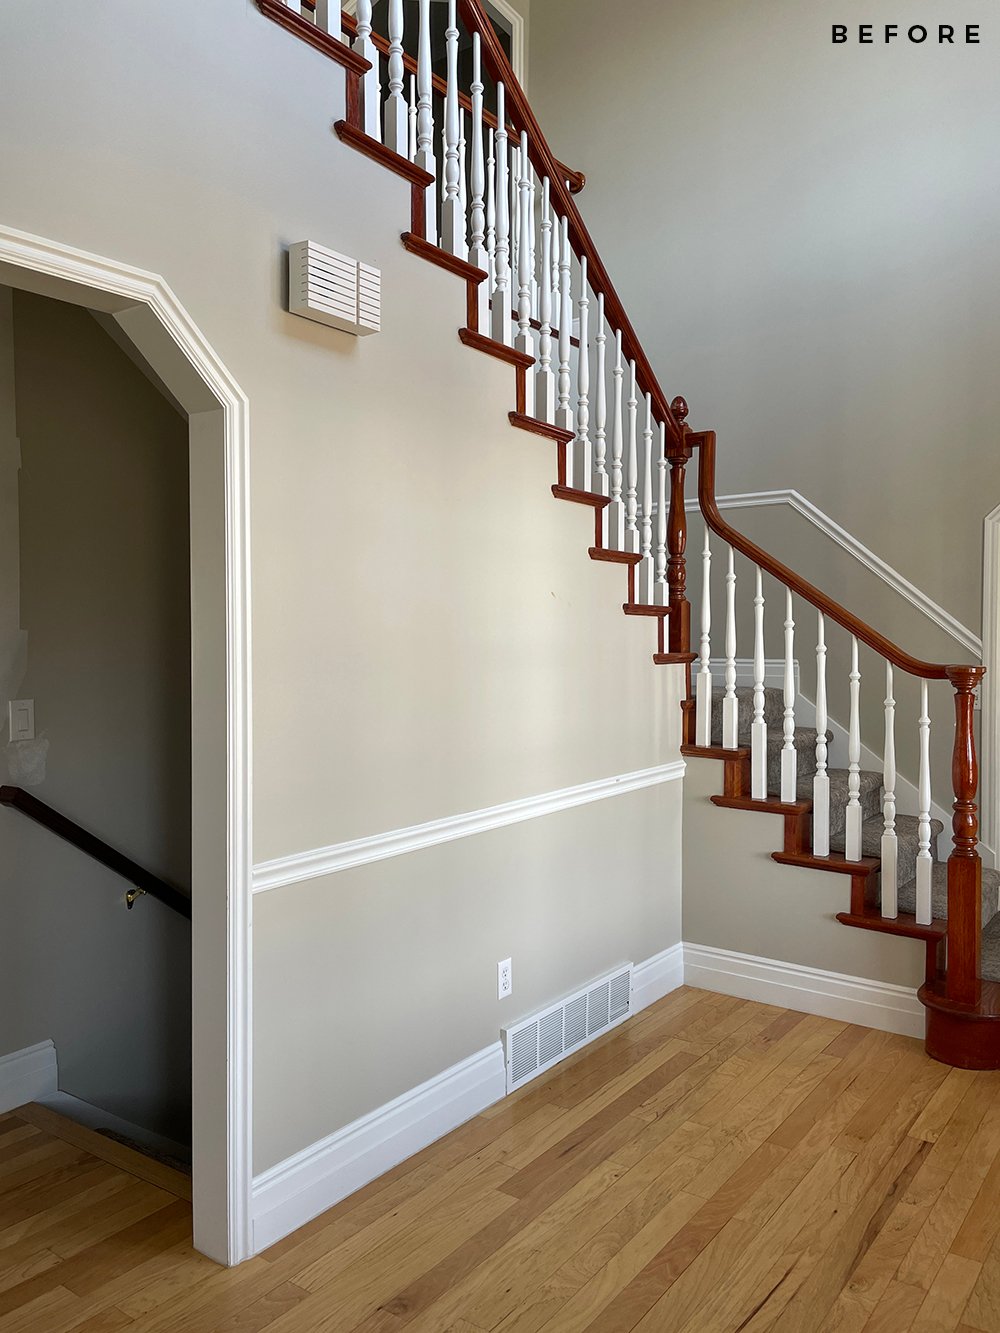
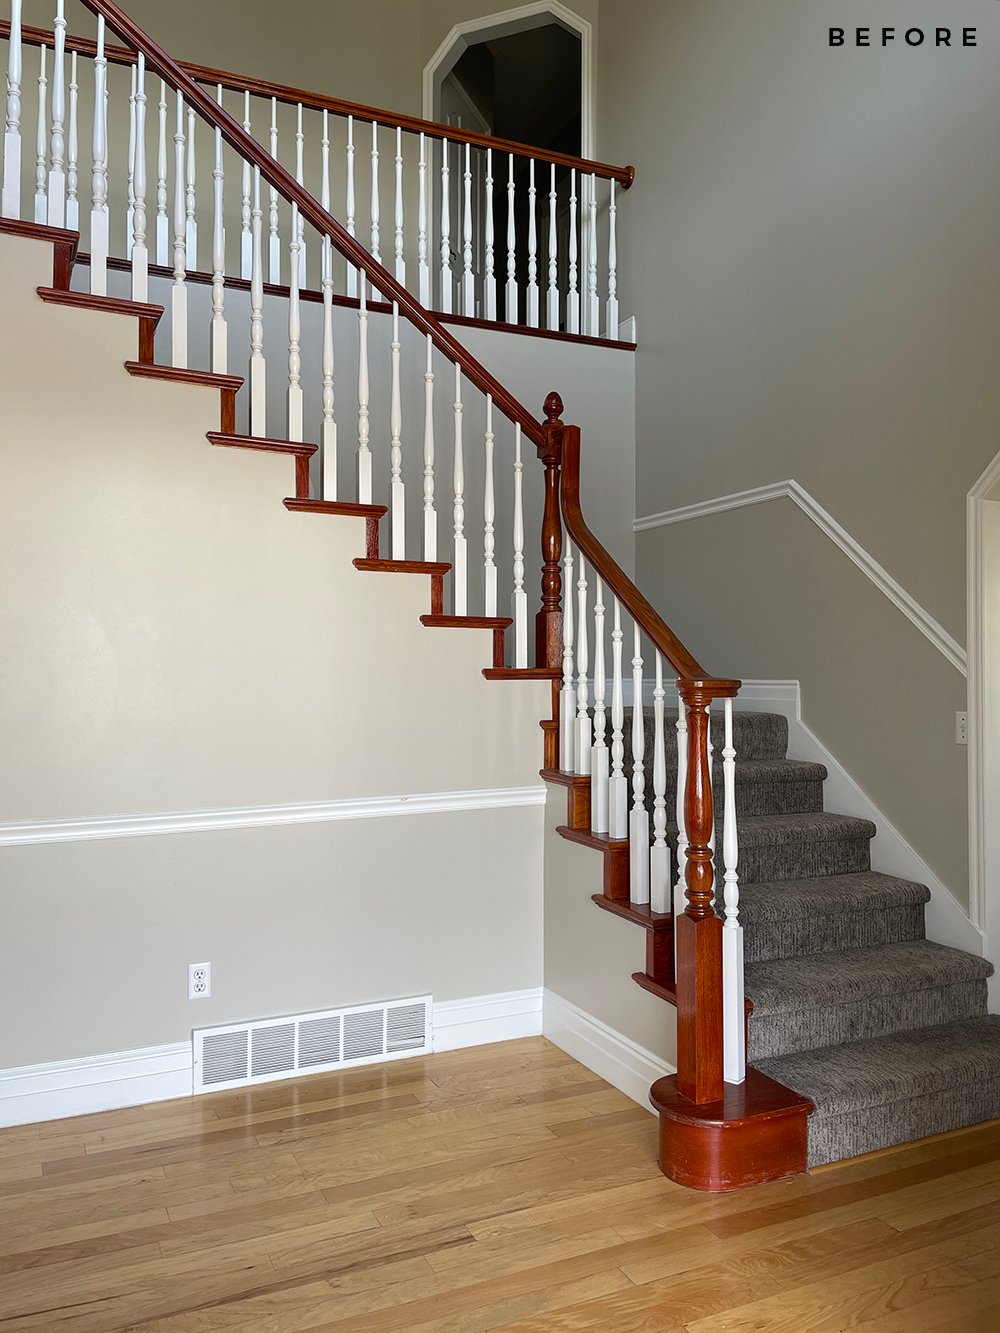
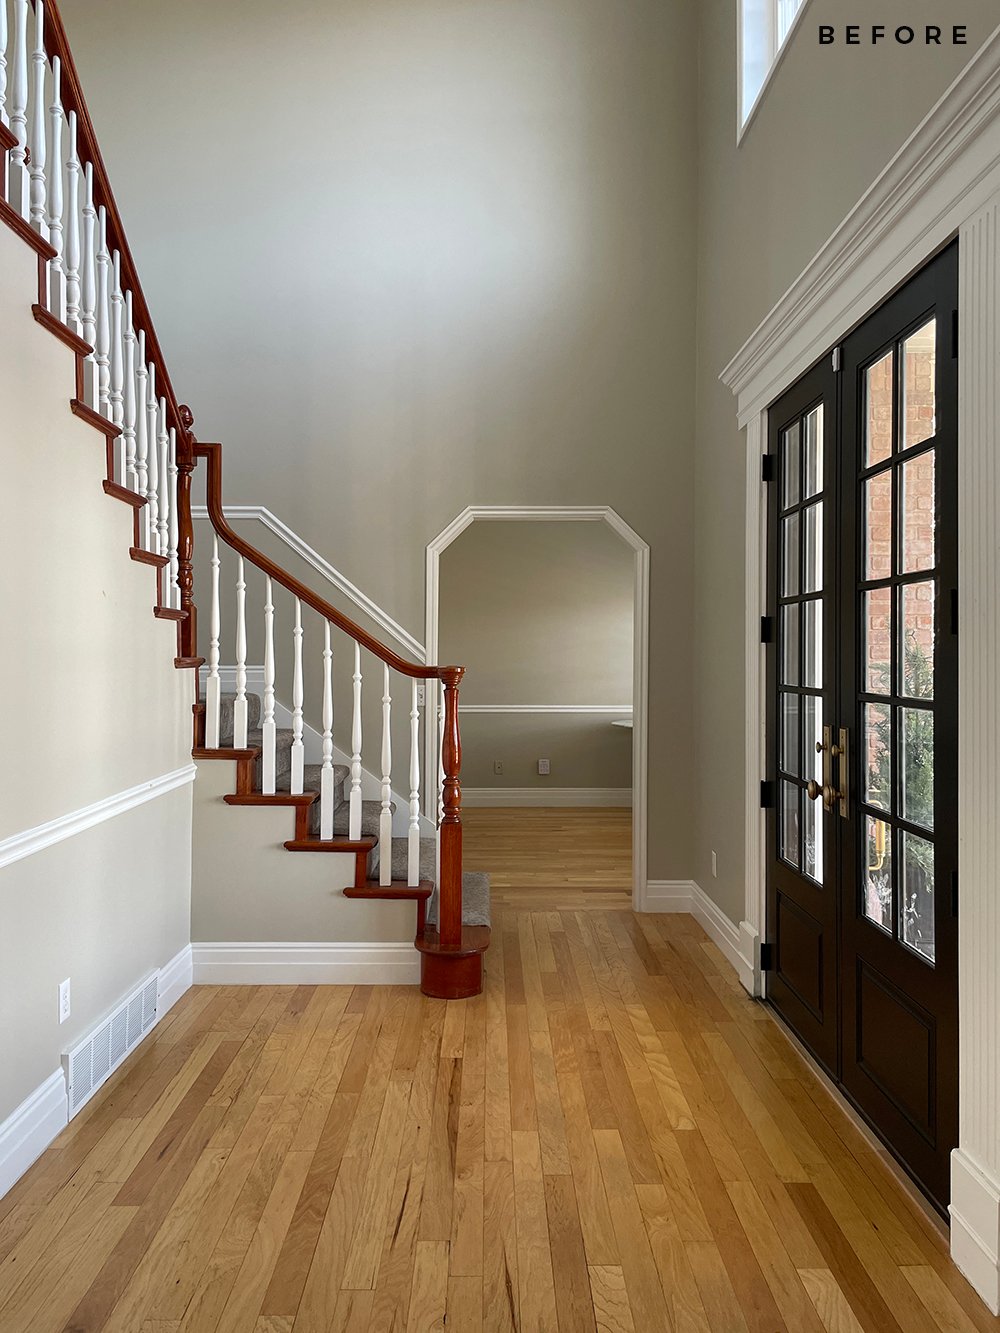 I wanted to take some proper before images of the space, after we cleared out the furniture. I shared some photos in this post, but I really wanted to give you a better sense and wider visual of the space once it was empty.
 It’s really a great blank canvas for us. We’ll be keeping the footprint and floor plan the same, but will be updating all of the finishes, millwork, the stairs, and inserting our aesthetic.
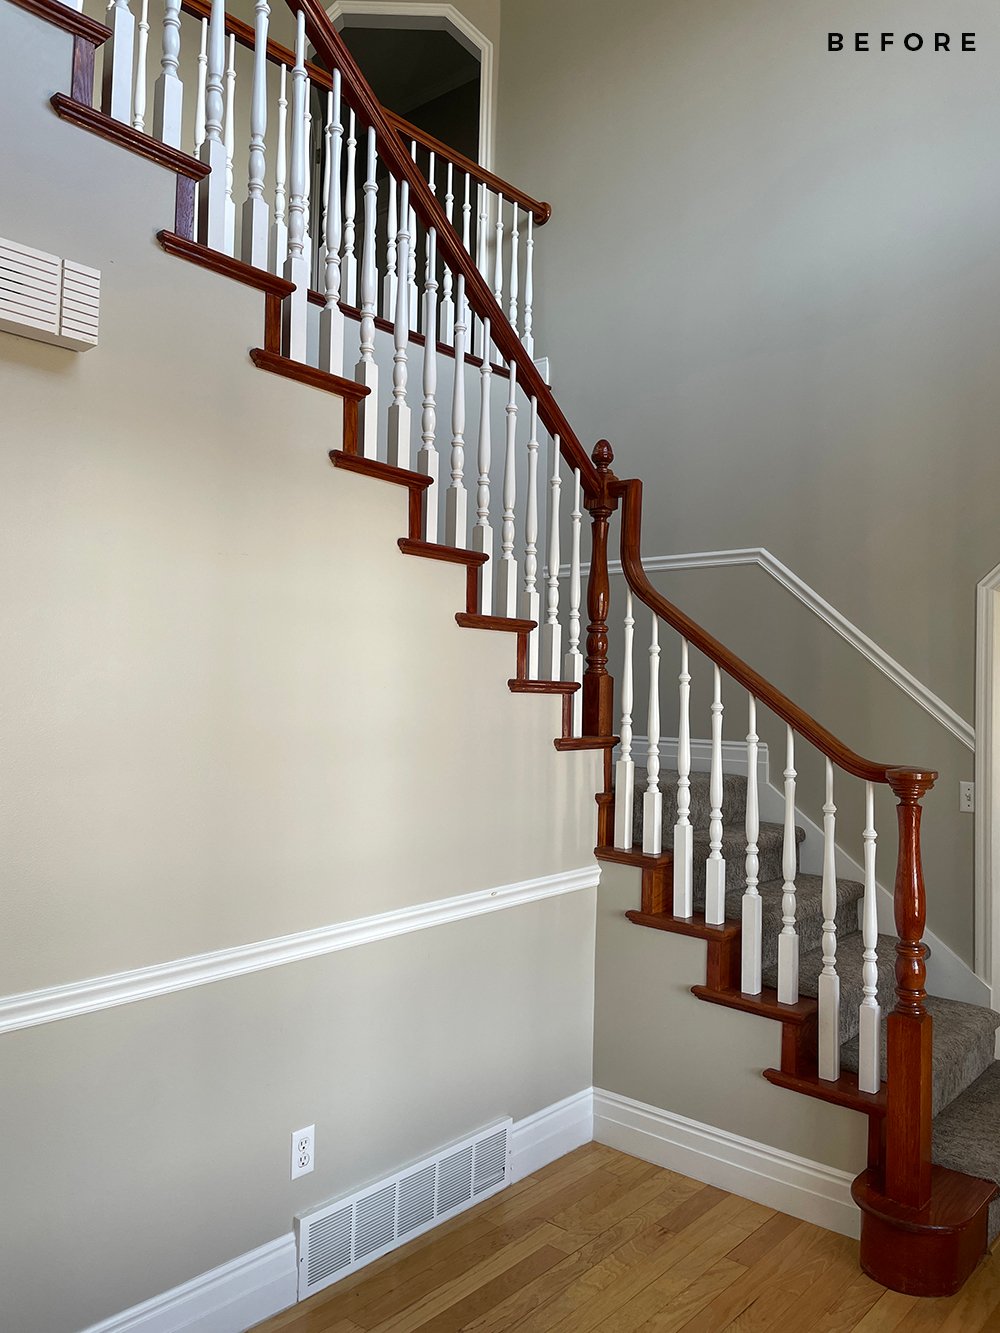
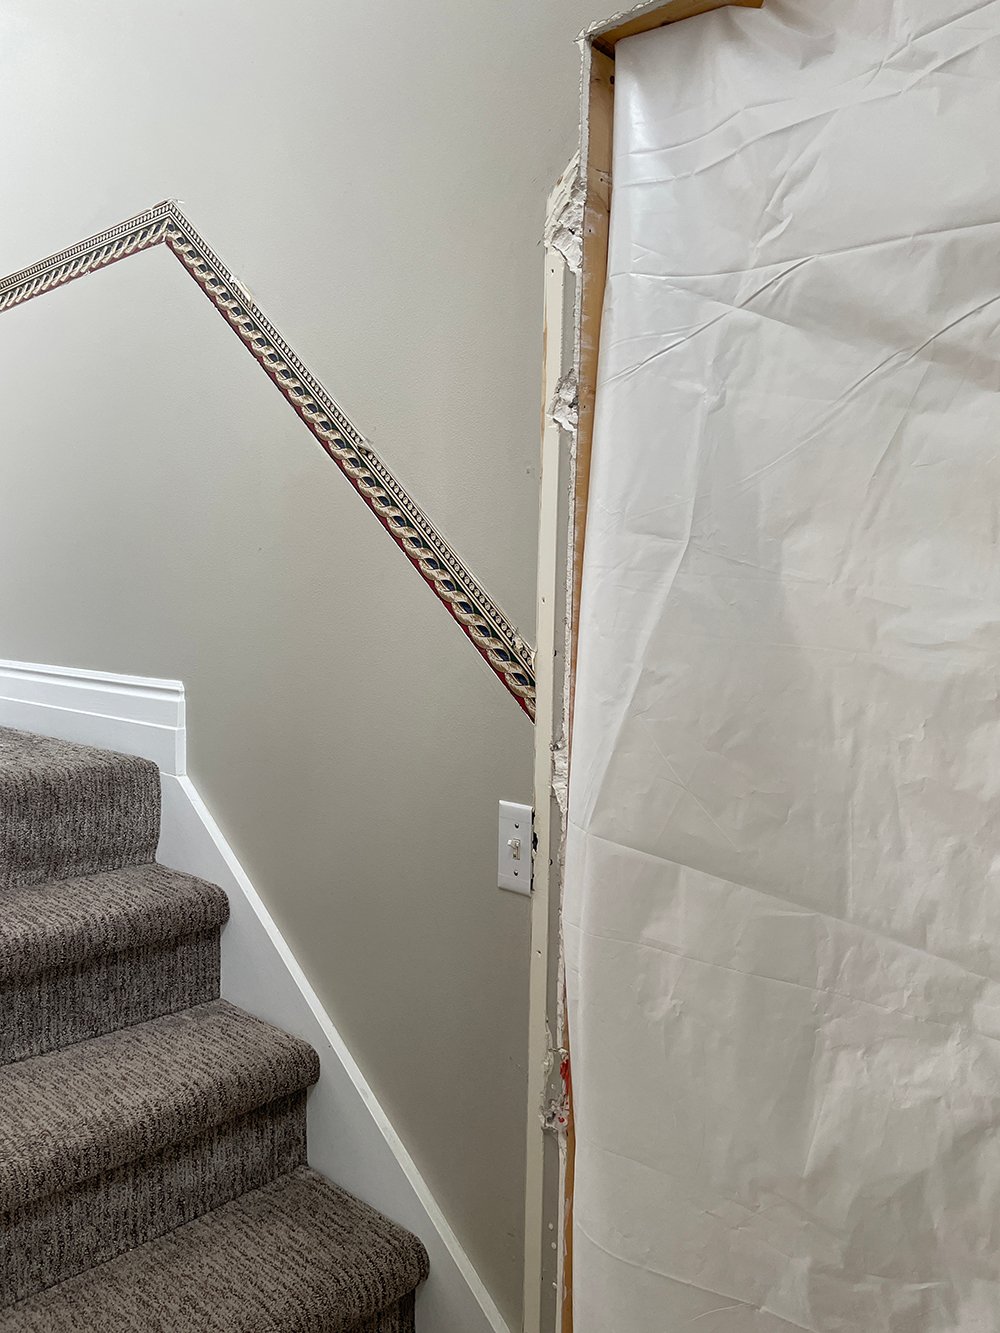
 Does this give you a better visual? The hall on the left leads into our formal living room! I have never been so happy to see those angled doorways go. We’ll be squaring everything off for a more simplified look.
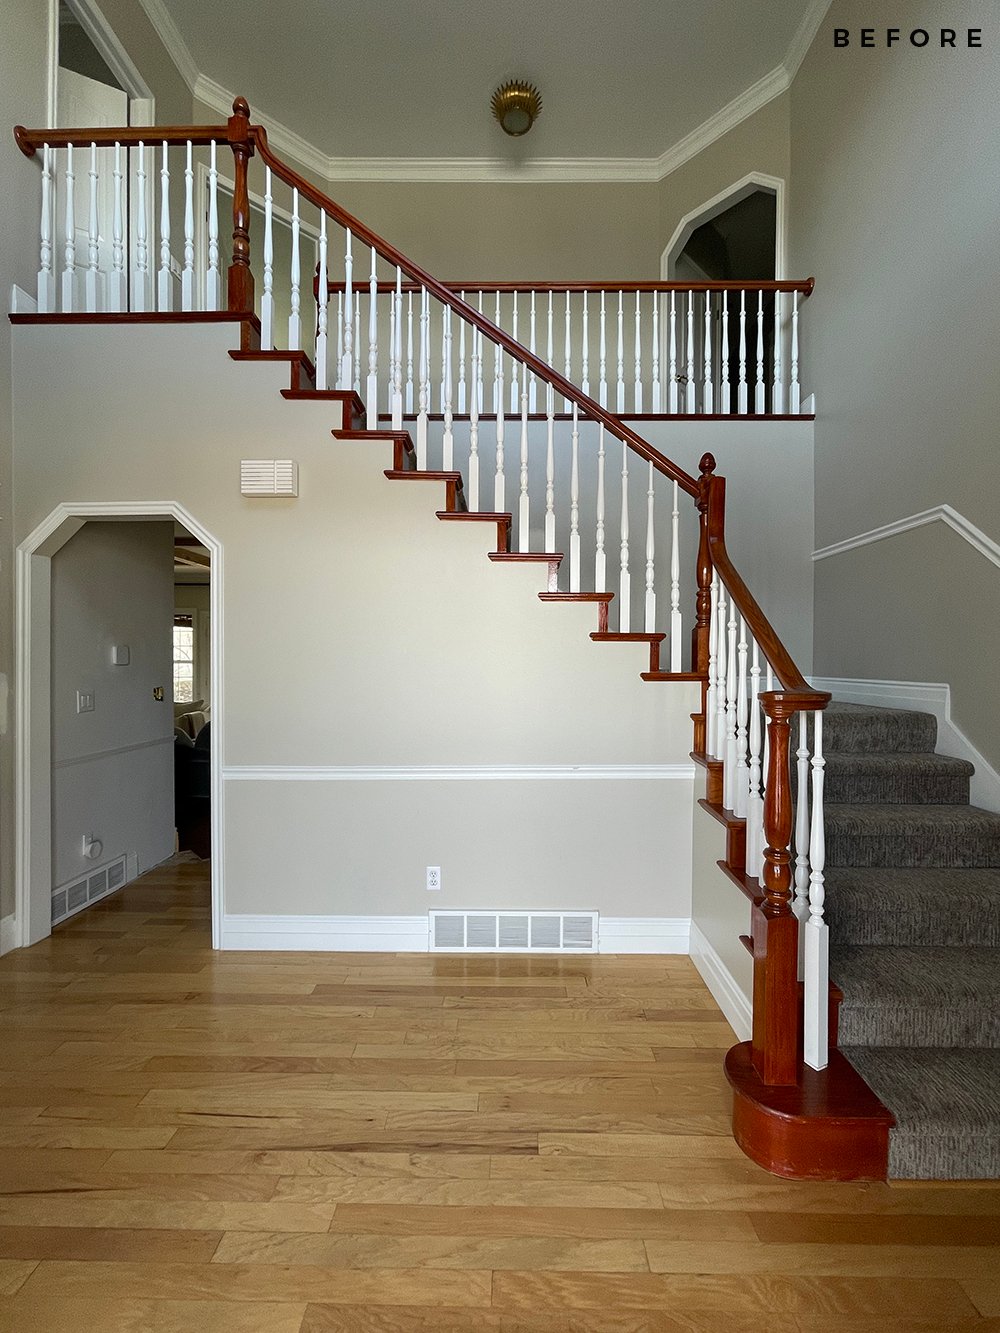
 That little hall also leads to our basement– which is a project for a later date. We actually decided it would make the most sense to go ahead and tackle the upstairs hallways at the same time as the entryway renovation, so everything looks seamless in this space. The vaulted ceiling really leads your eye upward and I want the entire room to feel cohesive and updated.
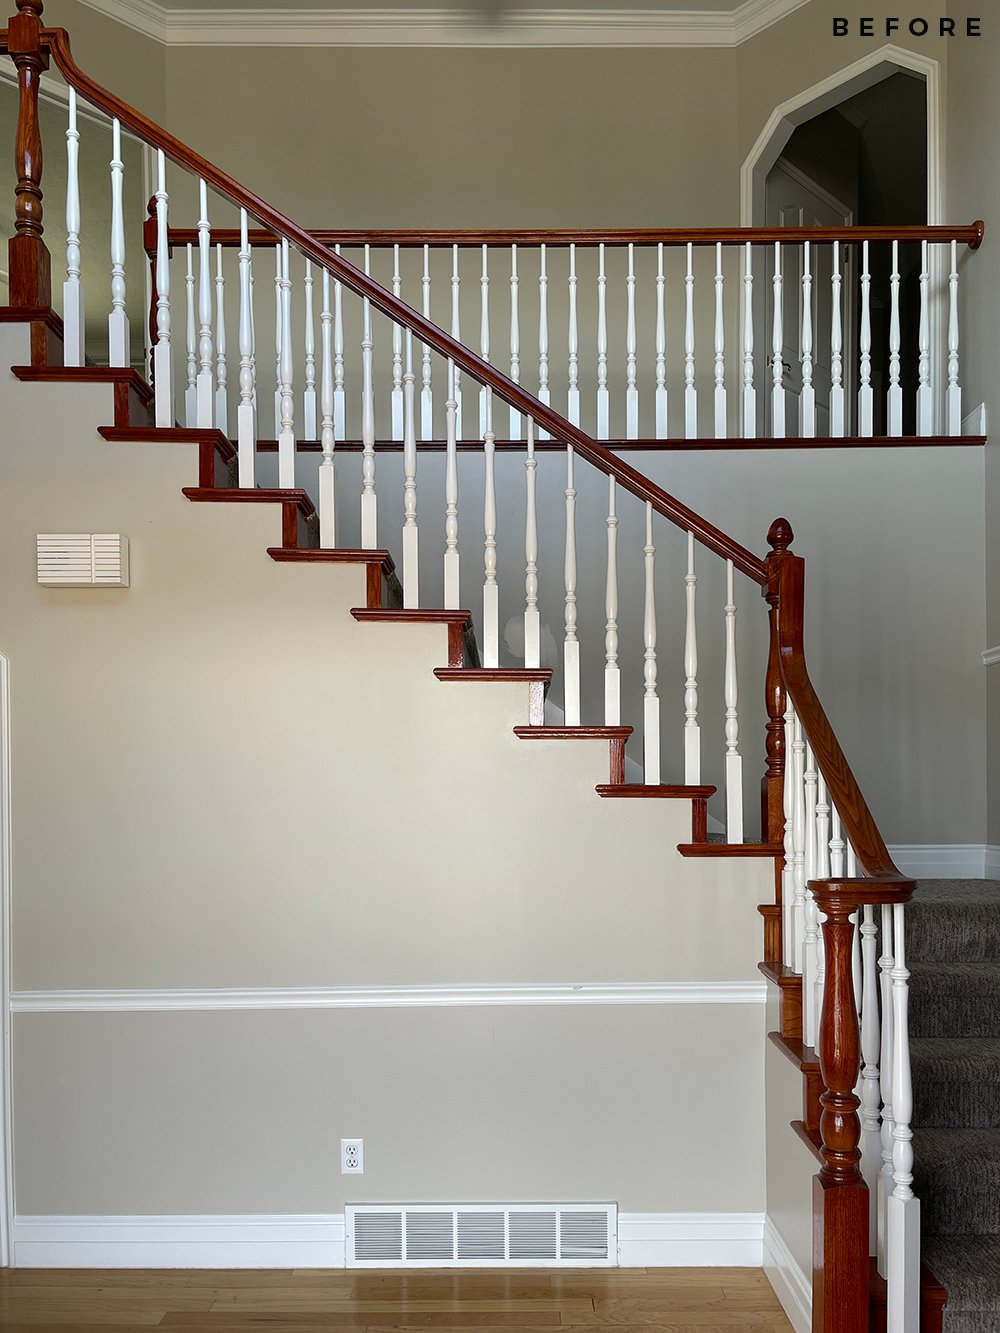 Therefore, the upstairs hall will be getting hardwood flooring, updated doorways, doors, and hardware- as well as a runner of some sort (probably vintage). We’ve got everything ordered- we’re just waiting on our millwork and stair parts (both have a pretty long lead-time).
 It’s going to be a bigger and more expensive project than we had anticipated, but I think it will be worth it to have this entire space completed at the same time. Ready for a little peek at demo?
DEMO
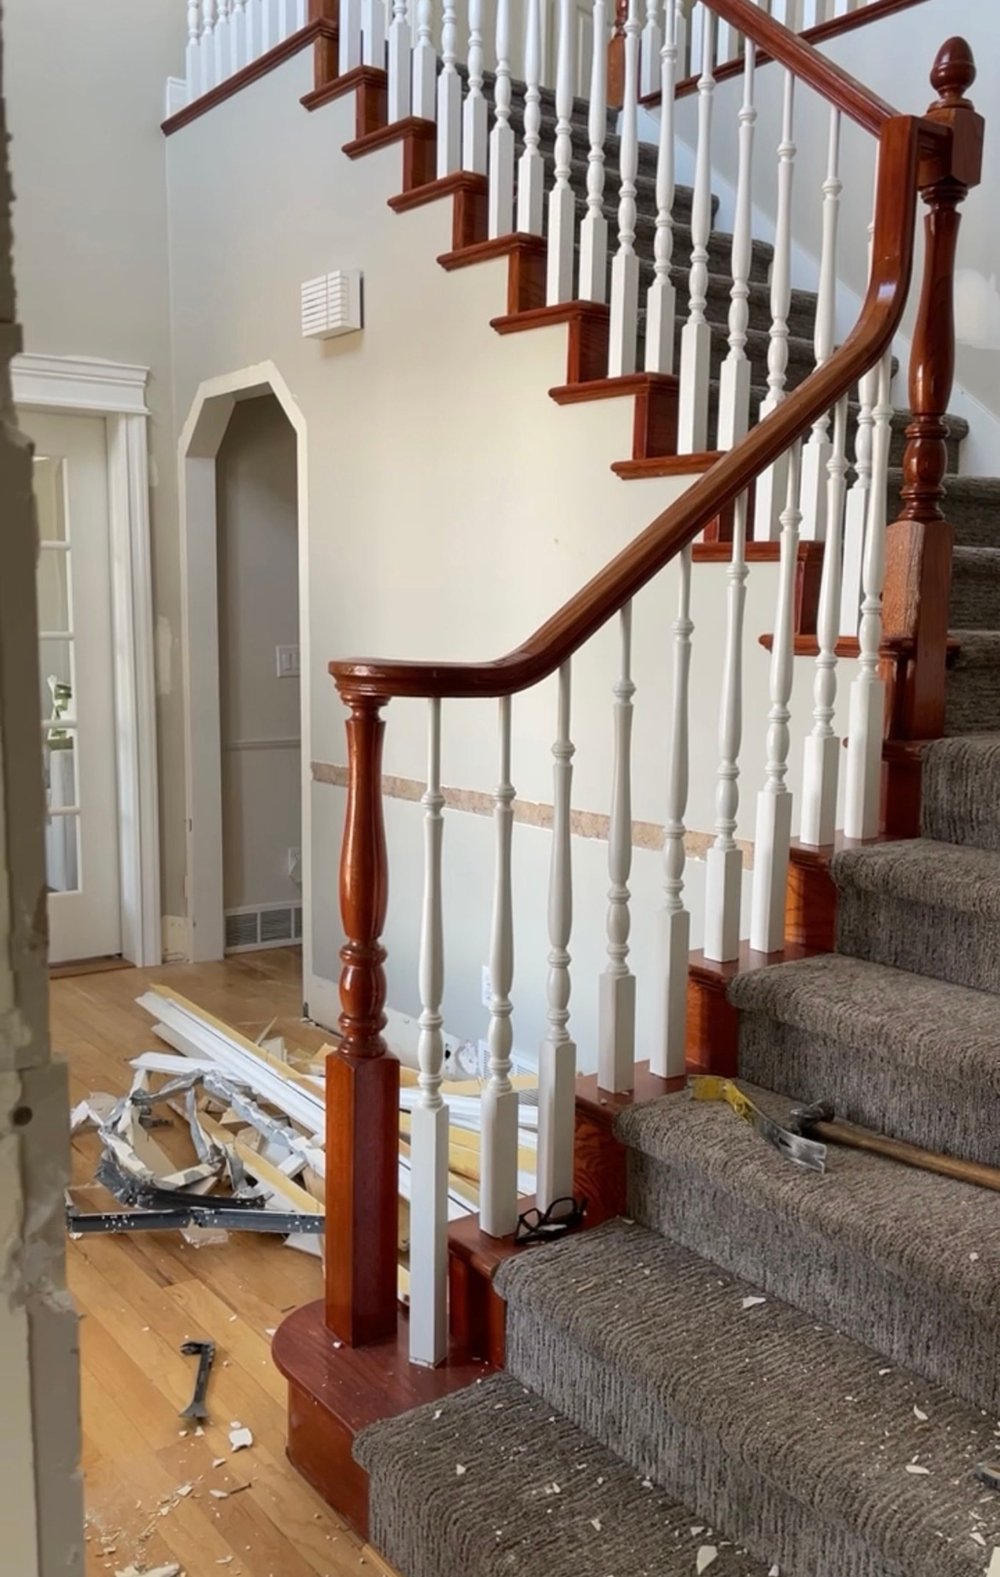 Emmett was swinging hammers while I was in bed resting. It always gets worse before it gets better, and this room is no exception.
 We’ll be reworking the millwork, so all of that had to be removed. He also removed the existing engineered hardwoods and installed some plywood, which will live beneath the tile.
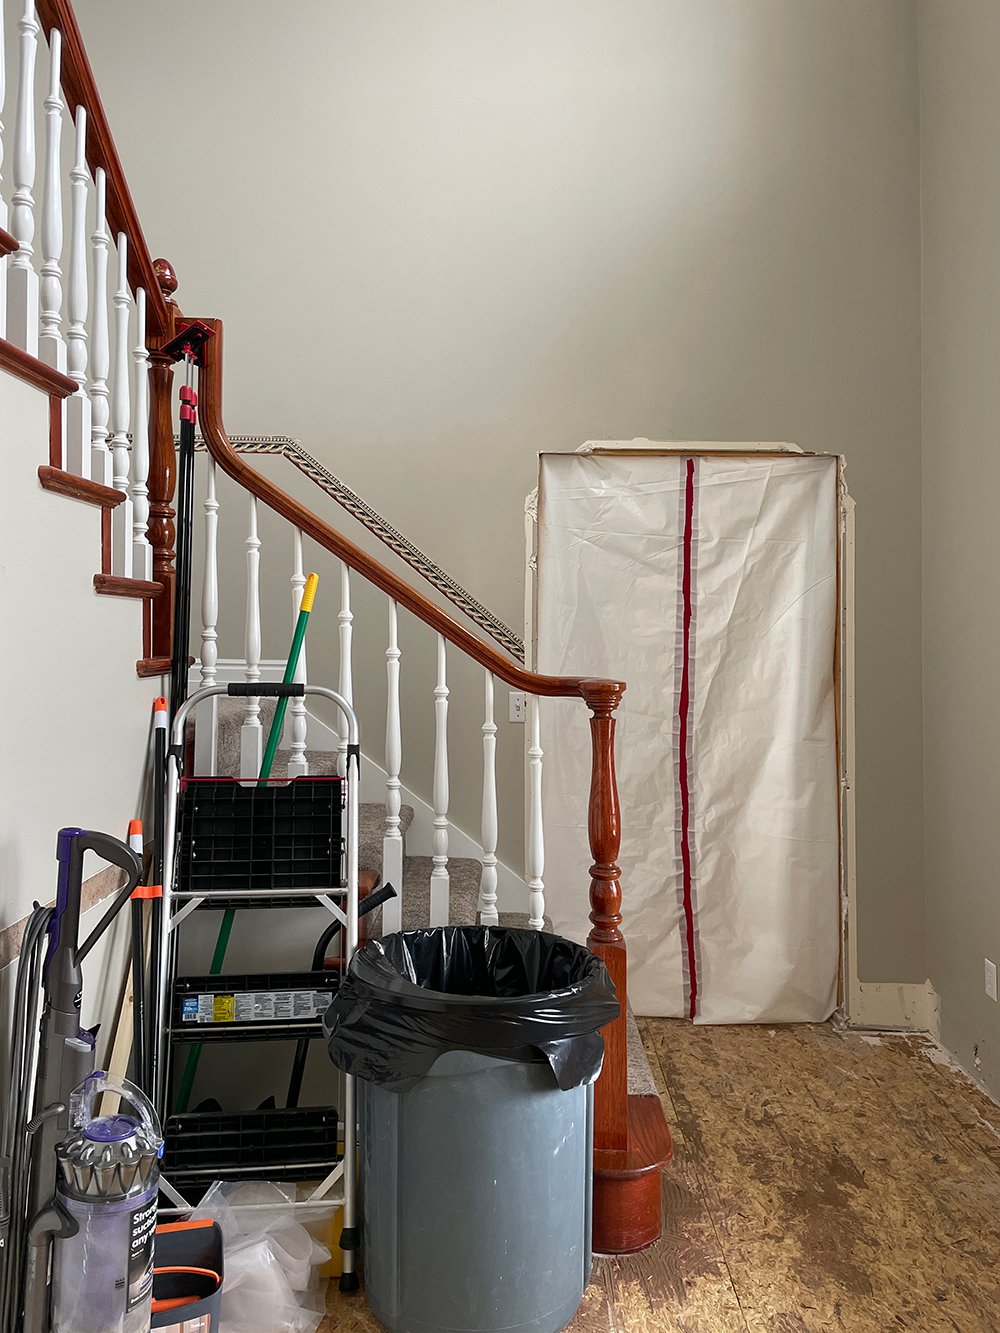 We always try to section off the house the best we can, protecting other rooms from dust, but it’s kind of inevitable. That wall will be getting closed in anyway, so I think that’s next on Emmett’s to-do list, so we can remove the plastic.
 We also uncovered an interesting strip of 90’s wallpaper that served as a two dimensional chair rail. Ha! It went all the way around the room.
 What do you think of that pattern and color palette? I honestly wasn’t expecting to find any wallpaper, so this was actually kind of exciting.
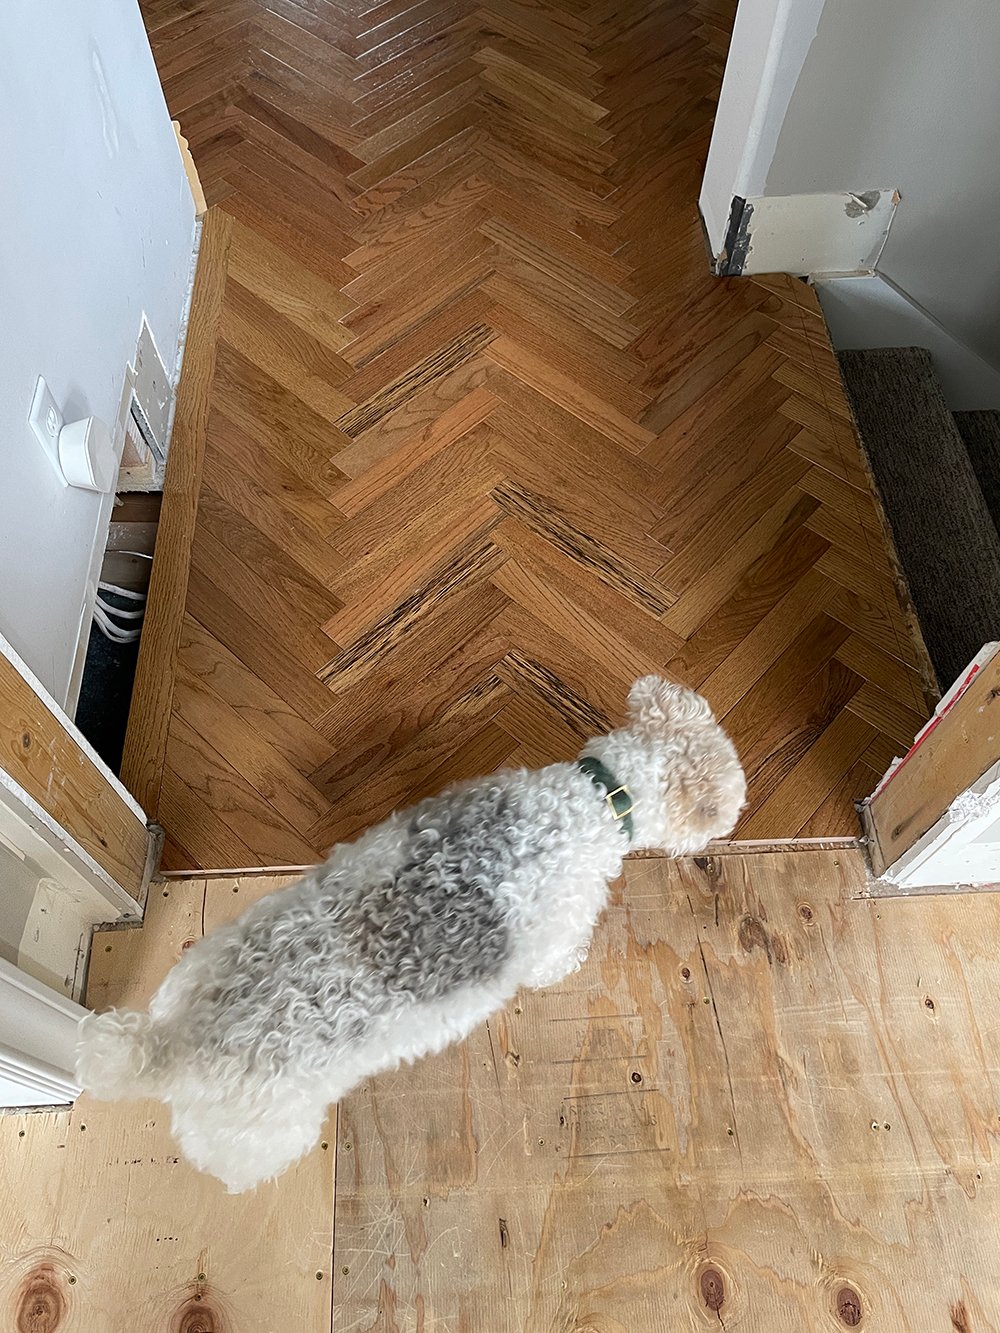 Emmett also finished installing the herringbone hardwoods in the little hall off the entry. This little section had just been plywood for almost two years and we were constantly tripping over it. I can’t tell you how thrilled we’ll be to have one seamless floor level once the tile is in!
DESIGN PLAN
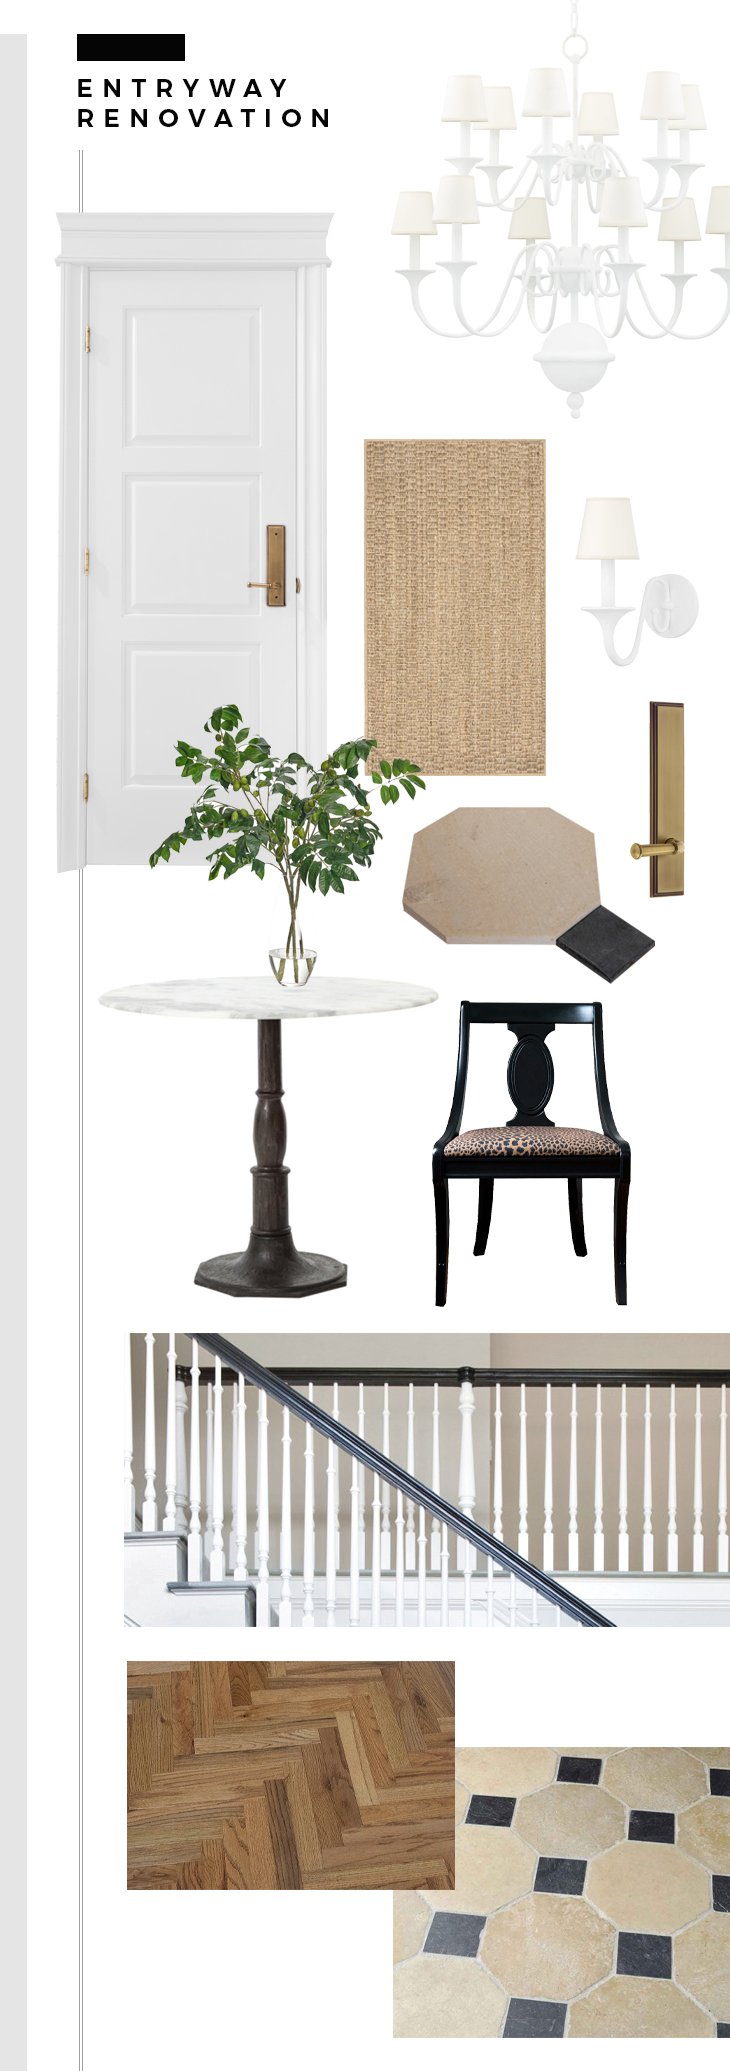 Moving onto the design plan… here’s a sneak peek at what is floating around my brain. It’s pretty solidified at this point, as we’ve purchased everything. I’ll share sources once everything is finished in the reveal post.
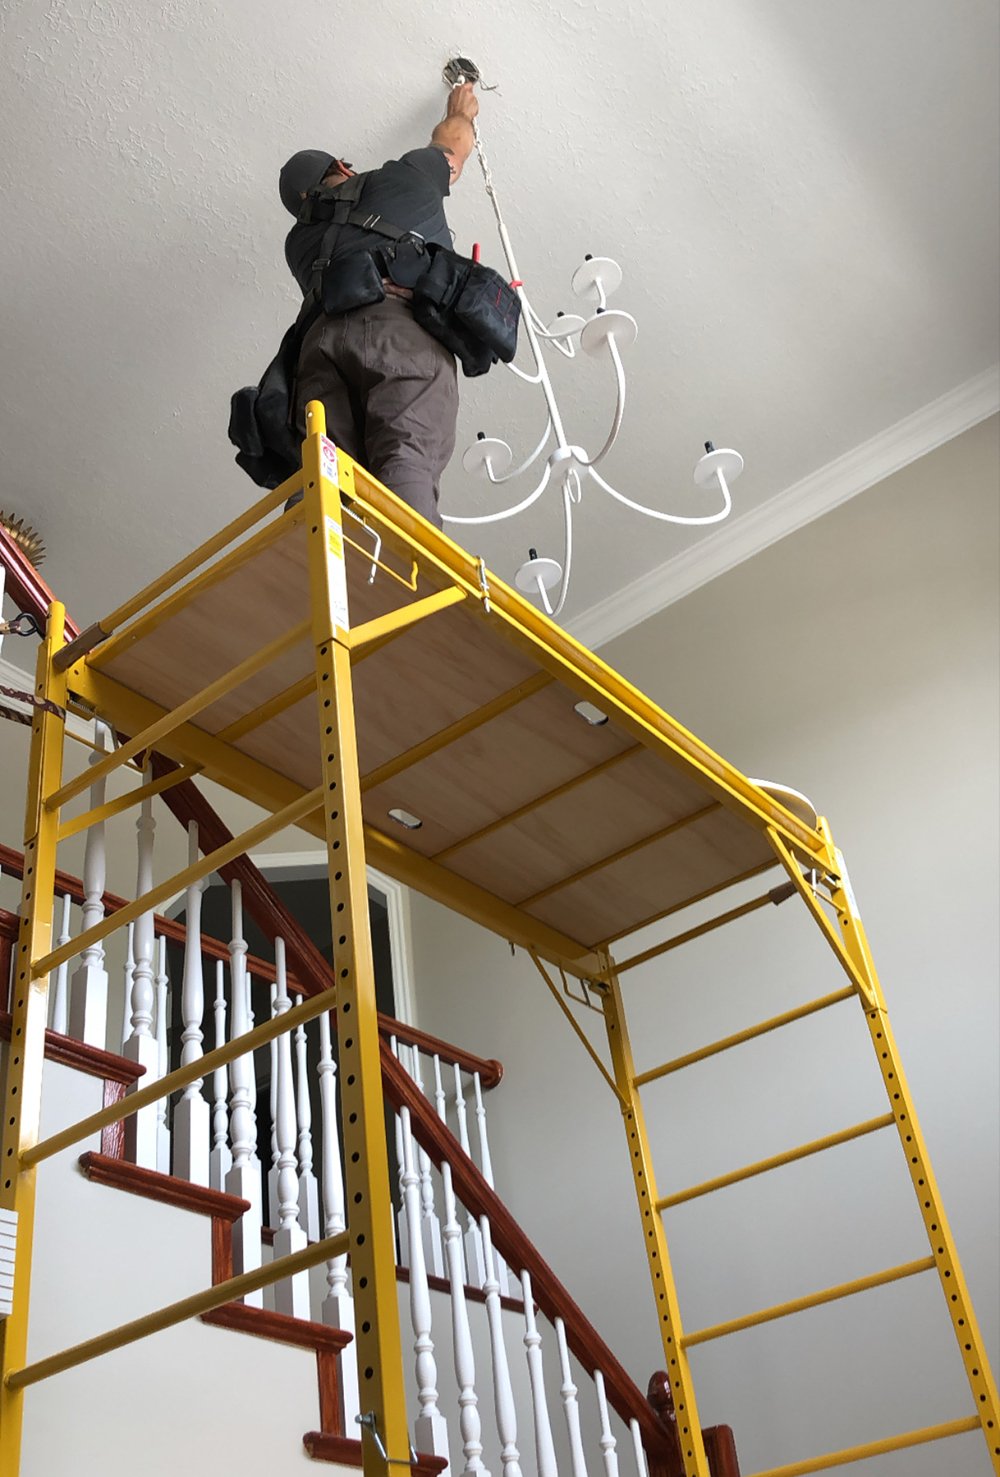
The plot twist? I bought a new chandelier. I know, I know… I just had Emmett replace it in May of 2020 (pictured below). We rented scaffolding, it was a big ordeal, but it looked much better, and I was happy. So what changed? I’ve always envisioned a white and airy chandelier hanging in this room. The Marcel Chandelier is beautiful and I’ve loved it these past two years, but a new chandelier was just released that feels more stylistically appropriate… more traditional, less modern. It’s also all white- with the same plaster finish. I bought the Windsor Chandelier (designed by Mark D. Sikes) because we’re having a big lighting sale at Tuesday Made. The timing was right and I think it will be a better fit. Emmett isn’t stoked about climbing more scaffolding, but he’s on board.
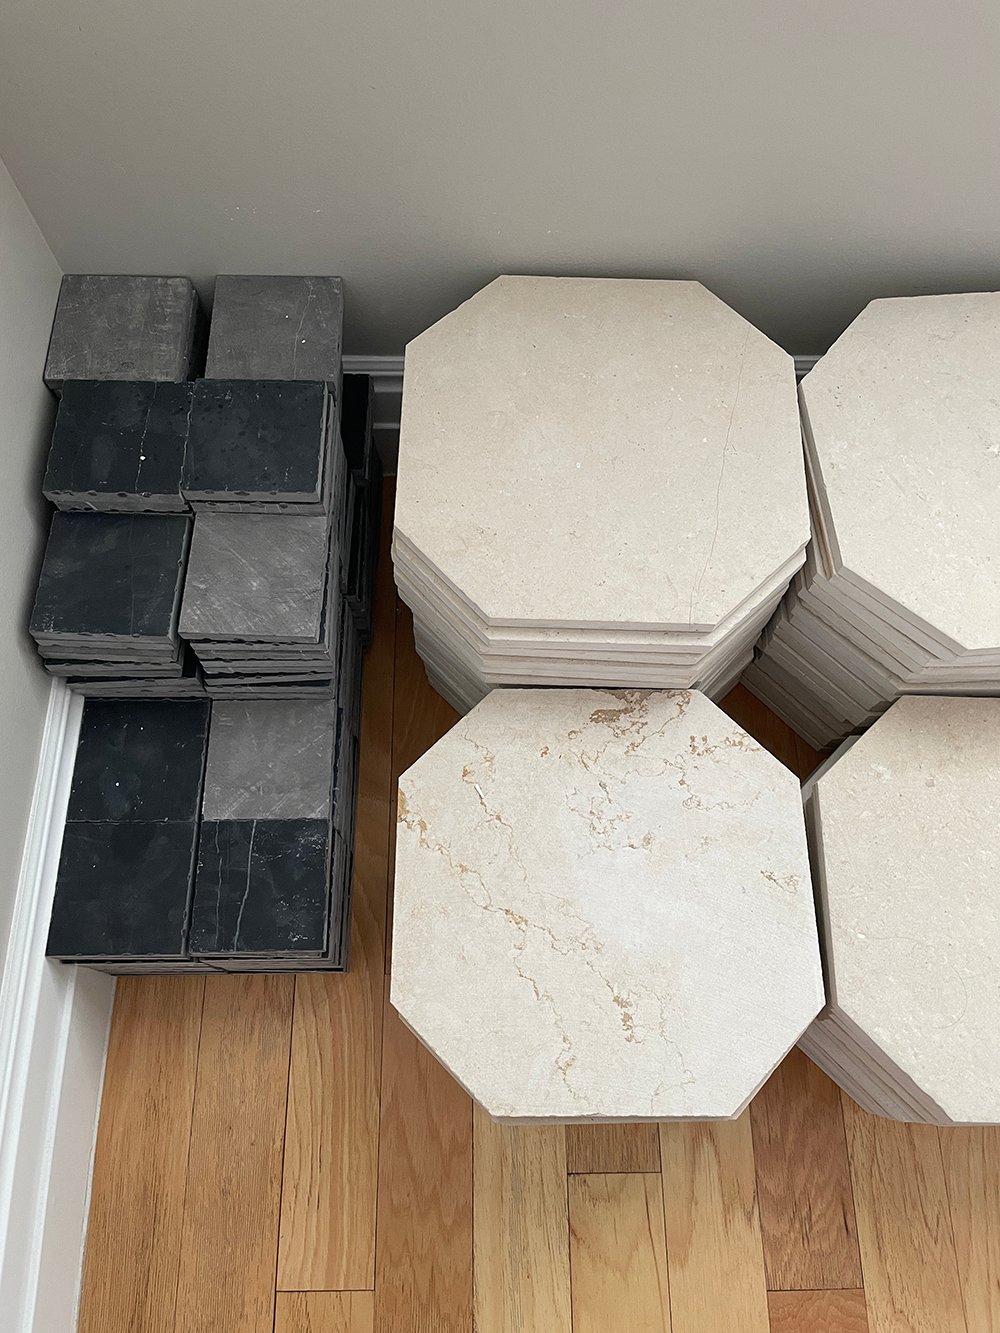
 I’ll be sure to share a tile post with you once we get that portion of the project wrapped, but I think you’re officially all caught up! Our original plan was to have this project finished in March, but given I spent so much of March & April in the hospital, we’re pretty behind. Our new goal is to finish the entryway and upstairs hall by the end of summer. I think that feels feasible, given the lead times and how much time we’ll need to devote. Wish us luck! Let me know what you think in the comment section below, and have a great week.