Fall Window Flower Box
 It hasn’t been long since I revealed the newest addition to our exterior that really increased the curb appeal. Remember our window flower box tutorial? While the front box is still going strong and is blooming like crazy, I’ve had an empty box under the dining room window for the past couple months (in plain sight of the veranda), that I’ve been holding out on for fall plants and florals. I’m happy to say, I finally tackled that baby and it’s filled to the brim with my favorite colorful fall flowers. Click through to see how I put it together!
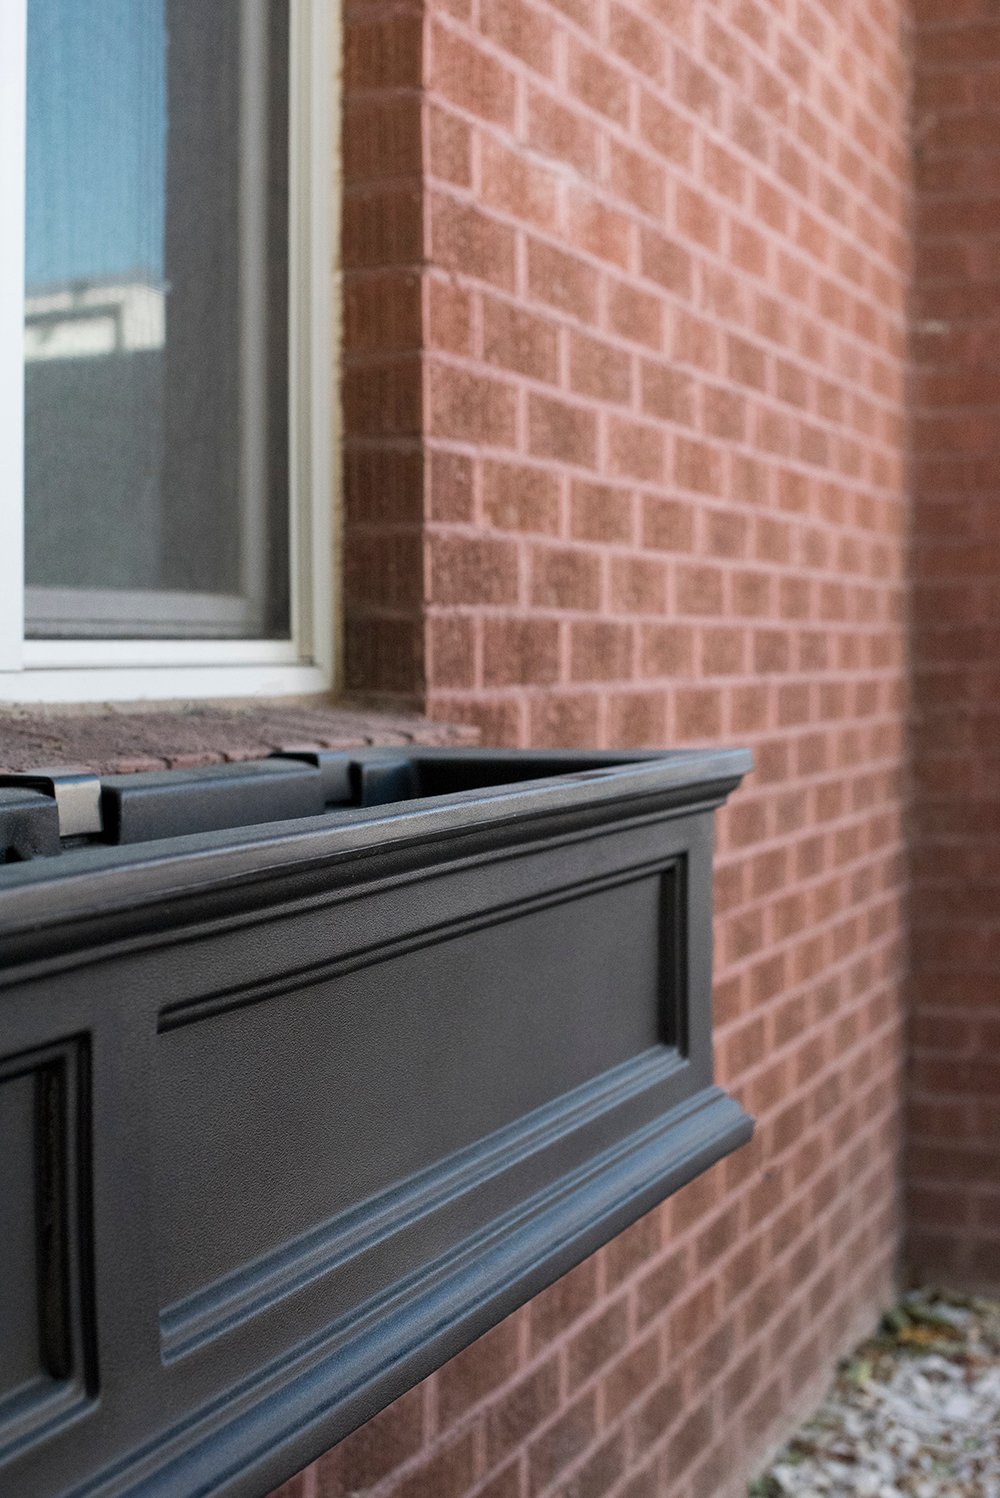
I’m going to focus more on floral arranging and planting in this post, since the last window box tutorial was really the DIY aspect of this project. If you need detailed instructions for installation, resources, potting soil recommendations, and other tips, CLICK HERE! This is what the empty box looked like before I got started…
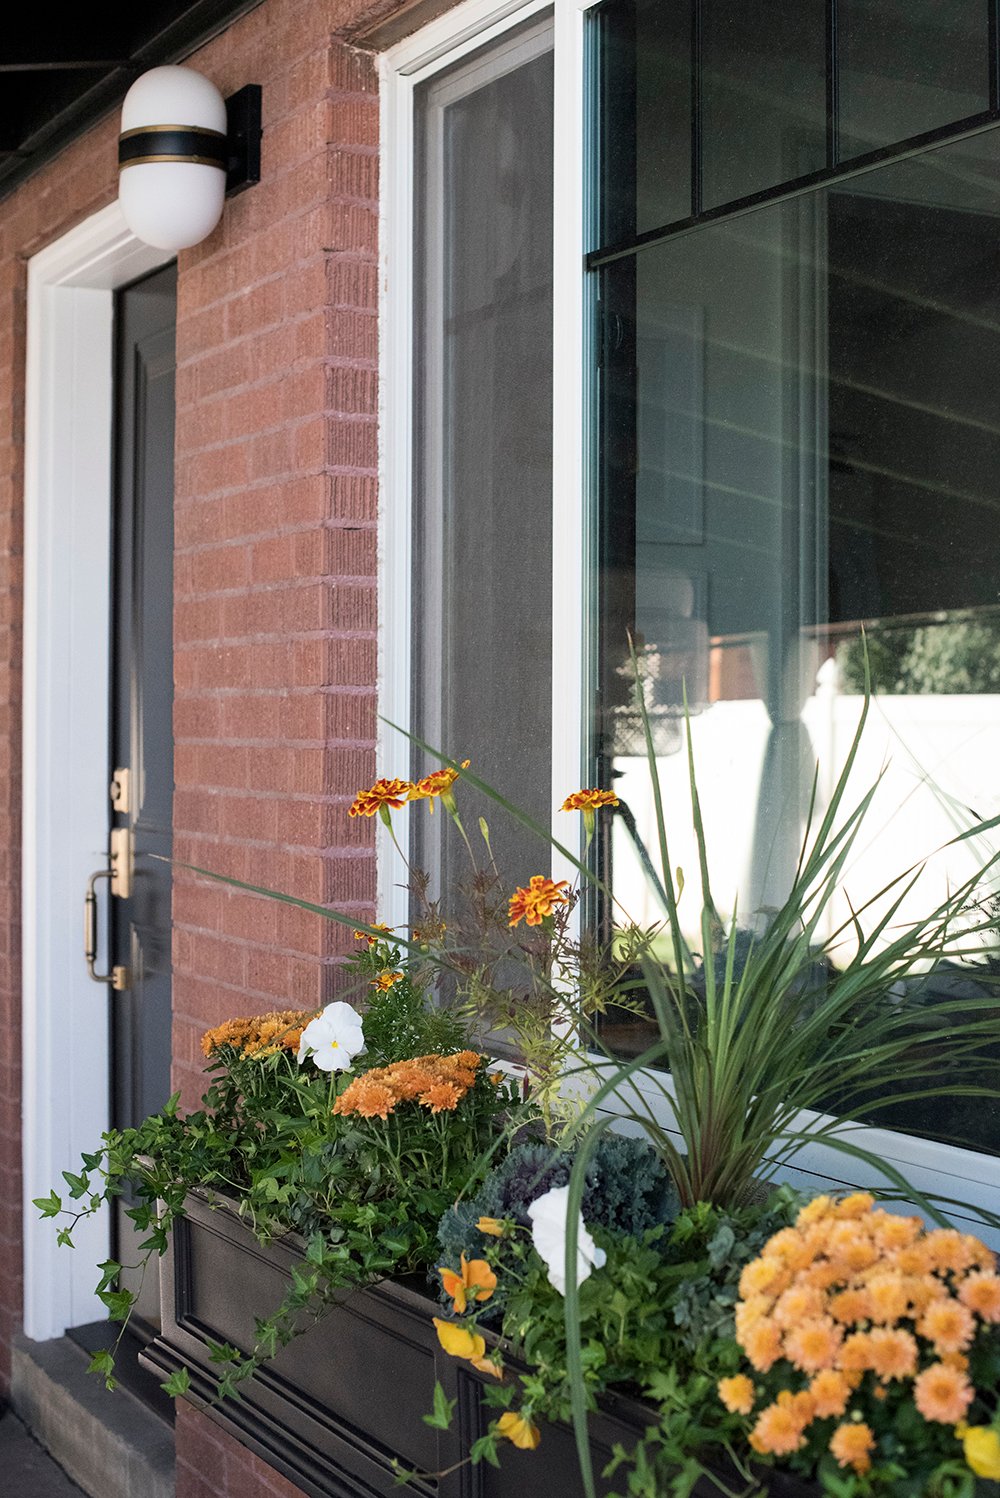
 It lives under our breakfast nook window next to the highly trafficked back entry into our laundry room. Therefore, it’s been driving me crazy that it has been empty for so long- given I walk by it numerous times each day.
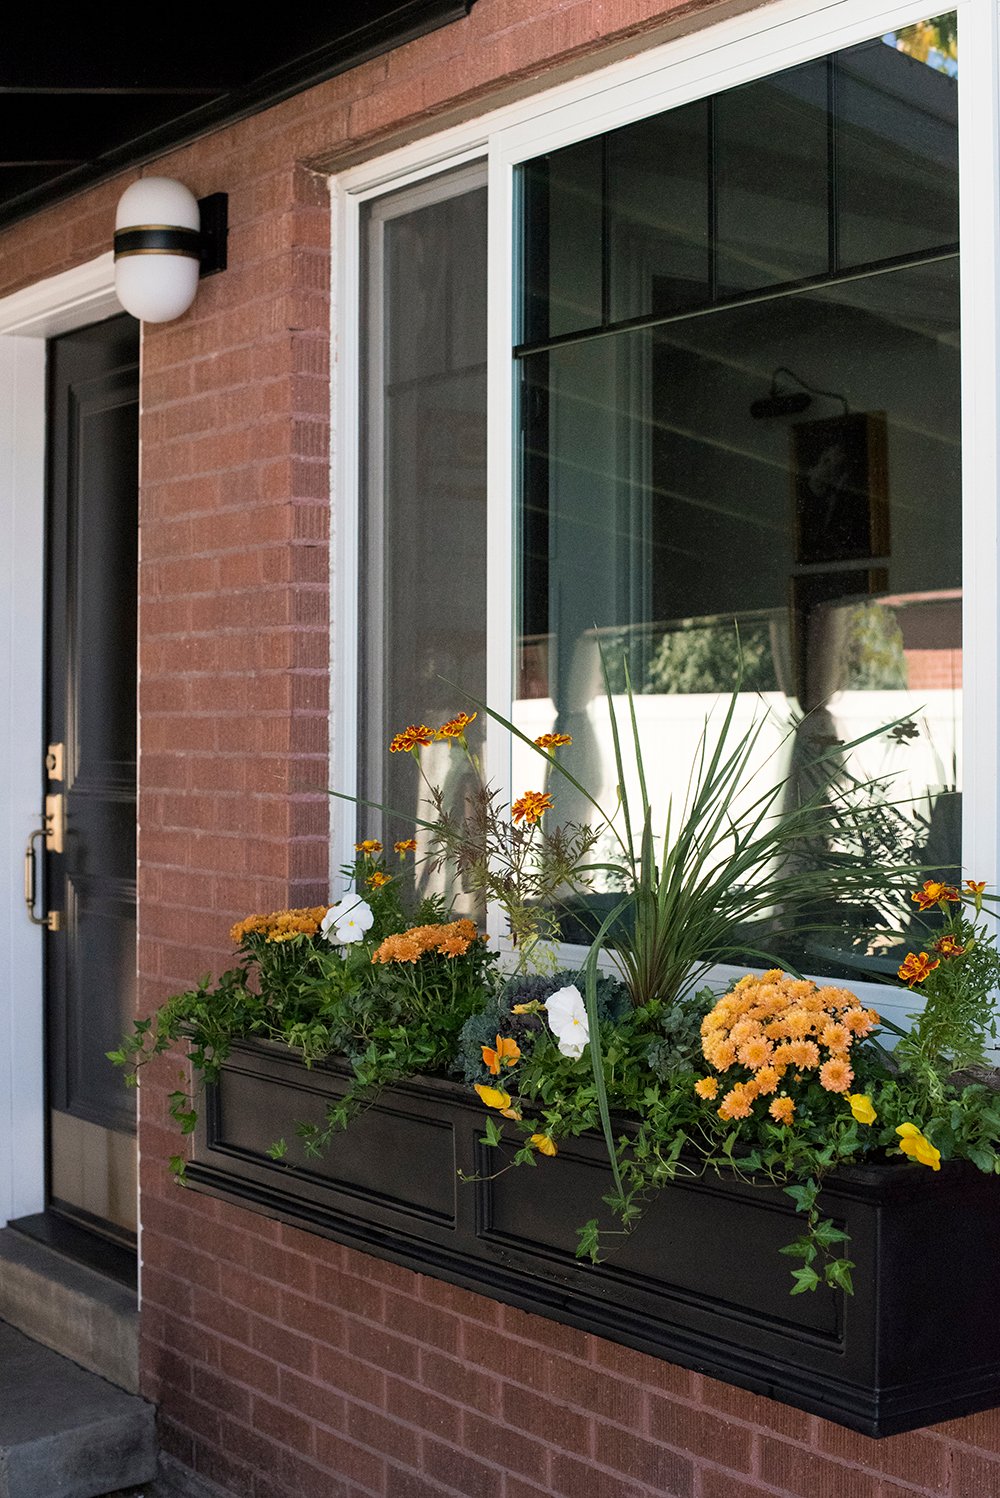
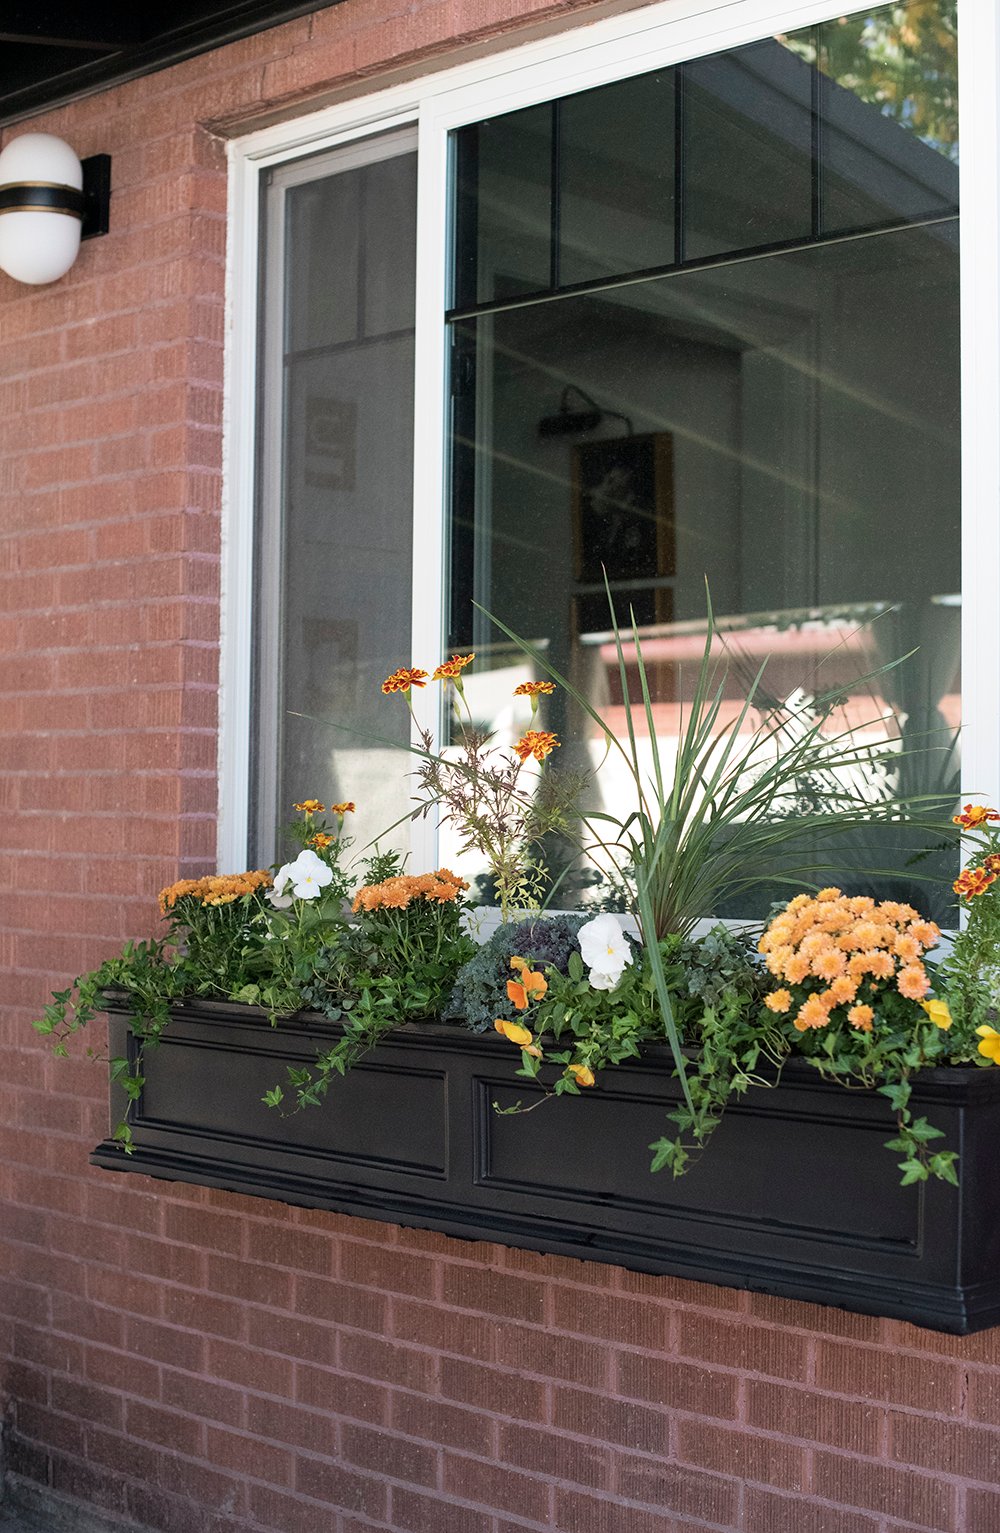
 Now it’s stuffed to the brim with orange-hued fall flowers. Check out the time-lapse below to see how the project came to life…
If you noticed my socks with Birkenstocks, no judgements please! I didn’t expect my feet to be in the frame. Haha! Yes, I’m totally that person you’d probably make fun of at the home improvement store. Here’s a still “after” image…
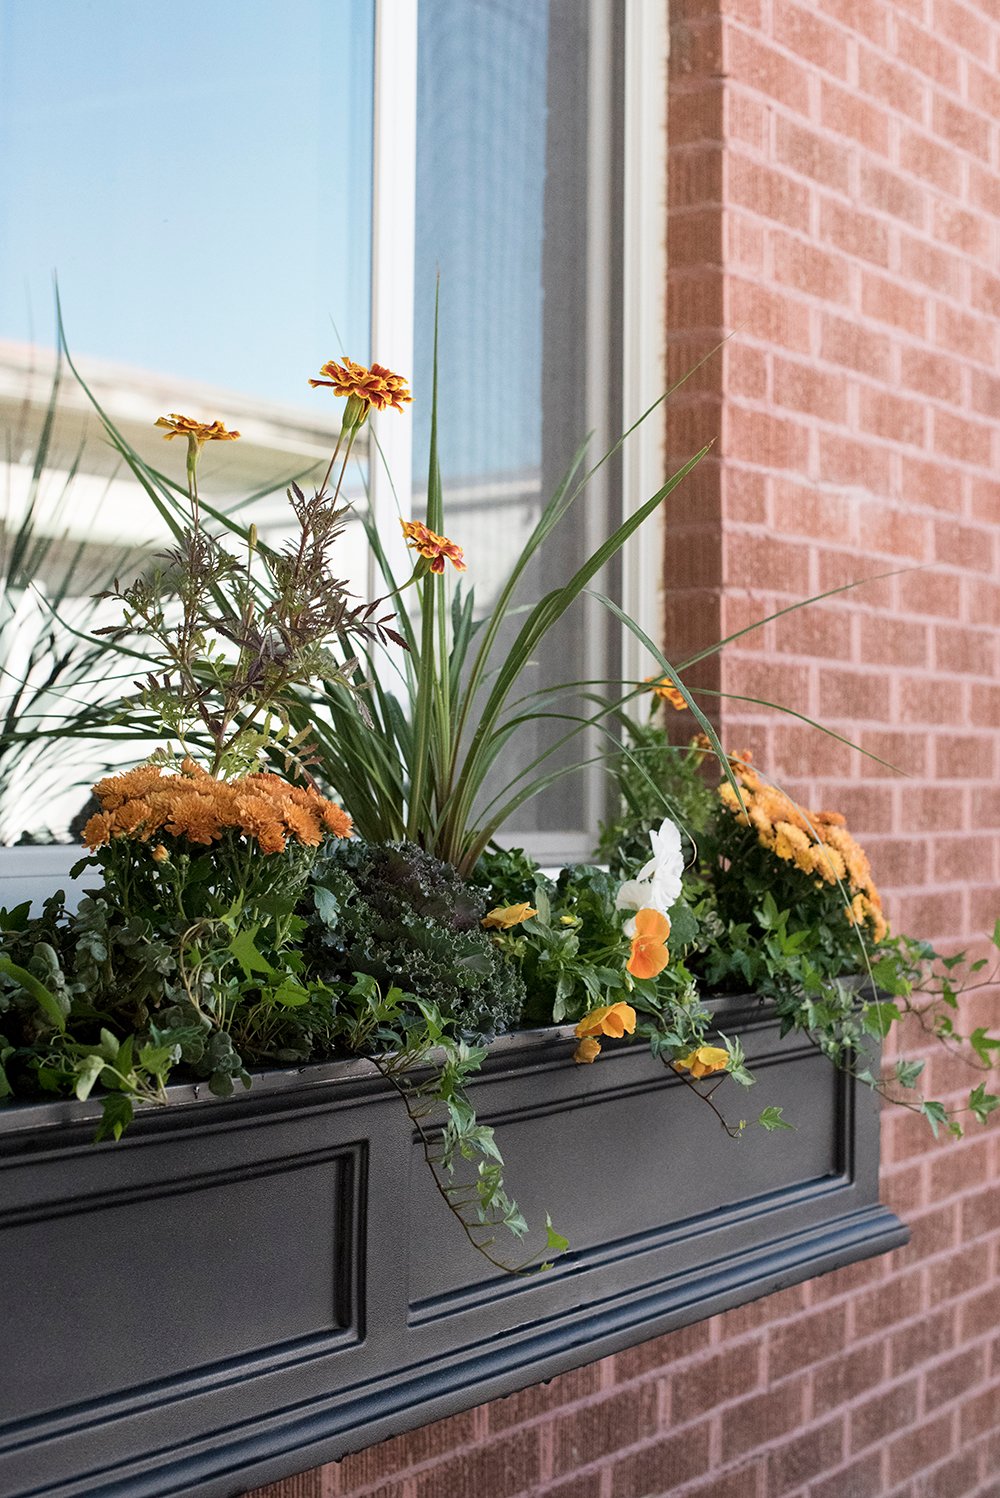
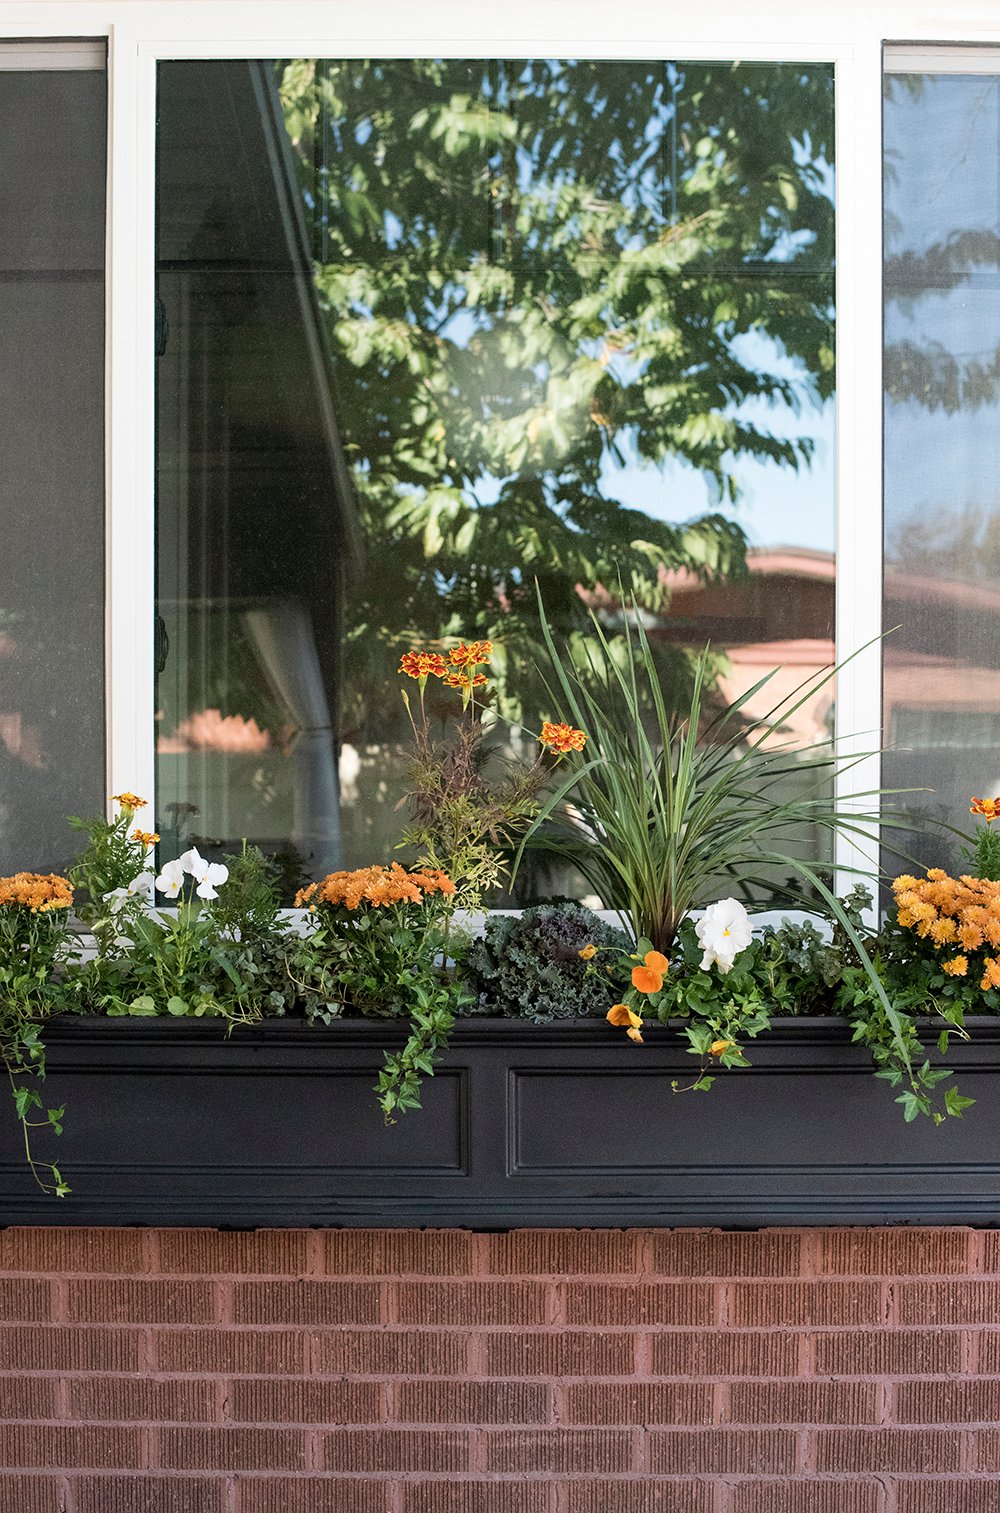 In a week or two, it should fill out nicely and look more mature. There’s a method to my madness and styling a gorgeous window flower box is actually very easy! Want to know the secret? It’s actually a formula I use (don’t worry- not the mathematical kind).
 When arranging a flower box, I have four things I like to check off the list for a well-designed composition:
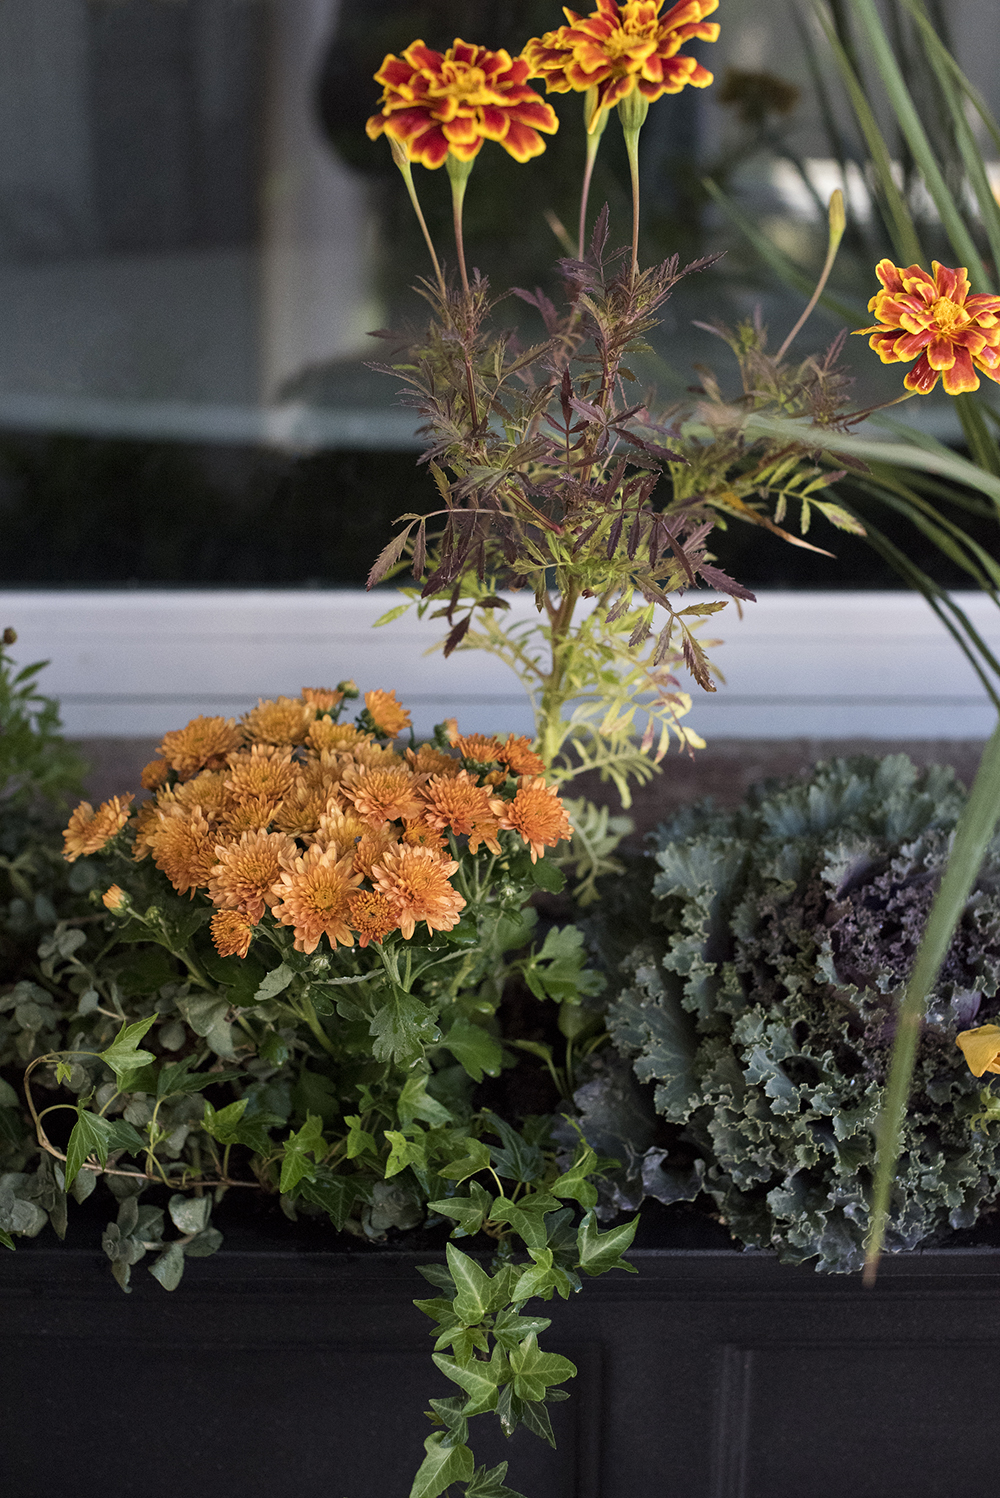
- the statement plant // This could be something colorful, textural, or just really interesting.
- a tall plant // You need something that sits upright and breaks the height grid.
- a cascading plant // I love a plant that drapes or hangs, tapering over the edge of the planter- breaking the grid in the opposing direction.
- filler // Filler is necessary to make a planter look “full”. Find something textural and monochromatic to consume the negative space.
 If that seemed confusing to you, I’ll share the plants I used for each category below…
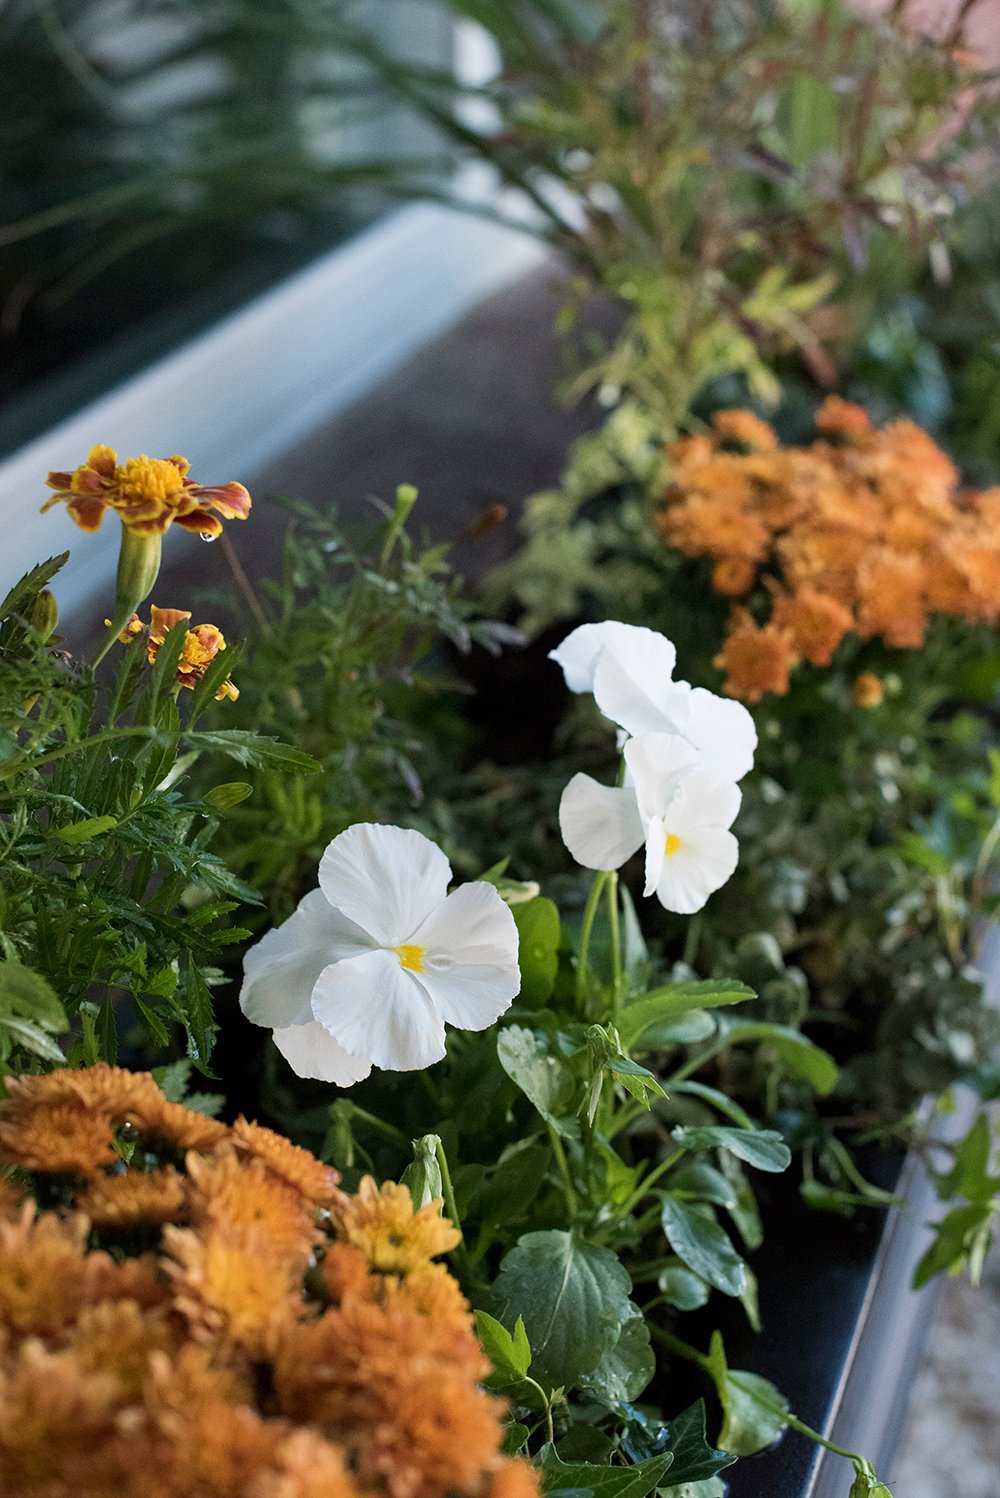
- the statement plant // mums & pansies (for the orange autumn color)
- a tall plant // maiden grass & marigolds
- a cascading plant // english ivy (ground cover works well for this)
- filler // kale & creeping speedwell (they add a nice texture too)
 Another tip? Use the rule of thirds when laying out the plants. Things shouldn’t look too perfect or balanced. Even if it feels unintuitive, plants look better positioned in an organic way.
 Although flower boxes can take some effort to maintain, it’s one of my favorite things to tend and switch seasonally. I love watering my flowers and the neighbors always comment on how pretty they look. I think they’re really rewarding! I’m telling you… adding window boxes adds instant curb appeal. We might not have the nicest lawn on the street, but nobody notices thanks to the pretty flowers.
 Remember, check out this complete DIY tutorial if you’re wondering about sources and the installation process. I also shared my “packing peanut” tip, so if you don’t know about that- it’s certainly worth a read!
 As always, I’d love to hear what you think in the comments below. Any other window flower box fans out there? I swear they’re so charming and look even better in person. Happy Friday and happy FALL you guys!! I’m happy it’s finally feeling festive around my house and the air is getting chilly.