How to Dye Fabric – The Do’s & Don’ts
 As I mentioned earlier this week, we spent the weekend working on a basement project which involved drapery panels from IKEA. It’s easy to use inexpensive curtains that fit the budget if you’re going for a minimalistic or neutral look, but when it comes to color- let’s be honest… IKEA doesn’t have a great range of colors to choose from. After bringing home three different options and not really loving any of them, I thought- “I should just dye them”. Yes, it sounds a little intimidating to mix a custom color and manipulate fabric or textiles to produce your envisioned outcome, but it’s really not as difficult as you might expect. Click through for an easy tutorial, and a few “do’s and don’ts”. I’ve had plenty of both over the years and it’s about time I shared! You can also catch a sneak peek of my finished drapery in the basement.
If you’ve been following along for awhile now, you already know I have a background in textiles and used to do this sort of thing allllll the time during my time in art school. I was constantly in the dye lab experimenting. It was something I really enjoyed. It’s weird to think I used to work with fabric on a weekly basis and this is the first time I’ve dyed something in years. I will say- I was a little rusty, which led to this post. Consider this your guide for what to do and what NOT to do if you also want to change the color of your curtains or fabric.
 Here are some quick rules or facts to know before you get started (these may or may not be obvious, but just in case)…
- You can dye fabric darker, bolder, or more saturated, but it can NOT go lighter than the current color.
- Dying fabric a solid, uniform color is more difficult than an organic or accidental pattern (like shibori).
- If your fabric turns out splotchy- don’t panic… you can “overdye” it.
- The larger the item or fabric is, the more difficult it will be to dye.
- Always test your dye lot and color before adding the fabric.
- There is a specific dye you should use for each material or fabric.
SUPPLIES + TOOLS
- tote, bucket, or bin (in my experience, storage totes work best)
- rit dye (natural or synthetic, depending on your fabric)
- hot water
- salt or vinegar (I use rock salt)
- rubber gloves
- stainless spoon or mixing utensil
- glass measuring cup
- laundry detergent
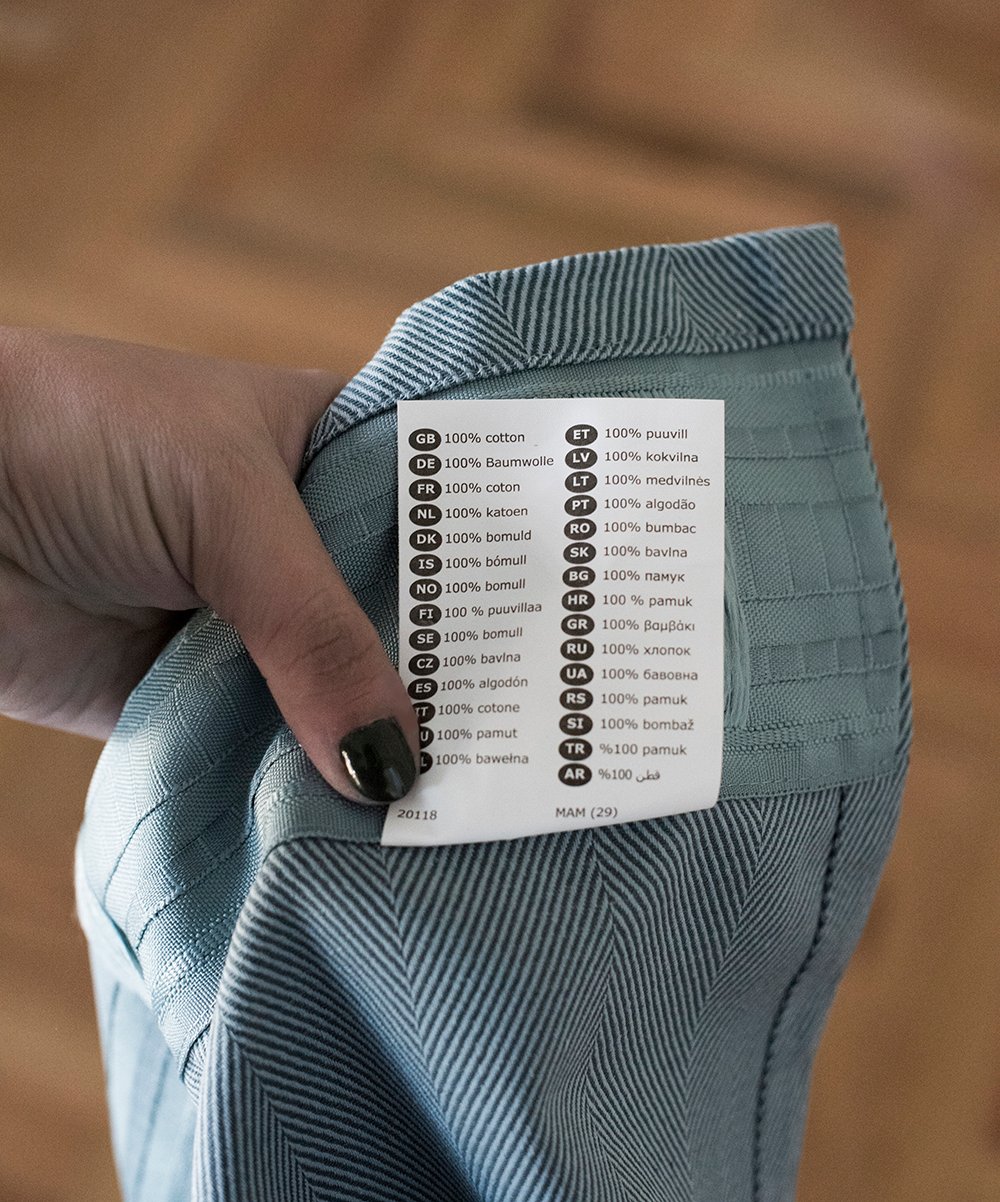
- fabric (in my case, curtain panels)
- sharpie marker
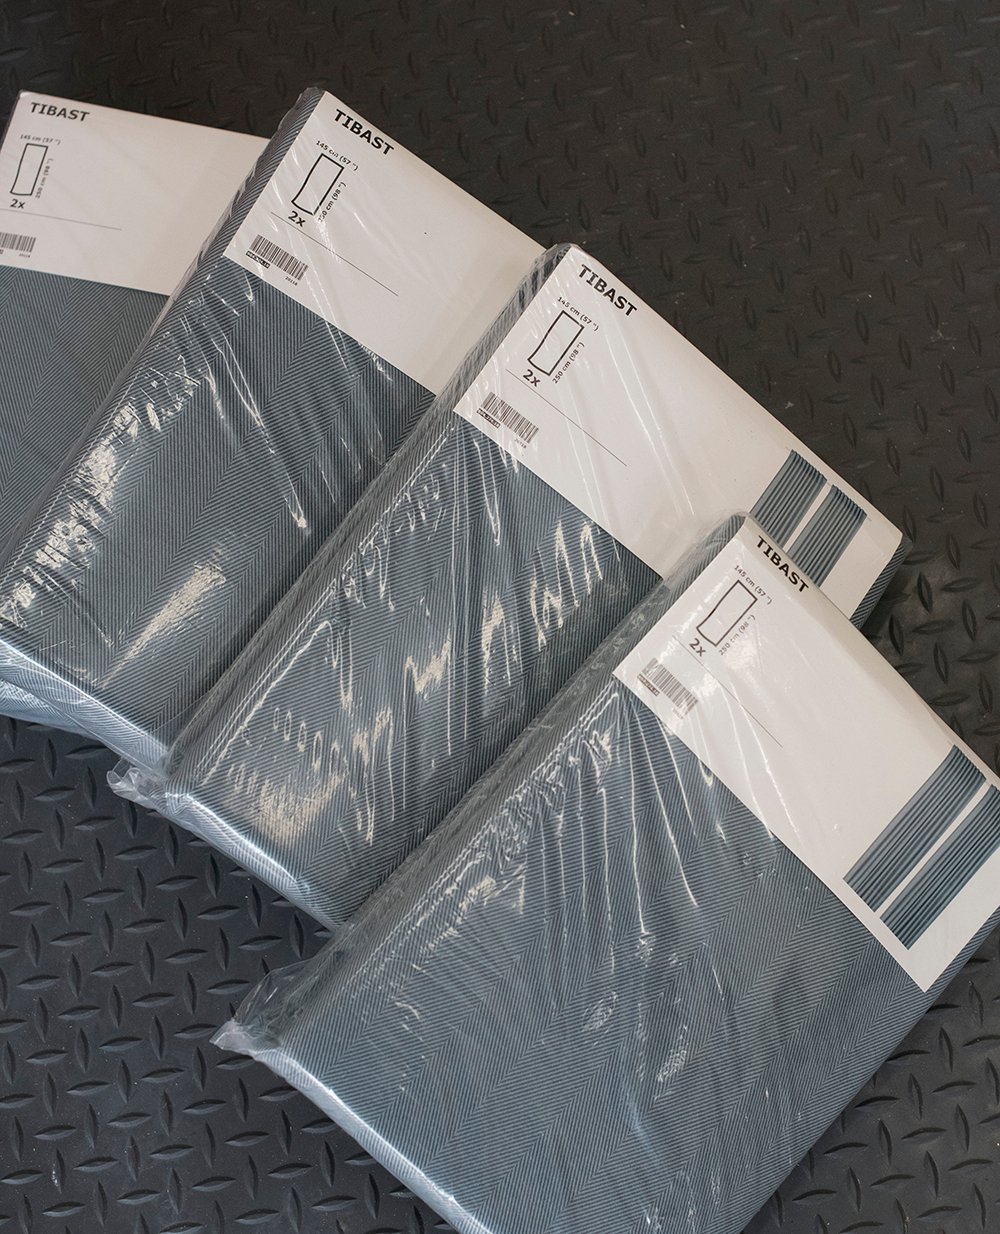 I purchased these Tibast cotton curtain panels from IKEA (pictured above) and wasn’t into the color for my space. I really needed a deep navy curtain. Obviously, that’s the reason for this post- because I decided to dye them. Here’s how I did it…
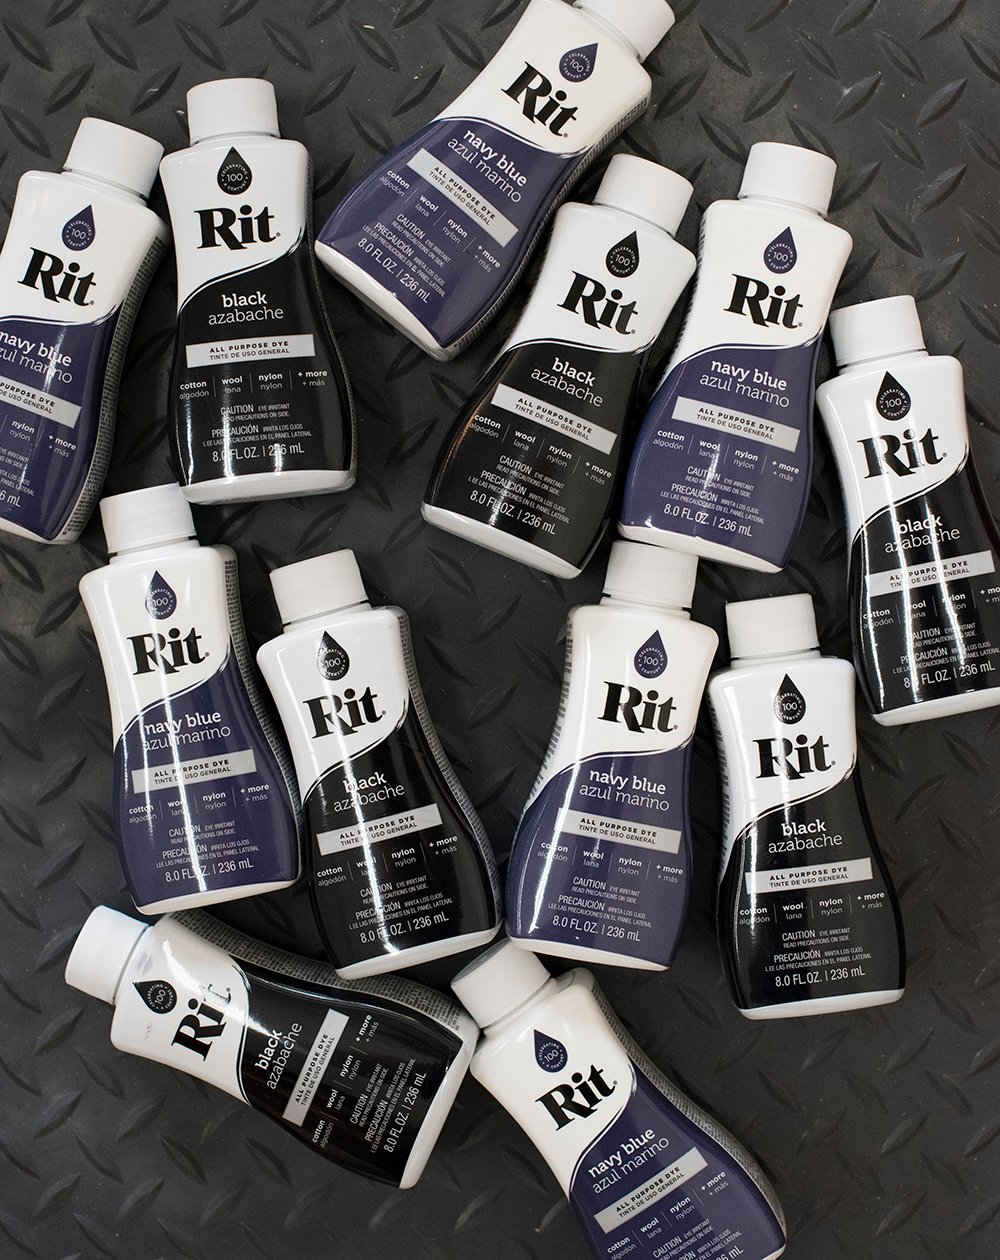
Step 1 // Choose your dye. Given my curtains were 100% cotton, I used this Rit dye- which is made for natural materials. They also make a dye for synthetic materials. Check your fabric and determine what dye is best for your project.
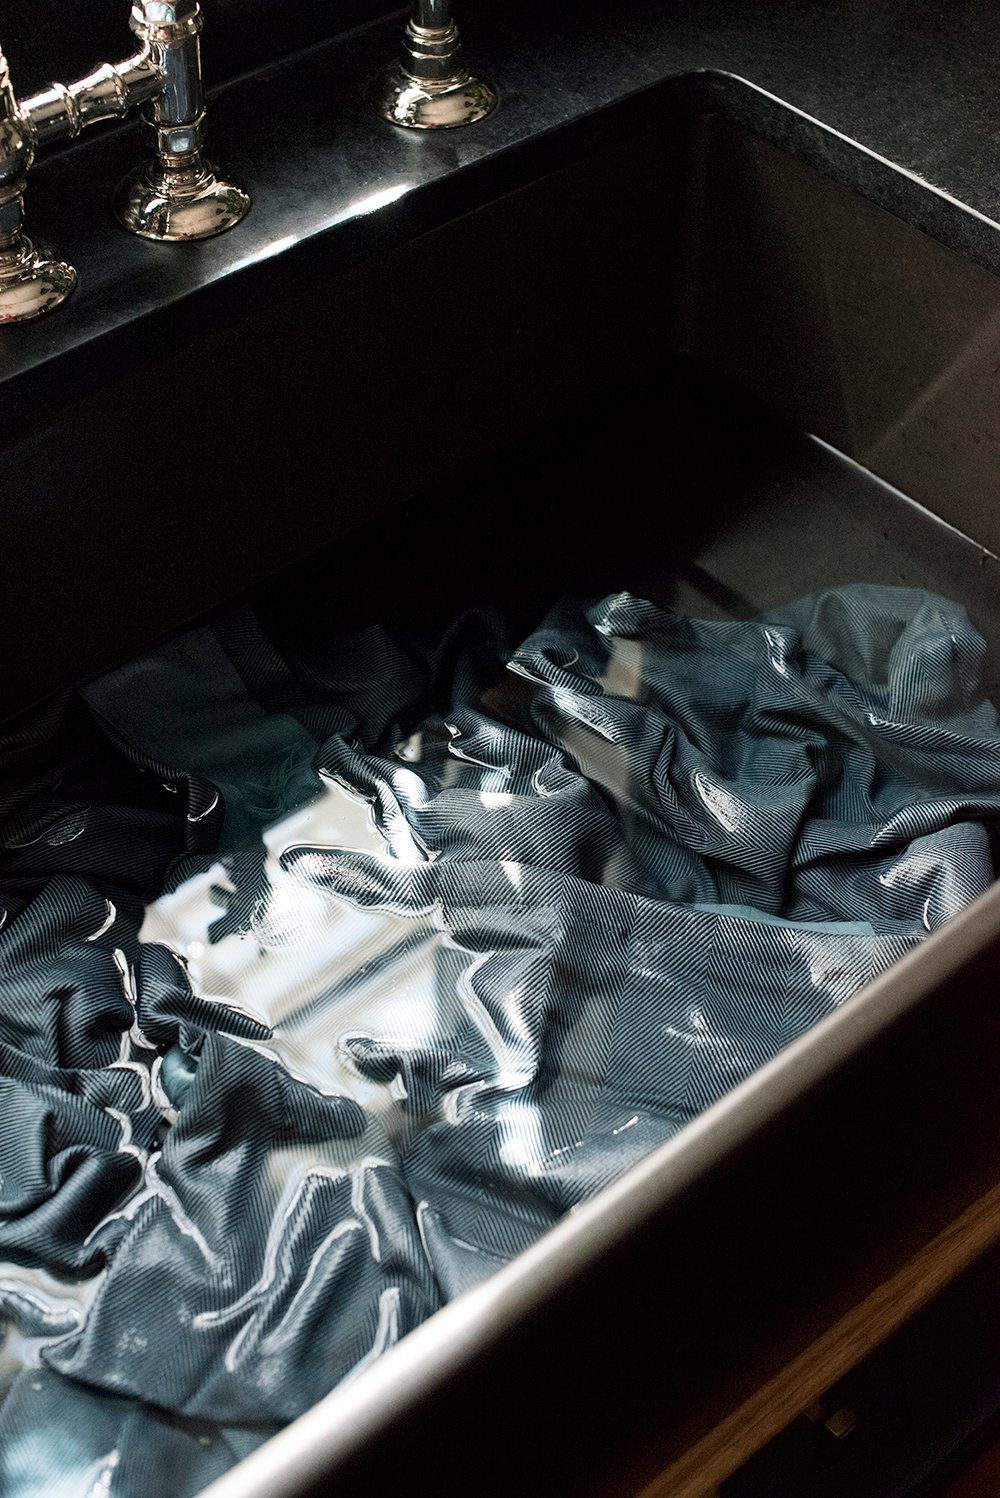
 Step 2 // Soak or prewash your fabric. I gave my fabric a good soak in warm water in my kitchen sink. Saturating the fabric with water will help it dye evenly.
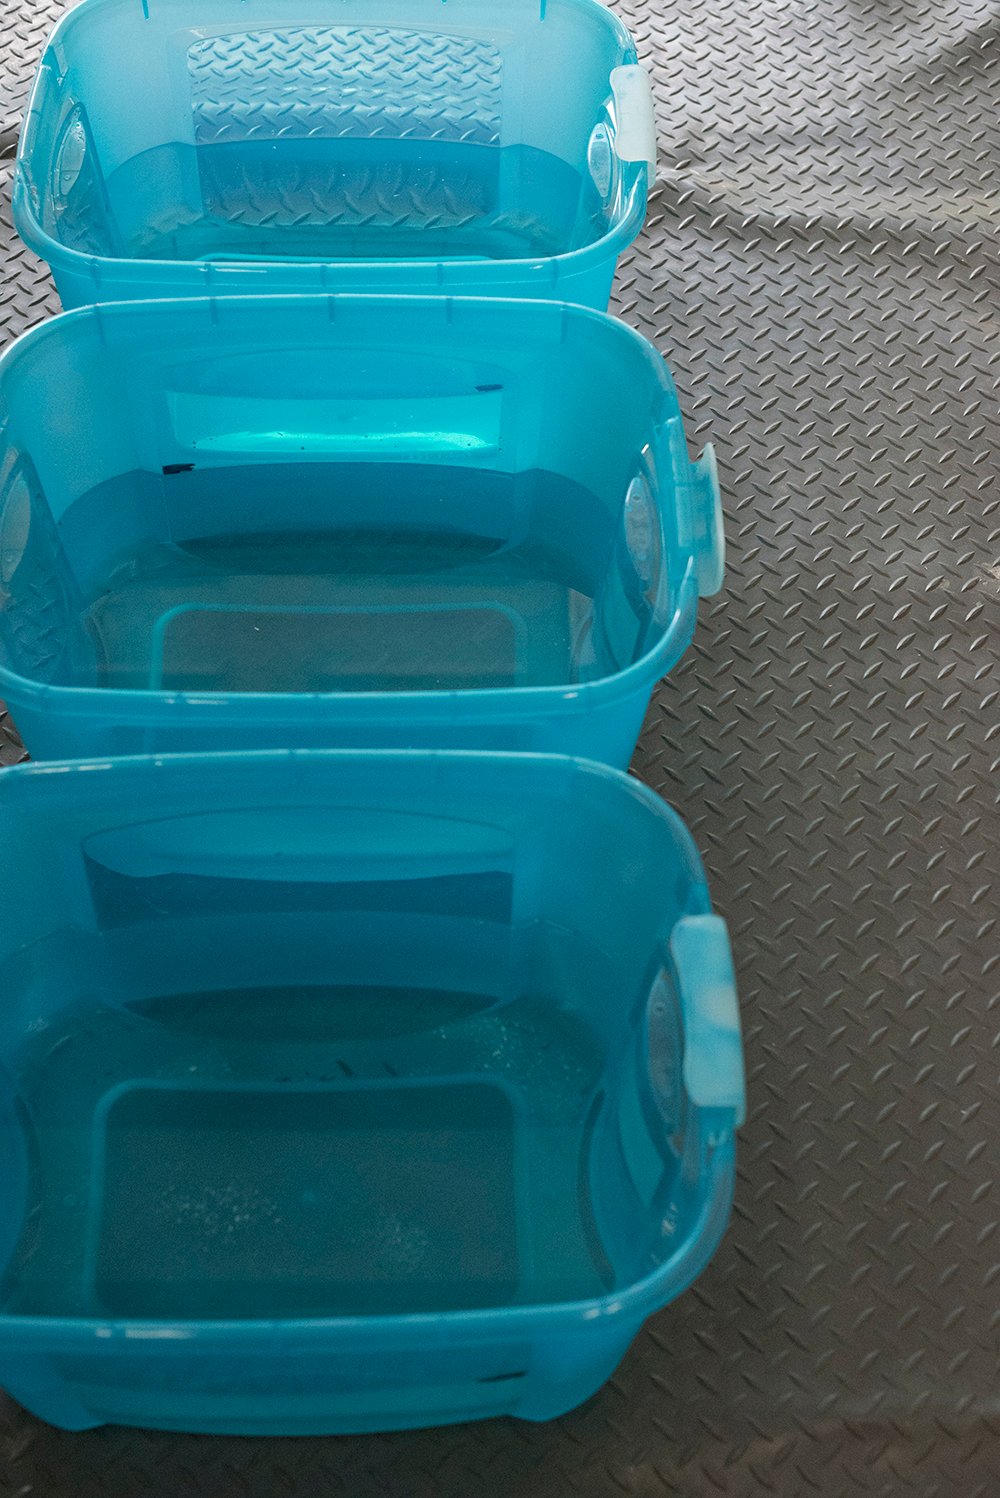
 Step 3 // Find a dye container. While the fabric is soaking in water, prep your dye bath. Begin by finding a container large enough to fit your fabric. The larger the container- the easier this project will be! I started with a 5 gallon bucket and quickly realized that wasn’t the best option. The plastic totes gave me more room to agitate and maneuver the fabric.
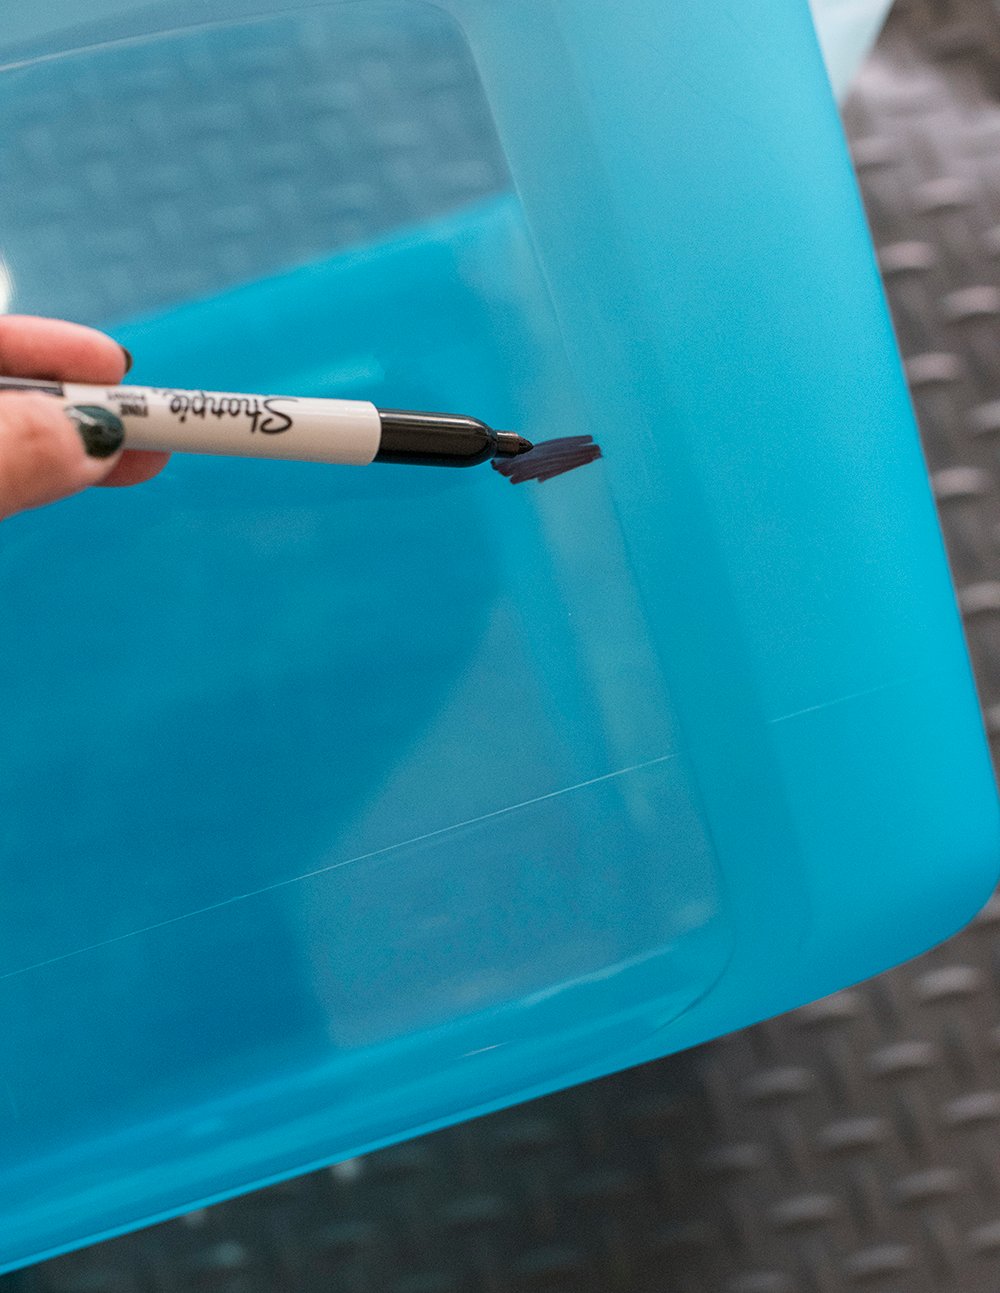
 Step 4 // Mark your container. I made a fill line mark on my containers with a sharpie so I could consistently dye my fabric. Having a “fill line” helped me fill the containers without measuring the water every single time.
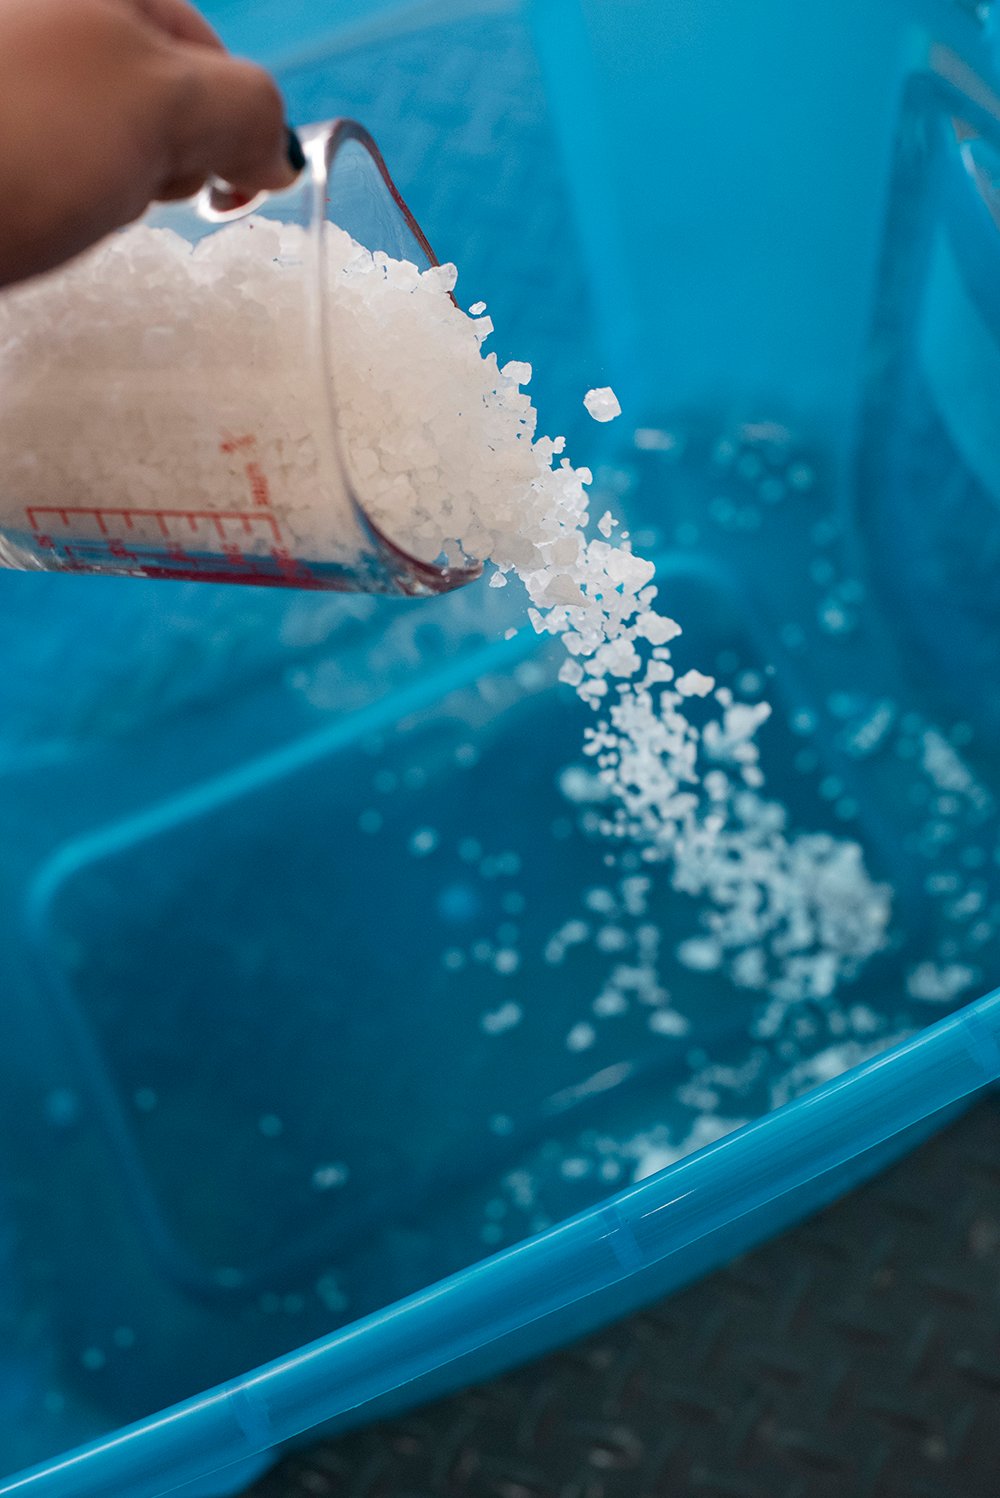
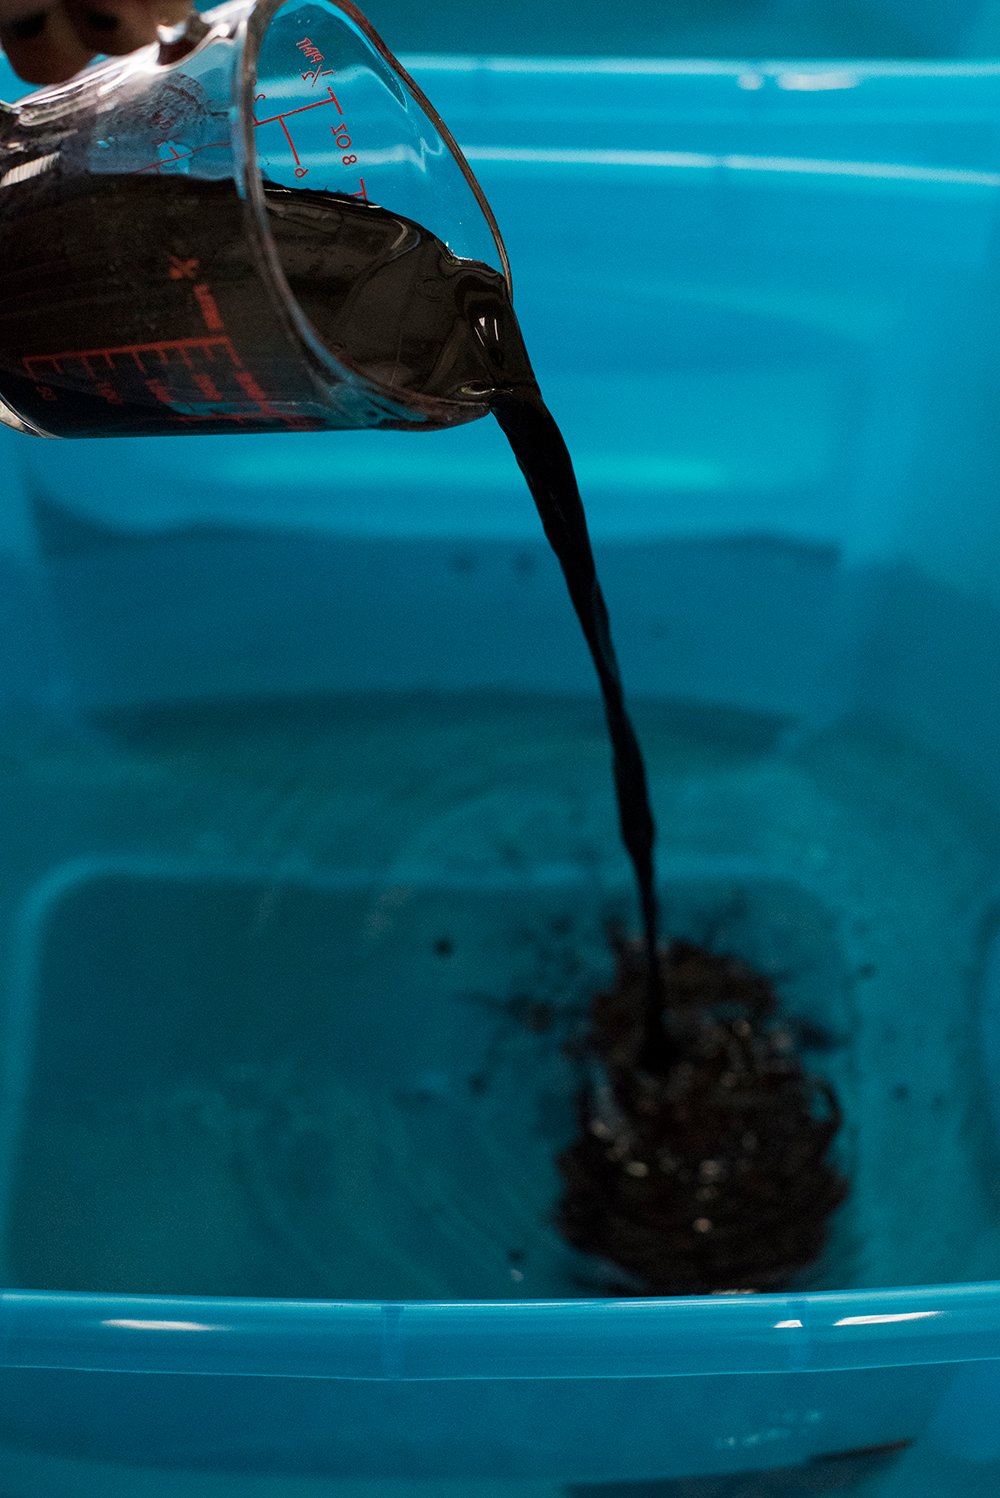
 Step 5 // Add the ingredients. I added hot tap water to my fill line, 1 cup of rock salt, 4 ounces of navy dye, and 2 ounces of black dye. I stirred the dye bath until everything was dissolved and evenly combined.
 Step 6 // Test the color and drop in the fabric. Next, carefully dunk a white paper towel or scrap piece of cloth into the dye bath to check your color. If everything looks good, submerge your fabric. I dyed 1 curtain panel at a time.
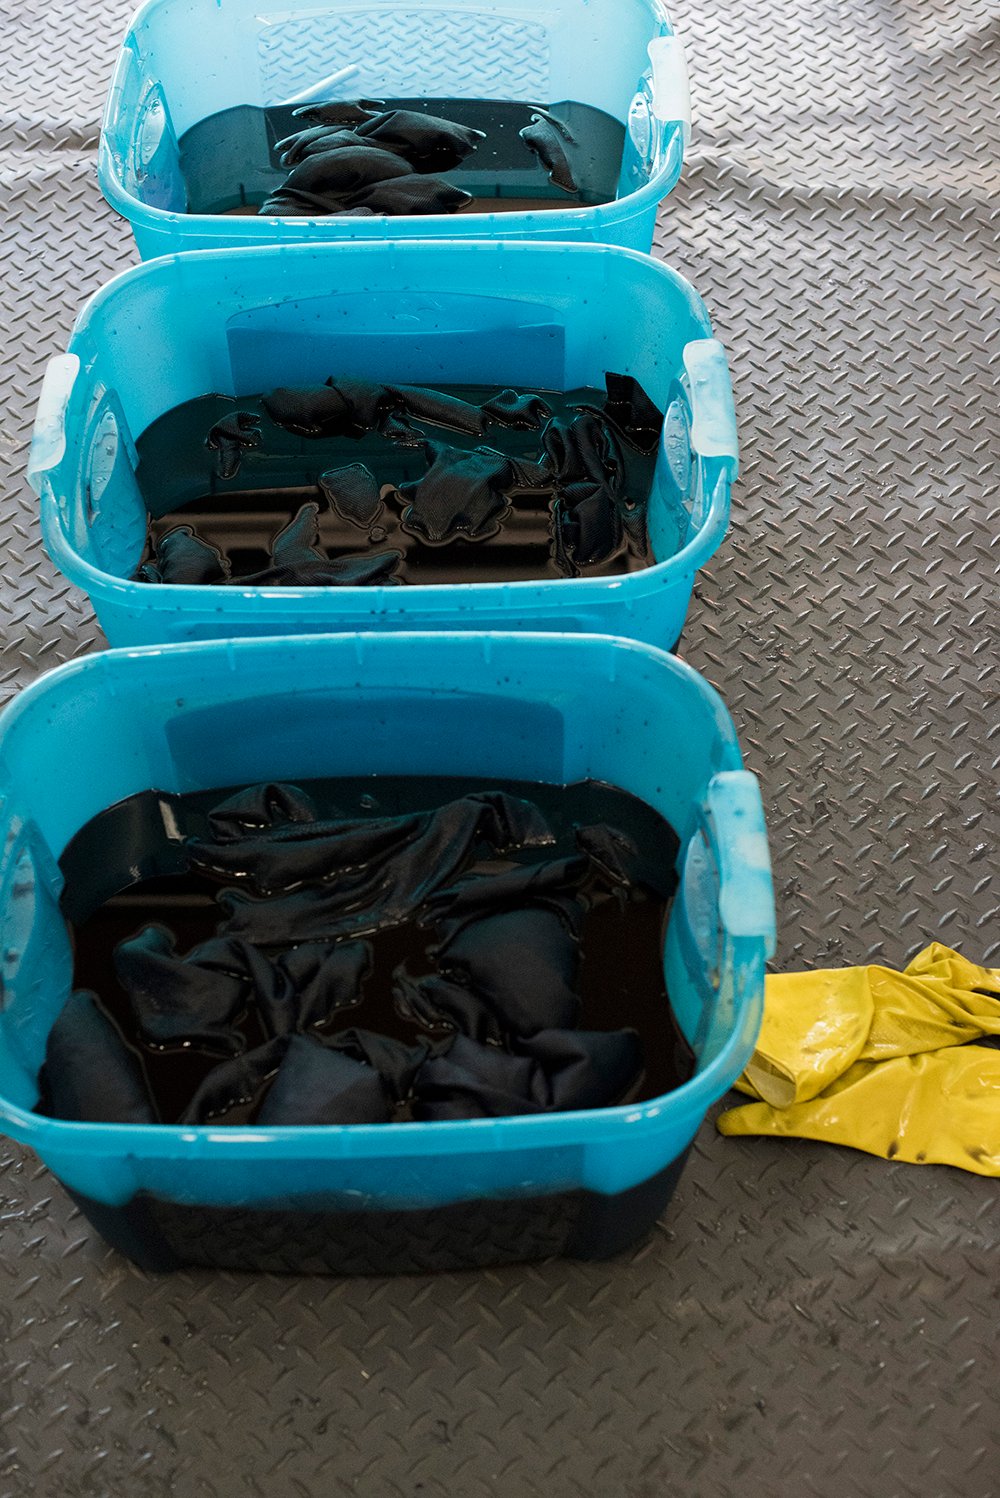
 Step 7 // Agitate. If you want your fabric to dye evenly, set a timer and agitate it every 5-10 minutes. I journaled each cycle so I could keep track… agitate, wait 7 minutes, agitate, wait 7 more, agitate, etc. Basically, you want to make sure the fabric is being moved around and isn’t creased or folded on itself… any resistance will come out of the dye bath lighter or splotchy. By agitating, you can ensure dye is getting to every single spot and completely covering the fabric. I left my fabric submerged in the dye bath for 30 minutes, but you can leave it up to 60 minutes, depending on how dark or saturated you want the color.
 Step 8 // Rinse. Carefully remove the fabric from the dye bath and rinse it with cold water until the water runs clear. I just used the garden hose for this, to keep the mess outside.
 Step 9 // Wash. Next, add the fabric to the washing machine with a mild or gentle detergent. I washed on warm because I was trying to get my curtain panels to shrink.
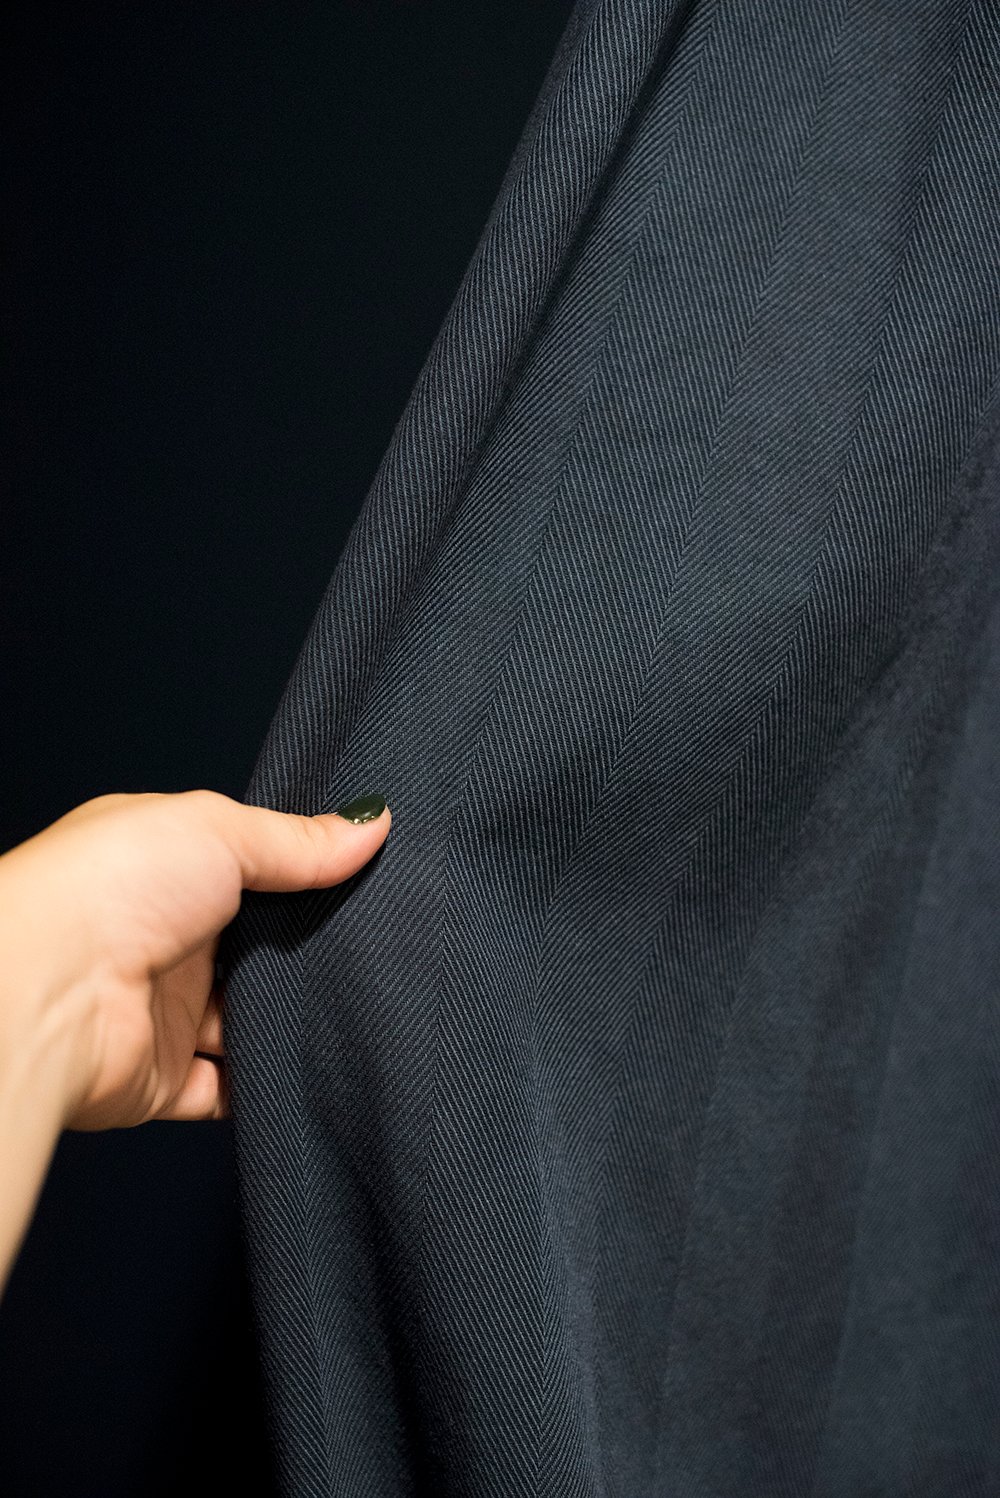
That’s it! I tumbled my fabric dry and everything looked pretty good and even. Again… it took some trial and error to learn the process and figure out how to dye evenly, so I figured sharing some “do’s and don’s” might be helpful. This is how they turned out…

DO:
- Use a spacious container.
- Confirm the dye is compatible with your fabric / material.
- Set an agitation timer.
- Wear old clothes and rubber gloves (it gets pretty messy).
- Journal your formula, dye time, and additional notes.
- Test your color before adding fabric to the dye bath.
- Use a measuring cup.
DON’T:
- Forget to wet the fabric before dying
- Forget to set your agitation timer.
- Eyeball measurements.
- Skip the salt or vinegar.
- Overcrowd the dye bath.
- Be afraid to mix different dye colors.
 I think that’s it! Let me know if you have any questions. I dyed a BUNCH of curtains for our basement project that I’ll be sharing soon. I dyed 16 panels- whew! It was a lot of work, but the end result was well worth it and I saved a ton of money doing this myself. I also ended up with the *perfect* color. It definitely looks like high-end custom drapery and I’m hoping nobody will notice I spent less than $200.