How to Hang Artwork in Front of Curtains
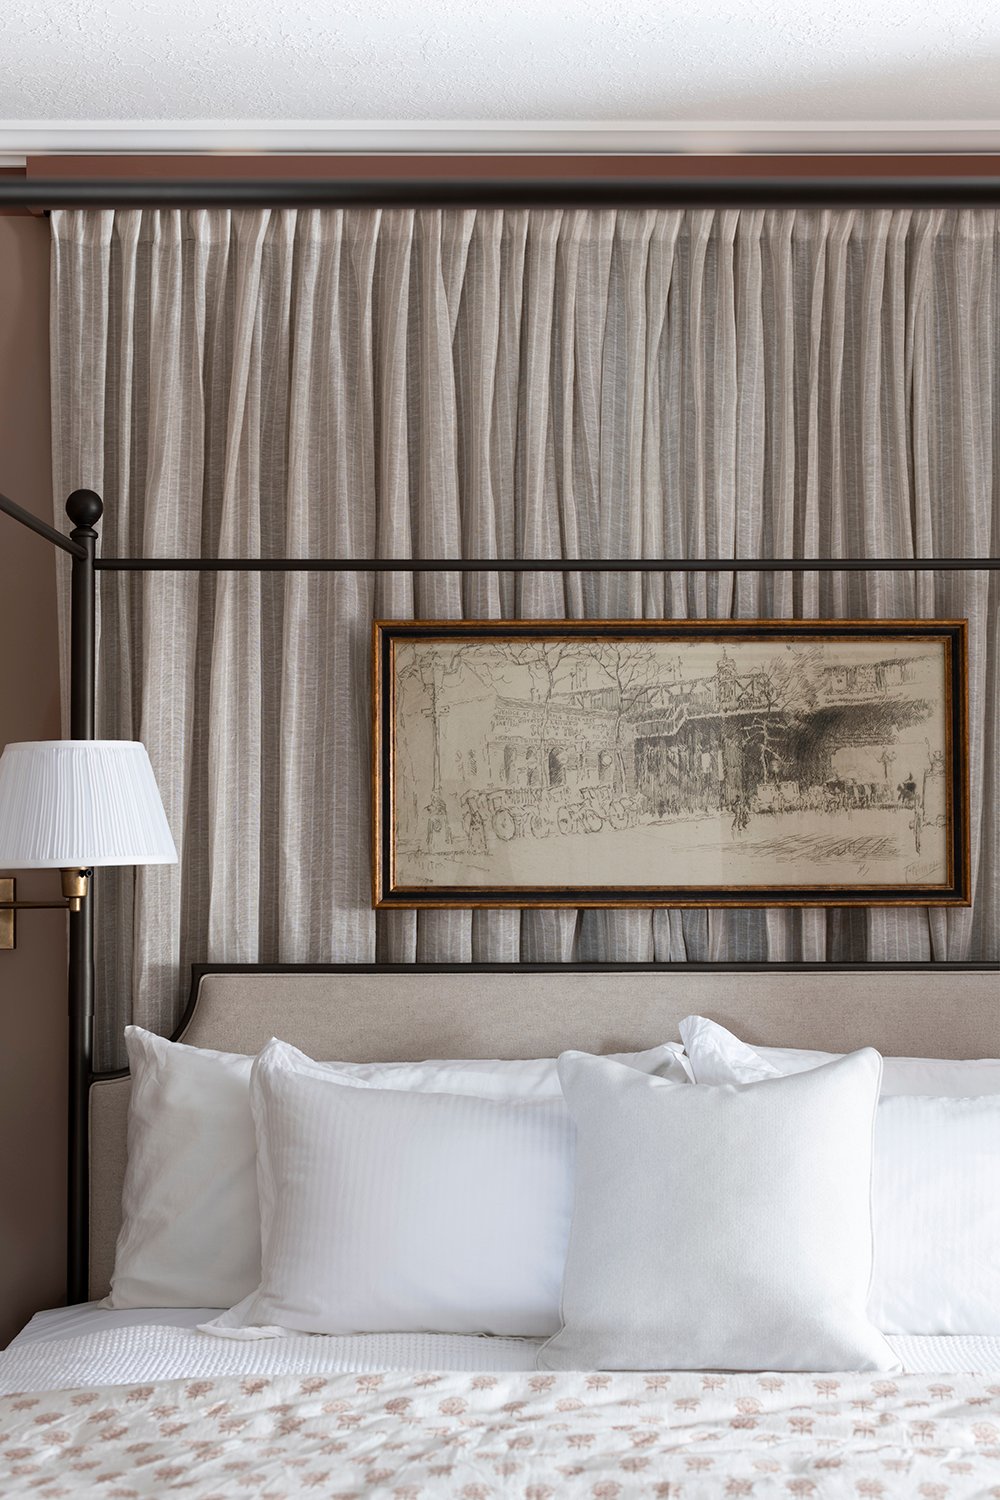 How was your weekend? We had the most lovely time skiing & enjoying Jackson Hole, but it’s always nice to return home. Short weekend road trips have been really fun for us this winter- and a great opportunity to explore some neighboring mountains. Before we left, Emmett & I started pulling our newly painted guest room back together. I’m hoping to have that finished space for you in a few weeks, just as soon as my remaining artwork arrives! In the meantime, some of you asked about the art installation above the bed. I shared a sneak peek on Instagram last week that generated quite a few questions… how do you hang artwork in front of curtains? Consider this an easy tutorial for that exact topic! If you also love the layered work of art perfectly floating above soft & textural drapery panels, this post is for you… click through for a very detailed tutorial- or pin & save it for later.
 To tackle this project, you’ll need the following…
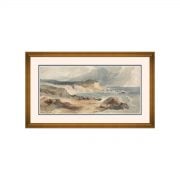
- Artwork
- Scrap Wood
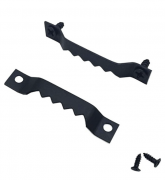
- Picture Hanger
- Laser Level (or regular level)
- Tape Measure
- Pencil
- Power Drill
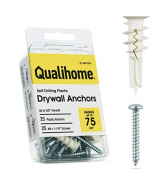
- Drywall Anchors & Screws
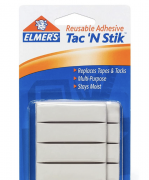
- Sticky Tack (for stabilizing)
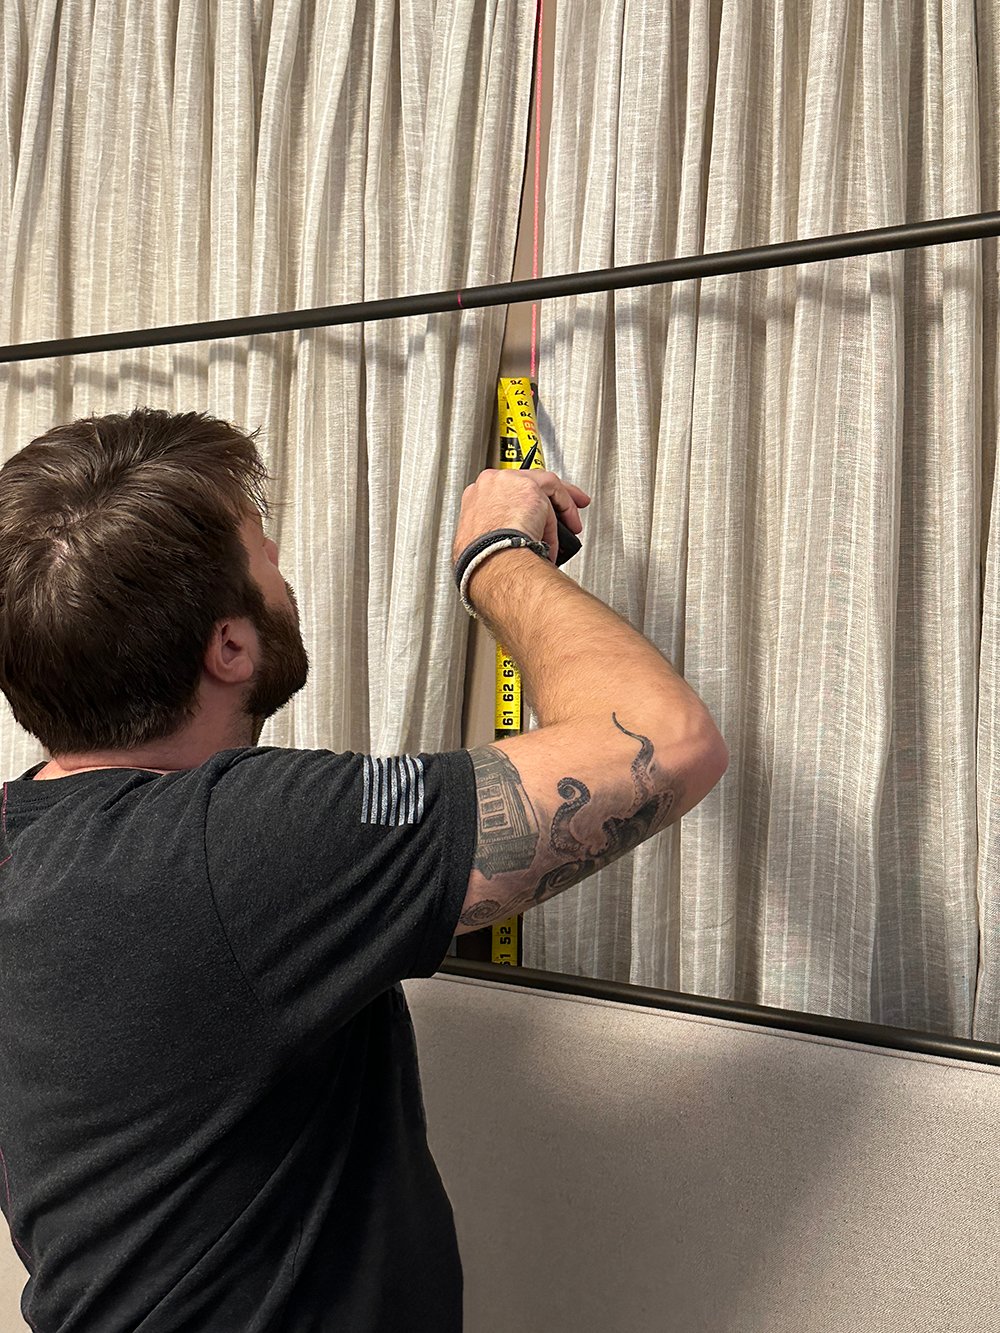
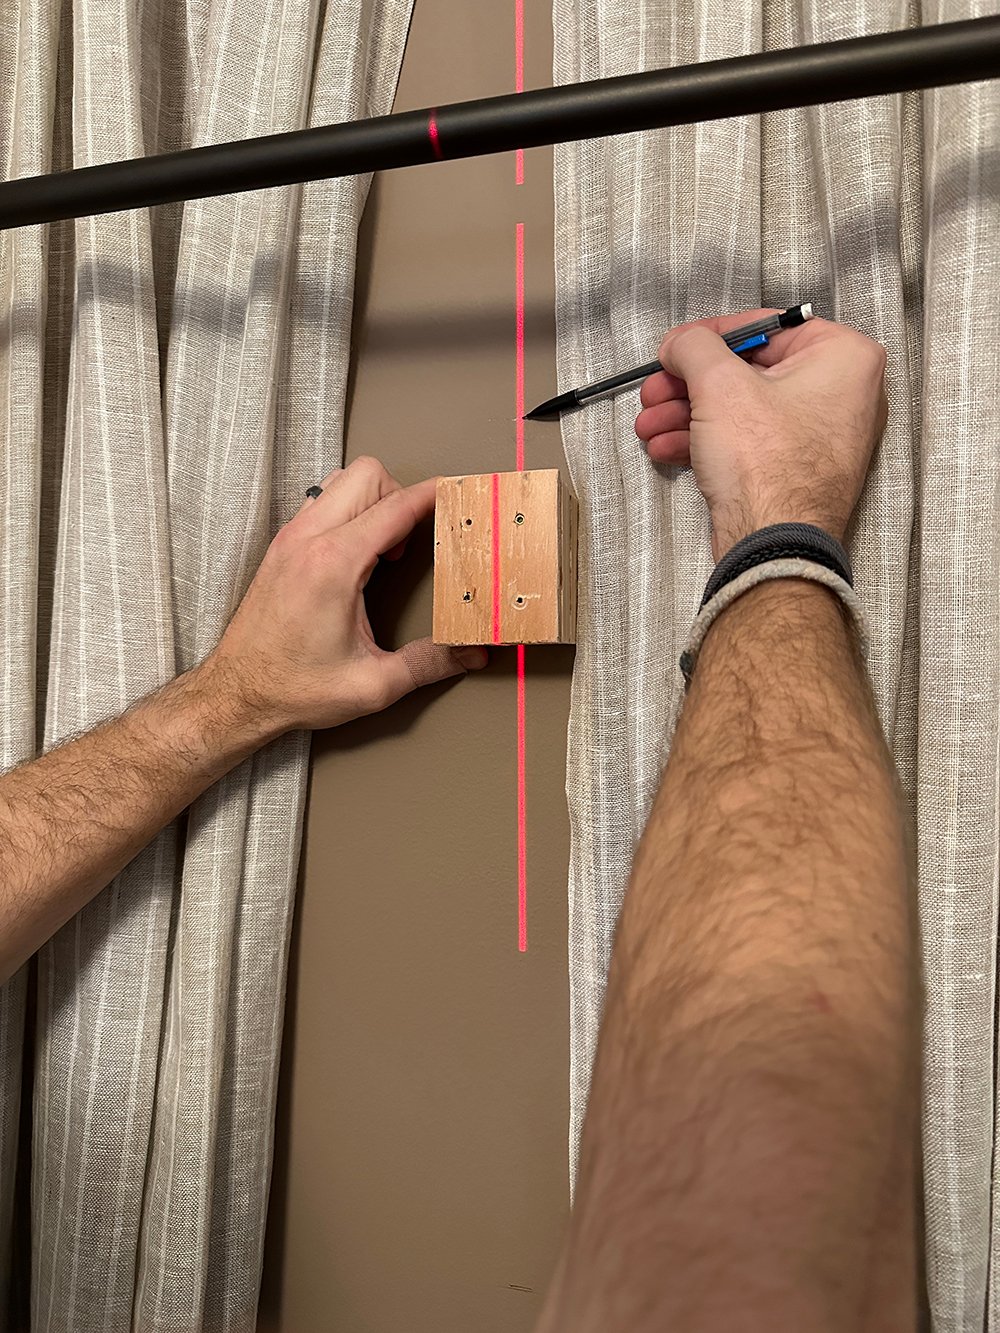
 We began by finding the center with our laser level, and mapping out the exact preferred artwork placement.
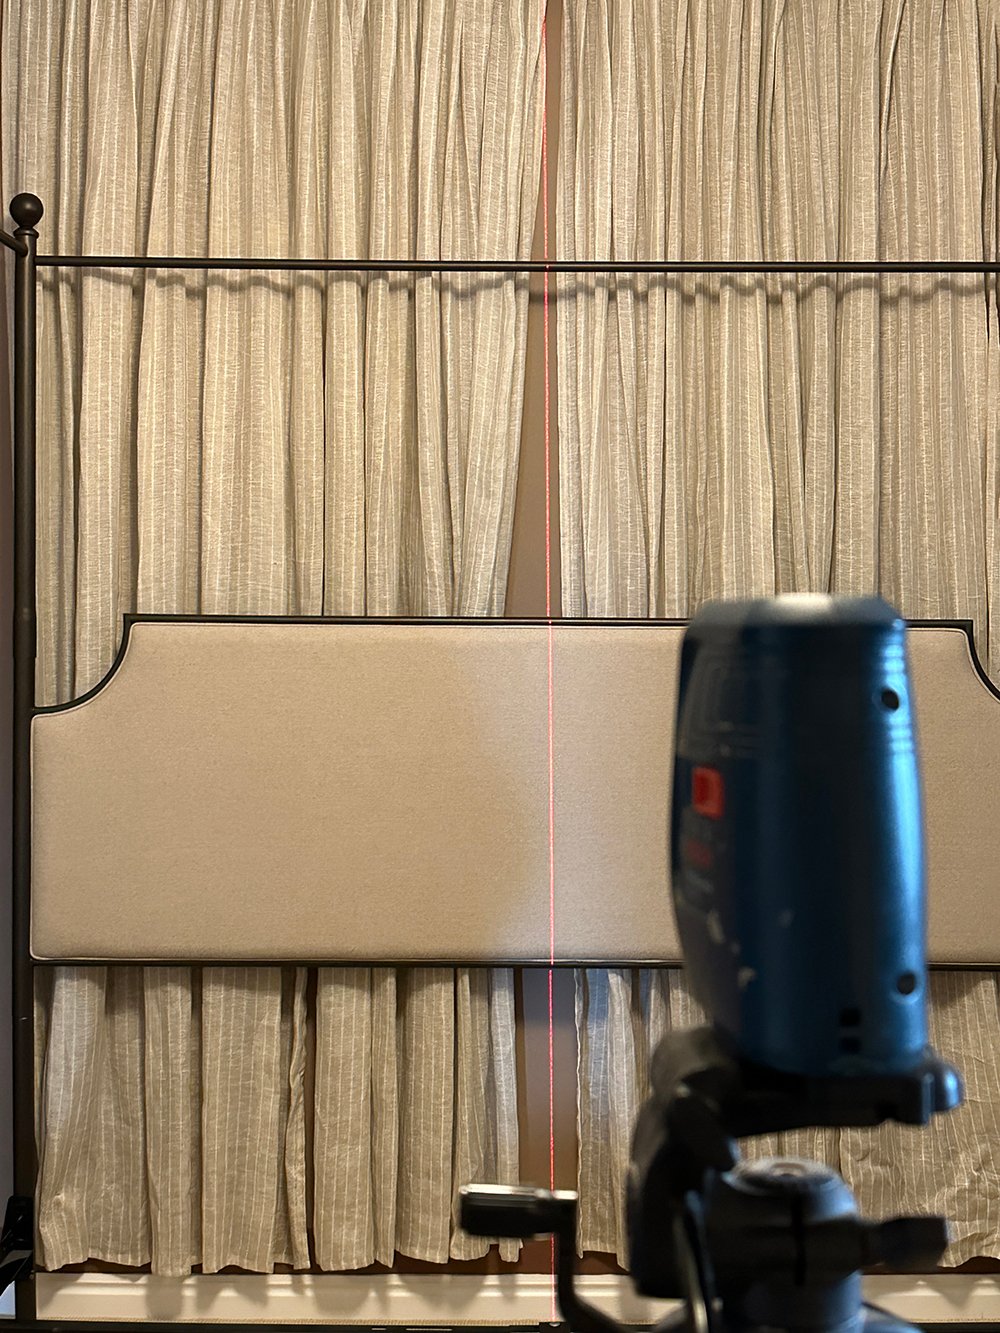 Emmett carefully measured to find & mark the center position, both horizontally and vertically.
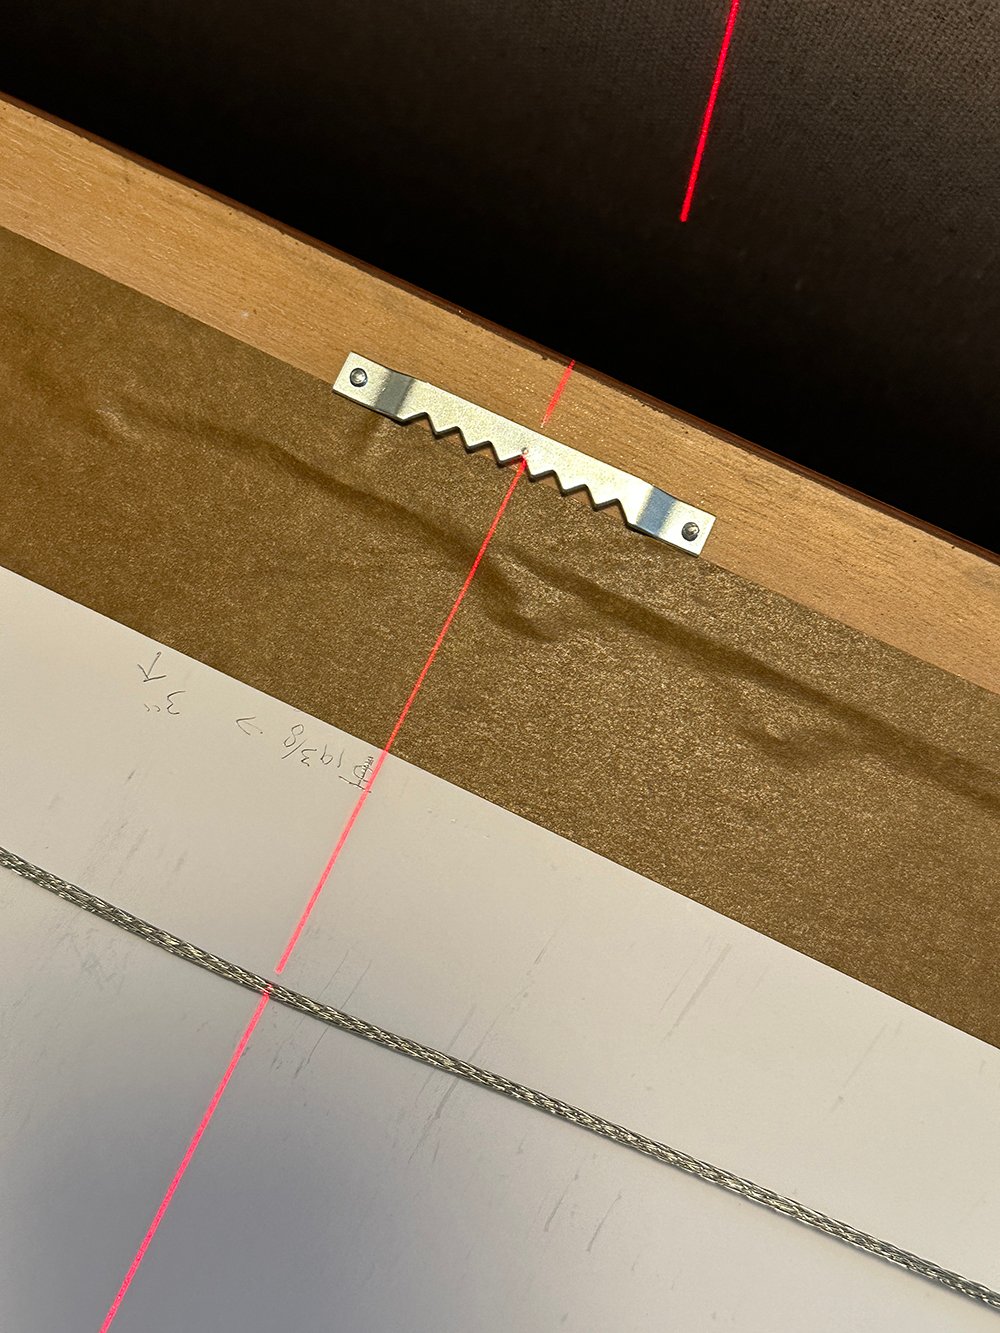
 Next, we screwed in a sawtooth picture hanger directly onto the back of the artwork. If your art doesn’t have one of these, it’s best for this type of installation- as opposed to a wire hanger.
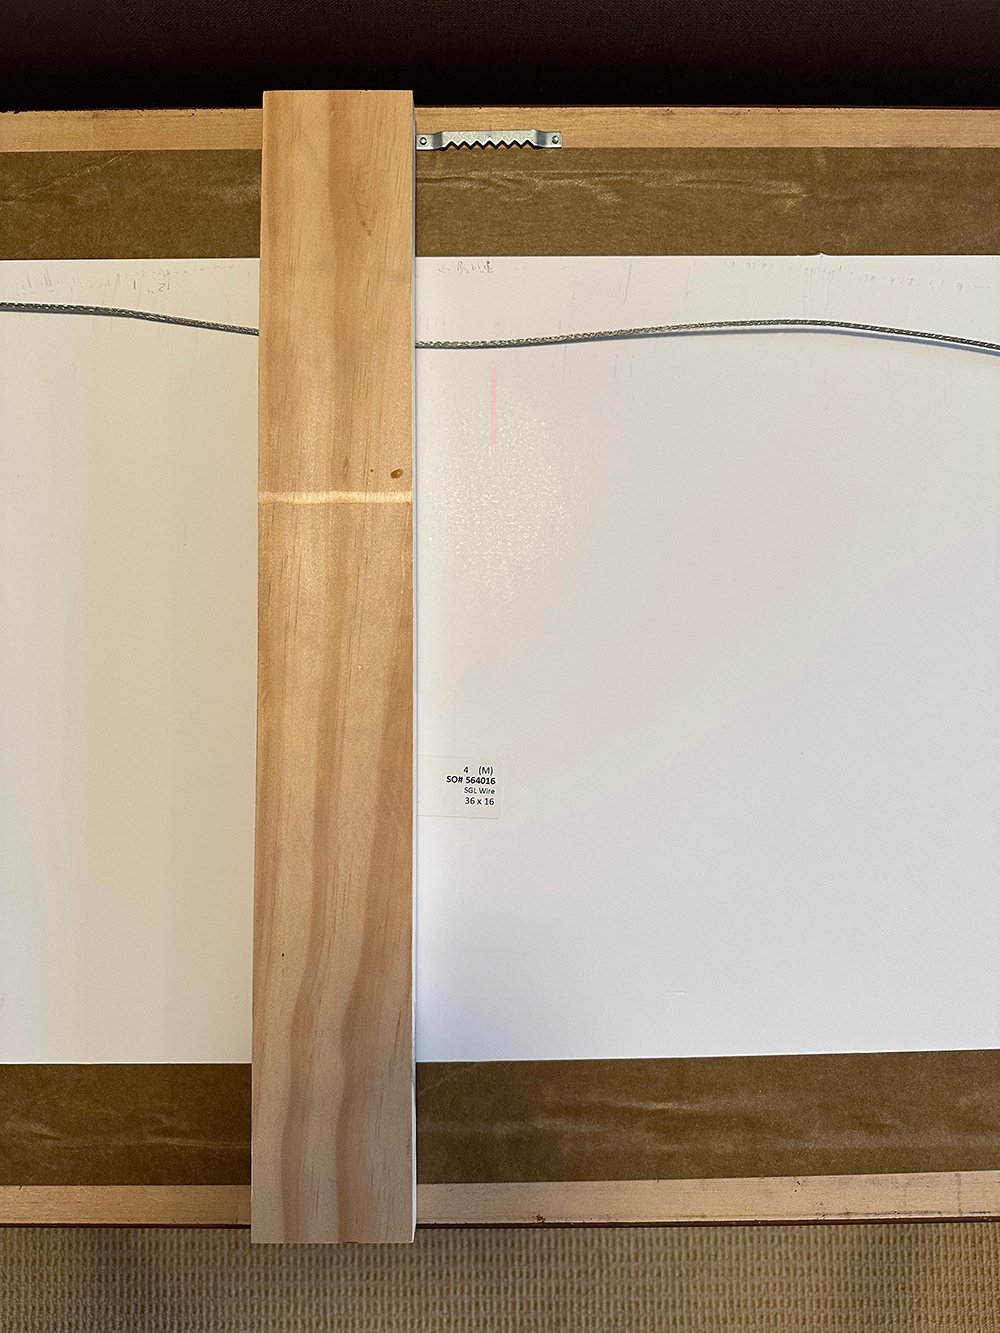
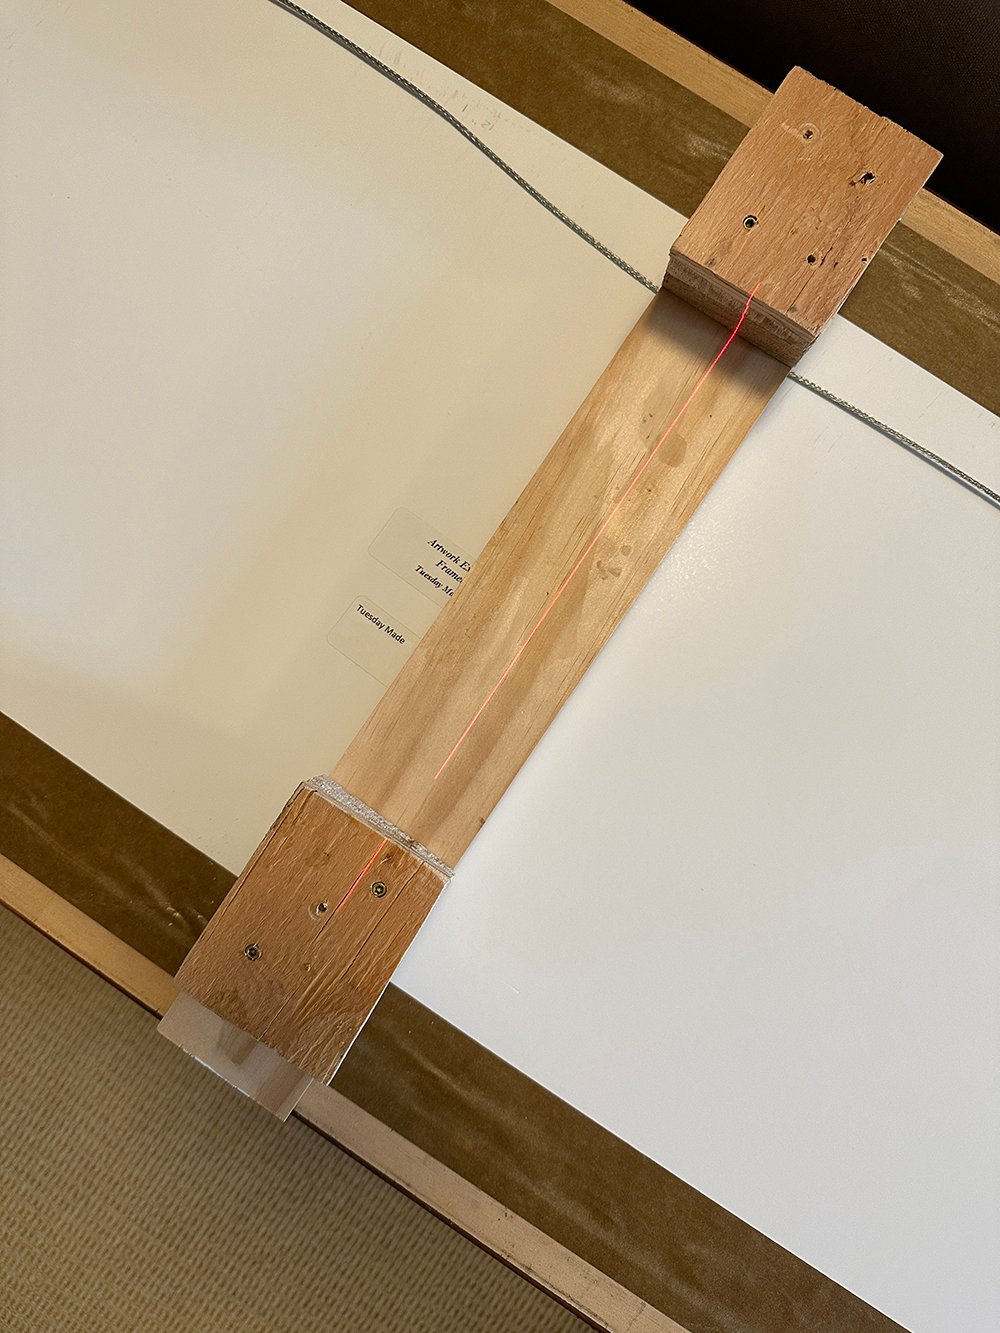
 We located a scrap piece of wood and cut it to the exact vertical size of our art, spanning from top to bottom.
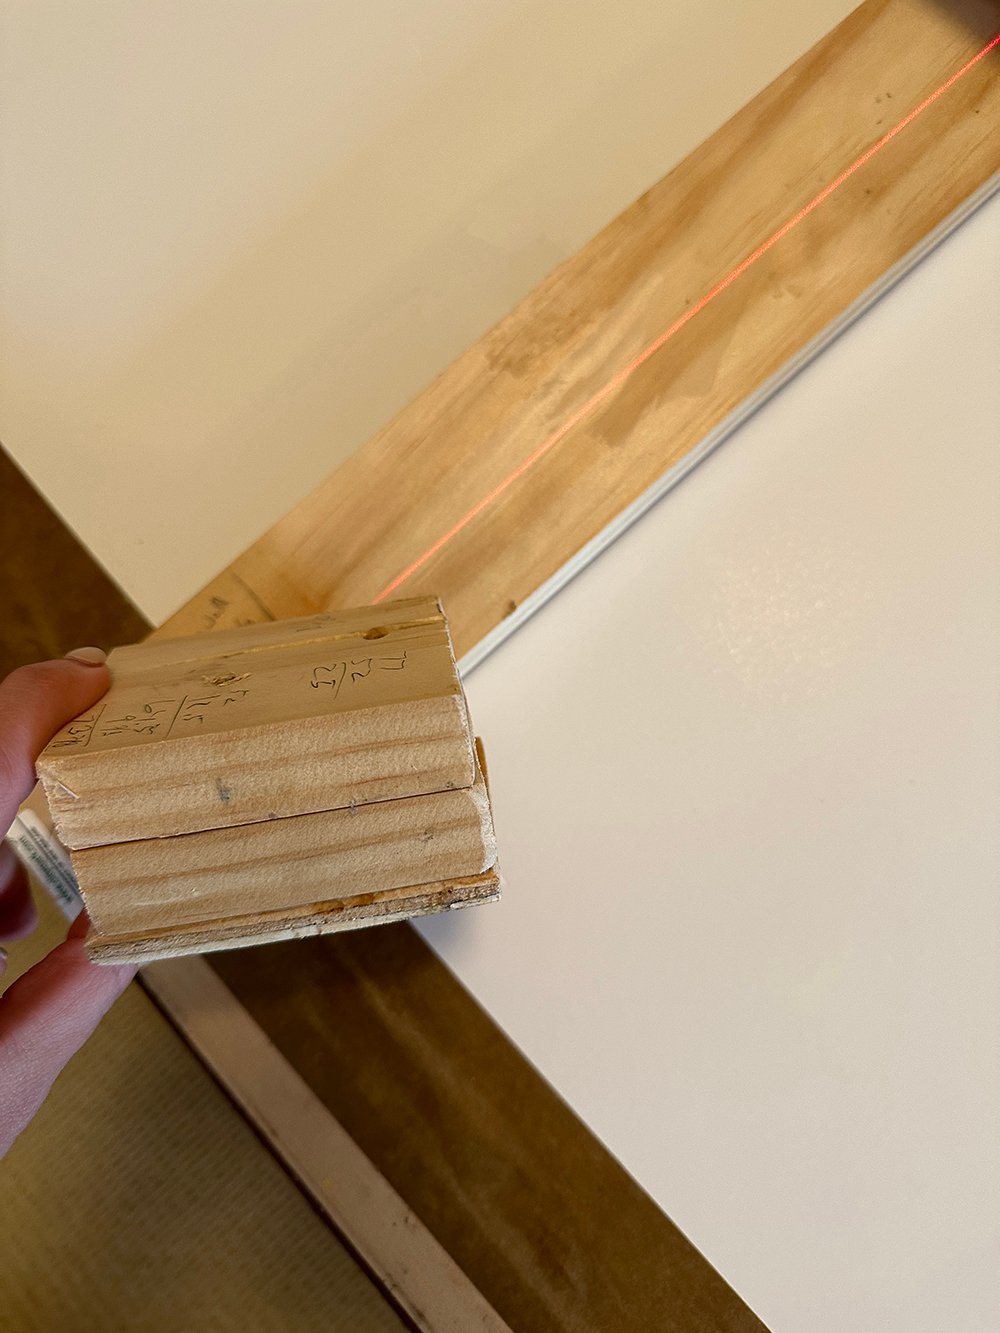
 Next, we calculated the projection or depth… how far in front of the wall & drapery panels we wanted the art to rest. We screwed some scrap wood blocks together until we reached our desired depth.
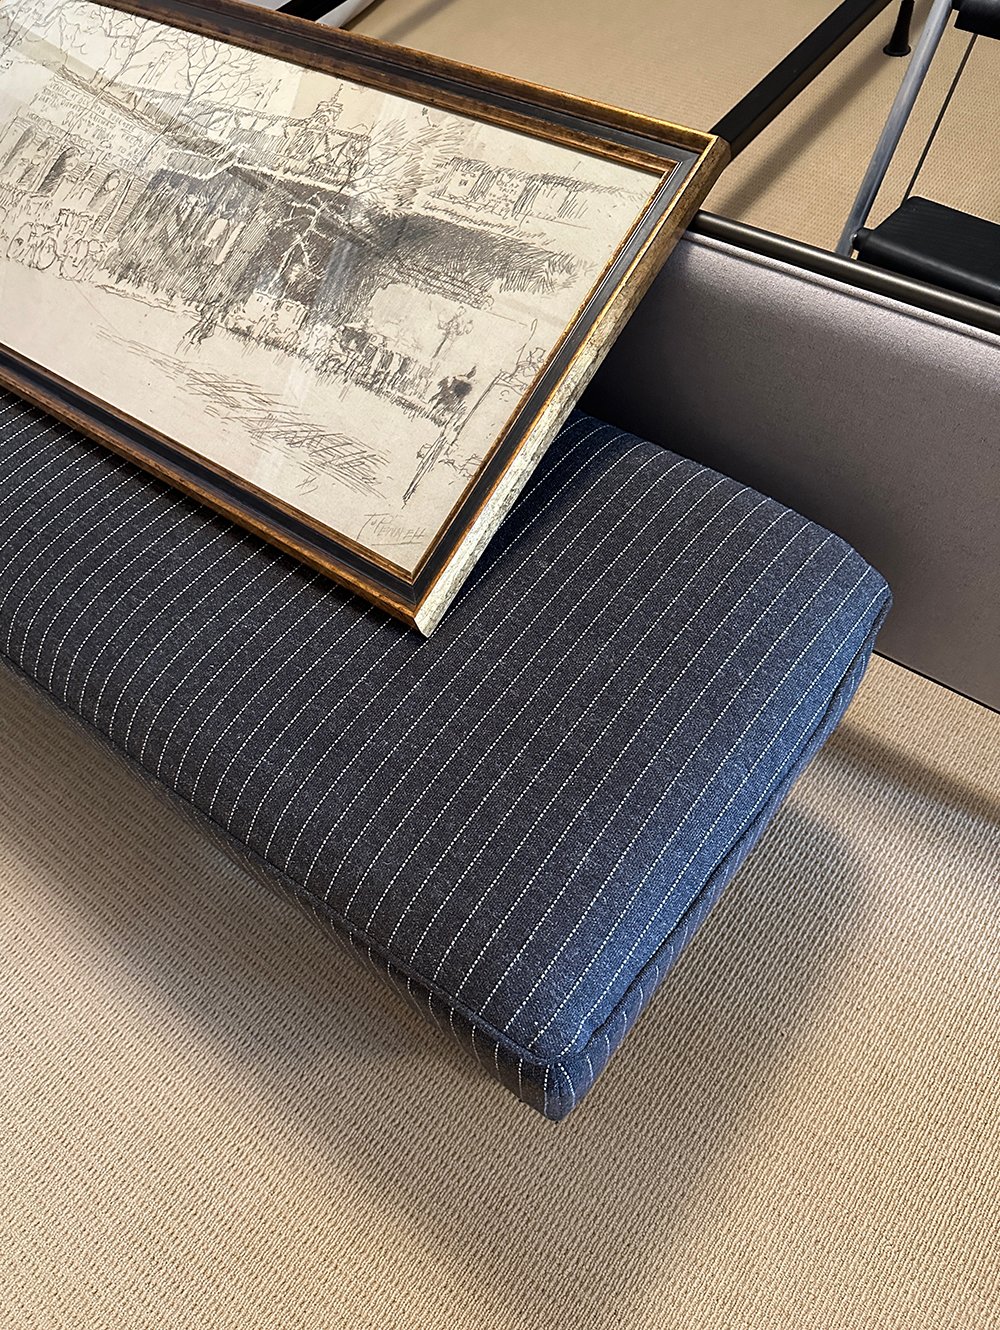
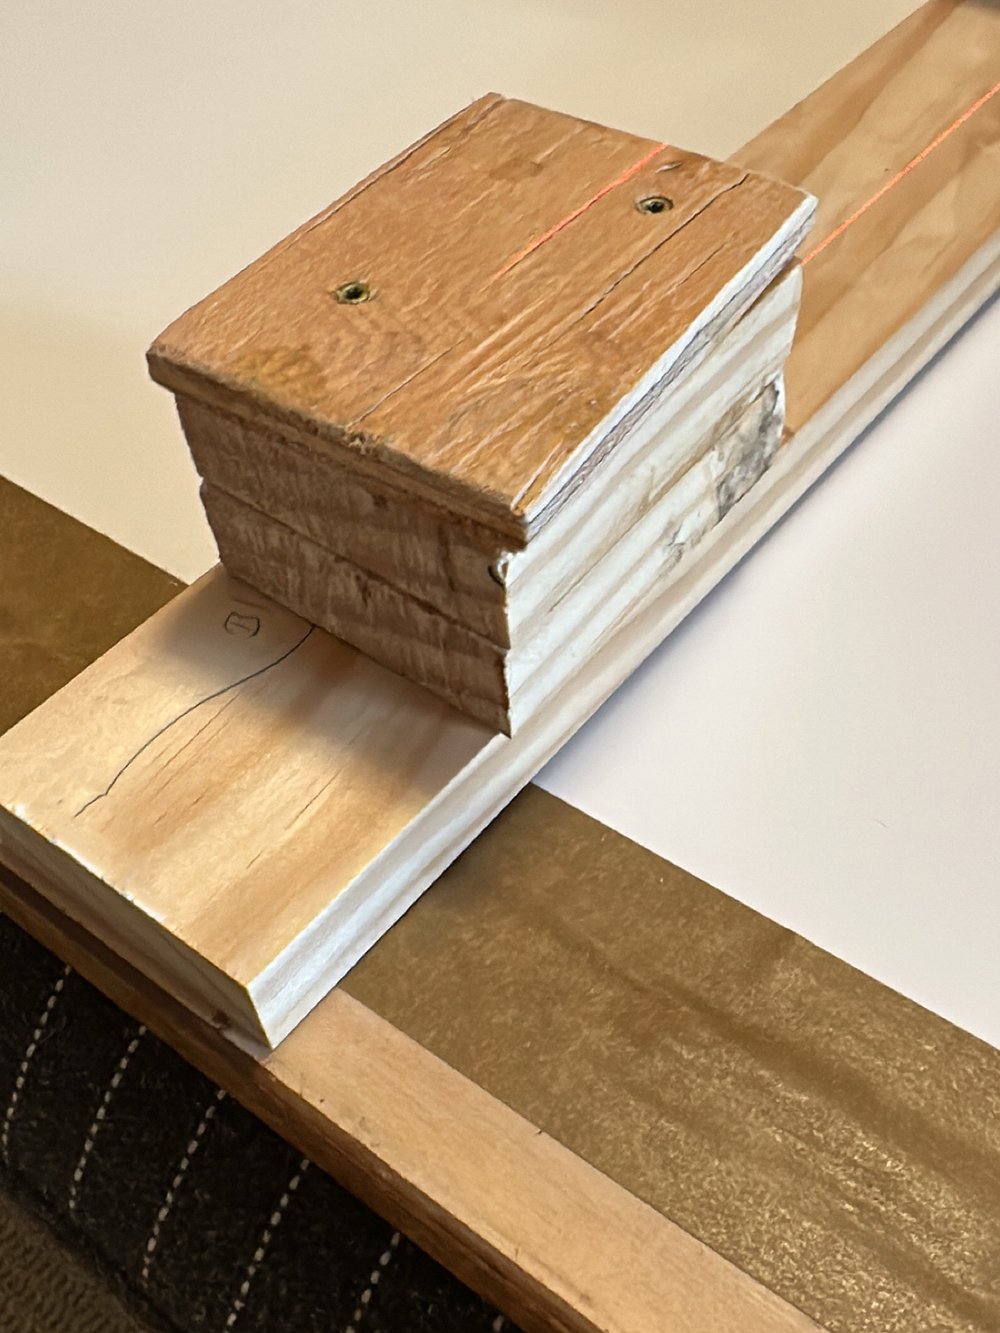
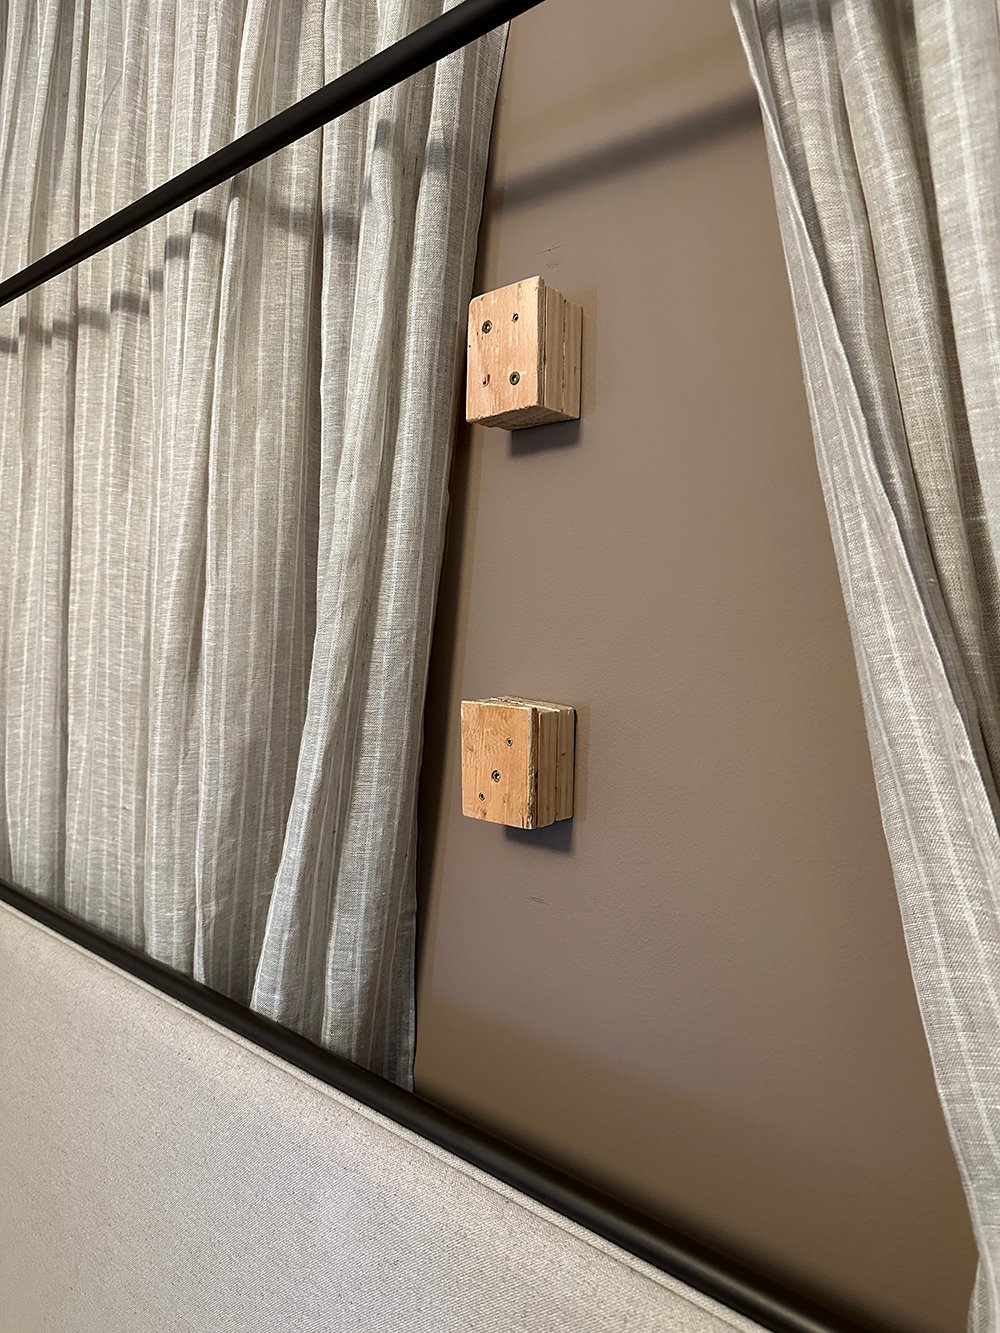
 Here’s a closer look at our little wood block sandwich… we needed two of these (one for the top and one for the bottom) that perfectly match, in regards to depth.
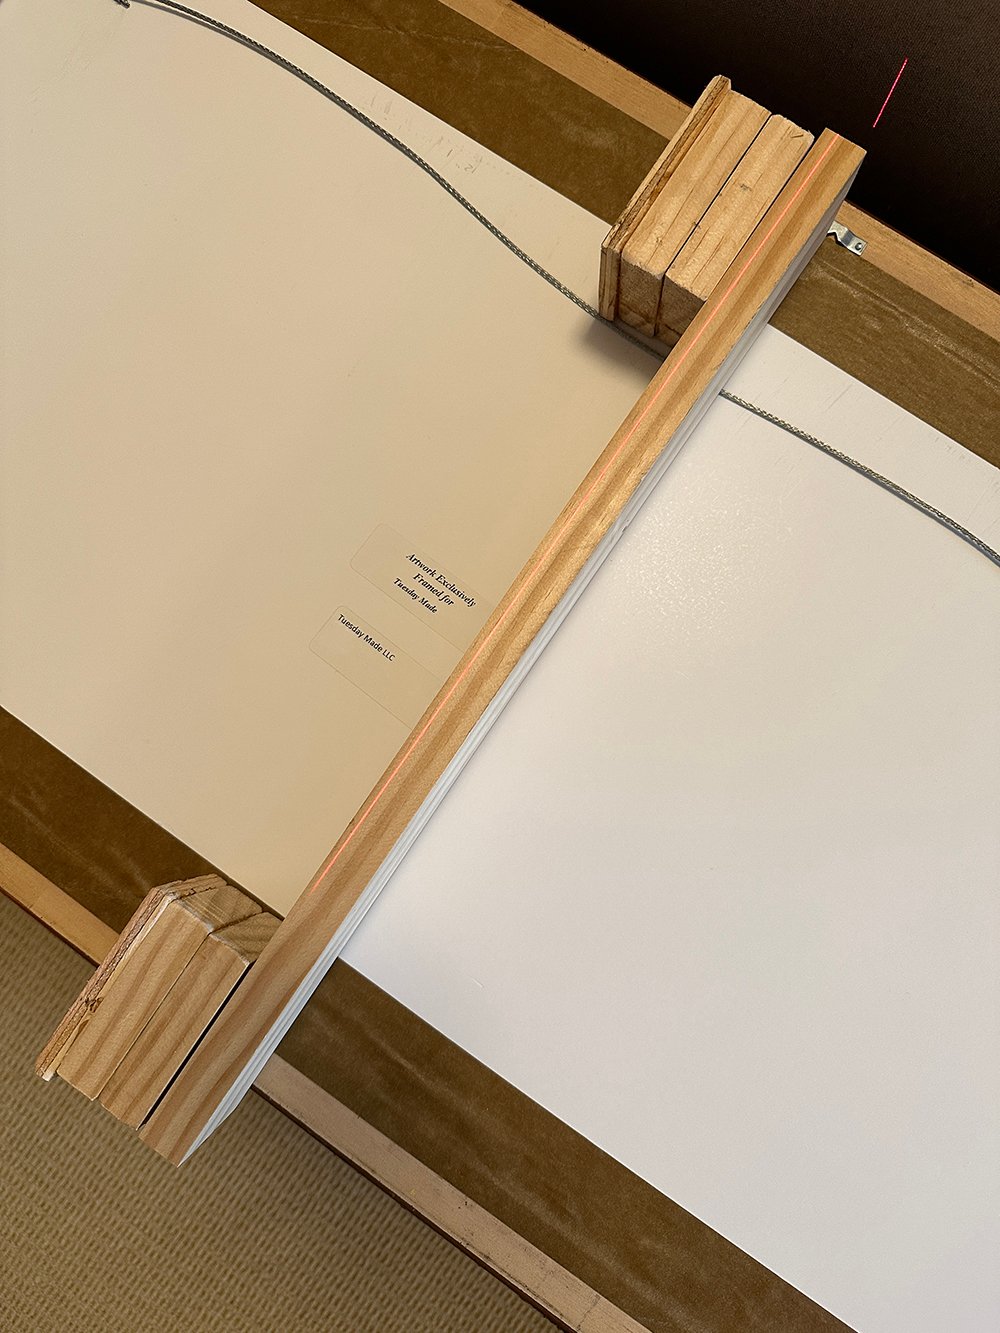
 We mocked up the blocks onto the strip of wood. These will be inset, to give the floating appearance…
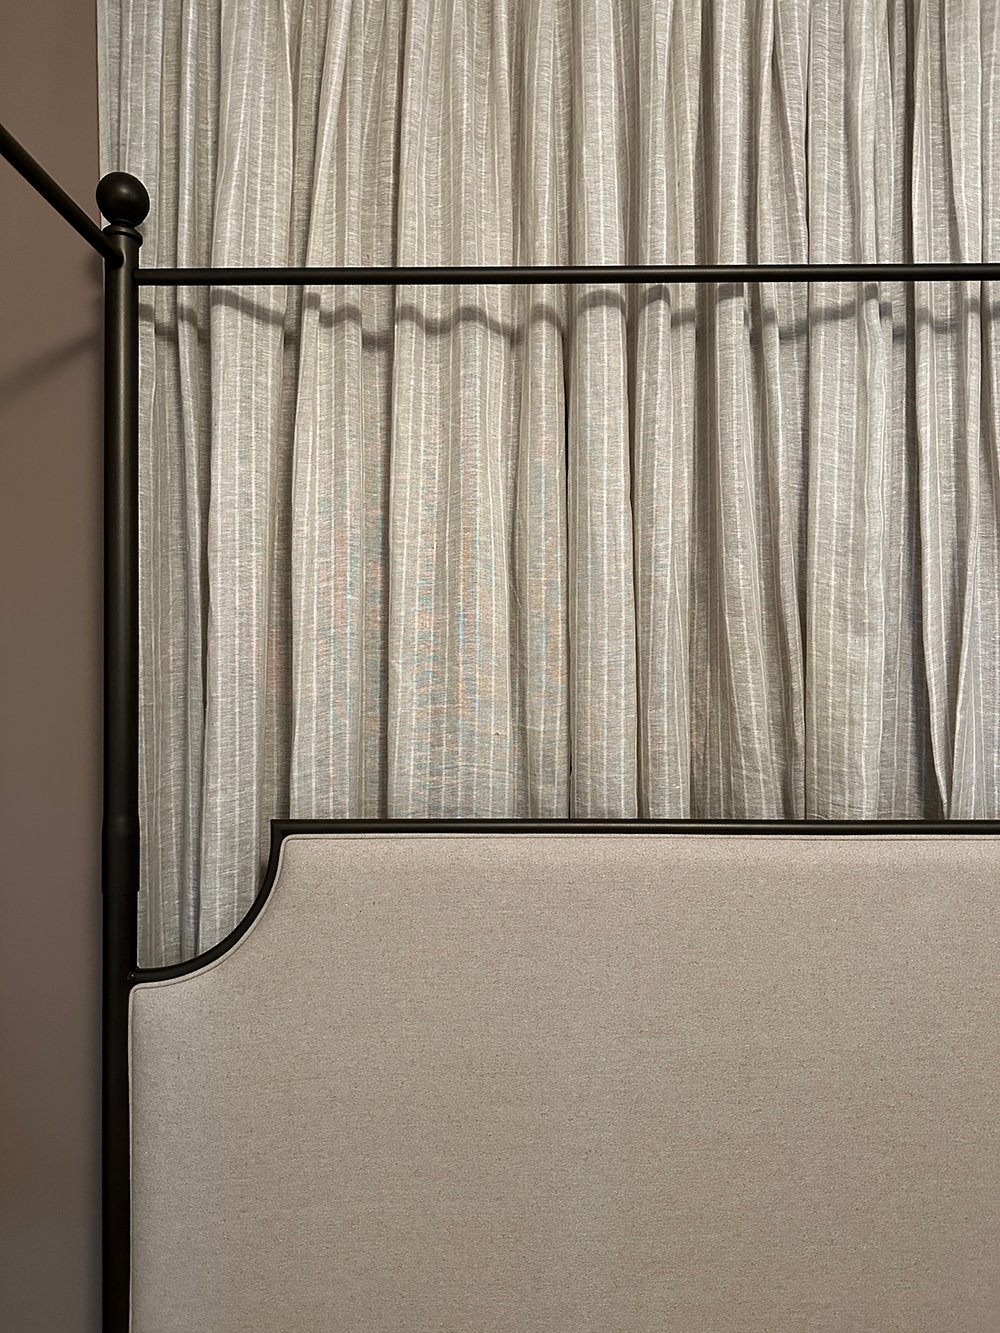
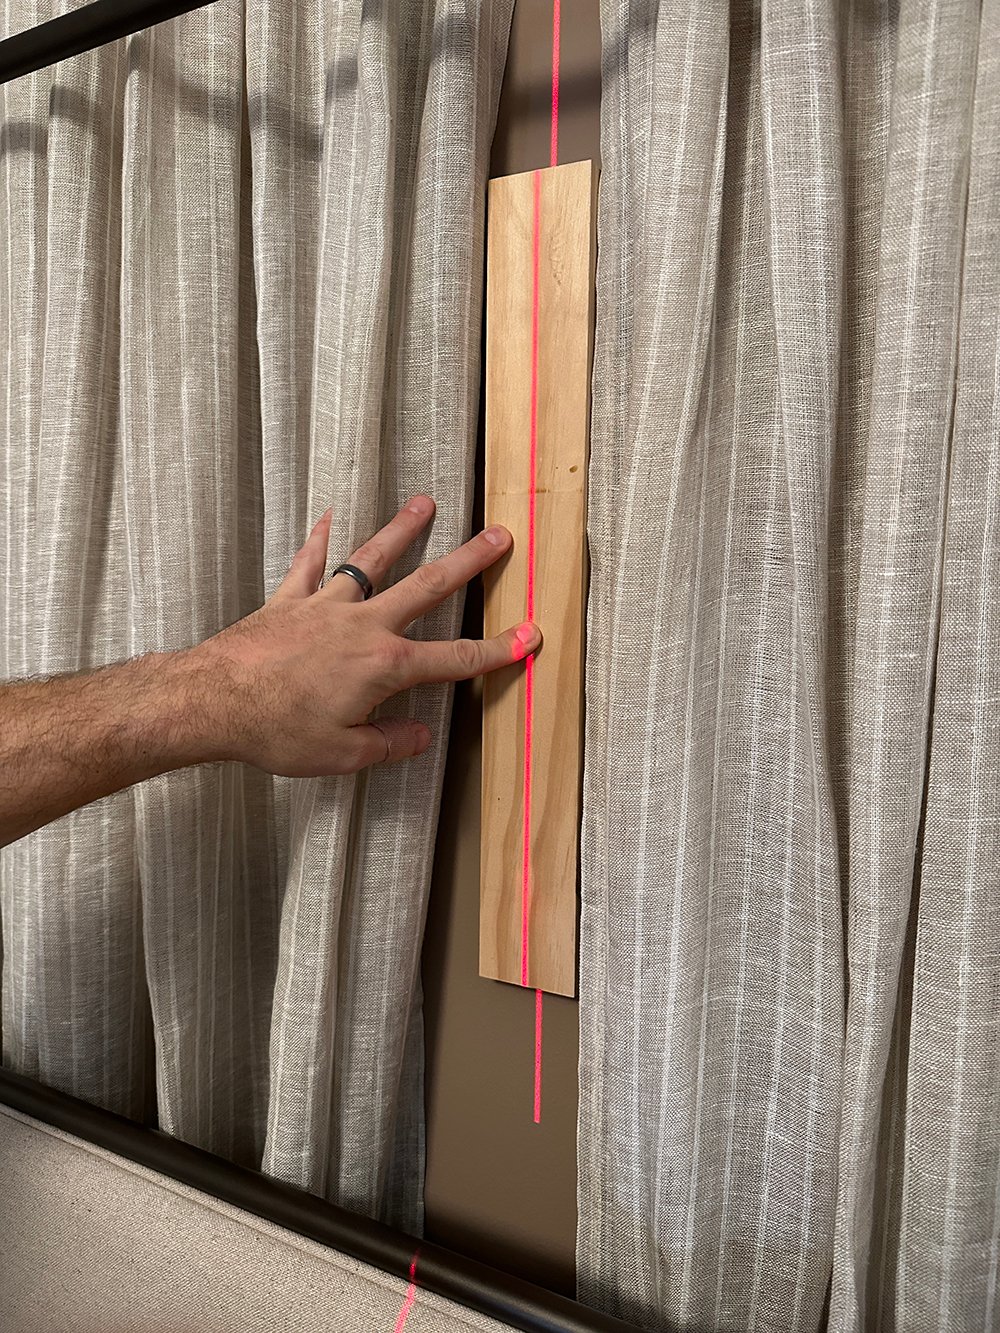
Then, we double checked our measurements, moving the strip onto the wall, making sure everything was aligned and properly measured.
 The blocks get screwed into the wall first. Mark your screw points prior to drilling for perfect alignment…
 Next, you’ll set the drywall anchors. These are especially important for installing heavy, oversized, or custom framed pieces of art. They add stability and ensure the artwork doesn’t rip from the wall… especially for pieces that project or appear to float, as they pull from the wall.
 Screw the first block into the wall, and repeat the process with the second block. Remember- they don’t have to look pretty, as they’ll be totally hidden.
 Next, secure the strip of wood onto the blocks, making sure your measurements are aligned and accurate.
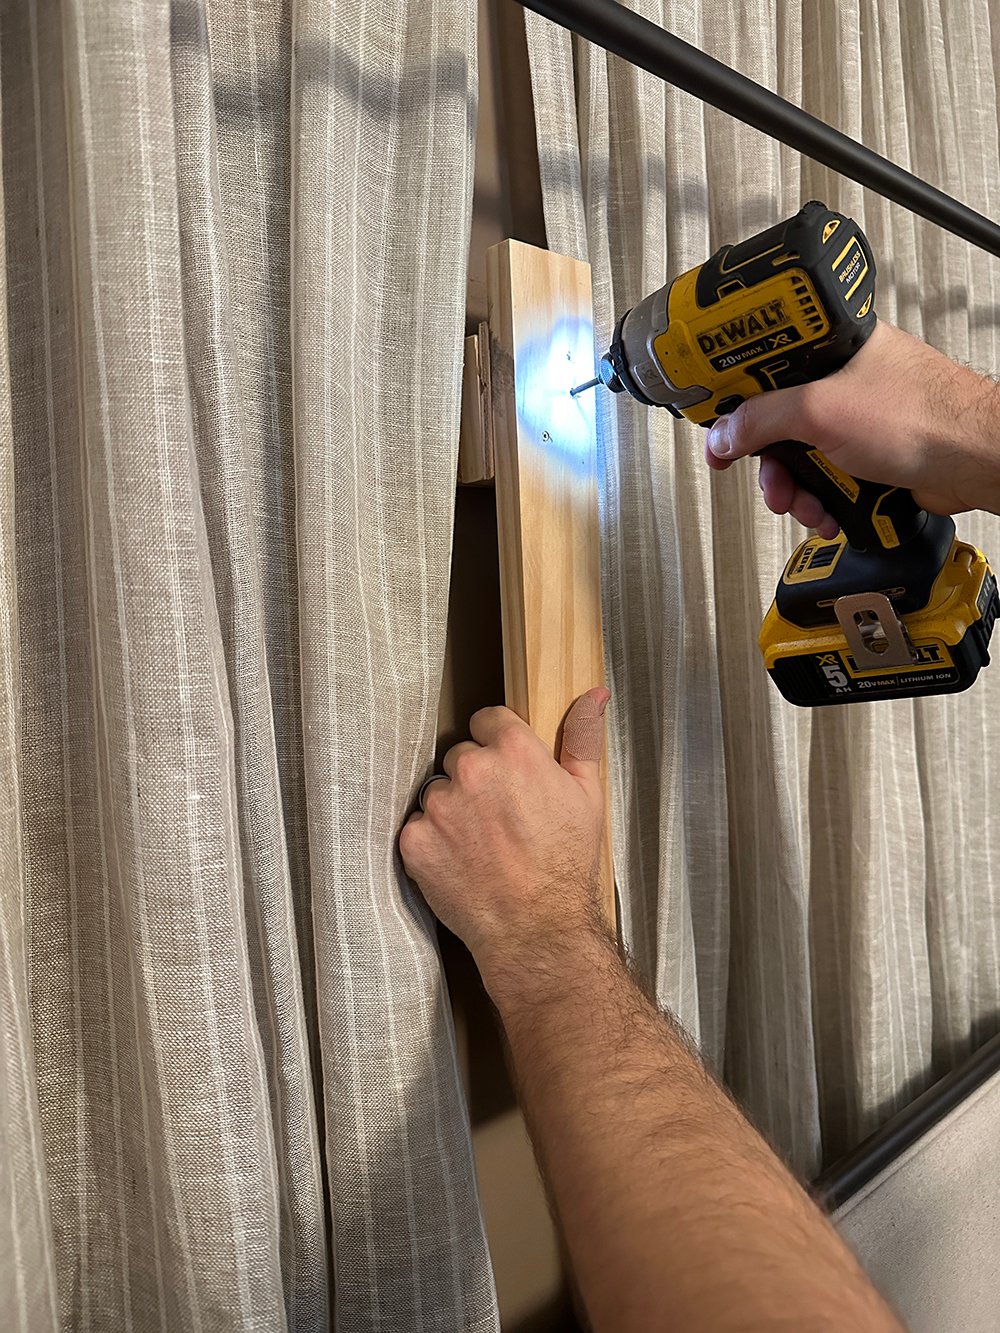 Add a nail to the strip, then you’re ready to hang your art! Keep in mind, it will be a bit wobbly, but we’ll address that in the next step.
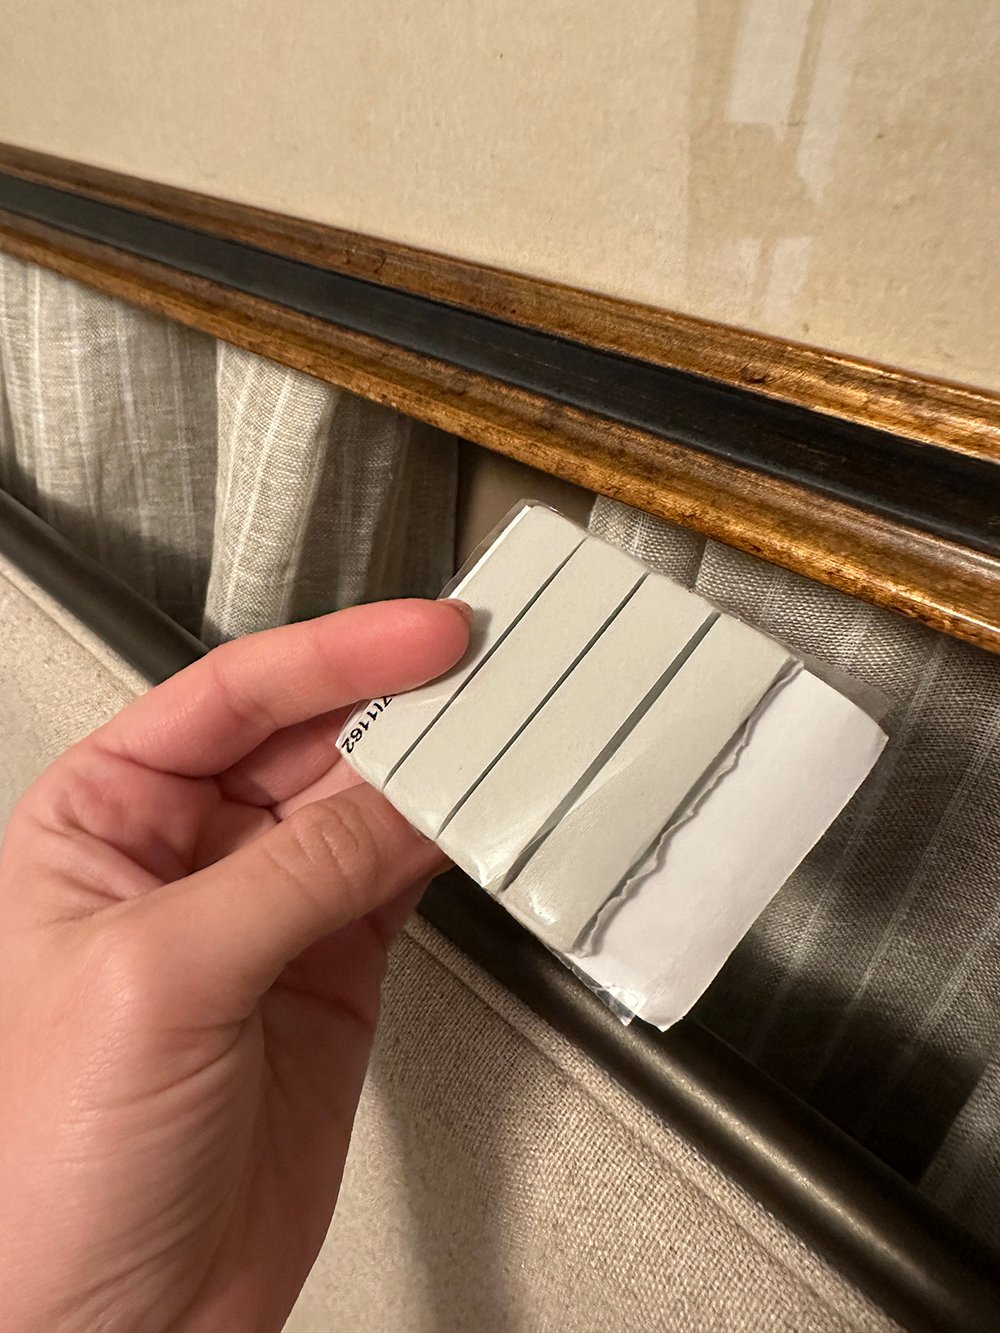
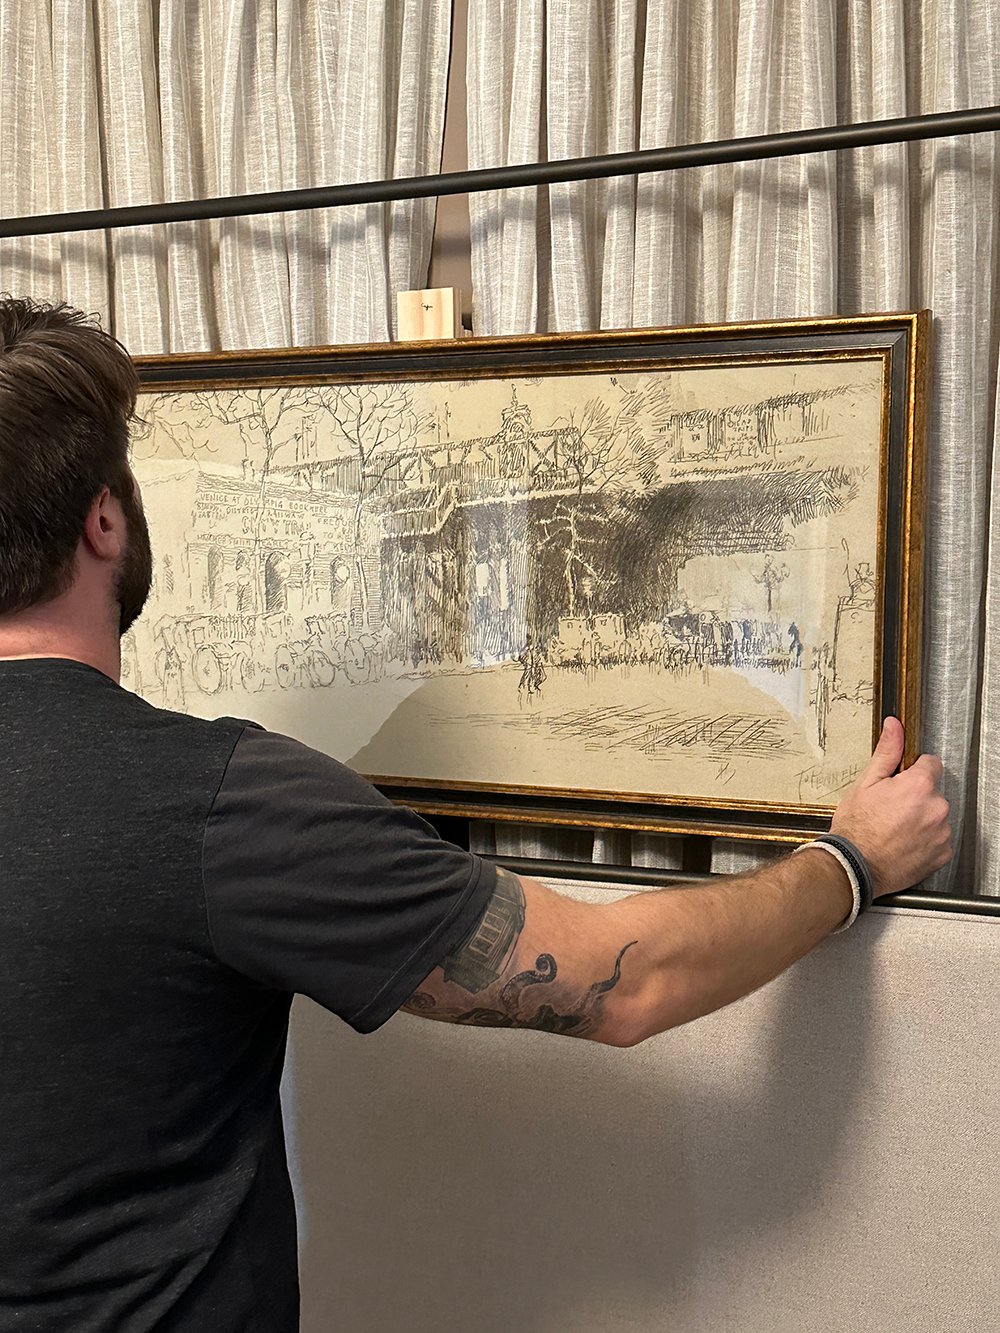 My easy secret weapon for hanging and securing artwork is sticky tack. On the backside of the artwork (between the art and the wood strip), I rolled up generous balls of sticky tack, pressing to secure the art at the bottom. Once secured, check the art to ensure it is no longer wobbling or can be tilted.
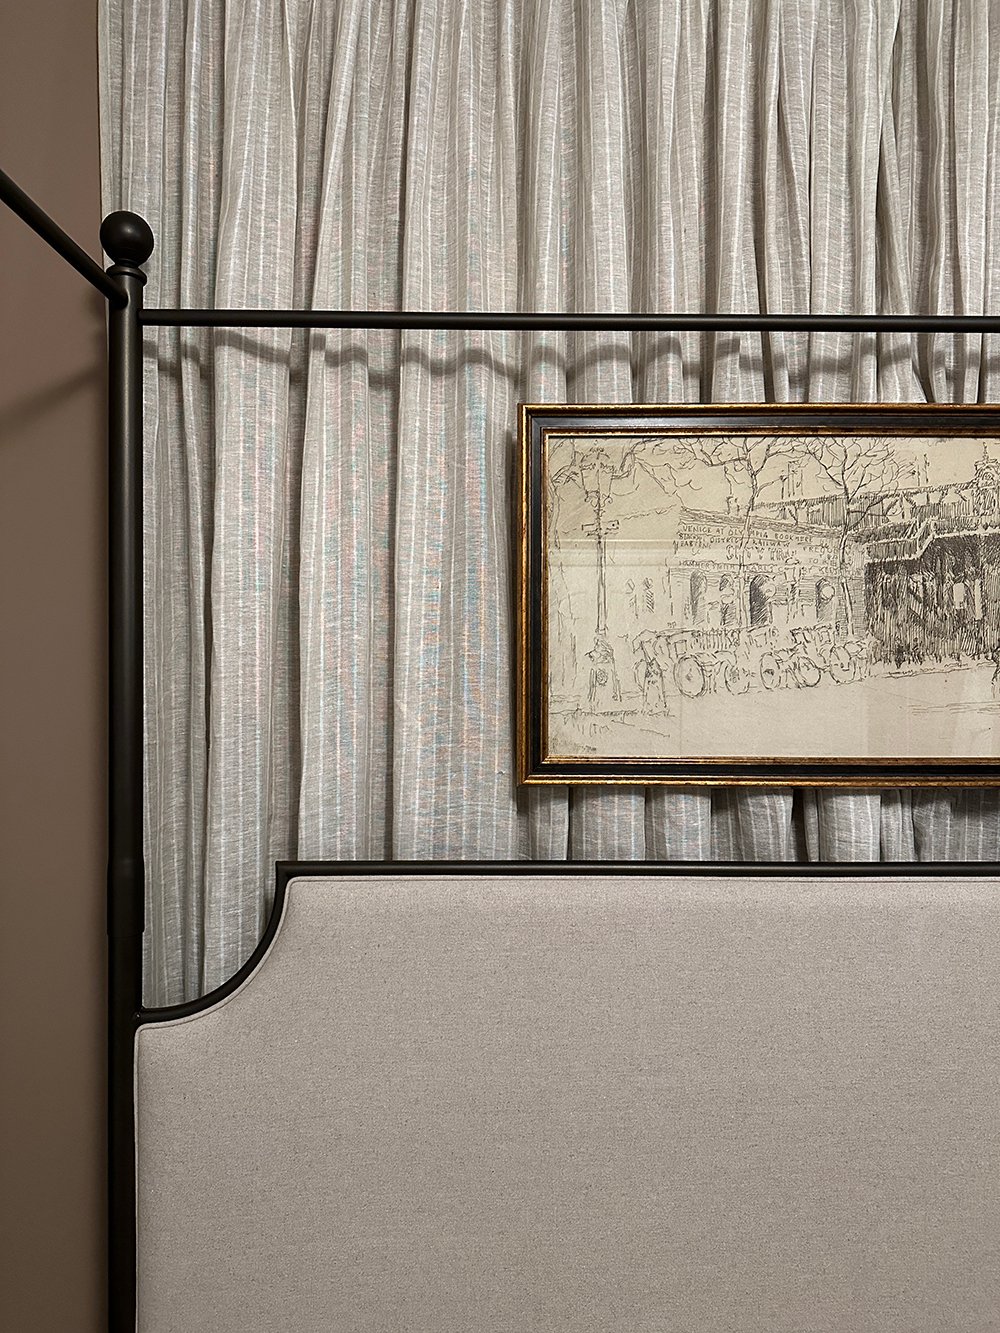
 The last step is to finesse the curtains or drapery panels, tucking them behind the art. If your curtains are decorative and aren’t often being opened & closed, you can also consider using pins to keep the curtains in place. I just used my steamer to train and tuck them behind the artwork- so they can be styled opened or closed.
 I’ve also heard of people using curtain brackets & wire to achieve the same look, but given the size and weight of my artwork- I needed something a bit more sturdy… which is why we ended up using scrap blocks of wood. All of that to say- this isn’t the only way to hang art in front of drapery panels, it’s just our preferred method.
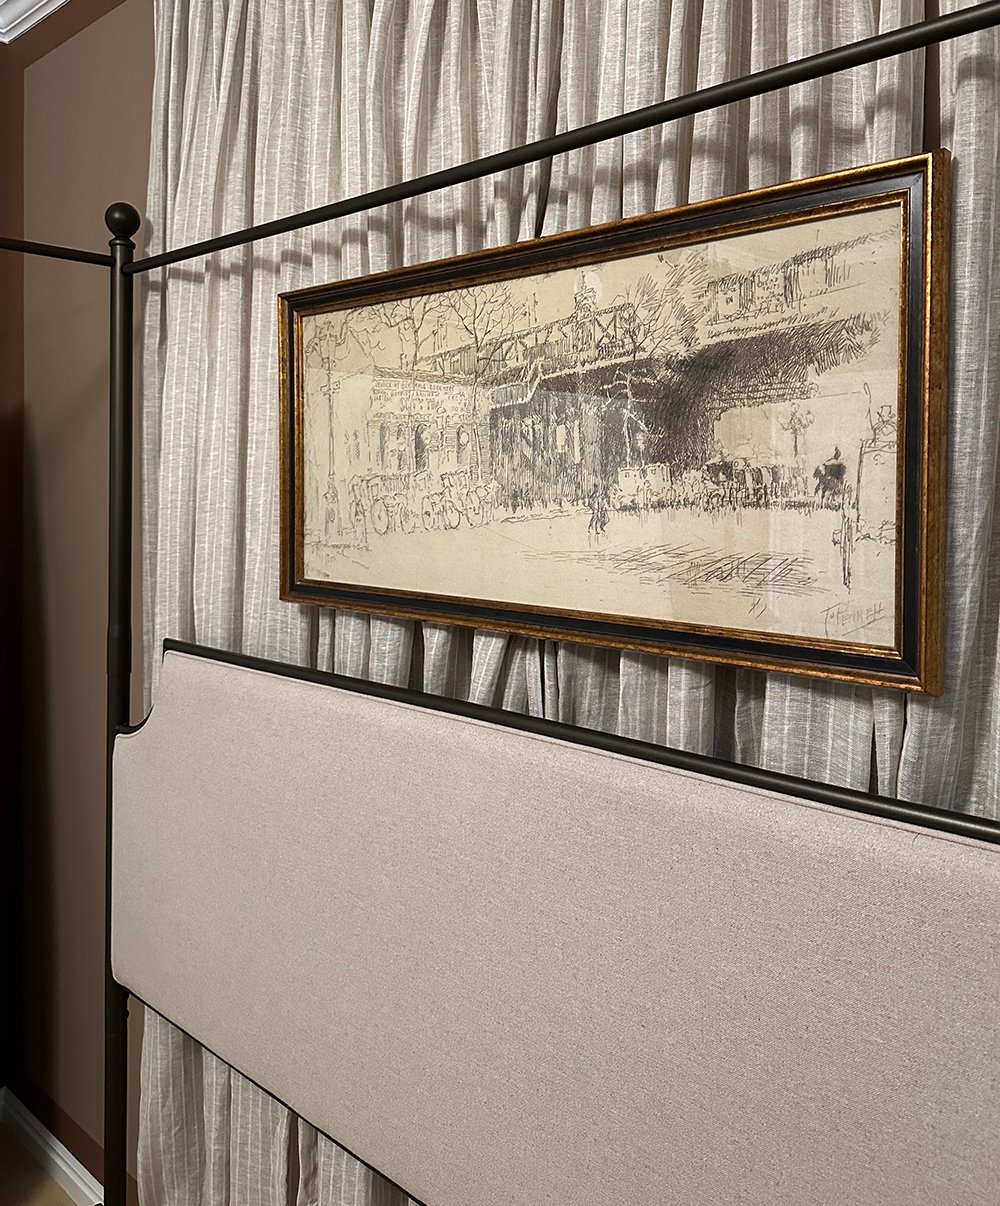 I hope this artwork installation tutorial was helpful! I’ve always been a fan of the layered look. I think it adds so much depth, softness, and is truly a custom gallery-worthy meets residential look. Have you ever installed art in front of textiles? Let me know if you have any questions in the comment section below!