My Color Blocking Concept for the Guest Room
 Happy Friday friends! Today we’re talking color blocking (again). I’ve had multiple people message asking how I determined my “formula” for color blocking our guest bedroom and wanted to share the specifics. How did I come up with the outlined look? How did I determine the width or ideal dimension? What was my painting process? How did I choose to pair those two specific paint colors? The list of questions are still rolling in, so I figured a blog post Q&A would help to clarify! Click through to read about my overall color blocking / border concept for the guest room and how I achieved the final look. I hope this is helpful if you’re planning a similar design in your own home…
This blog post is basically one big Q&A forum, so let’s dive right in… I’m answering all of your questions below!
How did you come up with the outlined look?
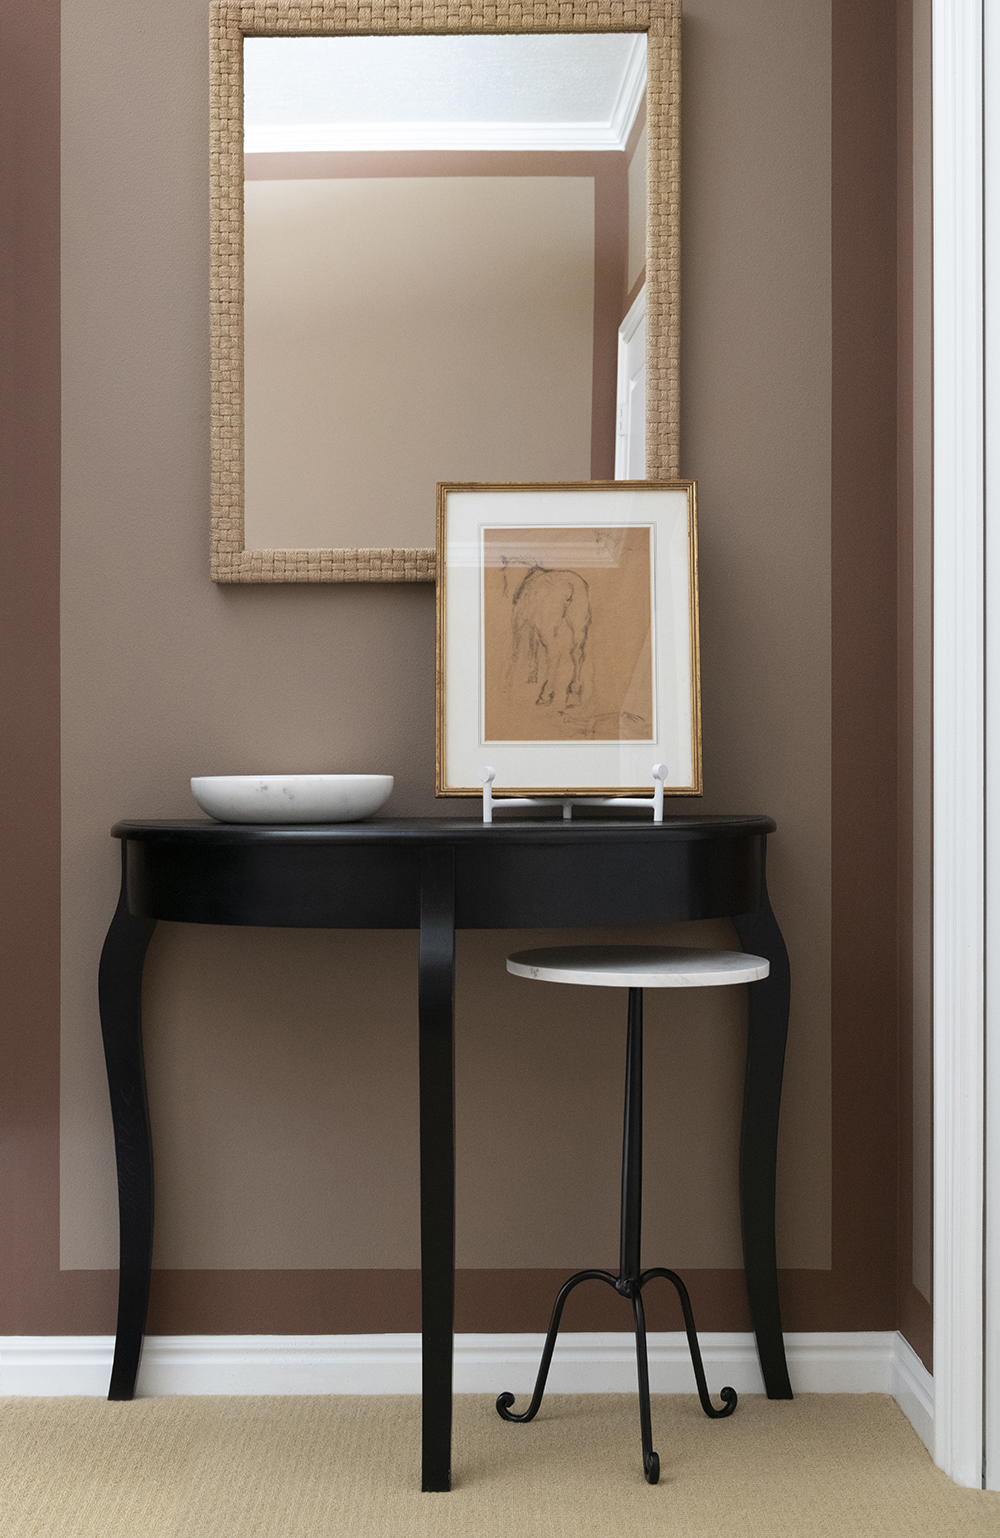
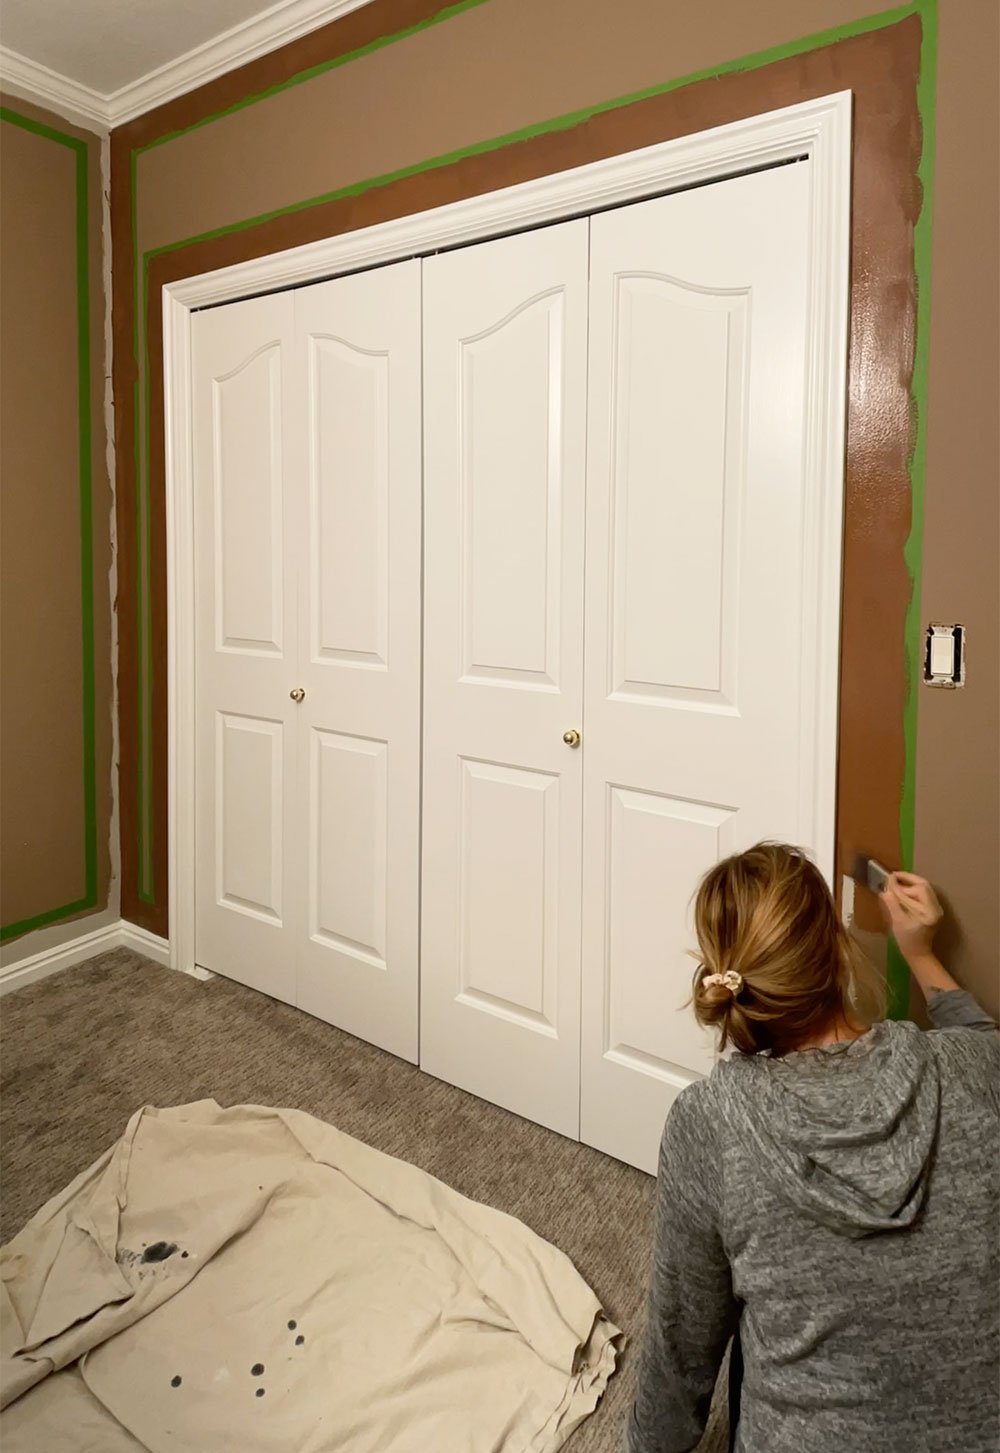
I didn’t want to spend a ton of time & effort drywalling and squaring off the two radius edges that bleed into the window nook… a telltale sign of 90’s homes. That would also require replacing all of the millwork in the room, which would be costly and time consuming. I tried to get creative with ideas for updating the radius, and in an effort to better disguise those soft corners, my color blocked border plan came to fruition. Crisp, clean straight lines helped to make the radius edges disappear… drawing your eye elsewhere.
How did you determine the width or ideal dimensions for the color blocking?
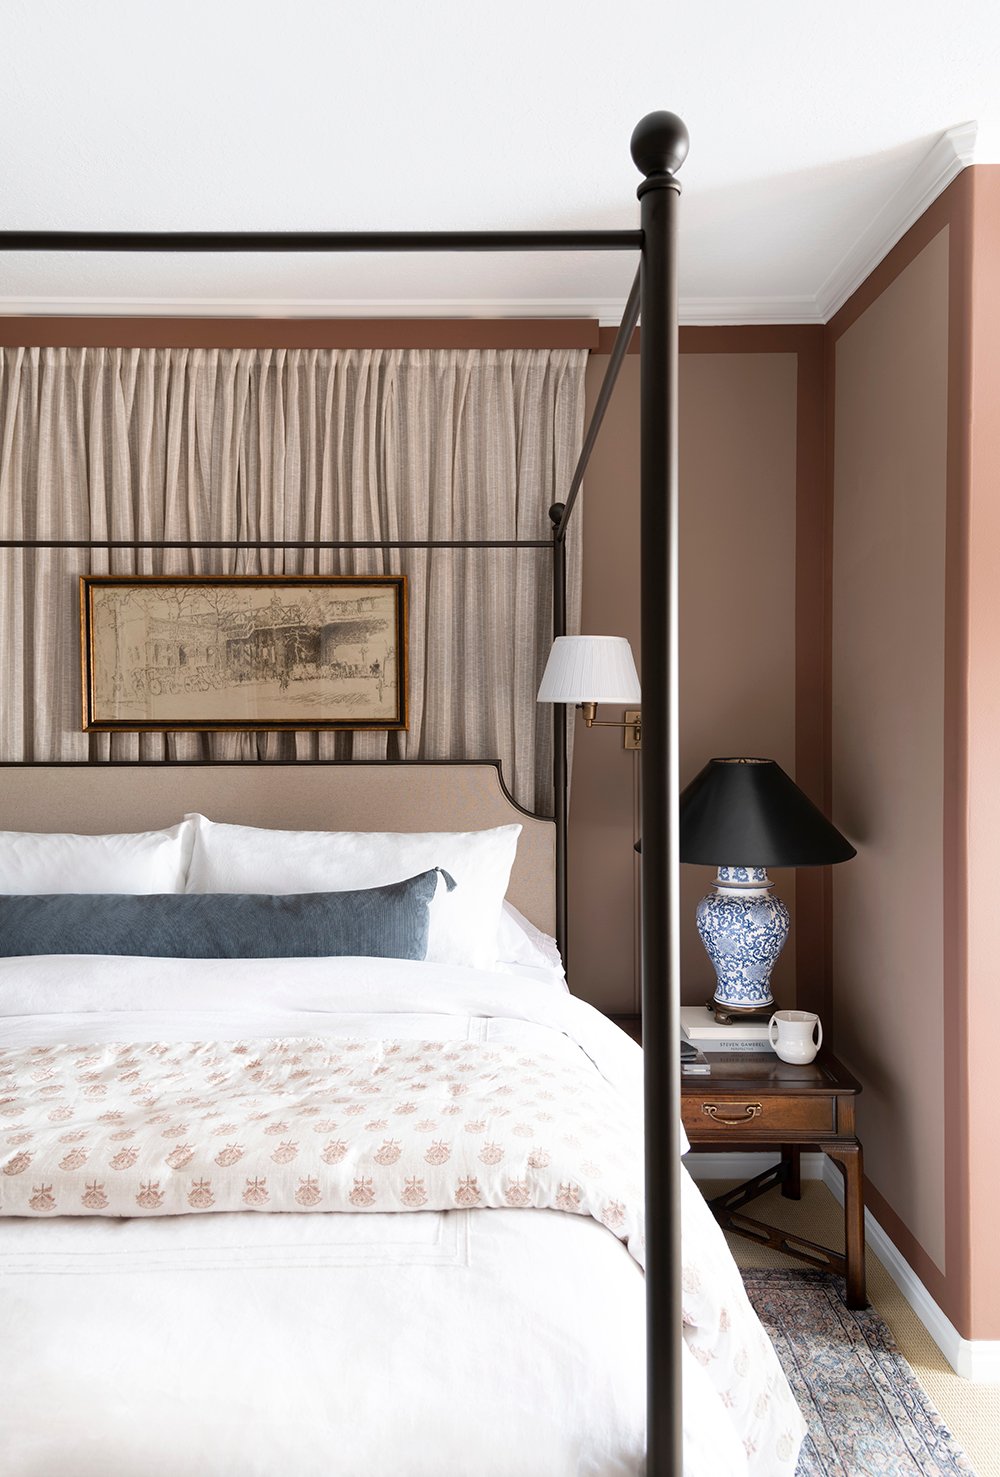
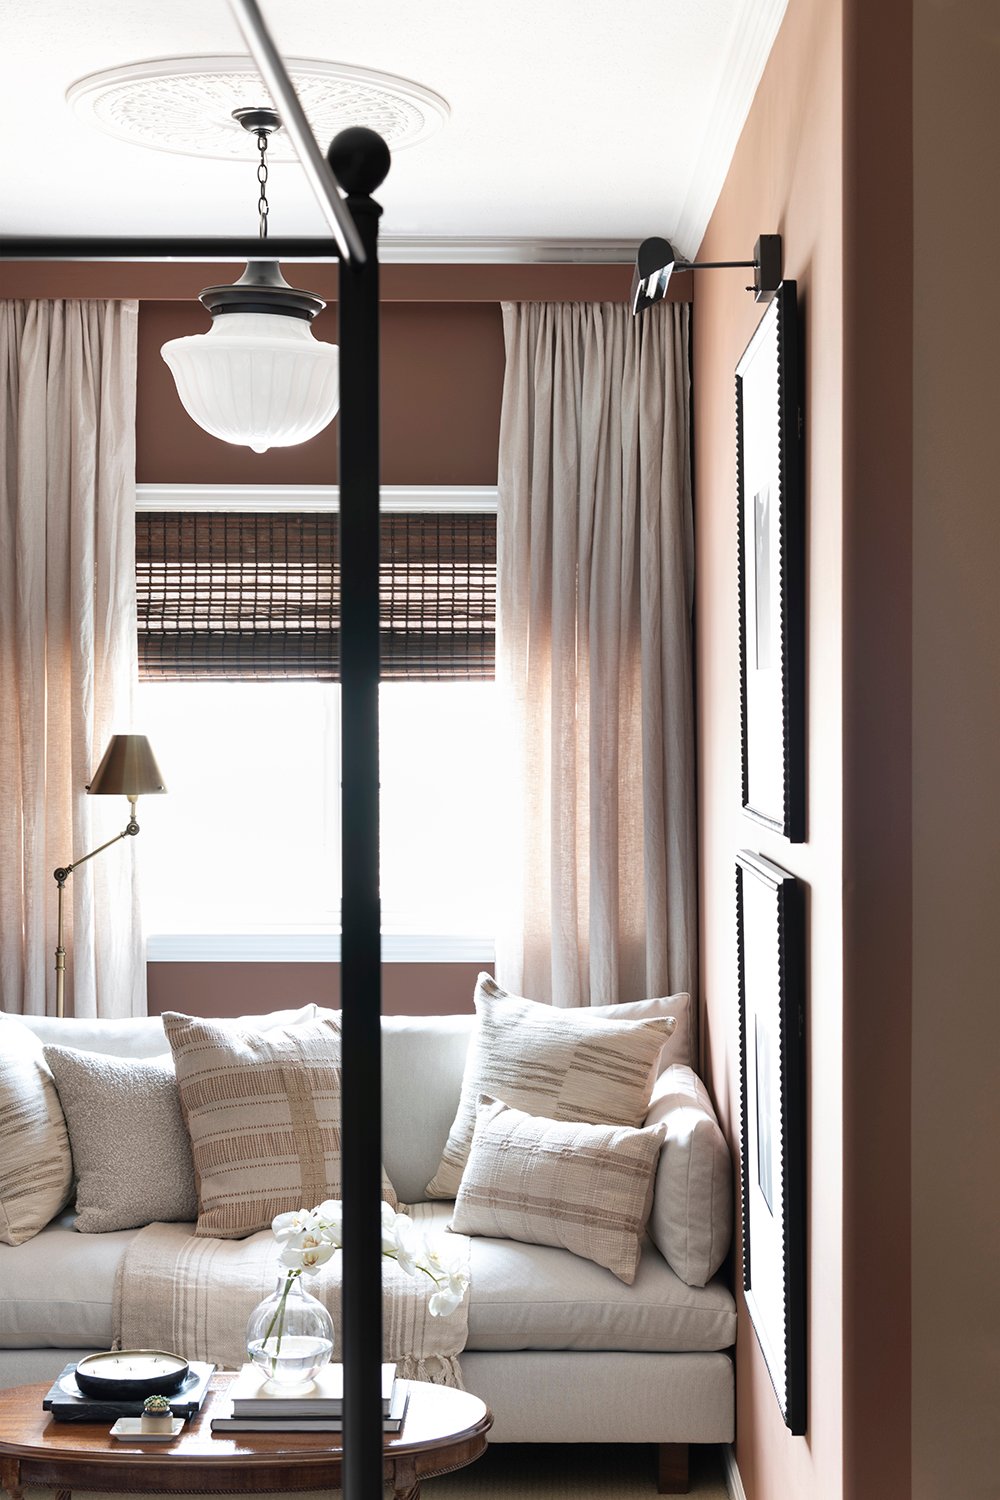
I knew I wanted the border to be slightly wider than the base, crown, and casing. I also needed it to be wide enough to conceal the curtain rod behind the bed, so the cornice could easily blend into the border. Did you notice that detail tucked under the crown? Check it out below…
How did you execute the paint plan?
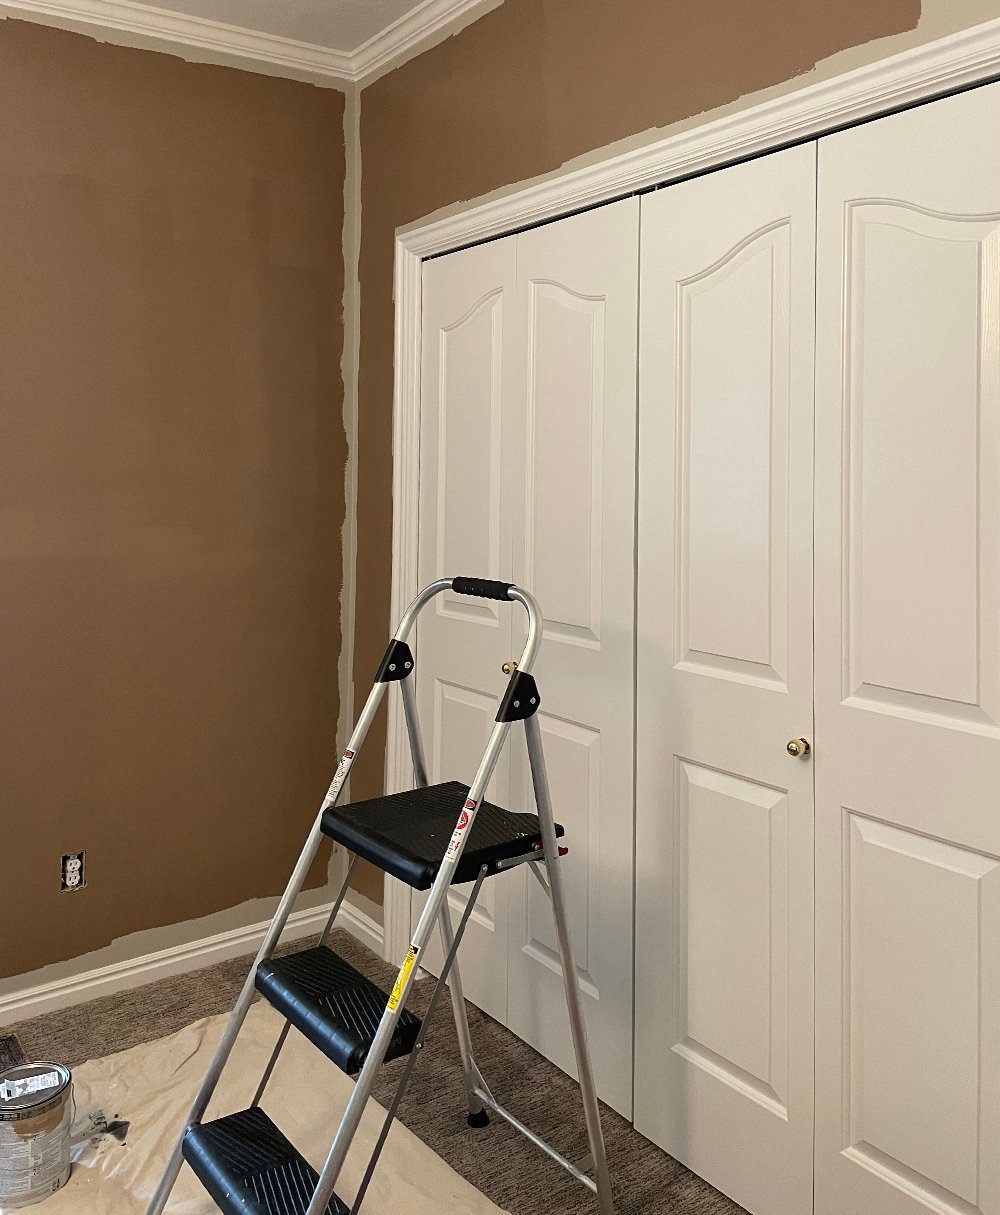
First I painted the main wall color, then I used a template (a card box) and a laser level to mark and tape where the border was going. Once everything was taped off, I painted the darker color (closest to the millwork).
How did you choose to pair those two specific paint colors, and do you have any recommendations for choosing two complimentary colors? What were the exact colors you used?
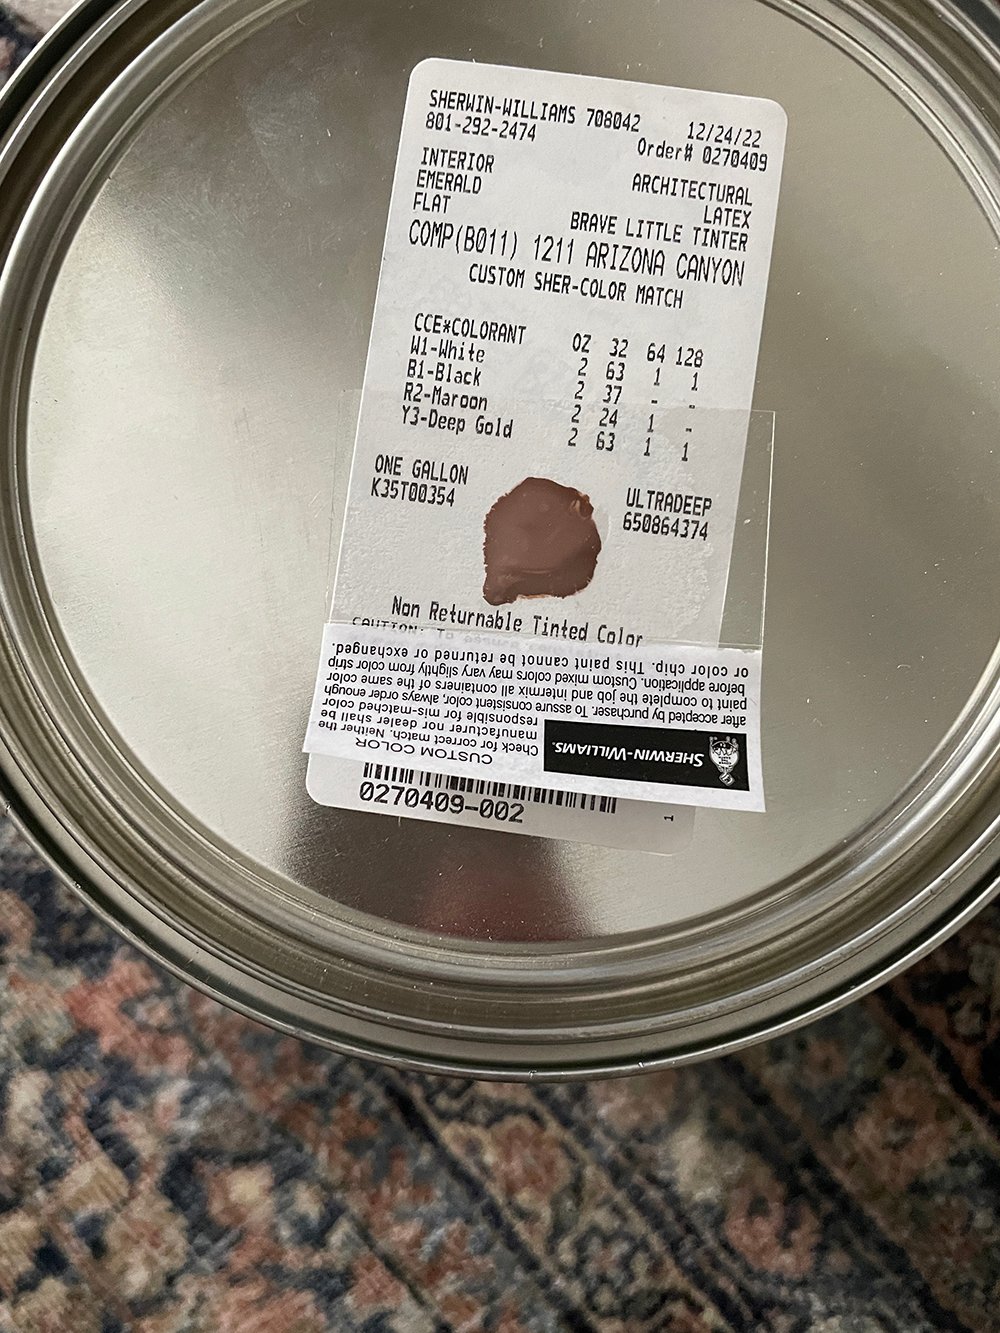
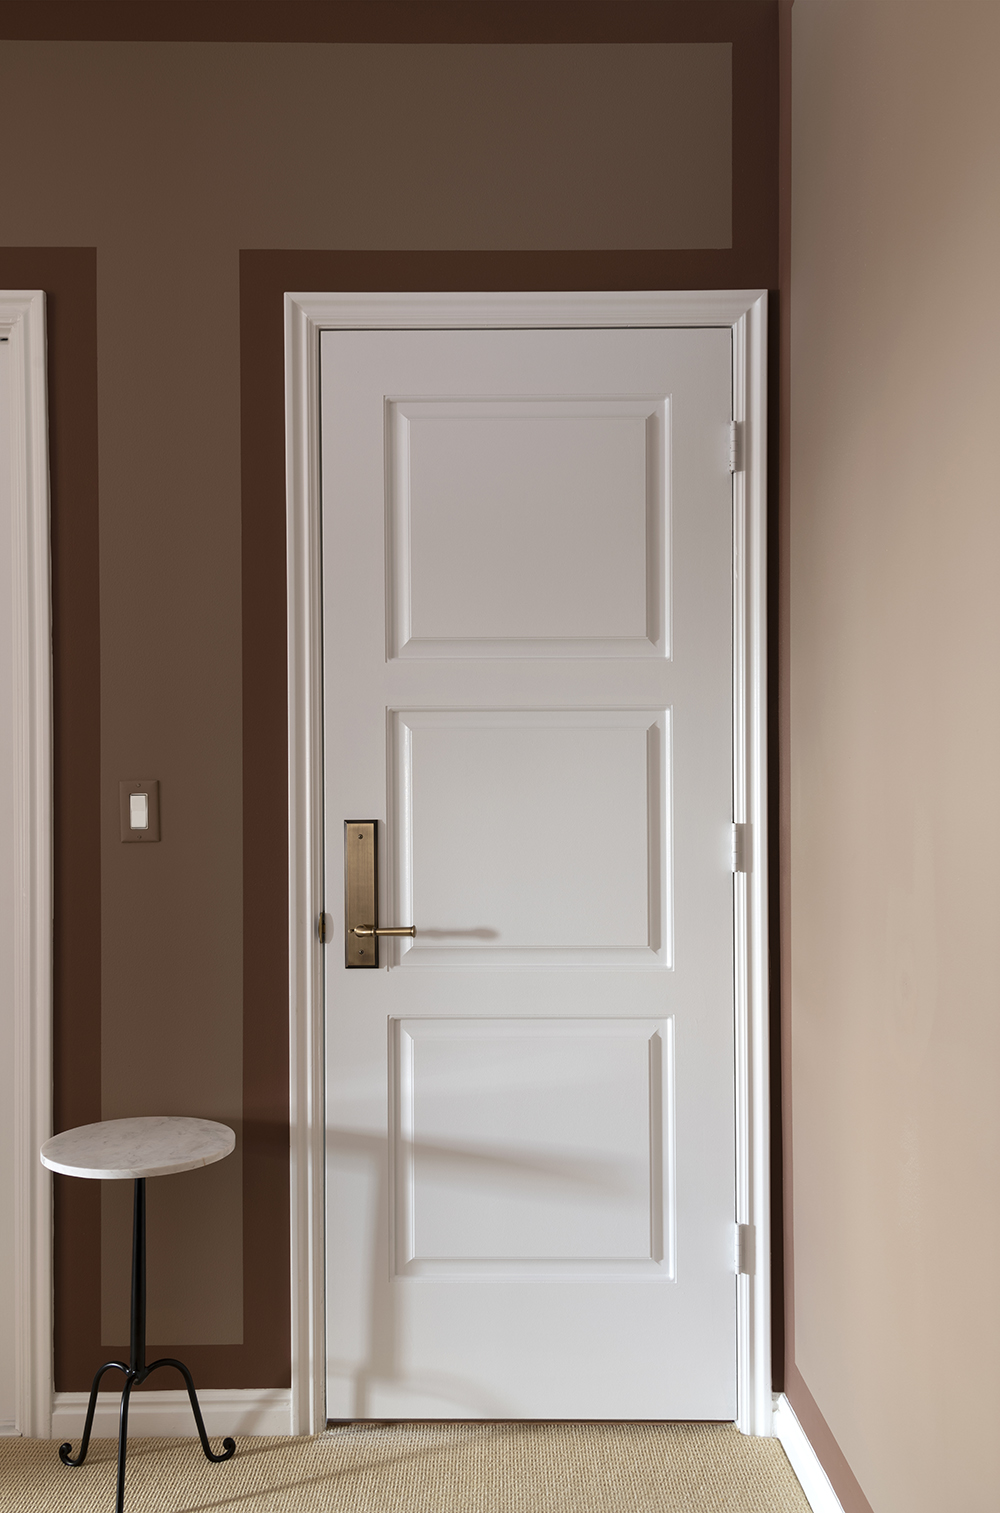
I was going for a warmer monochromatic look, so I landed on swatches that were within the same color family. I’d recommend pulling some swatches you like and picking colors that are just a few shades different (lighter or darker). If they both live on the same swatch card, that’s an easy bet. My exact colors? Arizona Canyon and Woodacres, but I had them mixed at Sherwin-Williams, despite the fact they’re Benjamin Moore colors… and yes- I was painting on Christmas Eve. Ha!
Why didn’t you include the millwork (casing, trim, crown, base, etc)?
In this room, I wanted a strong contrast with a crisp line. The ceilings are taller in this room and I didn’t need to make the room feel larger, so leaving the millwork and ceiling white was the easy move. It also saved me a ton of time to leave it painted as it was when we moved in. White is always a classic look for trim.
What was the process for painting?
To simplify… make paint selections, roll the wall color, mark & tape off the color blocked portion using a laser level & template, then paint the border. I used a flat finish for the walls and the existing millwork is painted with a semigloss.
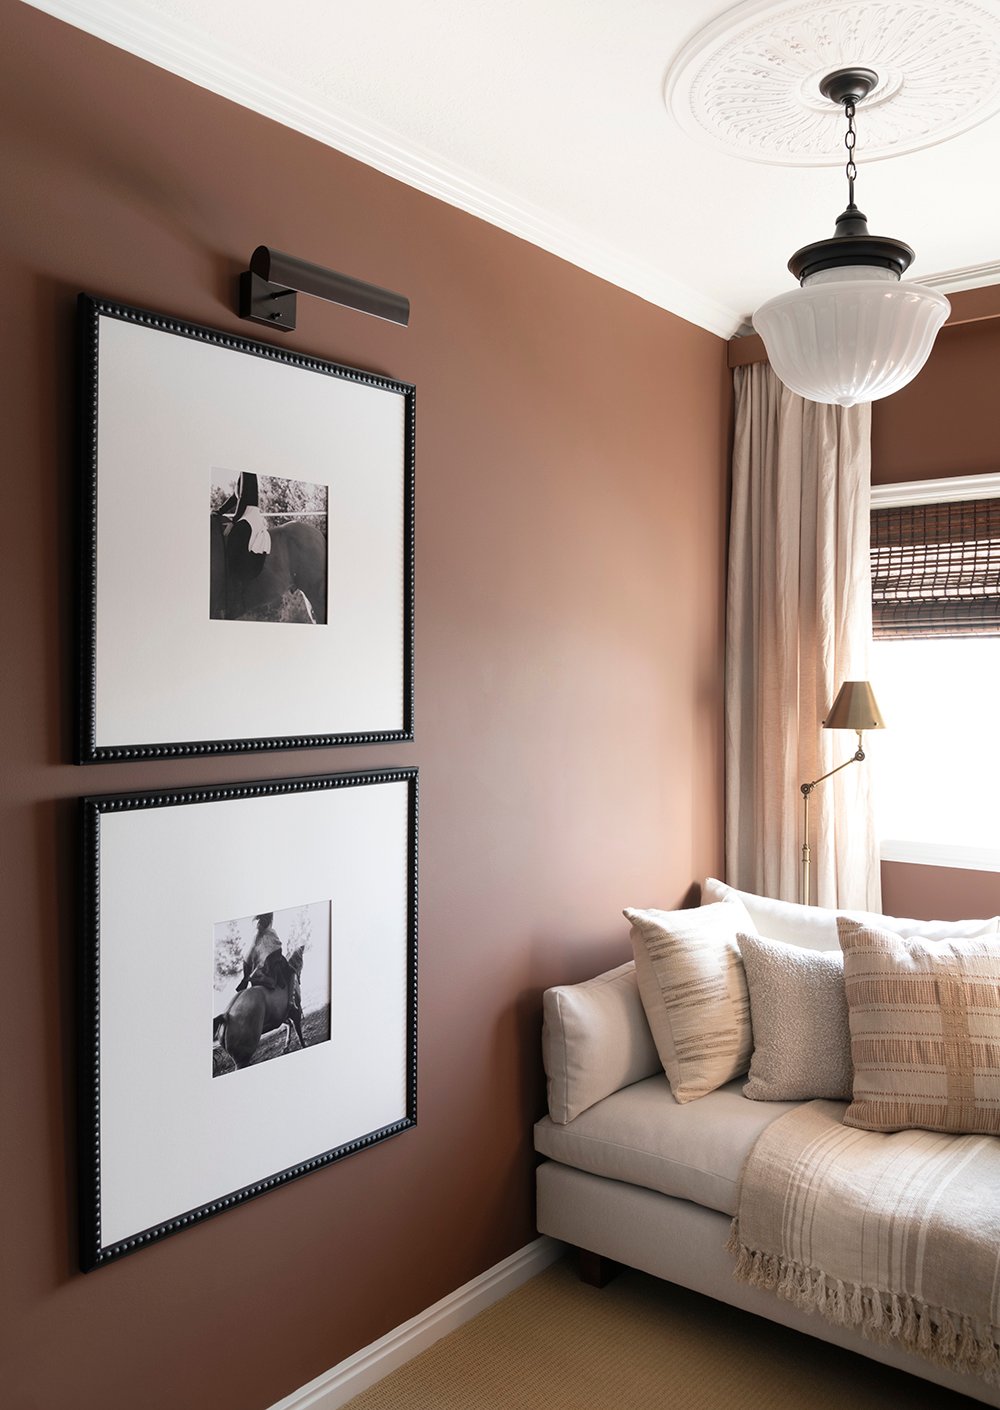
Why did you paint the window nook the solid darker color rather than continuing the color blocking?
I wanted to conceal those pesky radius corners and I liked the way the darker paint draws you into the nook. It also added dimension and provided a great high-contrast background for my oversized art. The nook / dormer gets more light than the larger part of the room, so it could handle a heavier, deeper hue.
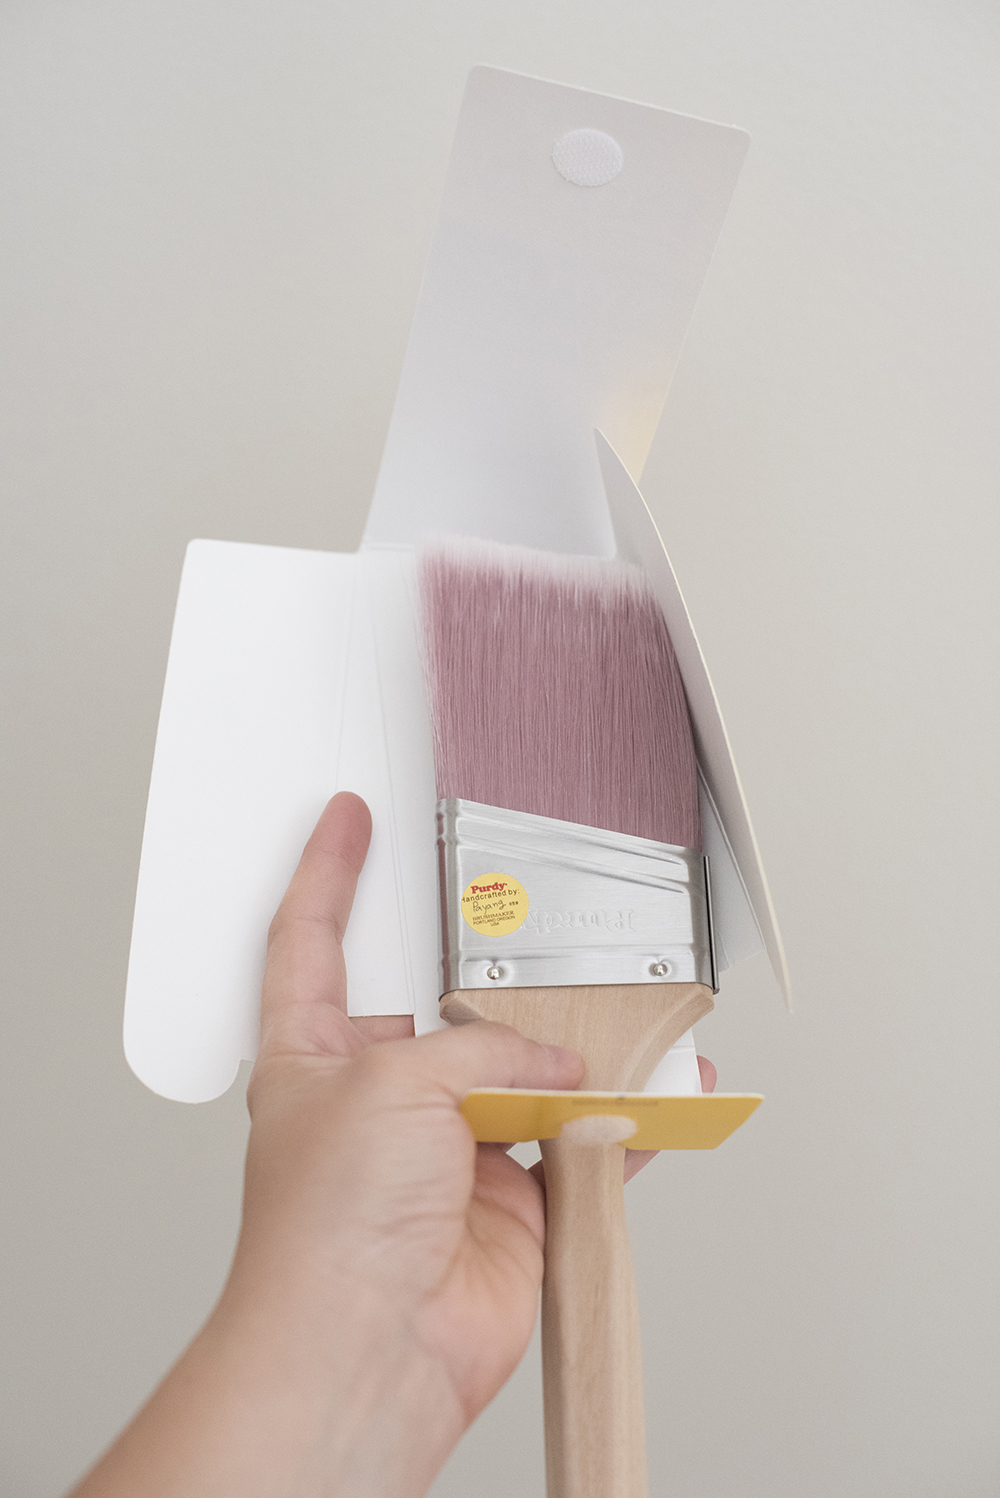
Is there a specific brush you recommend for this paint application?
I used the Purdy Clearcut Elite brush for this project (I like the short handle version). Check out these posts for additional painting tips…
- 10 Painting Tips for Cutting In
- How to Paint a Door
- How to Choose the Perfect Paint Color
- 10 Pro Painting Tips
What is the easiest way to get super straight, crisp lines?
A few things that make this project MUCH easier… a laser level, a template (I just used a playing card box), painter’s tape, and a good quality paint brush.
Did painting like this take forever?
Honestly, no. Since I wasn’t painting the millwork, I think it took the normal amount of time… or maybe even less than the typical room I’d paint. If you go into it with a good plan, it should be smooth sailing!
Would this work alongside panel moulding or millwork applied to the walls?
I wouldn’t use the same exact border or design plan, but you could definitely color block in a different way with panel moulding or a wall treatment. Maybe the inner panels are a different color, maybe the millwork is the contrasting element, or maybe you try a lower wainscoting type of look… like my old color blocked hallway.
 Alright, I think that’s everything I can think of for now! Let me know if you have additional questions in the comment section below. Would you ever color block a room or try a unique paint treatment? Paint is an inexpensive way to add personality to a space and you can use it as a handy design tool. It’s the easiest way to make a big impact on a budget. I’m so glad my idea translated and that many of you have taken inspiration from it. I’m all about getting creative in our homes… no matter what that looks like! Here’s to a great weekend ahead. We’re hosting Laurie Anne and her family, so I’m hopping off for a ski day. Have a good one, friends! I’ll link my tools below…
