Side Yard Garden DIY
 Our side yard wasn’t very functional and right about now, invasive ivy would be taking over. We had to rip it out four(!) times last year. This year, with everything going on… we decided to get back to our roots and plant a little garden. Emmett and I both grew up on farms with giant gardens and we even had a huge one at our first home, but given we live in the city / suburbs now, we really don’t have room for anything too large. We opted to use our side yard for some potted plants, a raised bed, and a little herb garden. We leveled it out, transplanted the existing periwinkle, ripped out the ivy, and lined it with gravel to make room for our new vegetable garden. Click through to see how things shaped up, get the DIY resources, check out what we’re growing, read about future plans, see how we hid our HVAC units, and for some before & after images.
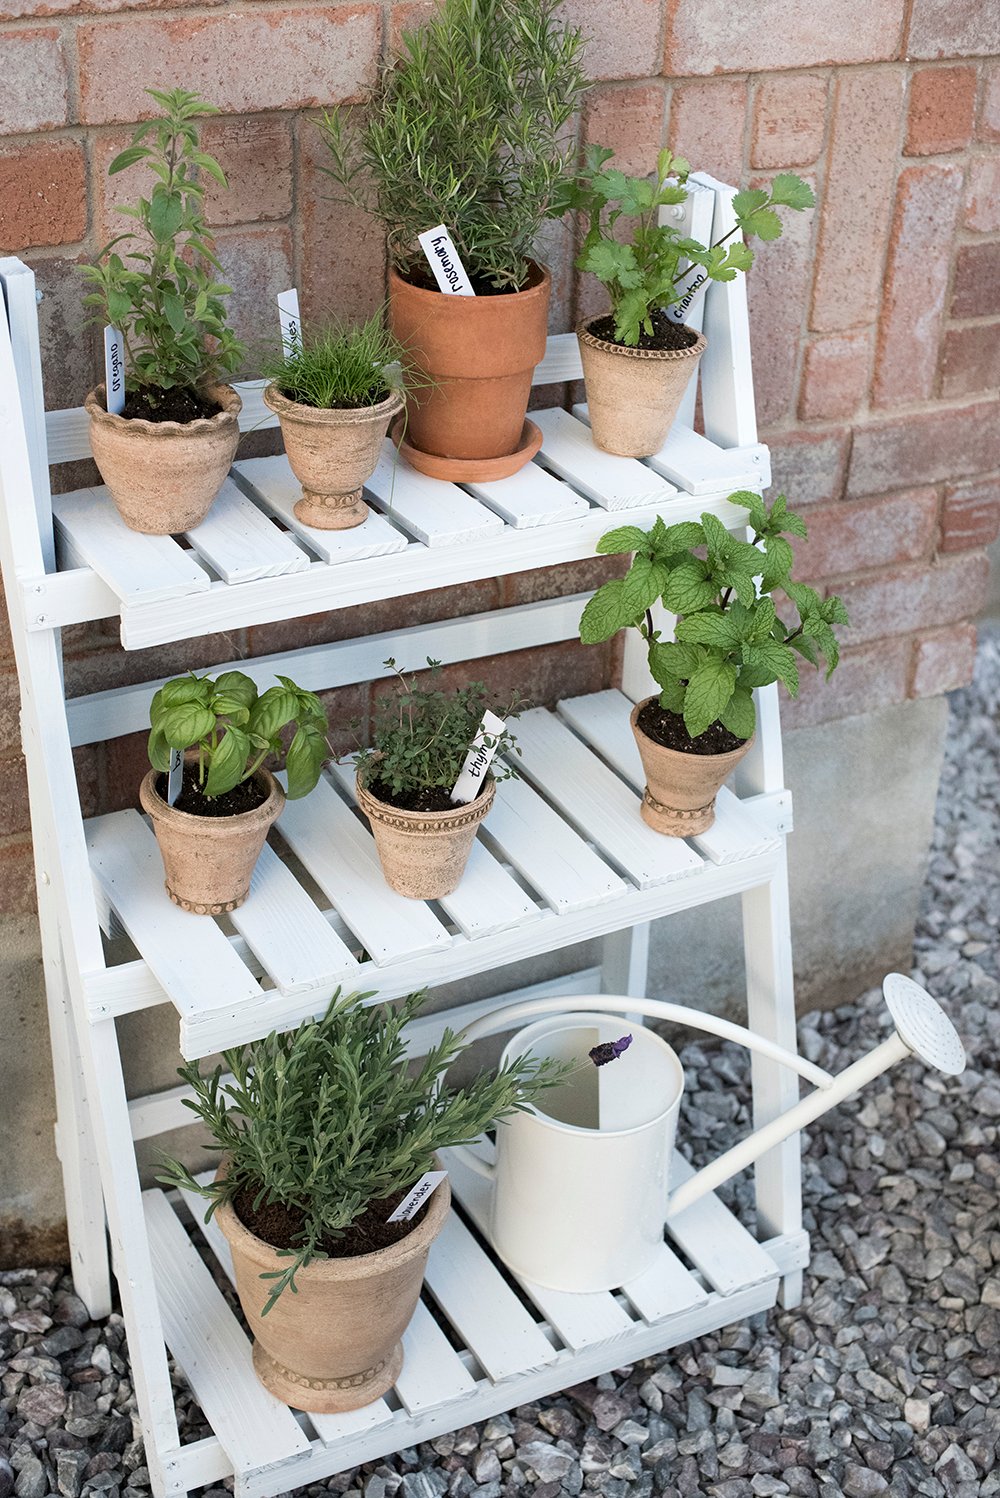
If you missed my tiered herb garden DIY, pictured below, you can find that tutorial here!
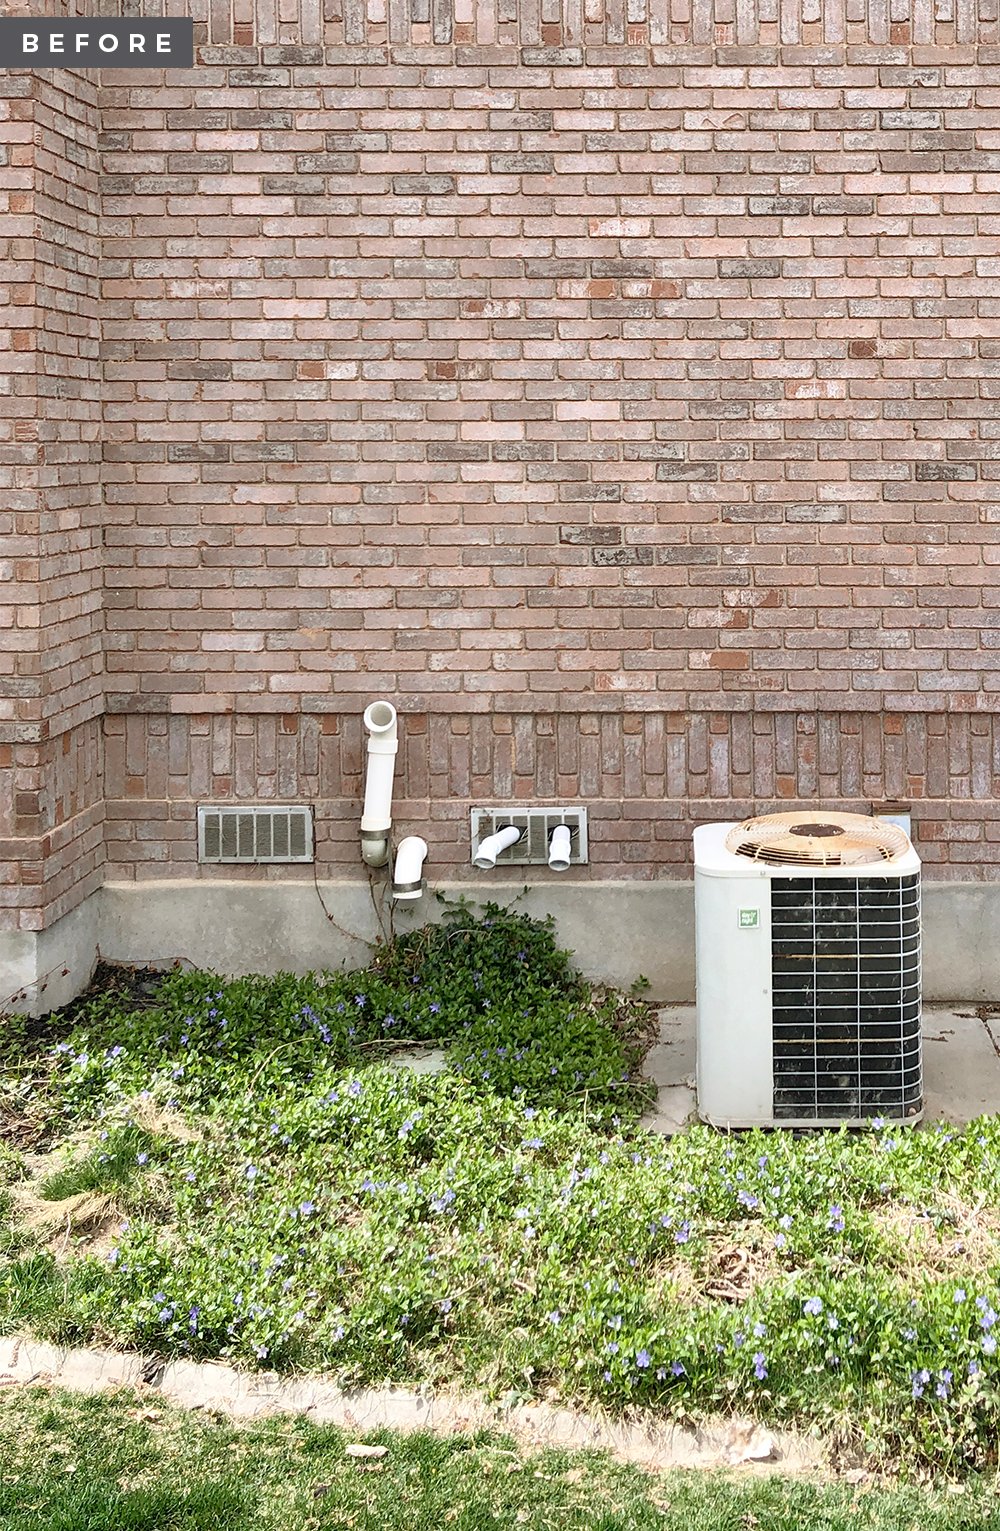
 First up… a before image. This is what the side yard looked like at the end of winter / beginning of spring:
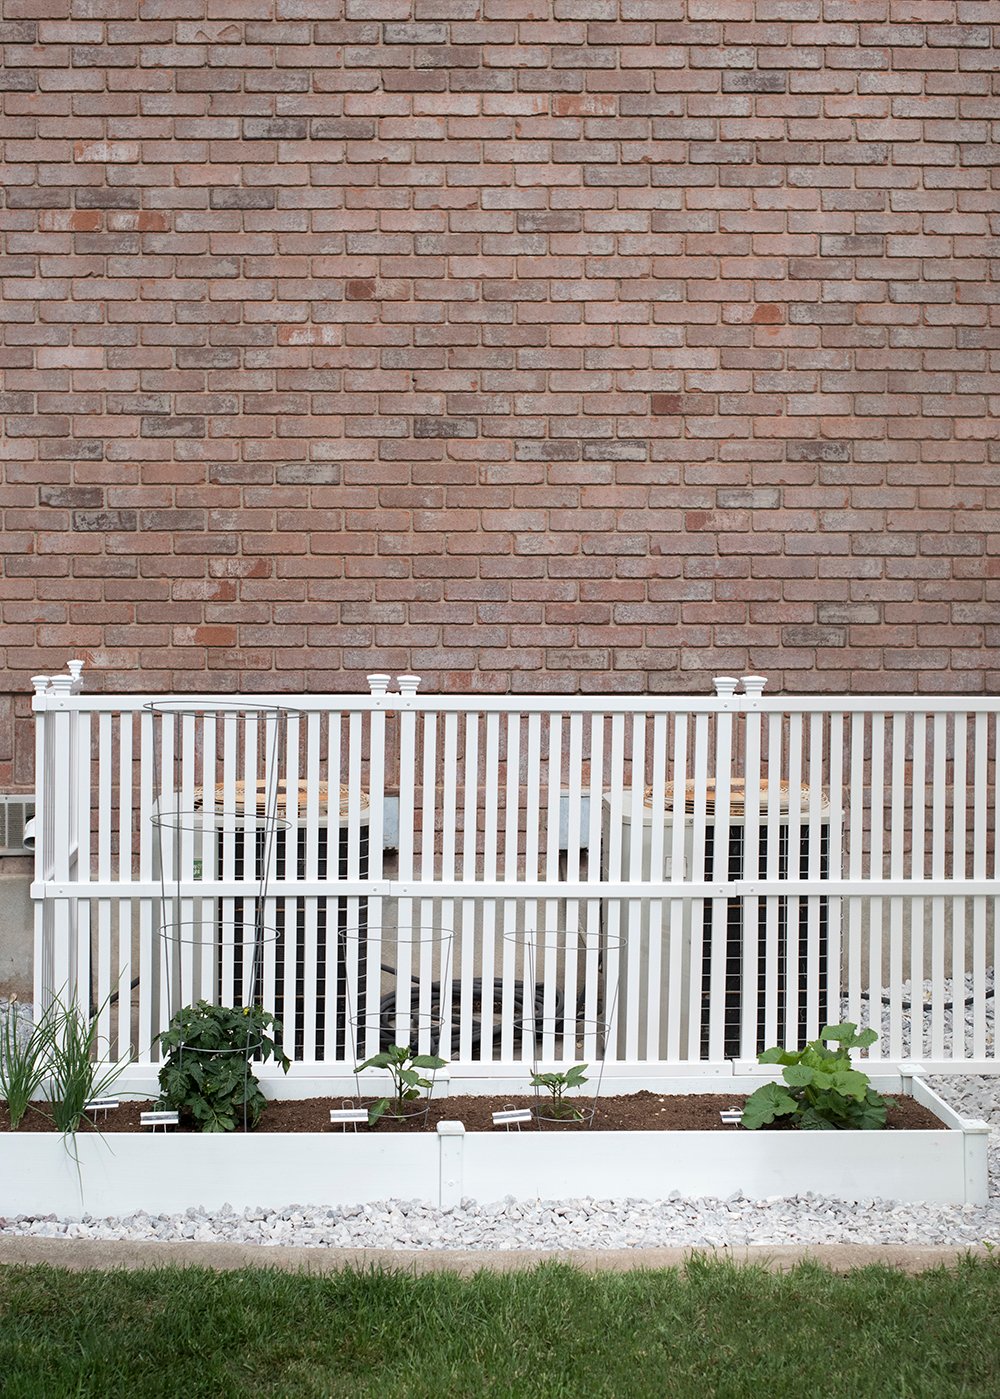
 It honestly doesn’t look too bad in that photo, but come summer- the ivy takes over, wrapping its way around the HVAC units, and crawling up our house. It sounds charming, but it was out of control. After transplanting the periwinkle, adding gravel, and installing our little garden… this is what it looks like today:
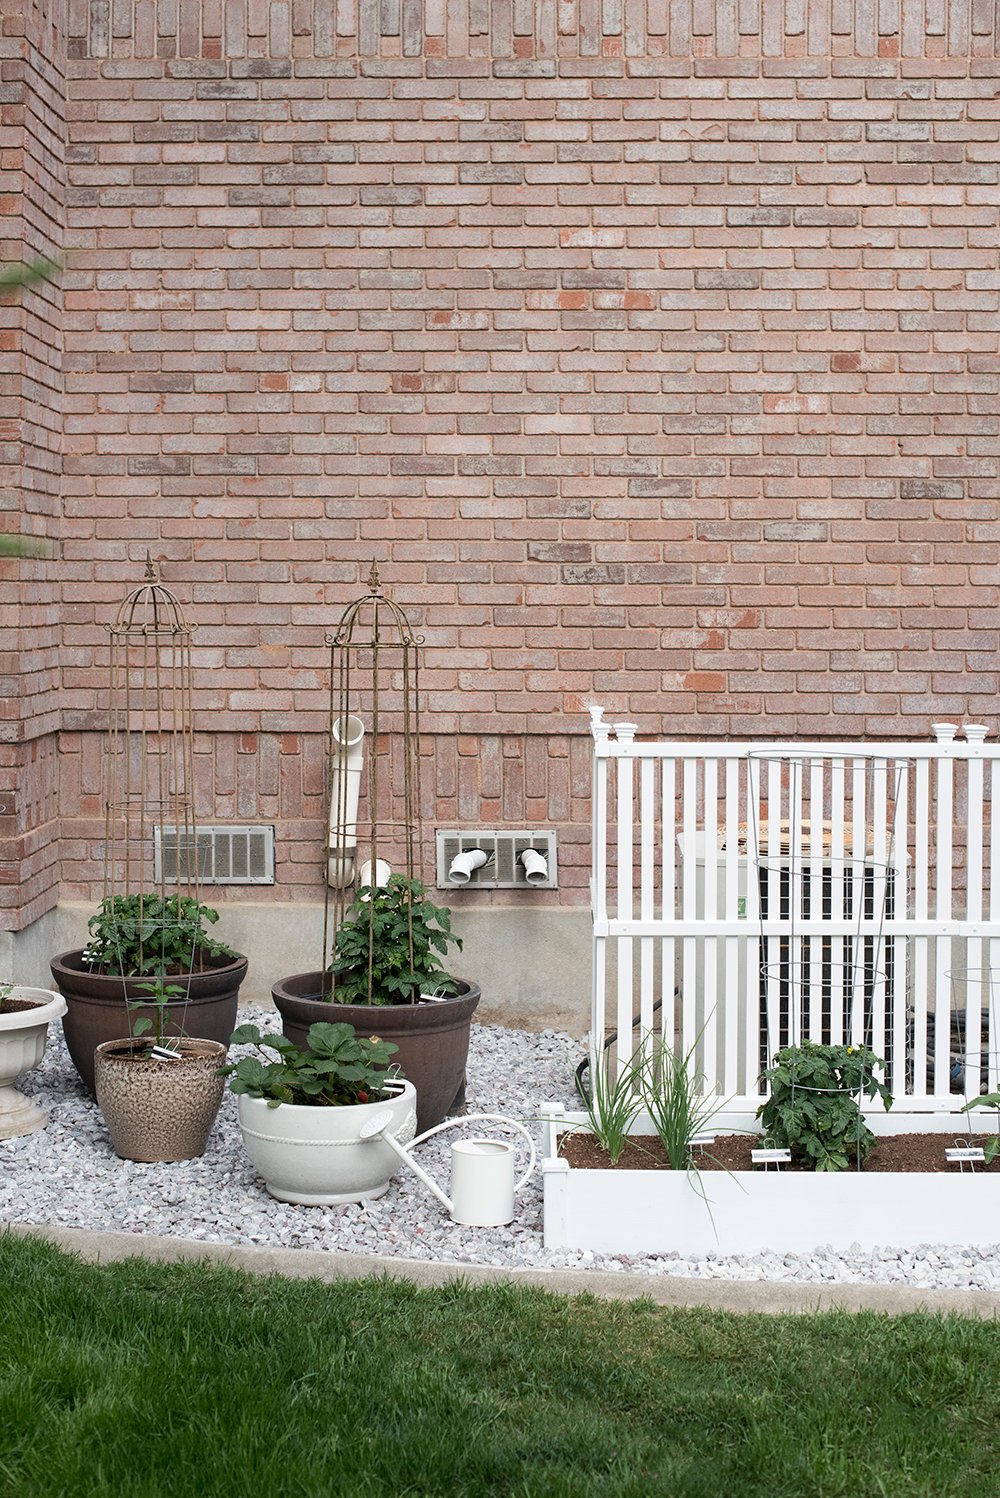 Better and functional, right? We never utilized this part of our yard until now. Although it isn’t exactly my “finished vision”, I’m really happy with the way things came together. Next year, my plan is to add a trellis to further hide the duct work, purchase matching planters, and source some decorative plant cages… maybe willow trellis or wrought iron? Right now it’s clean and functional (which was my goal), so next year will be more about beautifying the space and making it feel aesthetically pleasing. We did this quickly because I wanted to hurry and get things planted for the season and stick to a tight a budget.
 We had to do some major dirt work with a tractor we borrowed, but I’m going to skip that part and just share the raised bed / garden tutorial since that seems more applicable for most people. This is what we used…
SUPPLIES + TOOLS
- raised planter bed (we painted the exterior white)
- raised bed soil (we used 8-9 bags)
- plant labels (I used my label maker for these)
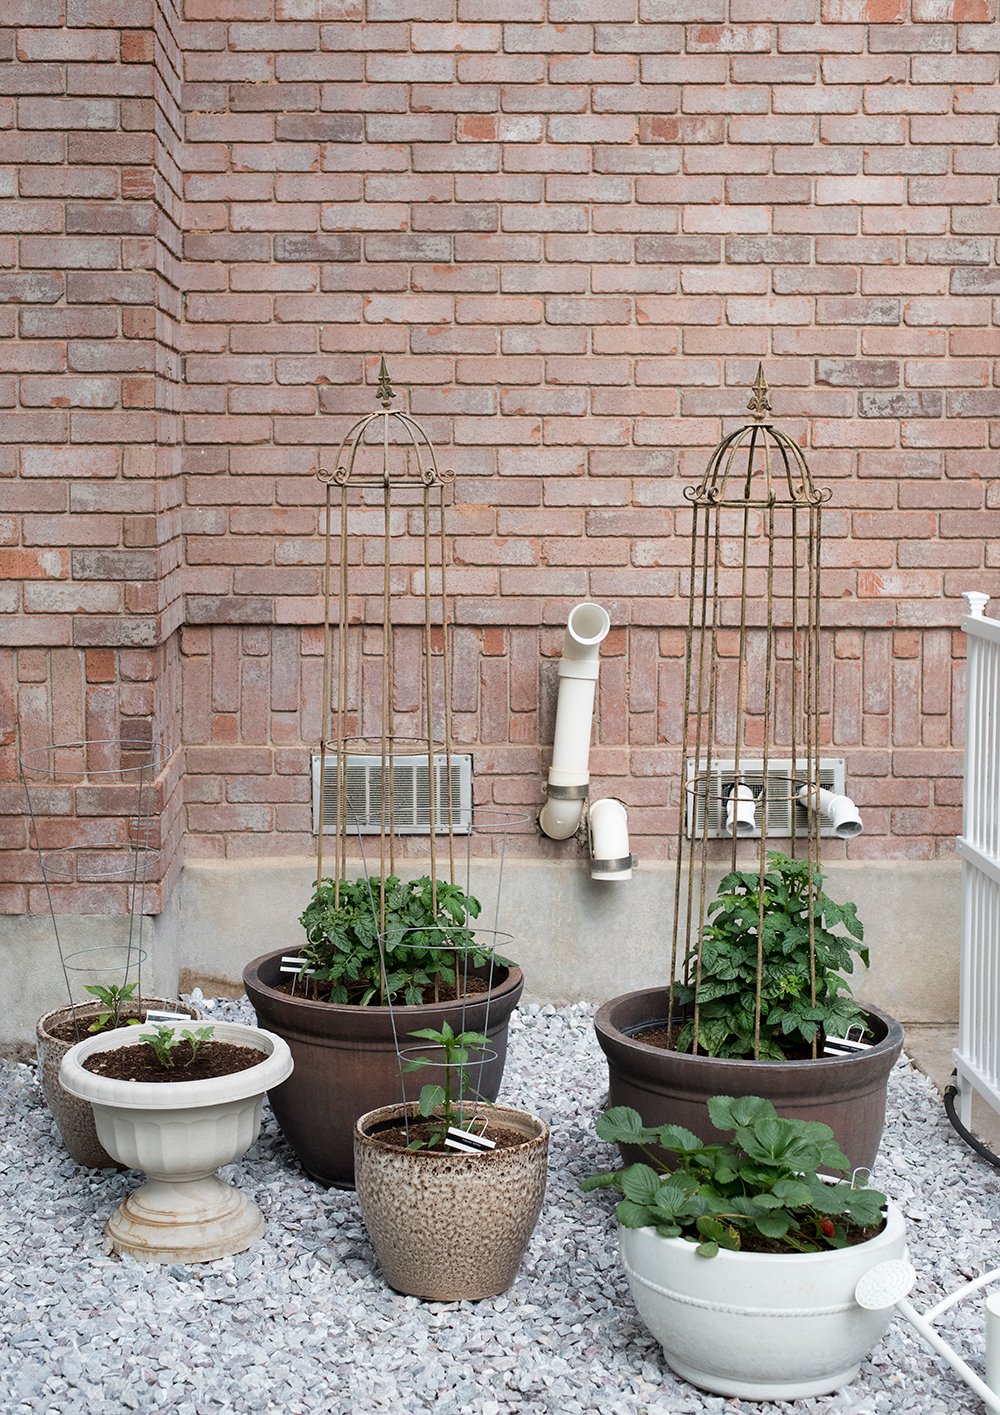
- an eclectic mix of pots we already had on hand
- gravel
- landscaping felt weed barrier
- staple gun
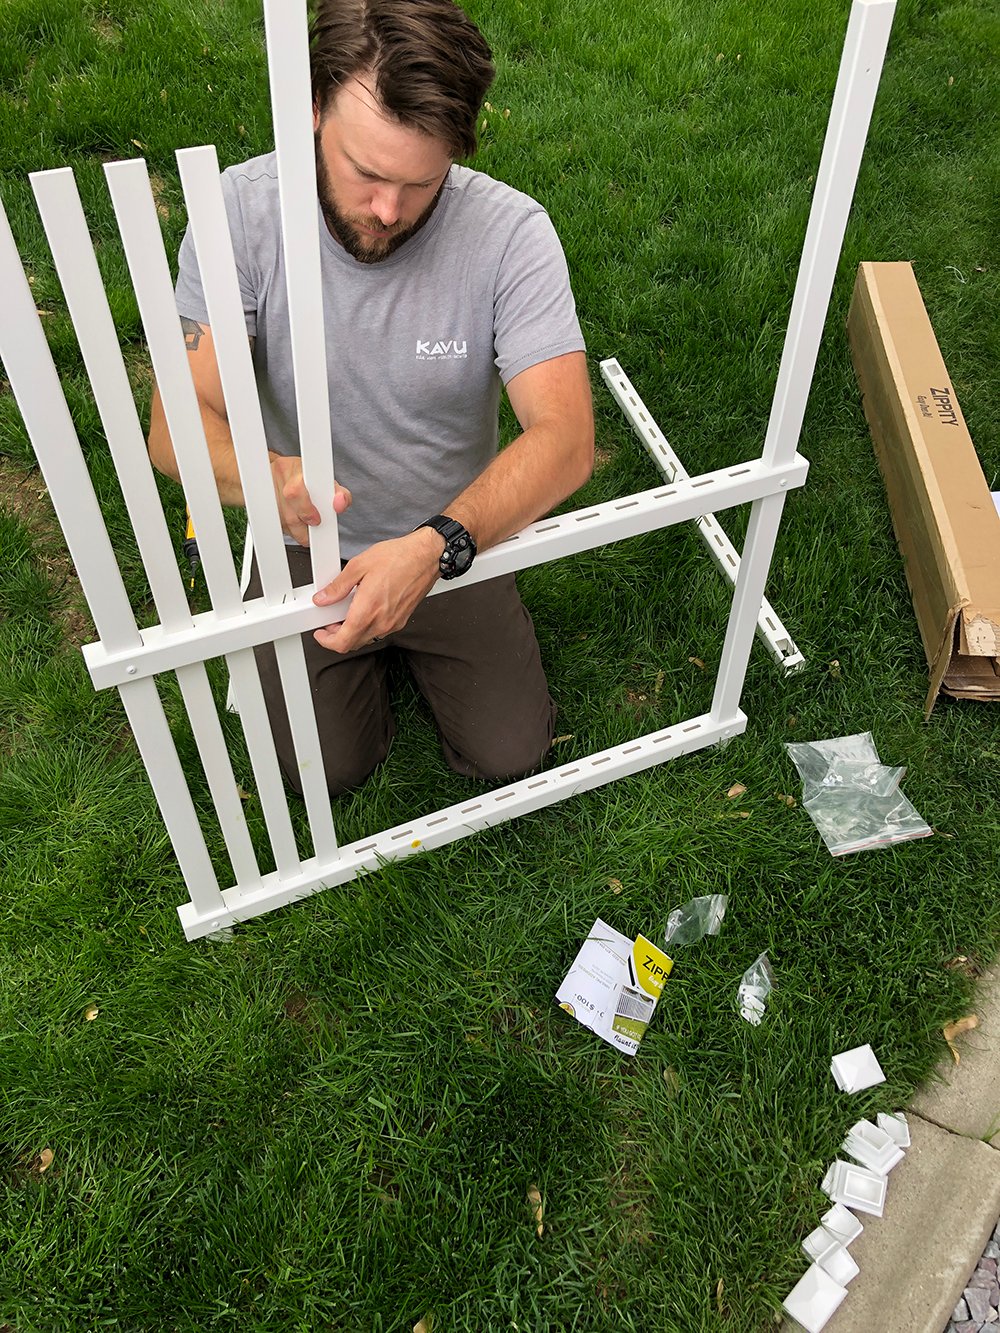
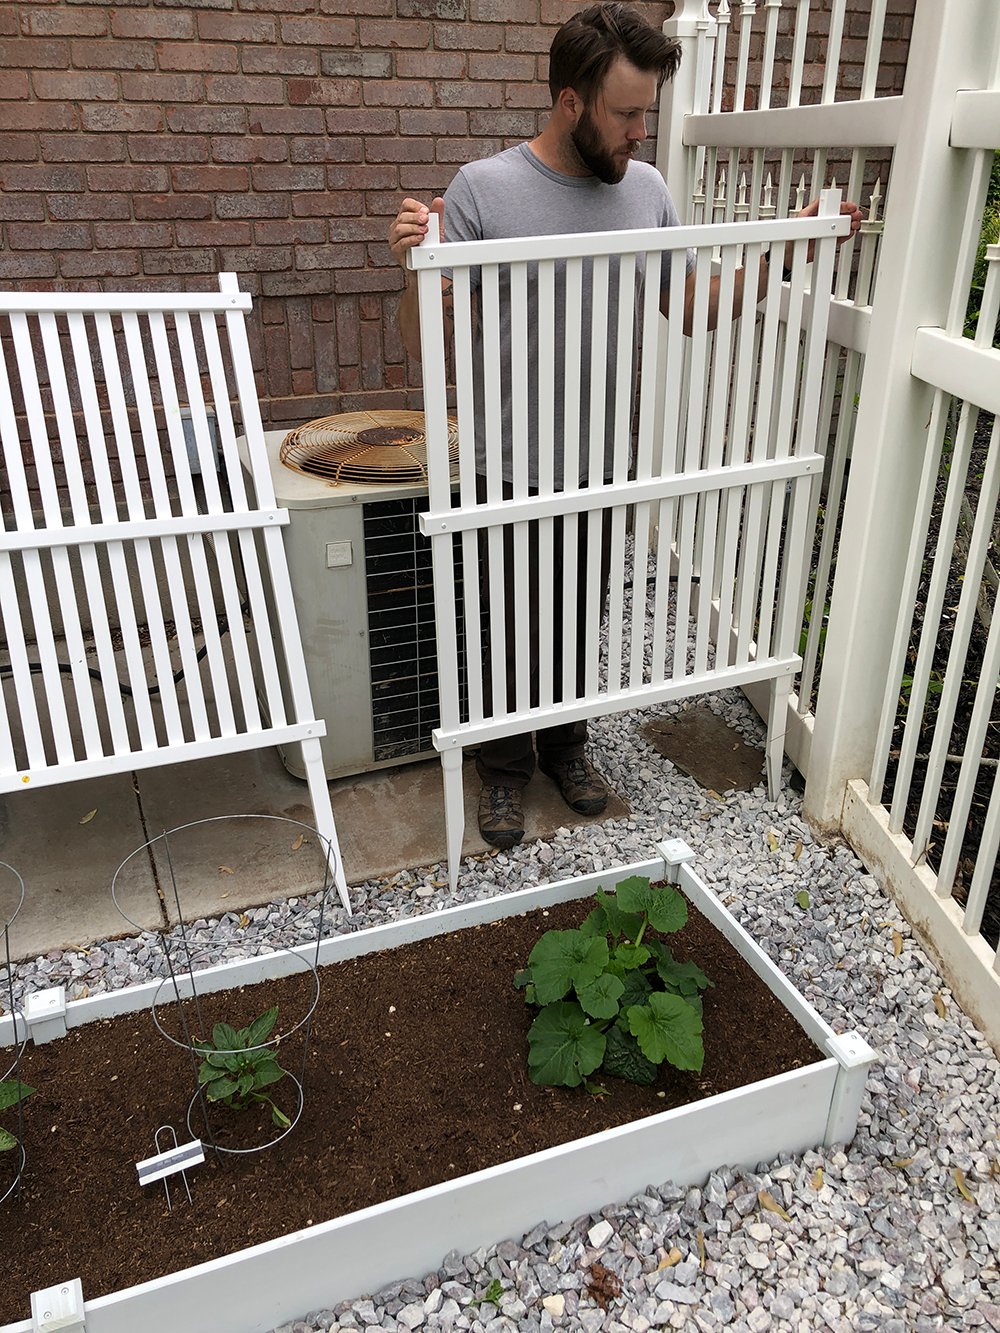
- panel screens (to disguise our HVAC units)
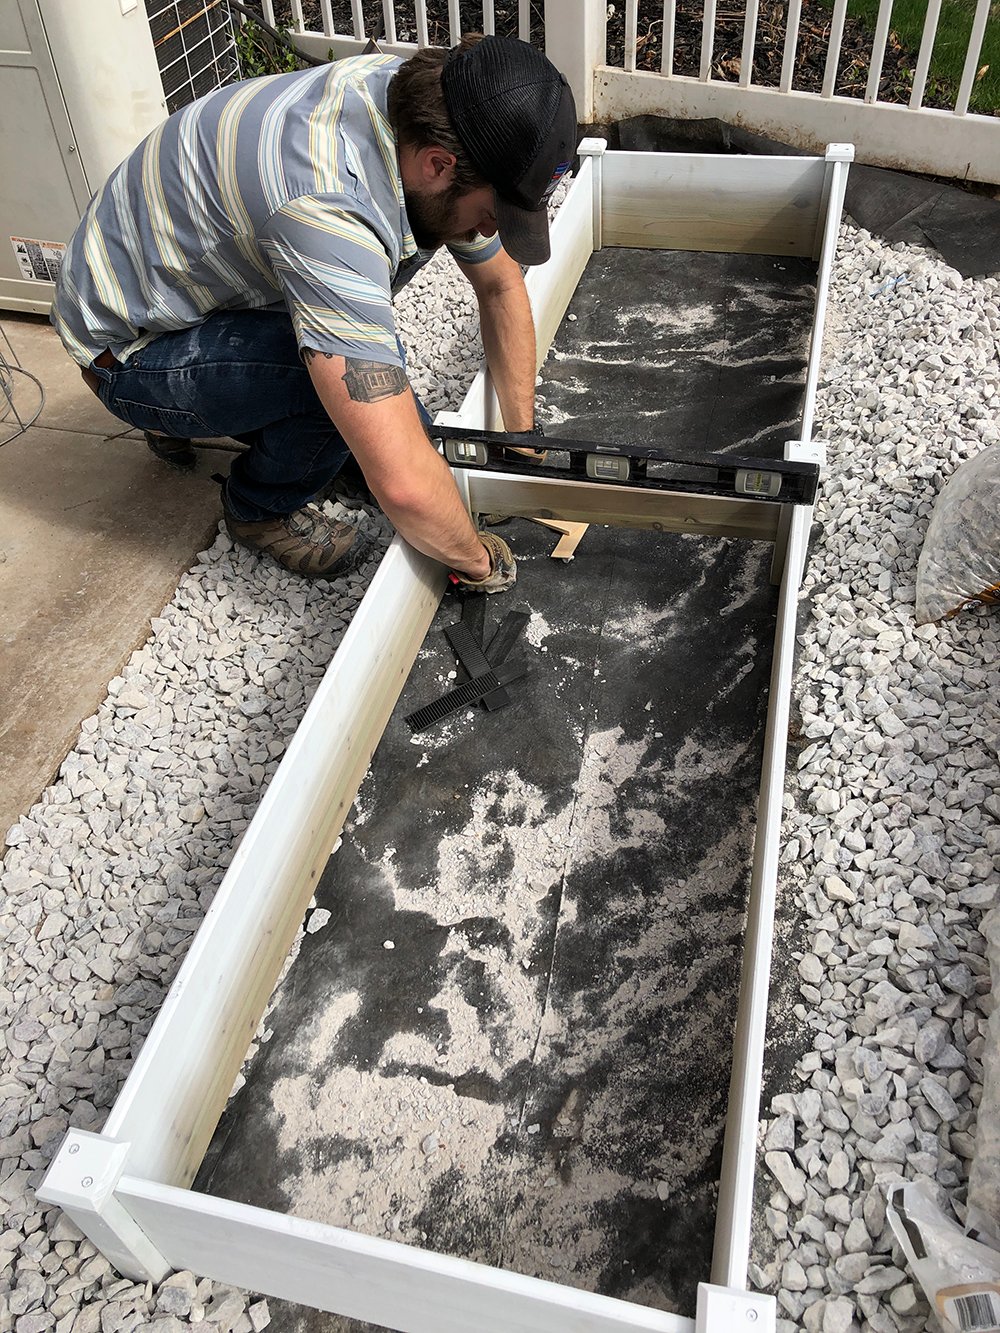 Step 1 // Assemble the raised bed and level it. Assembly didn’t take long at all, and we also decided to paint the exterior of our raised bed, so it better matched our fence and exterior.
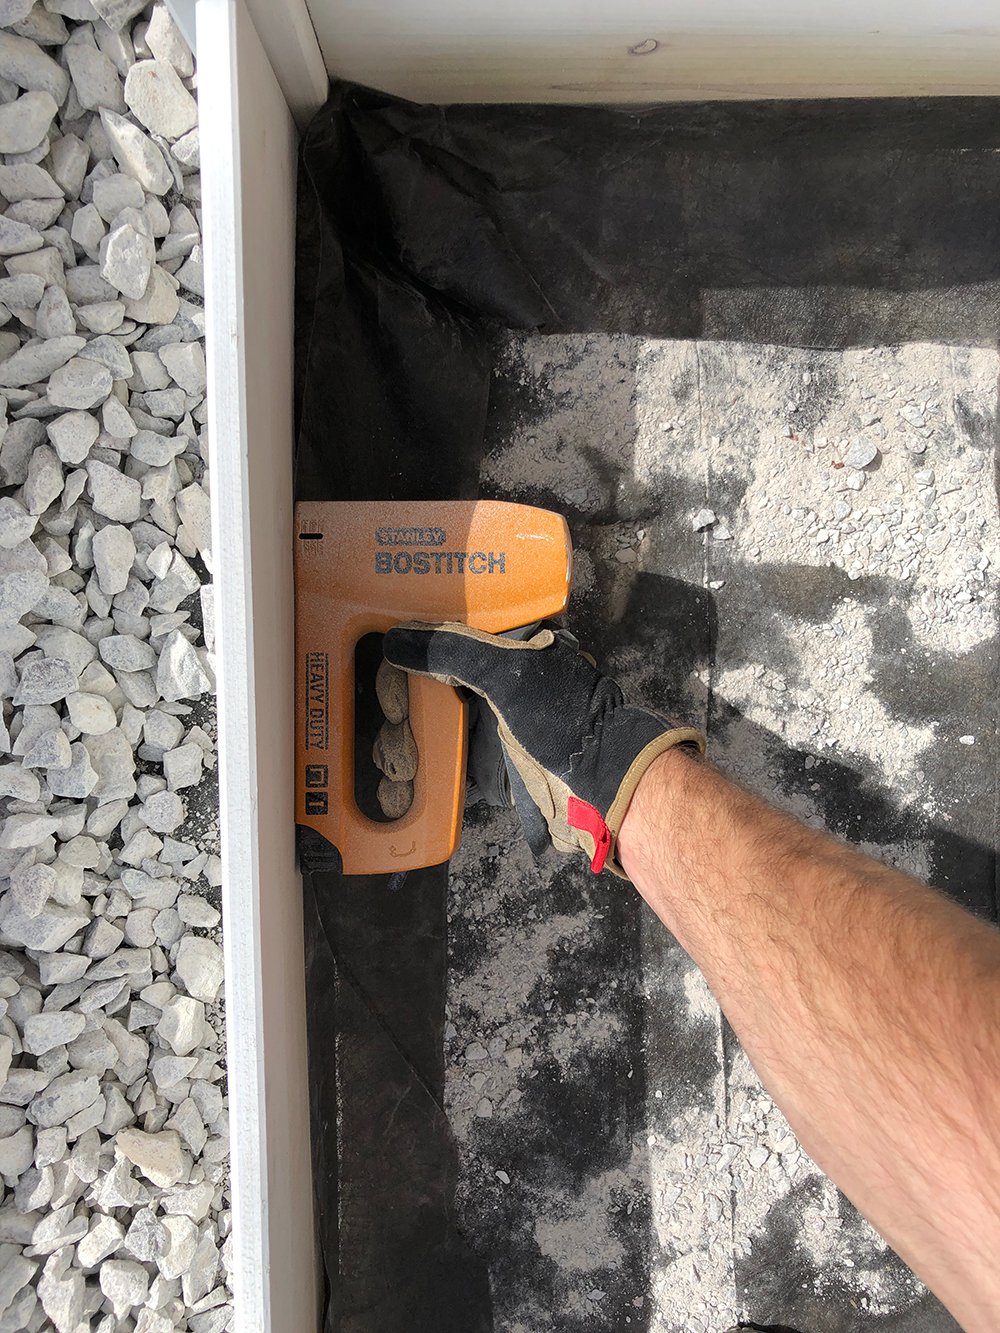 Step 2 // Staple weed barrier to the interior of the bed. To prevent the soil from washing out when you water your garden, you’ll want to staple landscaping fabric to the inside of the bed.
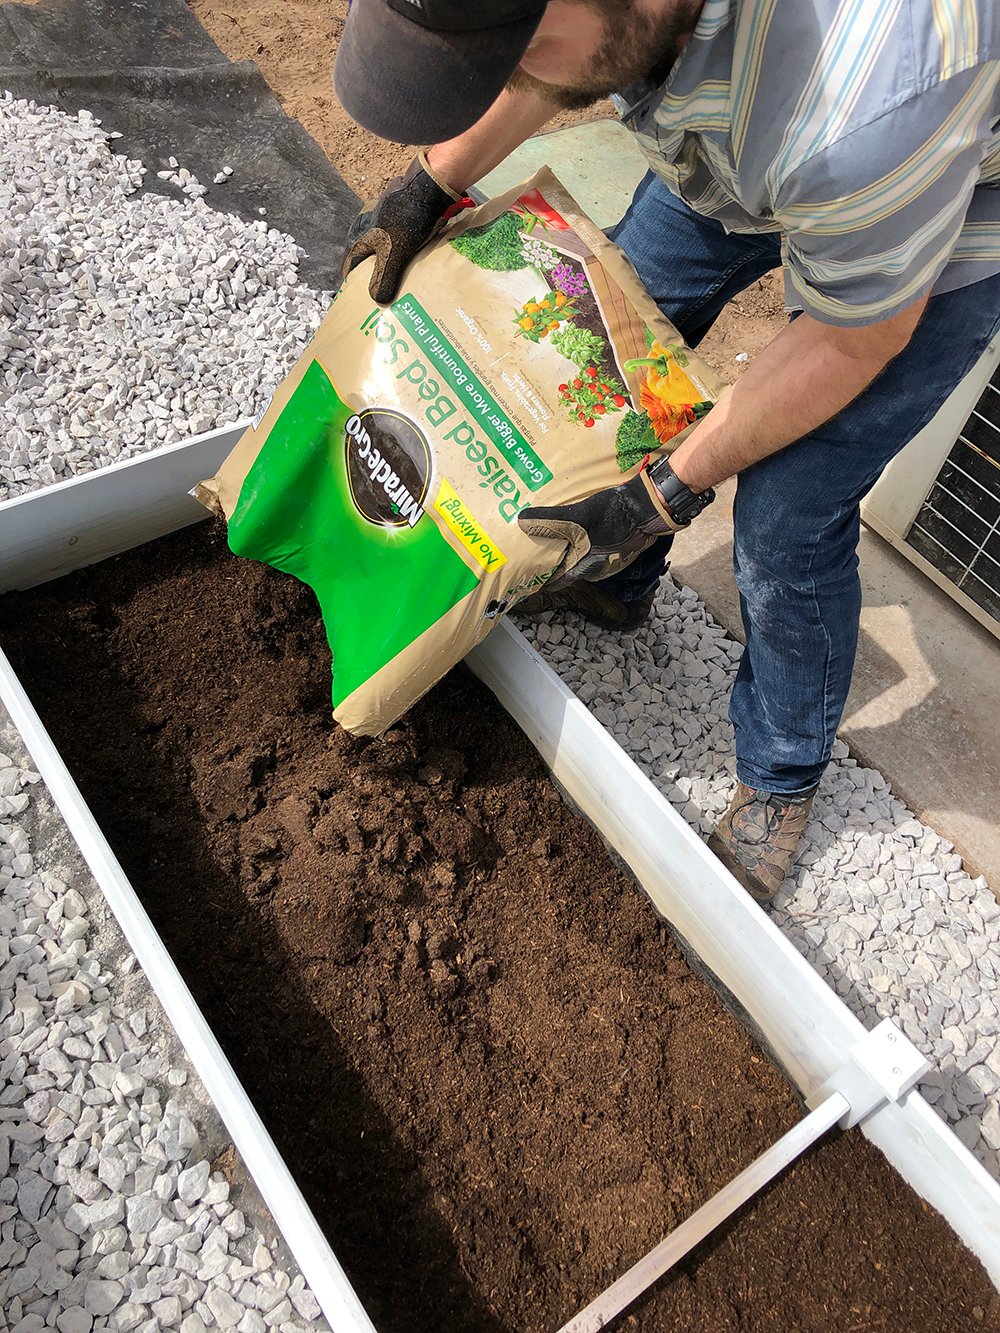 Step 3 // Add your raised bed soil. We just used basic raised bed soil, making sure to break it up while pouring it in. You’ll want to make sure there aren’t any big clumps.
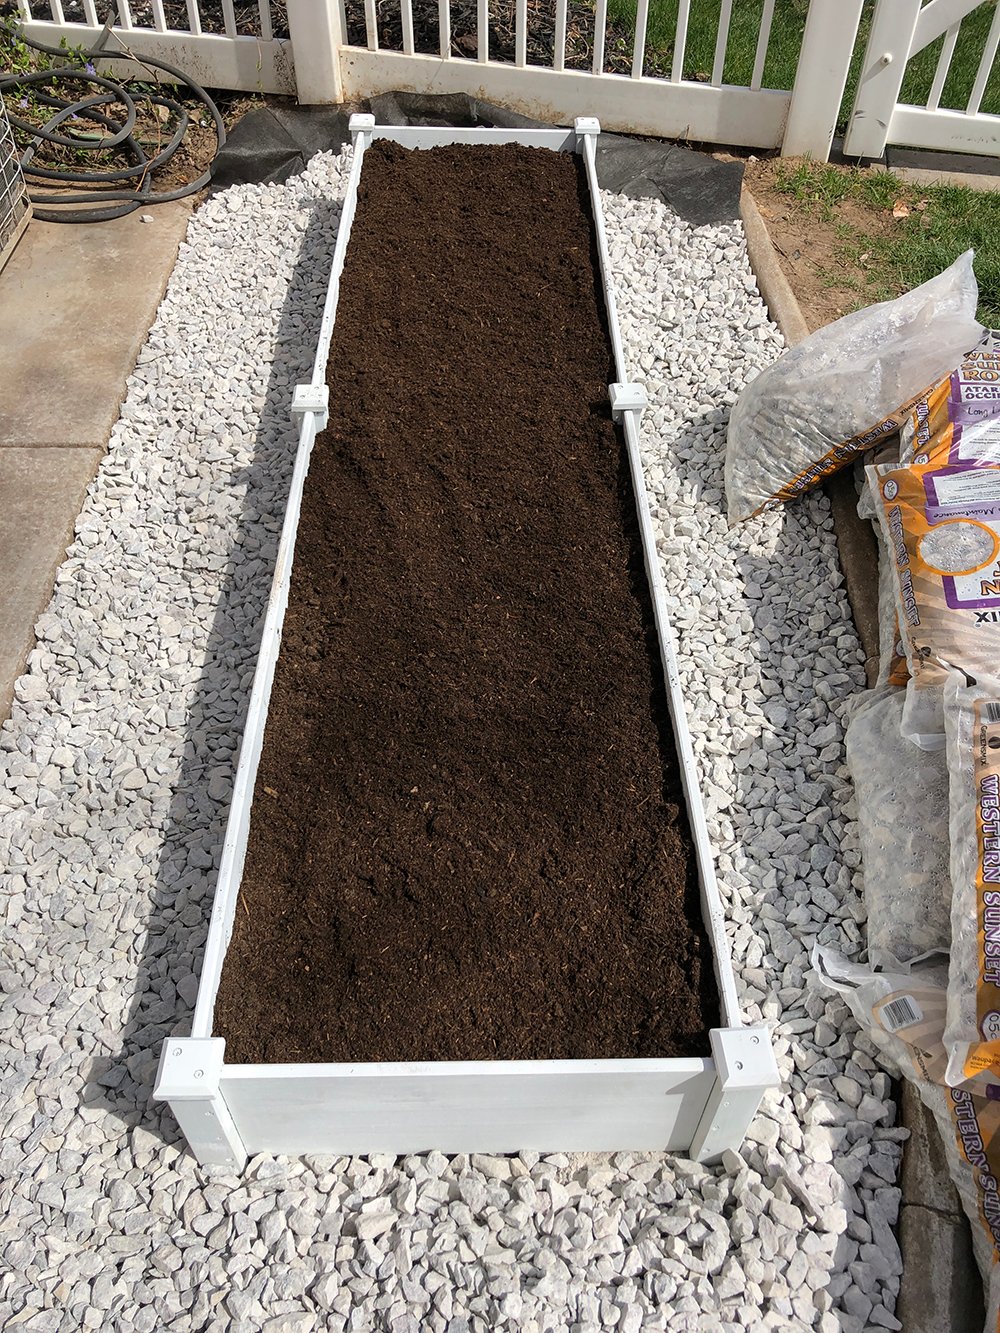 Step 4 // Measure and plan your garden. Depending on what you want to grow, you’ll need to plan for the appropriate negative space. Once you’ve determined your plants and their spacing & location, you’re ready to start planting!
 Step 5 // Start planting. Follow the instructions on your seed packets or starter plants. Certain plants like to be dug deeper into the soil, while others do great being planted container deep.
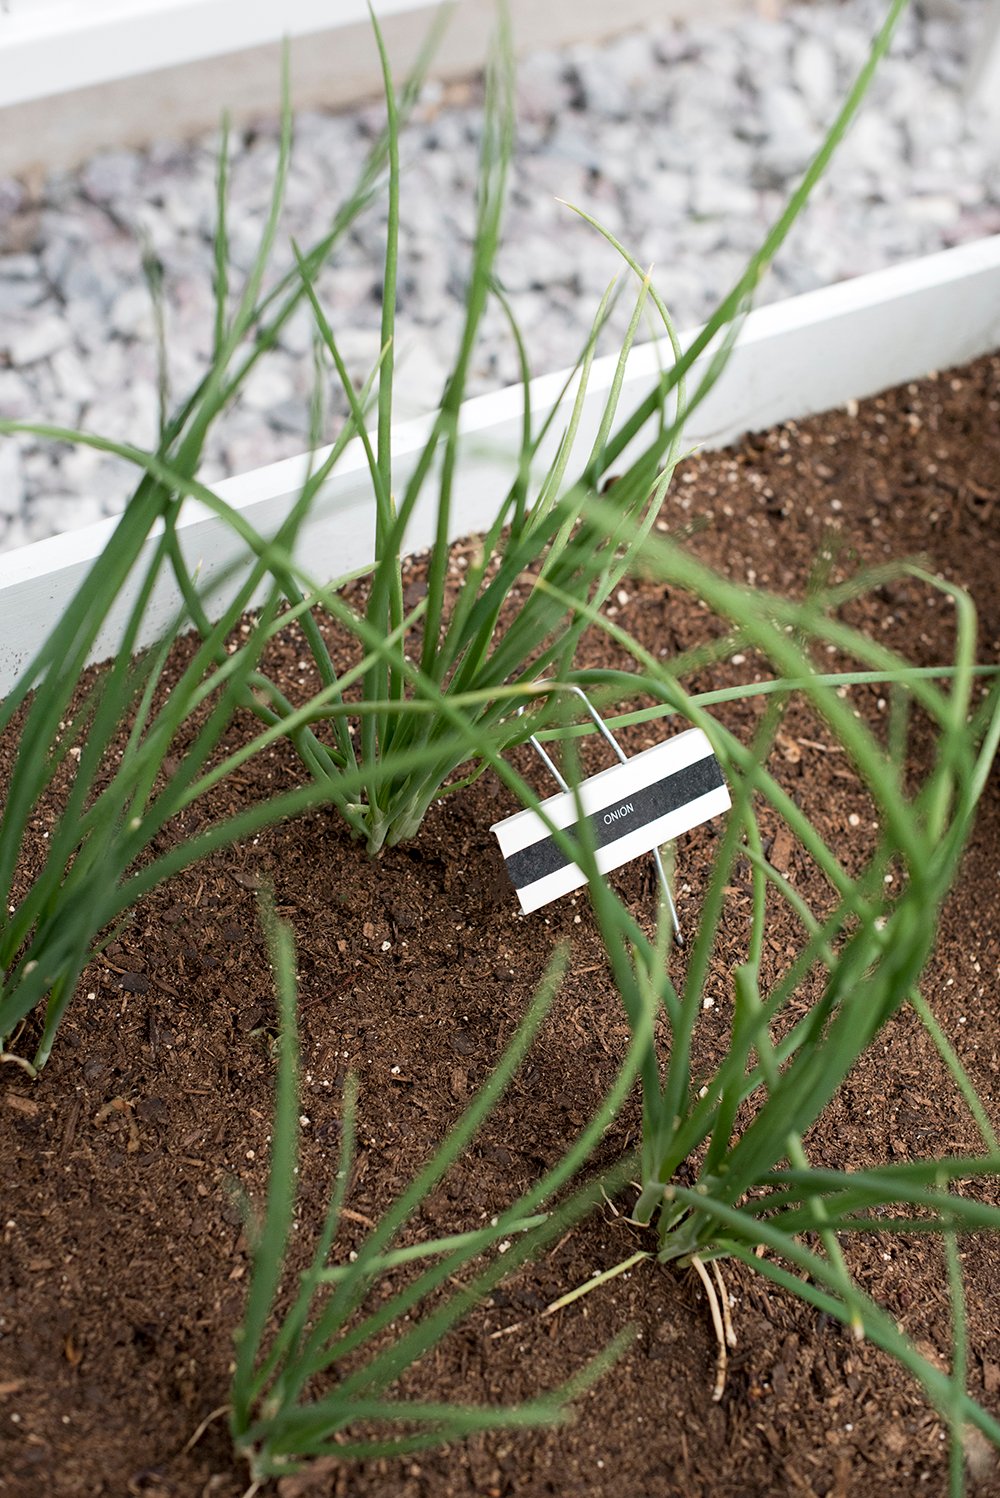
 Step 6 // Label everything. This step obviously isn’t necessary, but I like to be organized and labeling everything makes me happy. I obviously know what is planted in my garden, but the labels are helpful if you’re just getting started or are sending someone outside to fetch something for you.
 Be sure to water your plants regularly and make sure they get adequate sunlight. Lots of people begin a garden and forget how much work or care goes into maintaining it. My biggest piece of advice is to stick with it and create a routine, in an effort to avoid neglecting it.
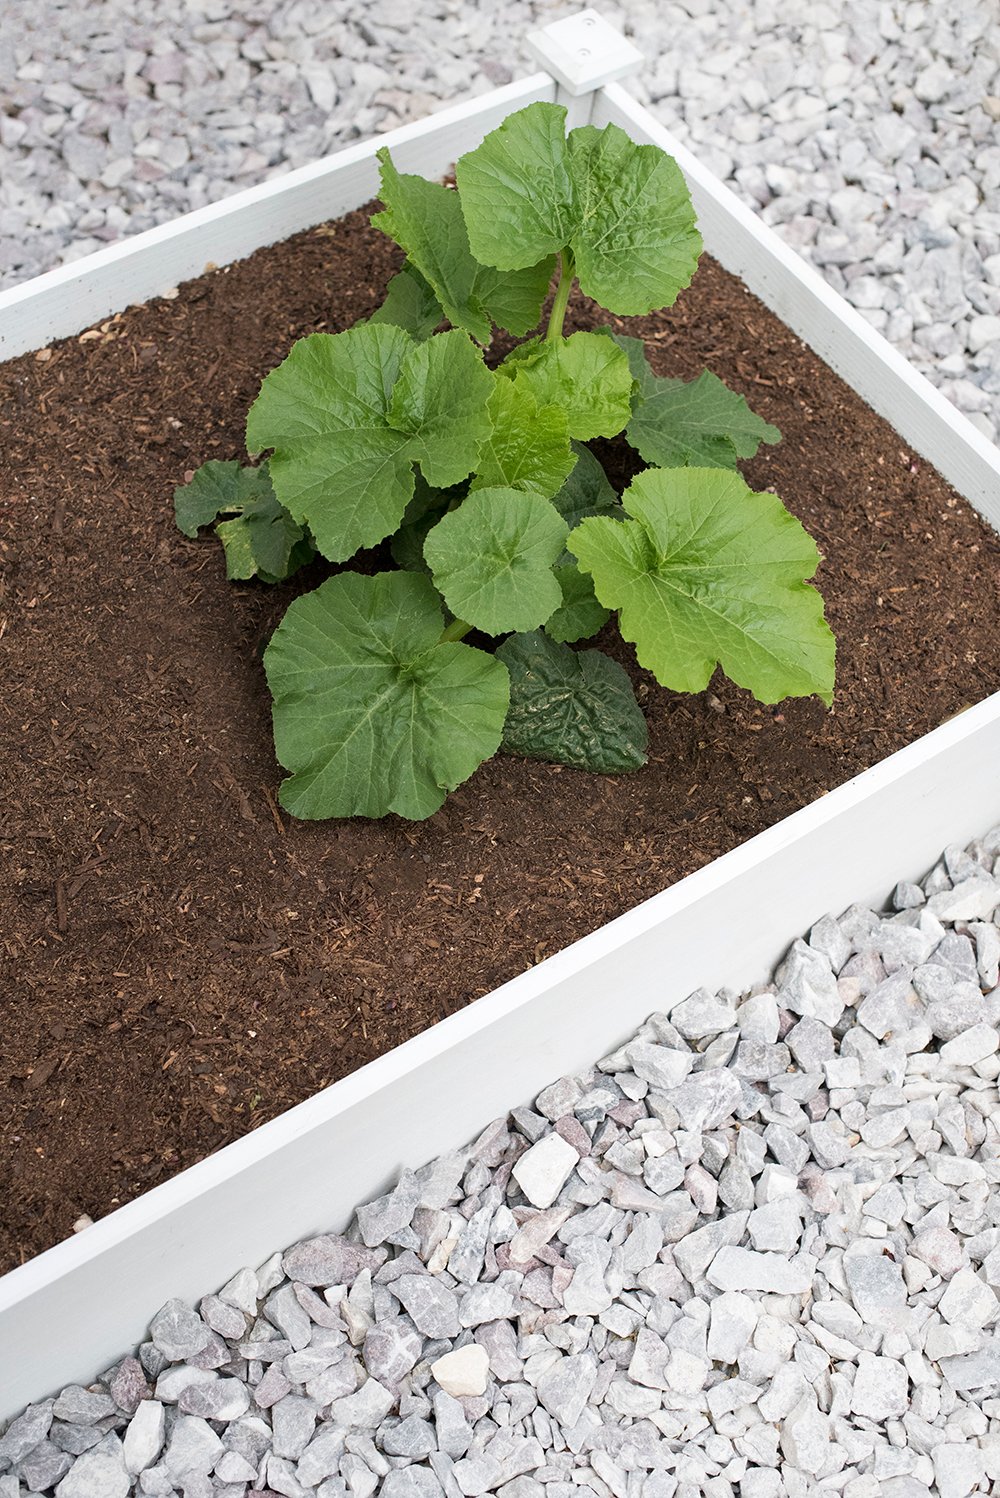
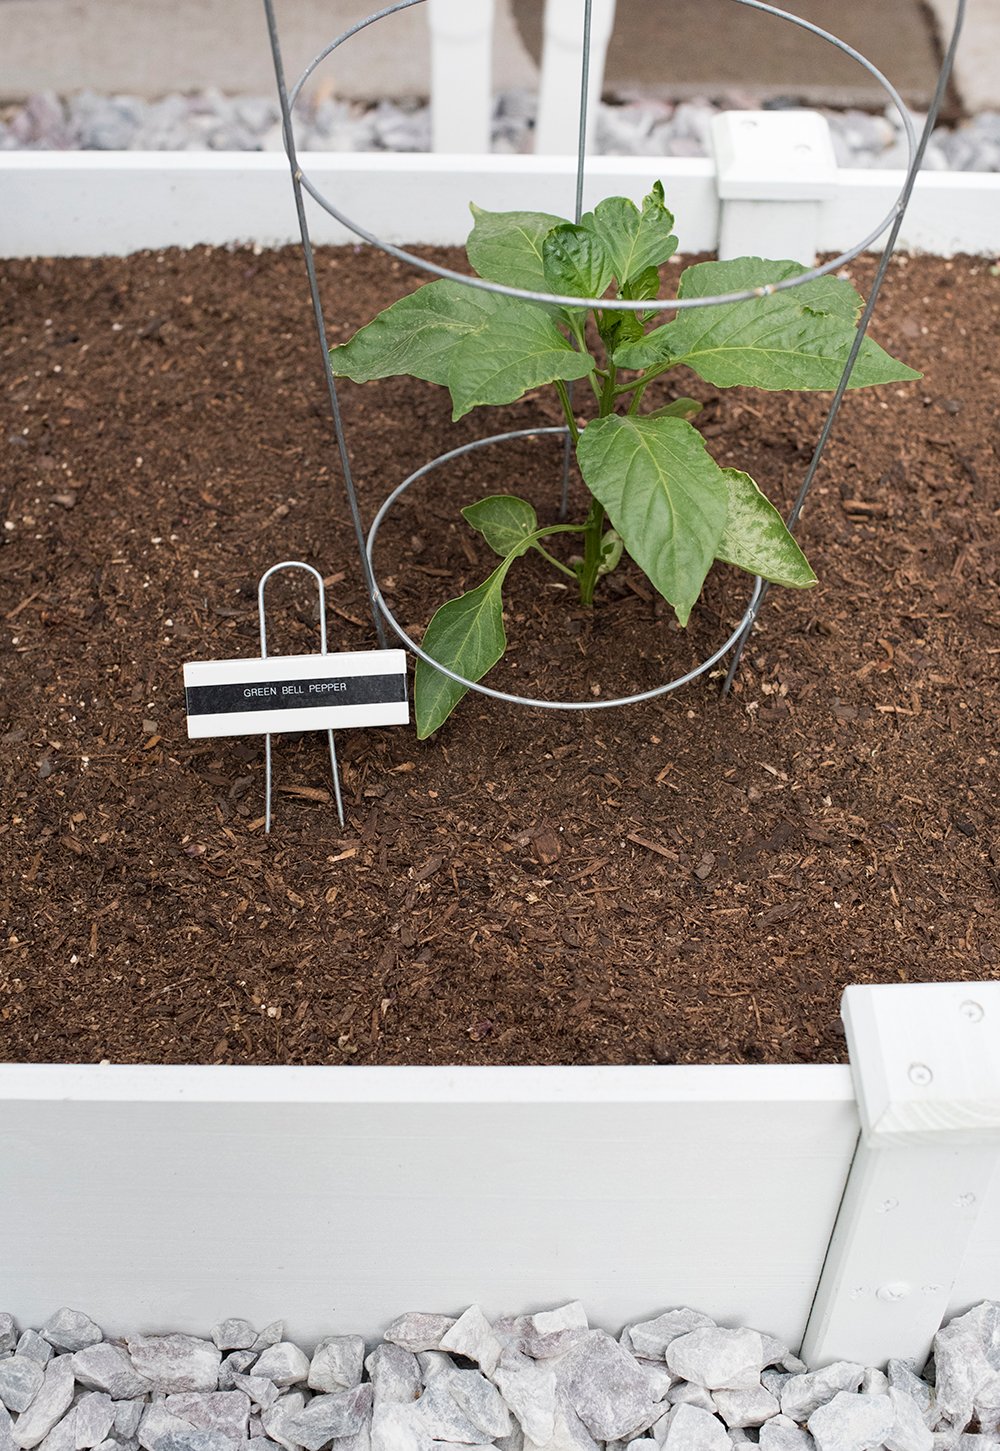 We planted all sorts of things this year… strawberries, bell peppers, jalapeño peppers, zucchini, all sorts of tomatoes, onions, melon, and of course plenty of herbs in our little herb garden! I’ve been loving watching things grow this season.
 Lots of people wondered how we would hide our HVAC units (the big eyesores). We landed on these readymade panels because they matched our existing fence, fit the budget, and were quick & easy to install.
 They’re honestly more sturdy then I expected them to be, and I think once the garden begins to grow larger, it will also help to further disguise the air conditioners.
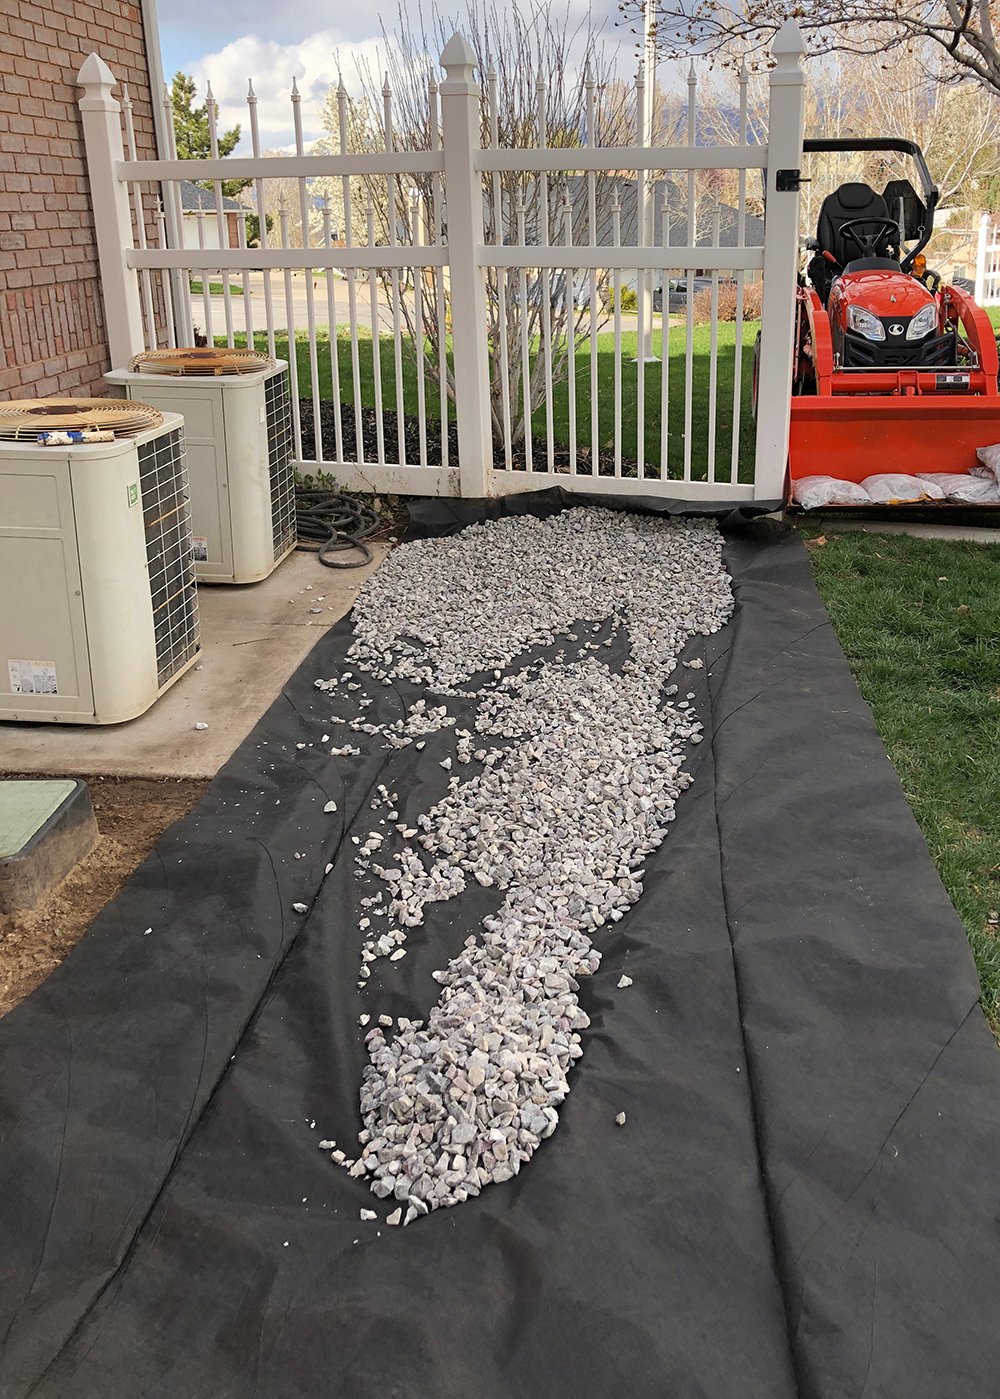
 I’ve shared this tip in the past, but thought it would be relevant and helpful if you have gravel integrated into your landscaping… see all the debris in the above image? This is the time of year the trees are dropping pollen and seeds like crazy. I use a leaf blower to “clean” the gravel, as well as a water hose. I really only have to do that this time of year, so it’s very low maintenance.
 There you have it… our little urban garden! Do any of you have a garden? Are you interested in starting one? I have such wonderful memories working in the garden. It has definitely been fun starting our first garden since moving to Utah. Let me know if you have any questions! Have a great week, friends.
