The Camper Reveal
 After a fun long weekend camping in Wyoming & Montana with our family, I’m excited to share the camper reveal with you today! Before we dive in, if you missed the before images, our reasoning for getting a camper, my initial design plan… click here for that post. I also shared a couple progress posts, if you’re interested in seeing those… click here and here. This was actually a pretty spontaneous project that has been a lot of fun. We’ve already made some good memories in the camper- both renovating and camping! Emmett & I are really happy with how things came together. The aesthetic feels more like us, it functions so much better, and it’s very cozy & comfortable- pretty charming, if I do say so myself. Click through to check it out!
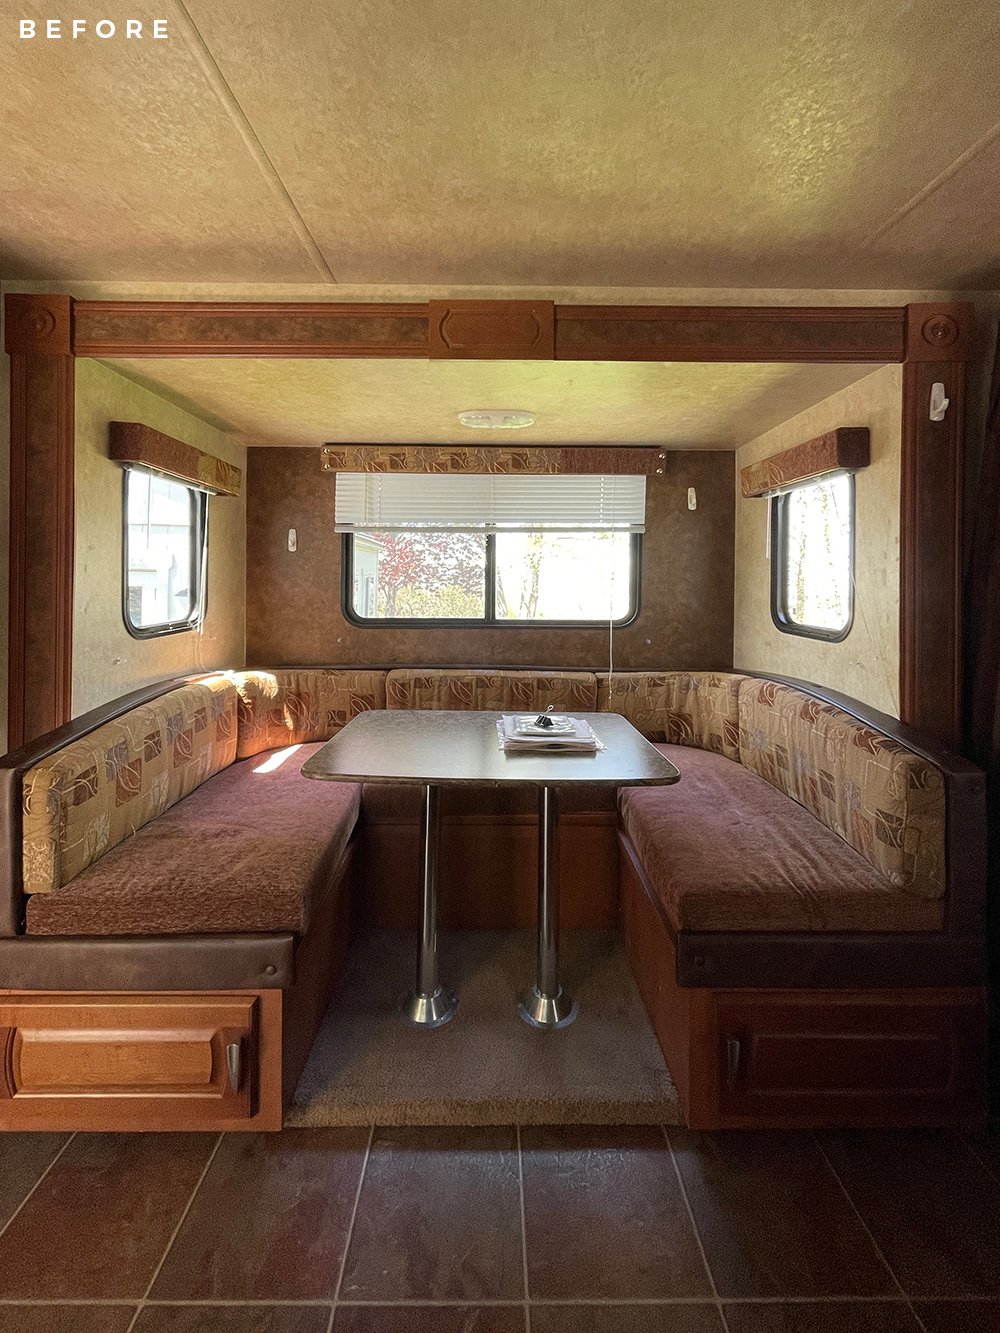 Remember what it looked like before? I’ve always wondered why camper and RV manufacturers don’t place more emphasis on design… it’s hard to believe this camper is a 2013- I feel like the original design made it look so much older. Today, it looks like this…
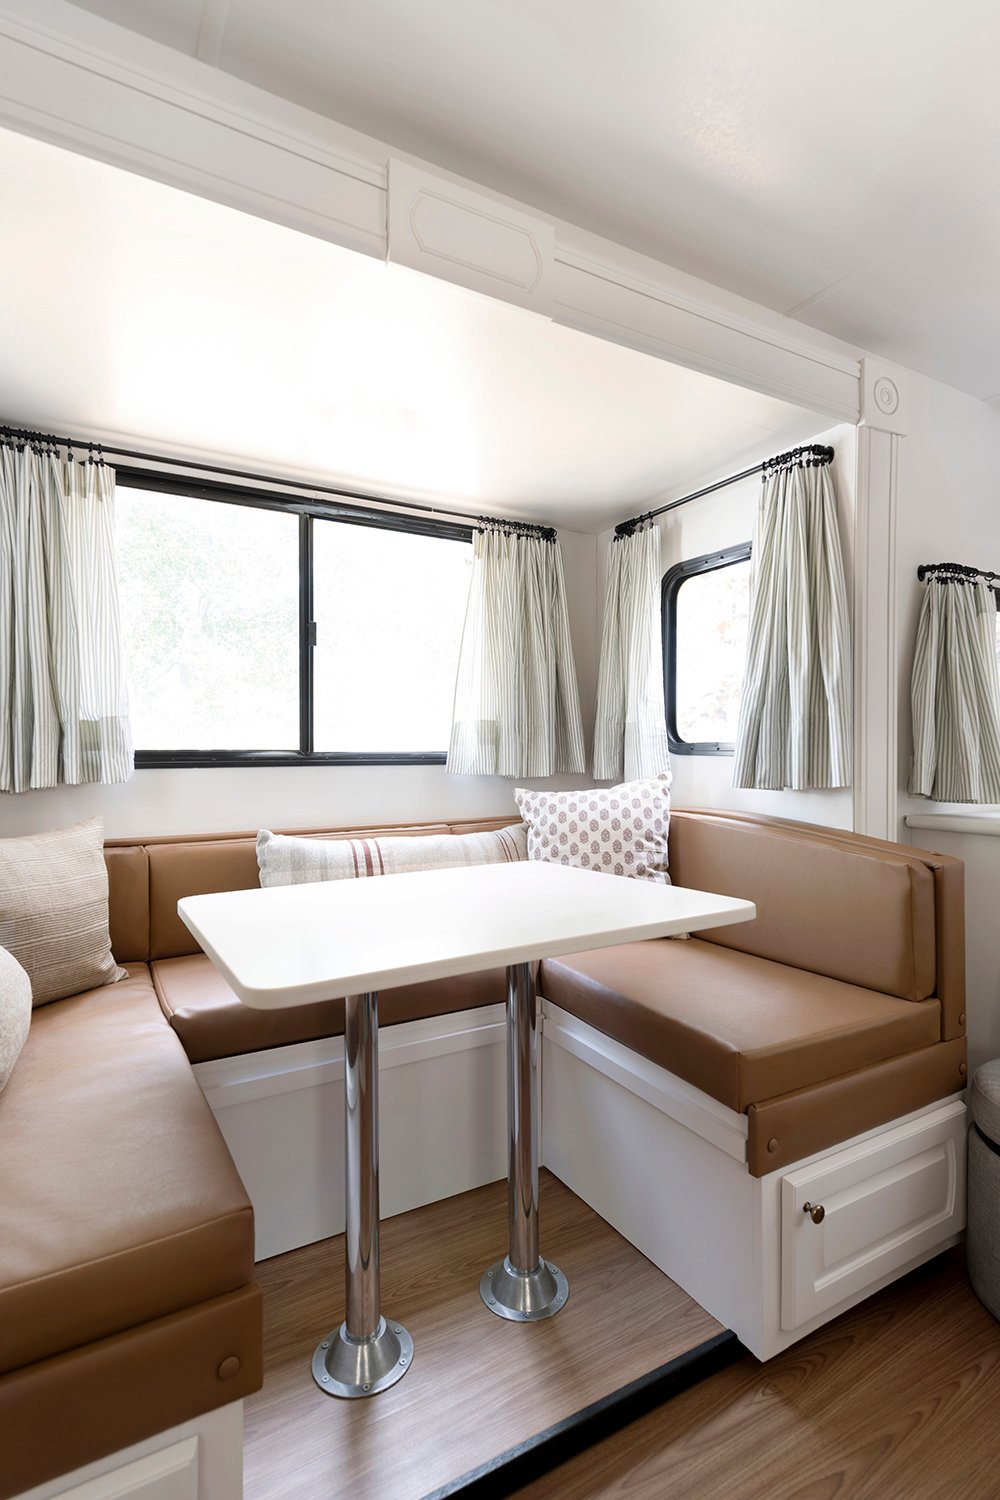
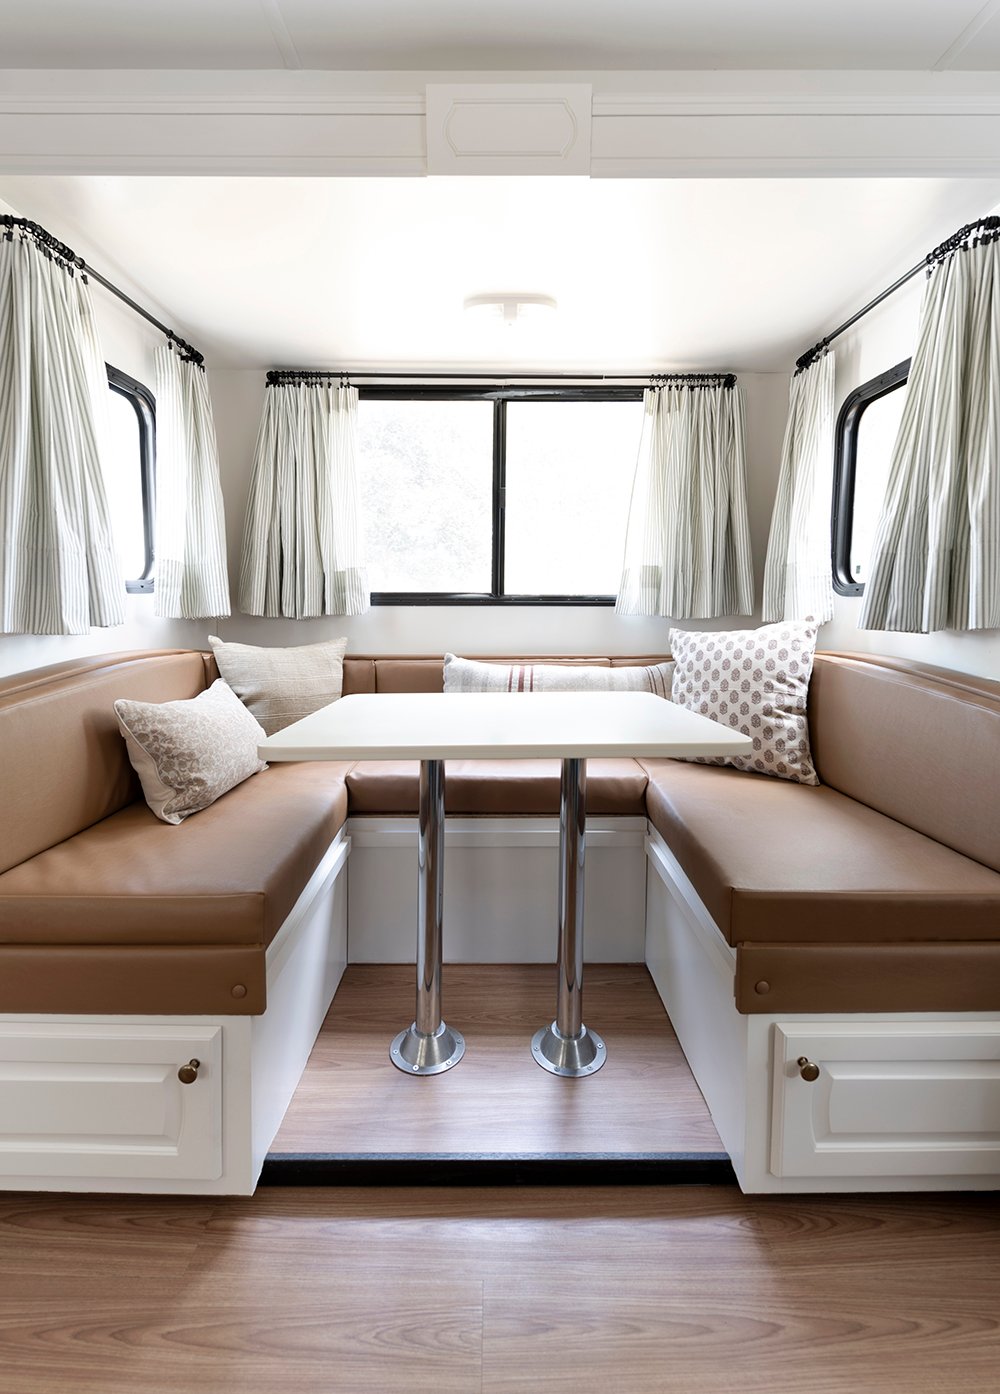 It’s bright, cheerful, and feels much larger- thanks to different paint and material choices. What a difference those easy changes can make! I wanted to design a camper that was beautiful, functional, and most importantly- dog friendly.
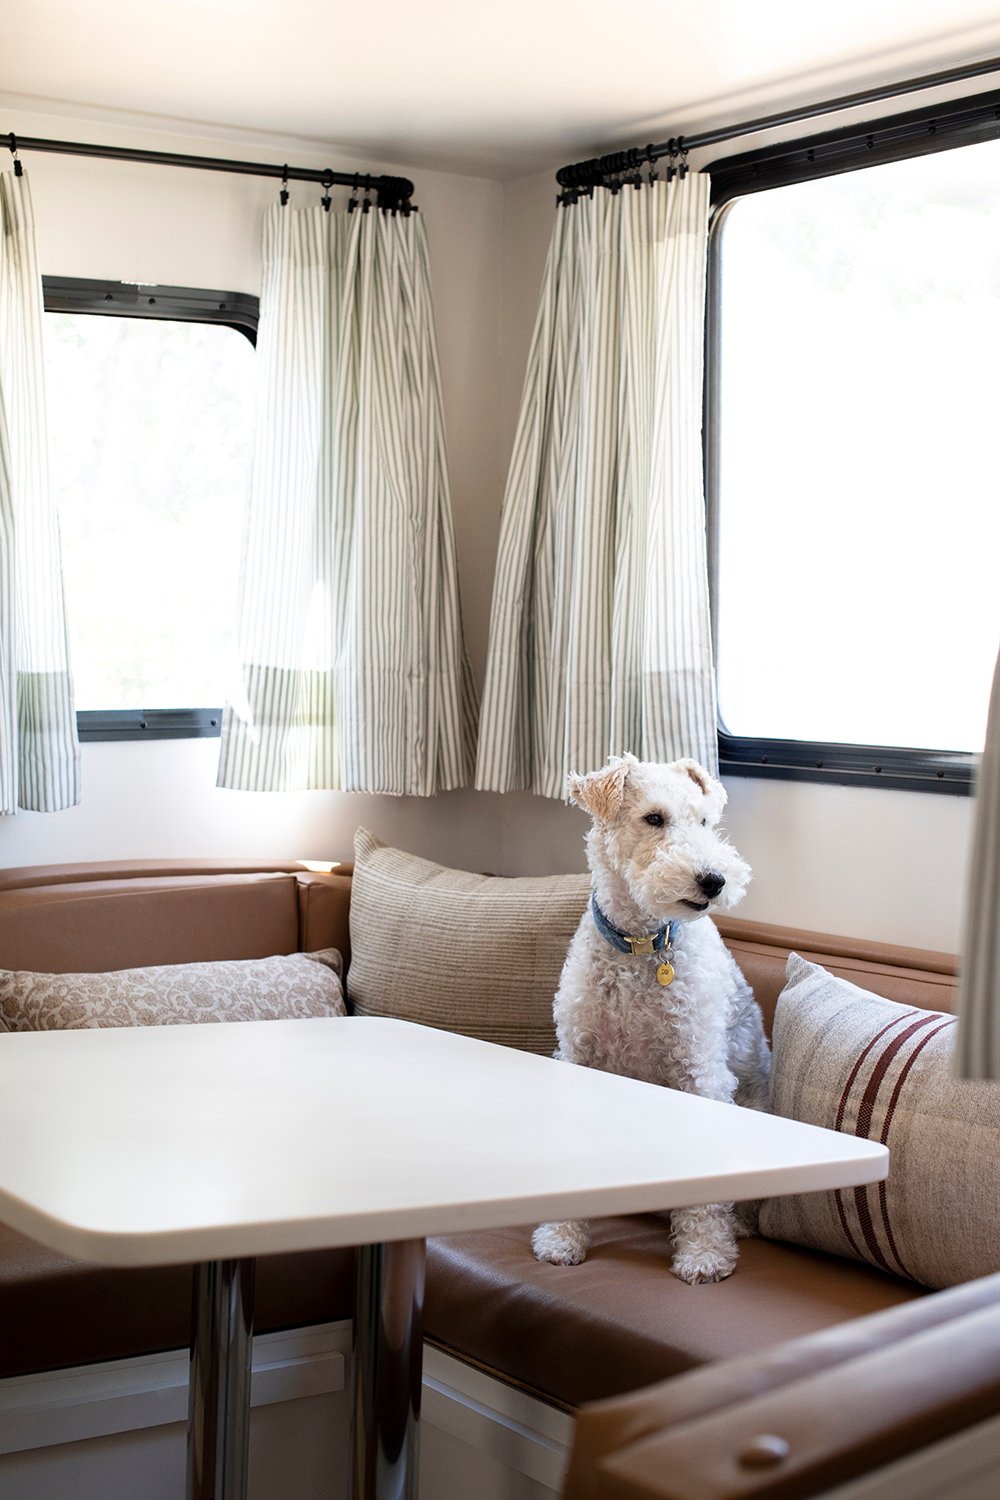 One of our biggest annoyances was having to leave the dogs at home with a sitter or not sleeping great in our small tent when they did tag along. Now we don’t have to worry about restricted trails or getting sleep, as they have a safe and spacious place to stay while we camp & travel.
 With that in mind, I made sure to choose very durable materials that could withstand pets. I rummaged around the workroom attic, in search of a bolt of commercial grade vinyl to reupholster the banquette seating. For under $10 a yard, I scored a cognac colored vinyl that was perfect for the dogs and the aesthetic I was going for.
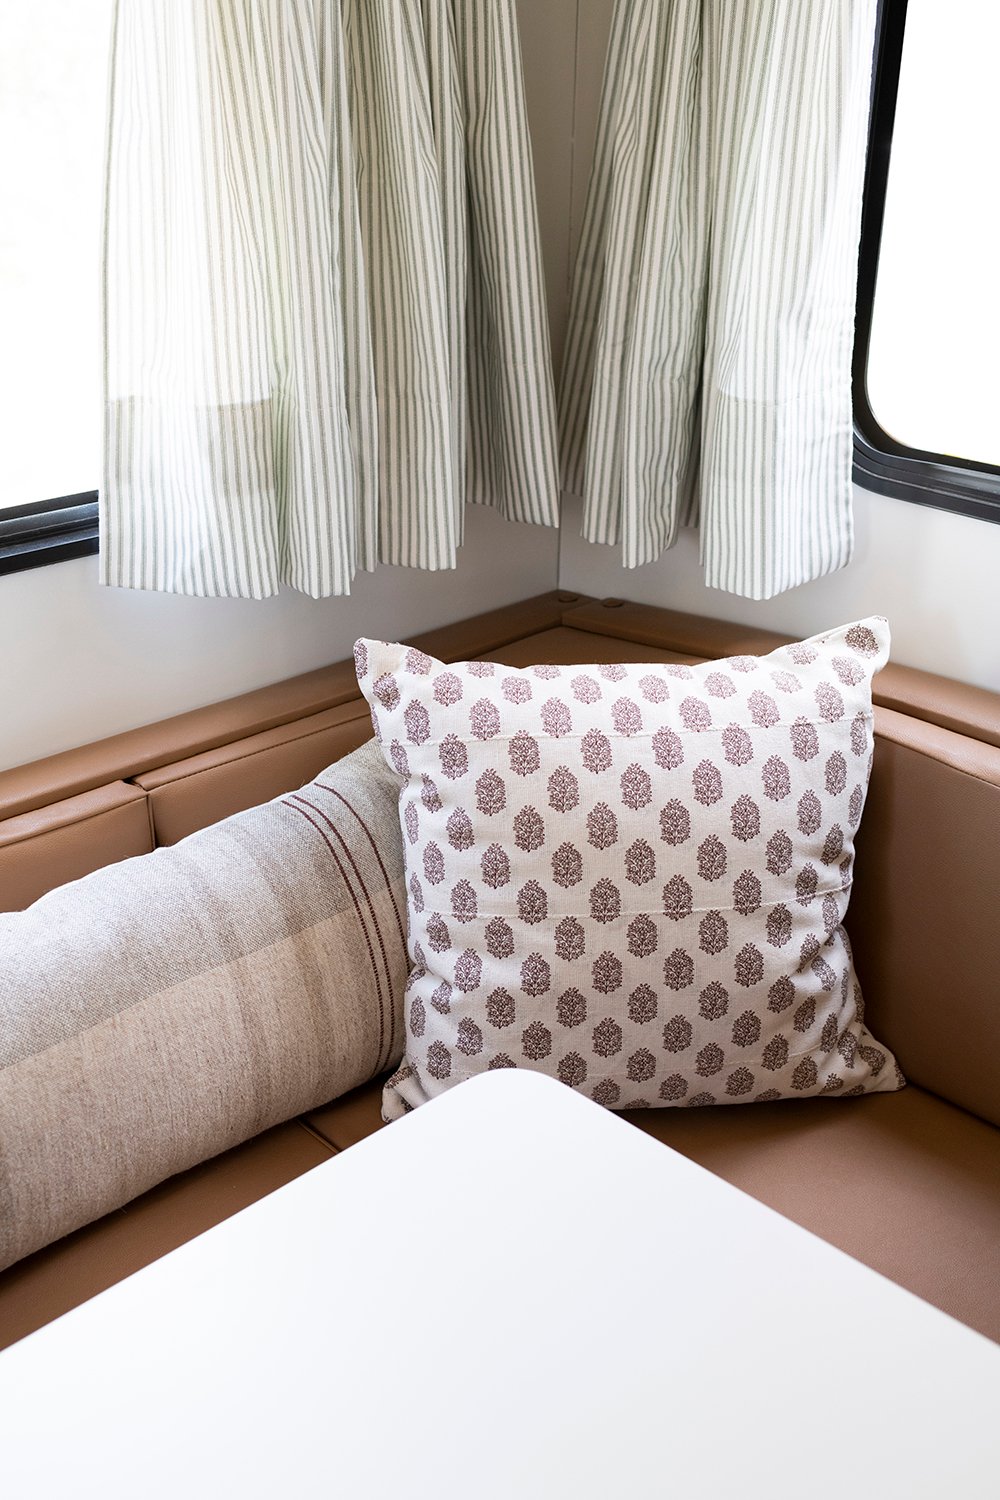 I also did a lot of pattern mixing in the camper. I knew I wanted the main paint color to be a creamy neutral (to provide a bright backdrop), but I didn’t want it to feel boring. I tried to pull in a lot of pattern within the textiles to make things feel more interesting.
 We had a tight budget for this remodel, which challenged me to get creative… our goal was to keep it under $1k, and realistically- I think we ended up spending just under $2k. The majority of that went toward updating things you don’t see (a digital temperature gauge, a quiet generator, hitch updates, etc).
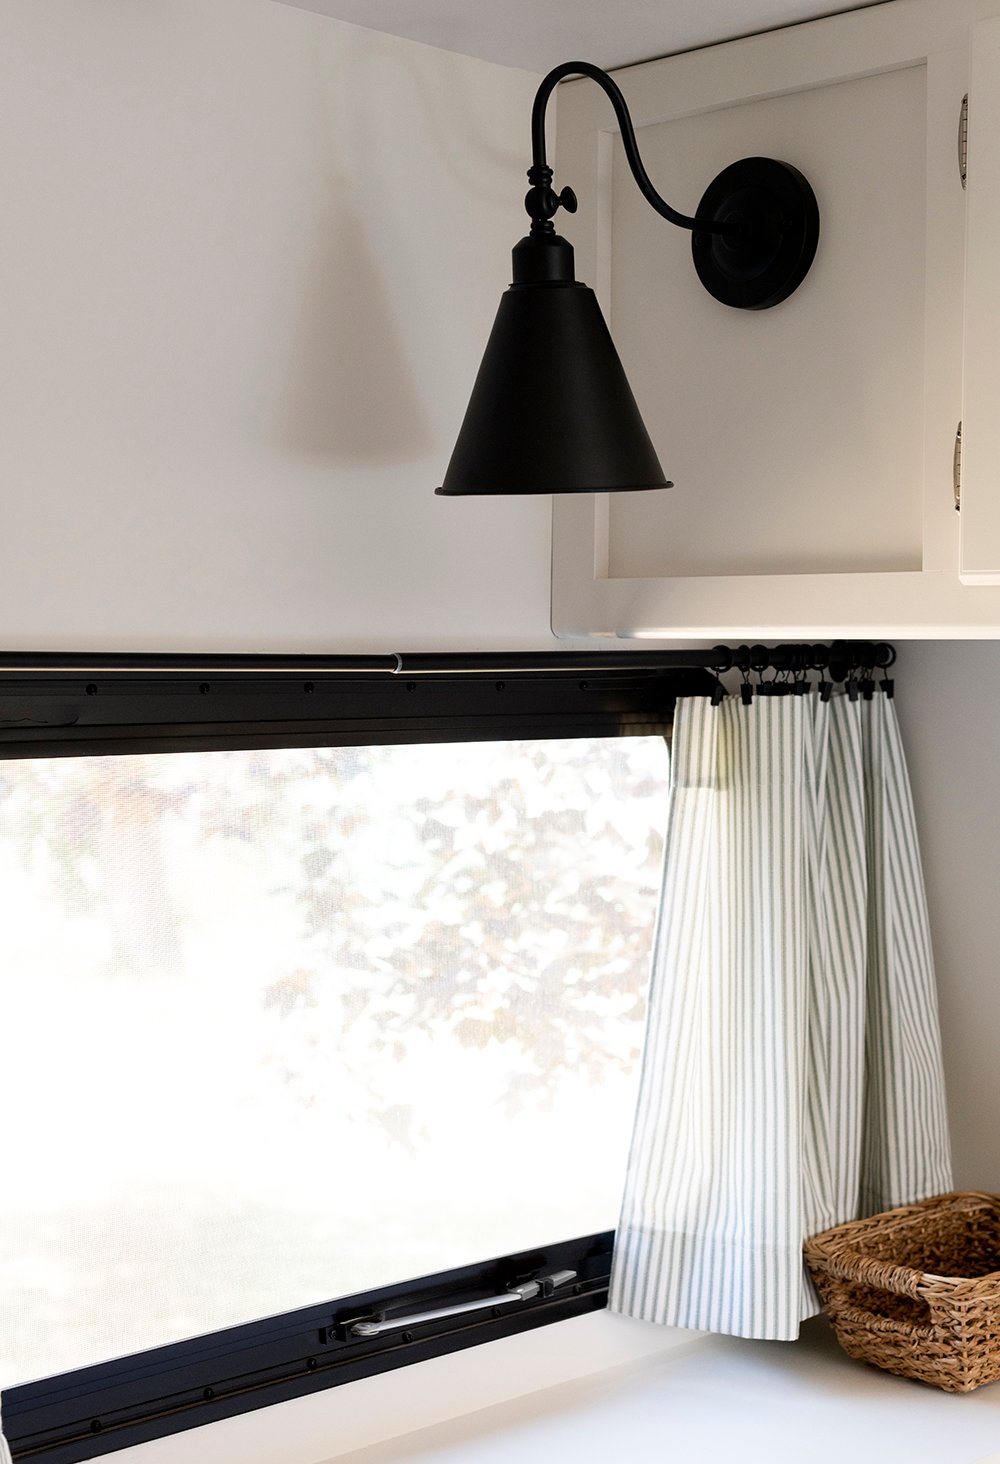
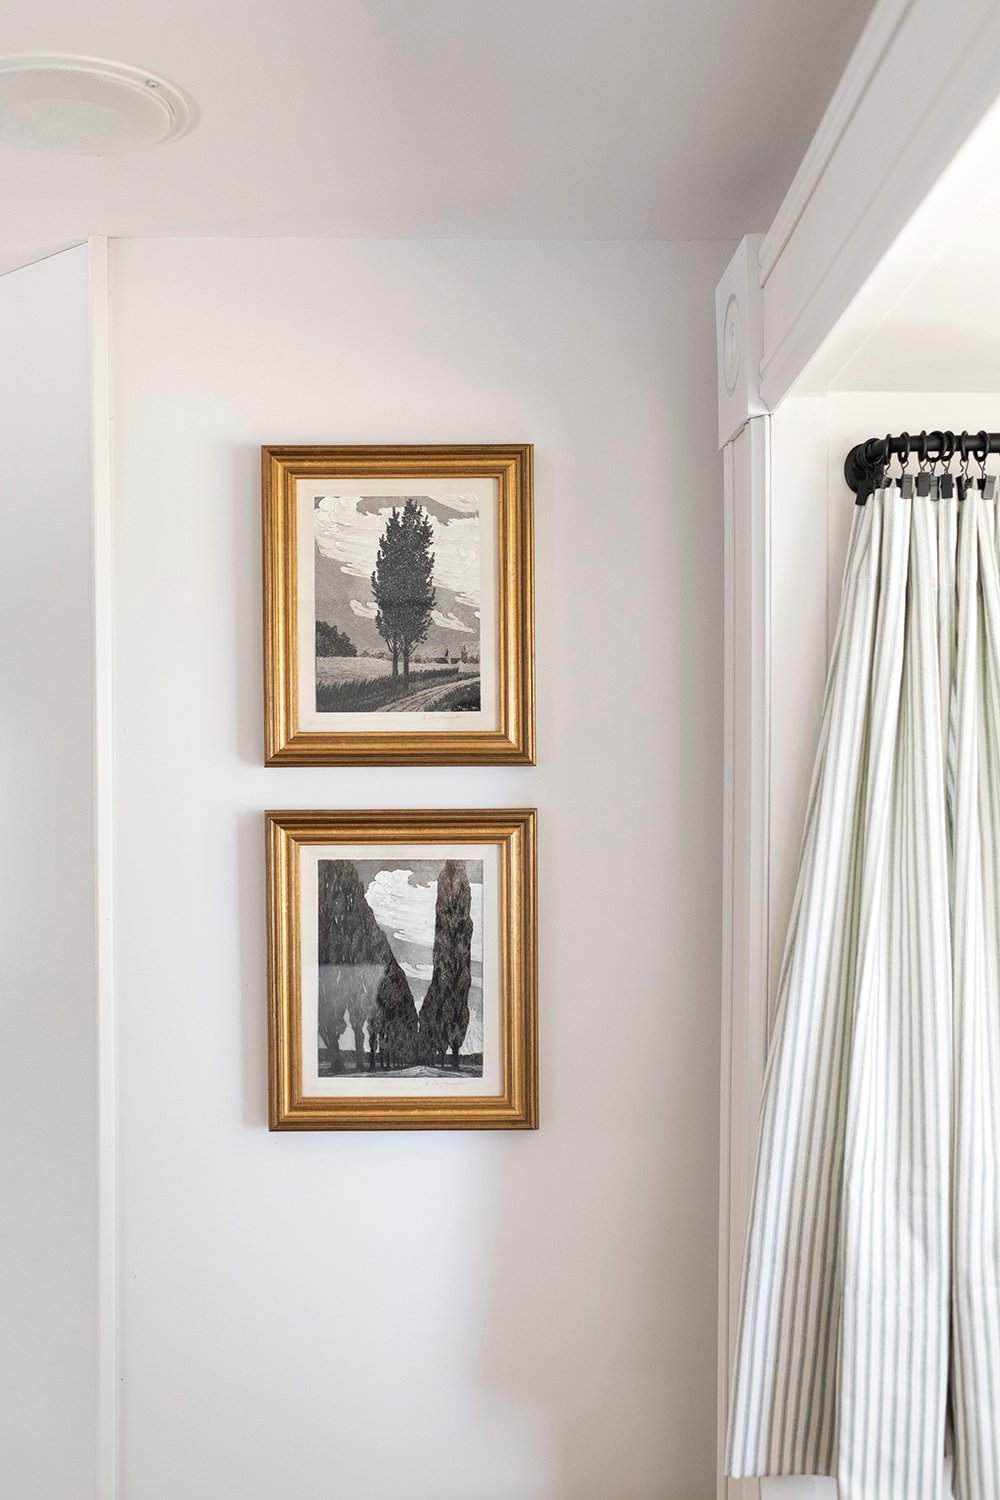 In regards to the decor, I primarily used things I already had on hand. I’ve been hunting for a good place to install these tree pairings, and they ended up being perfect here! How do you hang in art in a camper, you might ask? We used a LOT of velcro! That was another big challenge- thinking of how to safely secure everything, so it stays put during transport. Let’s move onto the kitchen… remember when it looked like this?
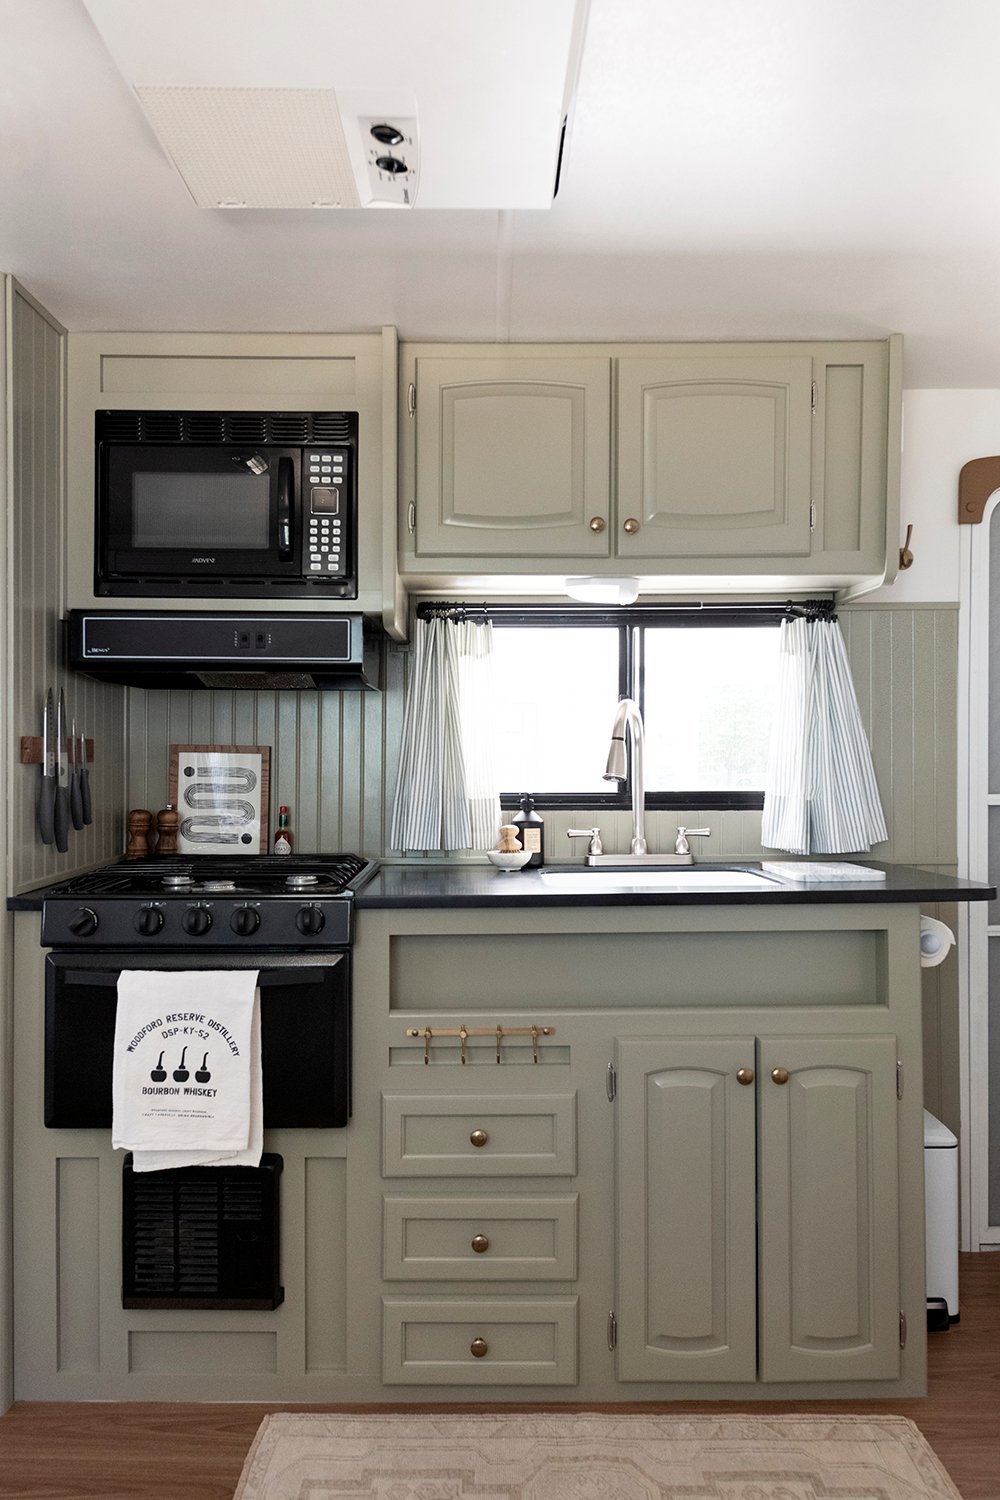
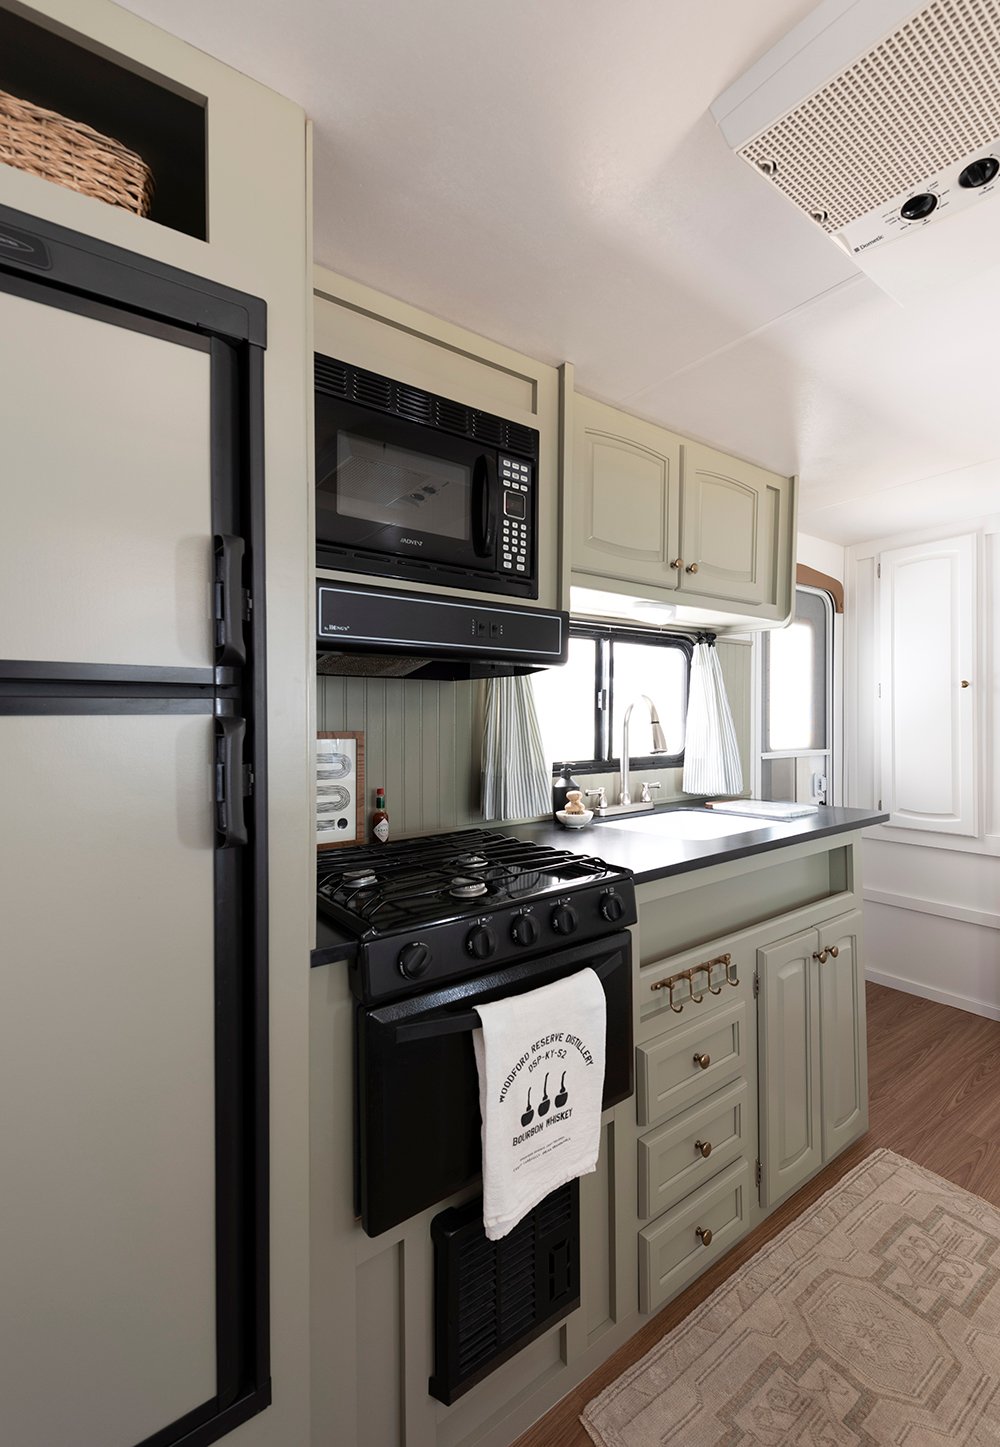
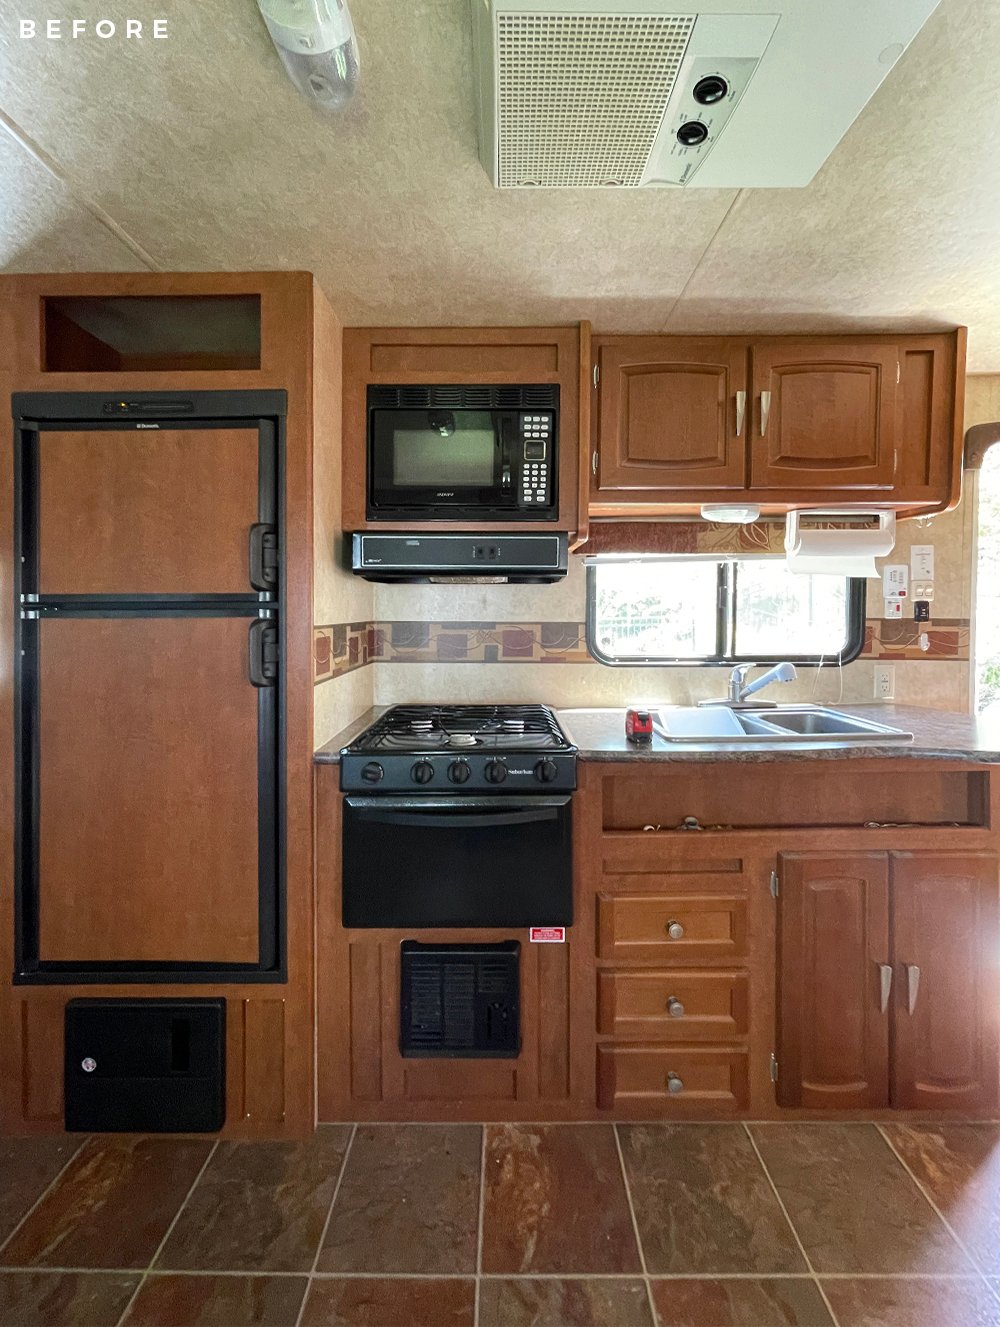 Can you believe the difference? It’s amazing what paint, hardware, updated plumbing fixtures, new window treatments, and a different backsplash will do for a tiny kitchen. Everything in the kitchen works wonderfully- it really just needed some cosmetic help!
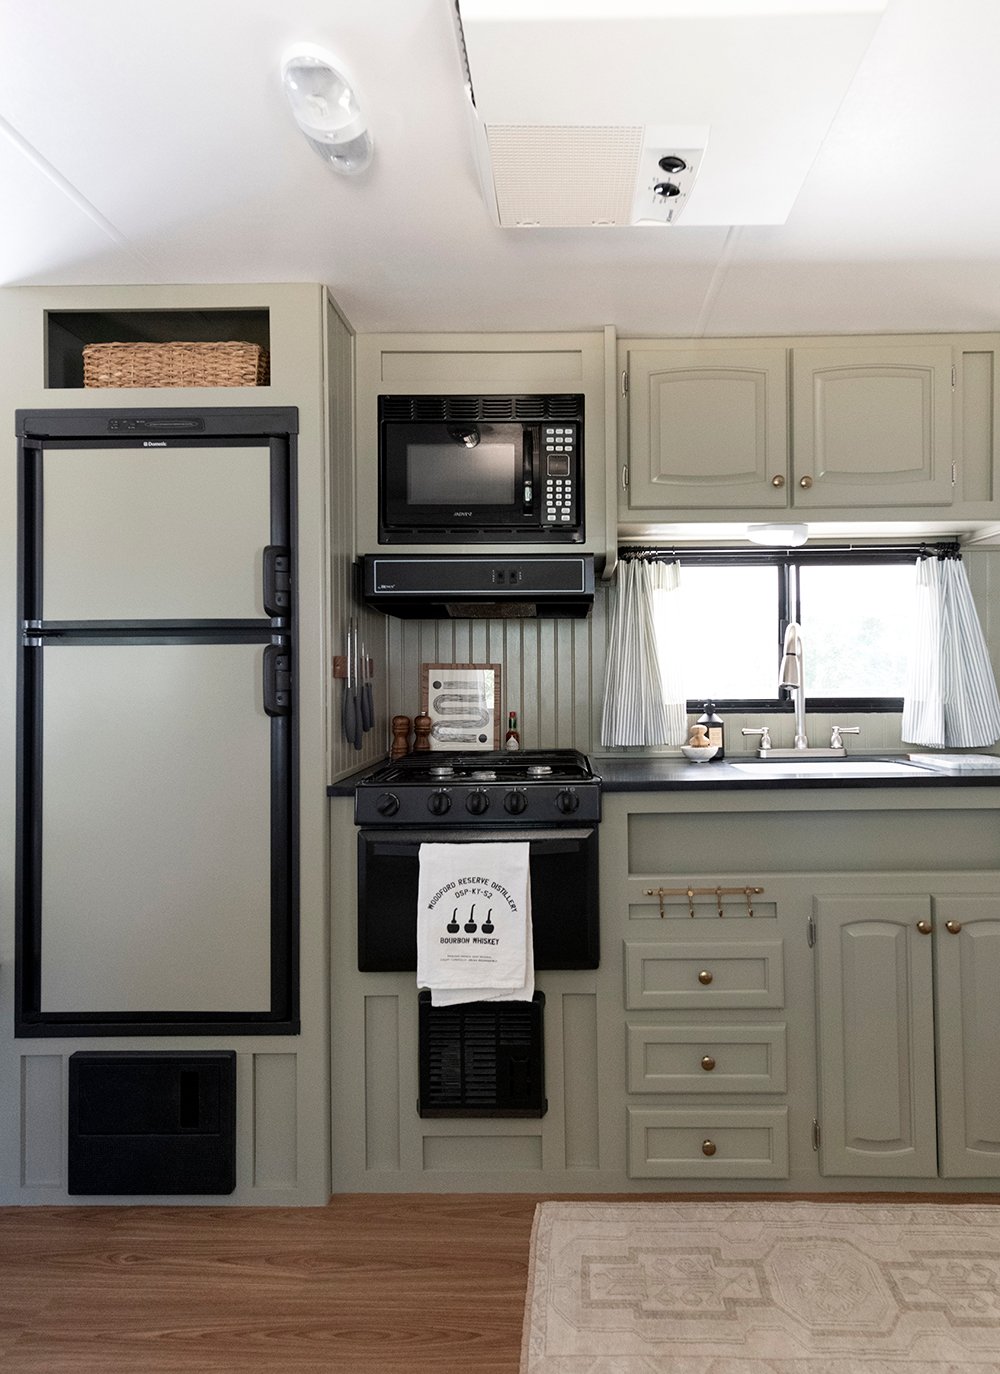 At the last minute, we also decided to switch the countertop and sink. I’m a fan of a big single basin sink (it’s just feels more functional to me), so we grabbed a discounted sink from a local outlet, and again- used solid surface remnant slabs for the countertop.
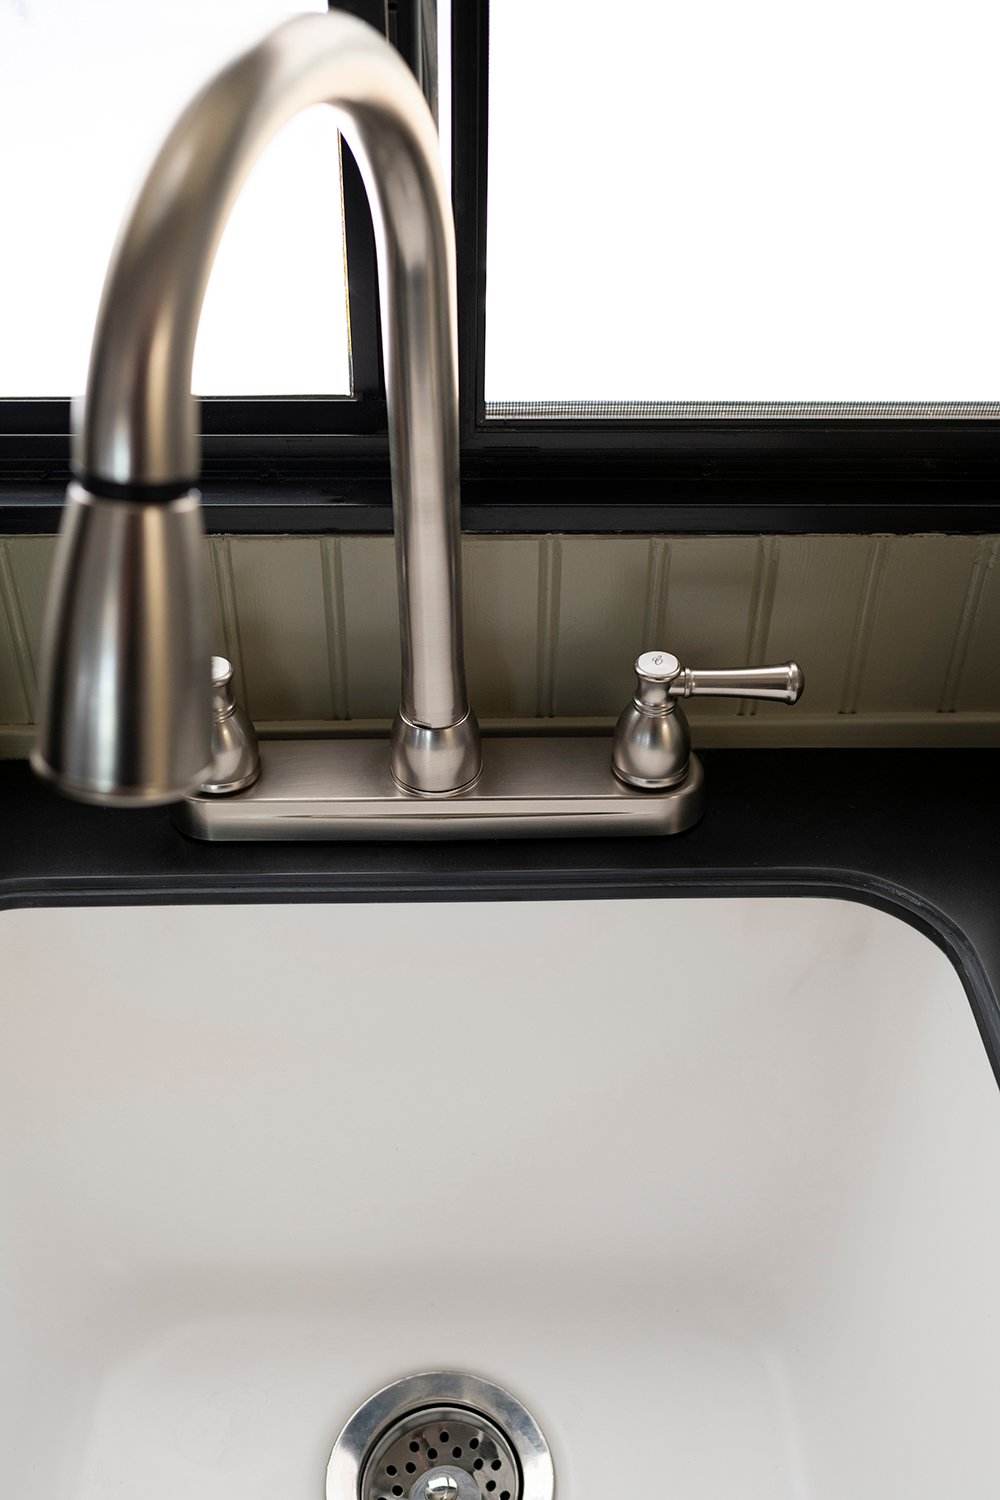 Along with designing with transportation in mind, I also had to be aware of material weight. Since this is a camper, we had to use lightweight fixtures. It was a bit of a struggle to find aesthetically pleasing RV faucets, but I finally found a pull-down gooseneck option with a classic look.
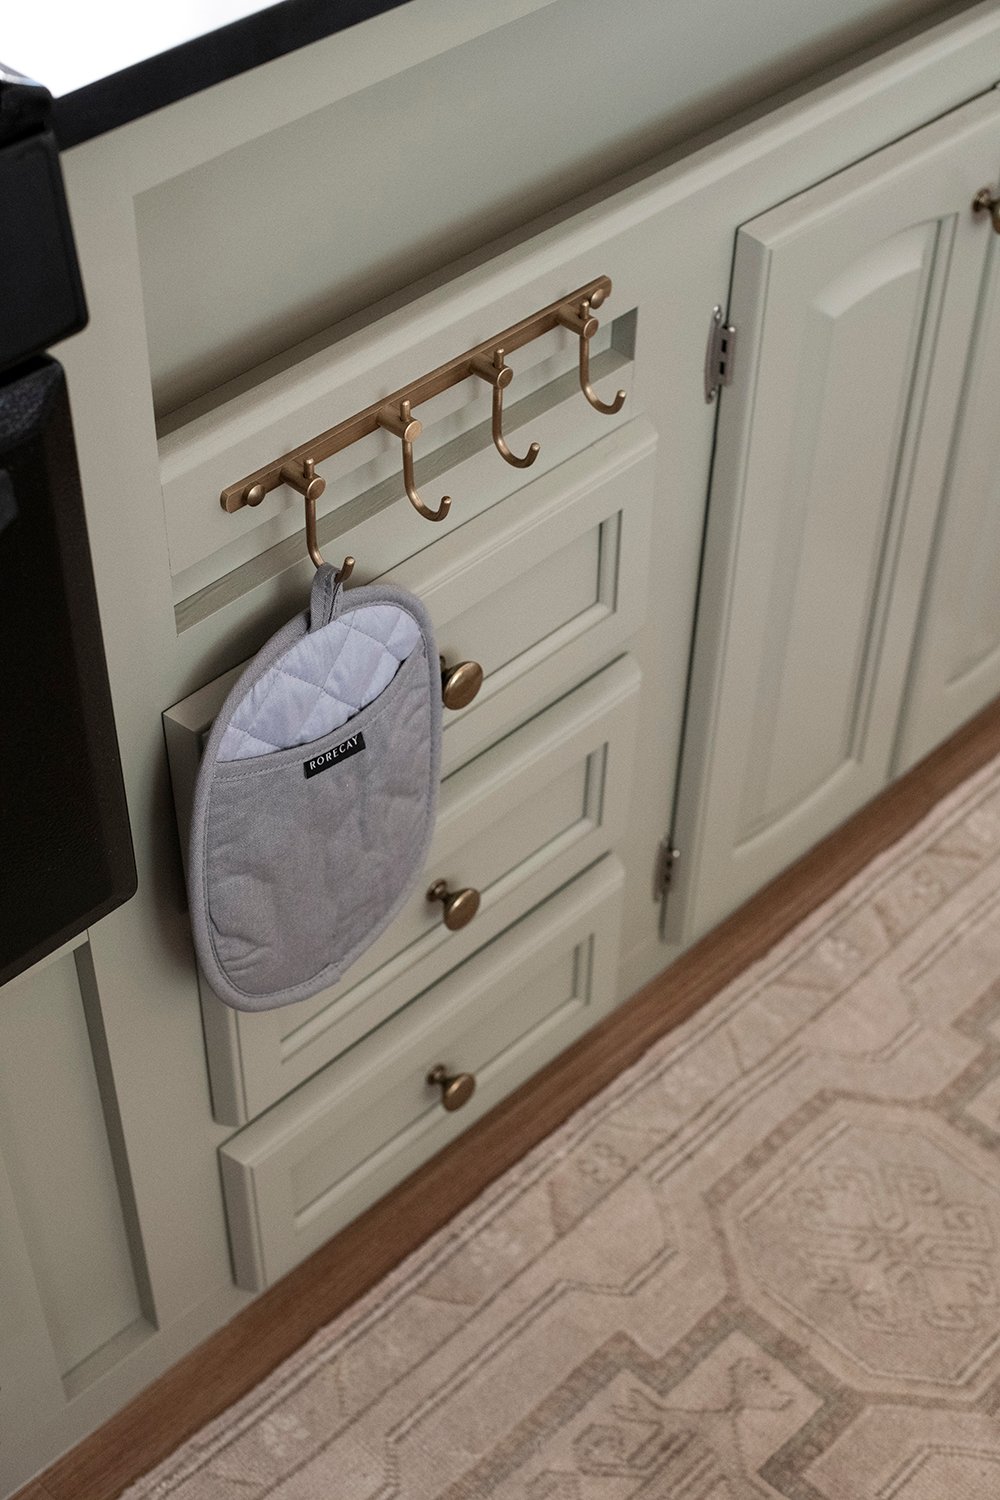 I also tried to squeeze the maximum amount of functionality from the kitchenette- using every nook, cranny, and negative space. From hooks and drawer organizers to a magnetic knife block, I tried to be intentional with decor that doubles as functional design.
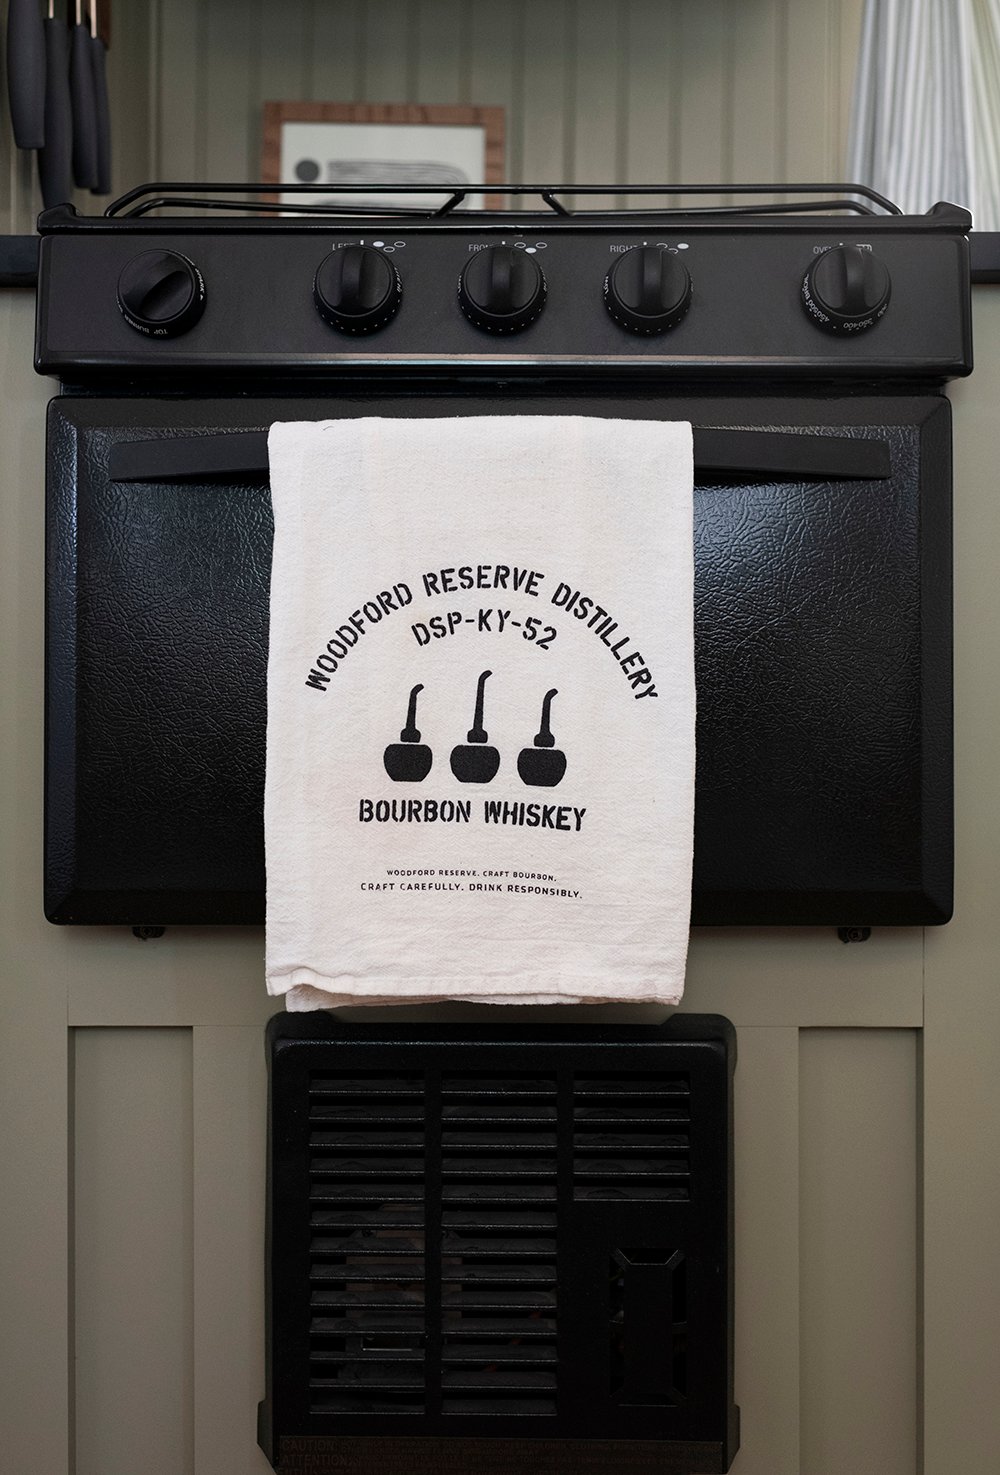 Of course it was also fun to add our personality to the camper. This cotton kitchen towel came from a bourbon tasting we shared at Woodford Reserve years ago, along the bourbon trail in our home state of Kentucky. It felt like an appropriate addition to the camper- we always bring bourbon or whiskey camping. Is there anything better than sipping a cocktail around the campfire? I think not.
 You probably guessed that I’d style in a vintage rug! Is it a little extra? Totally- but vintage wool rugs are the easiest to clean and I love the softness it adds. We’ve had zero issues with it. I installed a rug pad beneath it, so it doesn’t shift. Funny enough- Crosby thought that was where he was supposed to sleep.
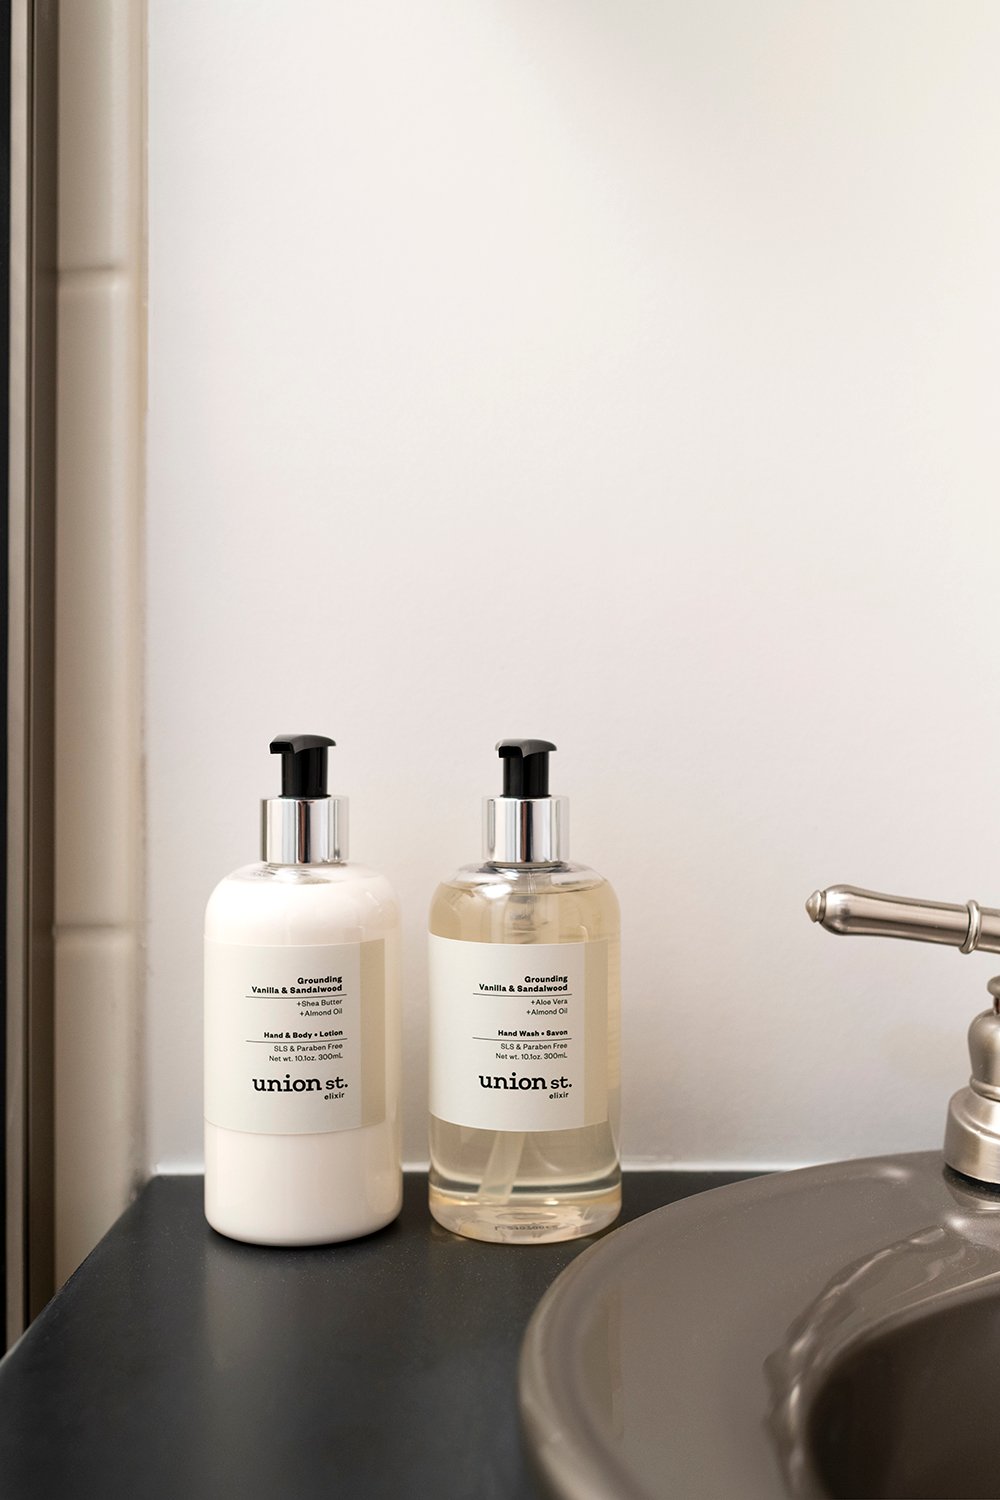
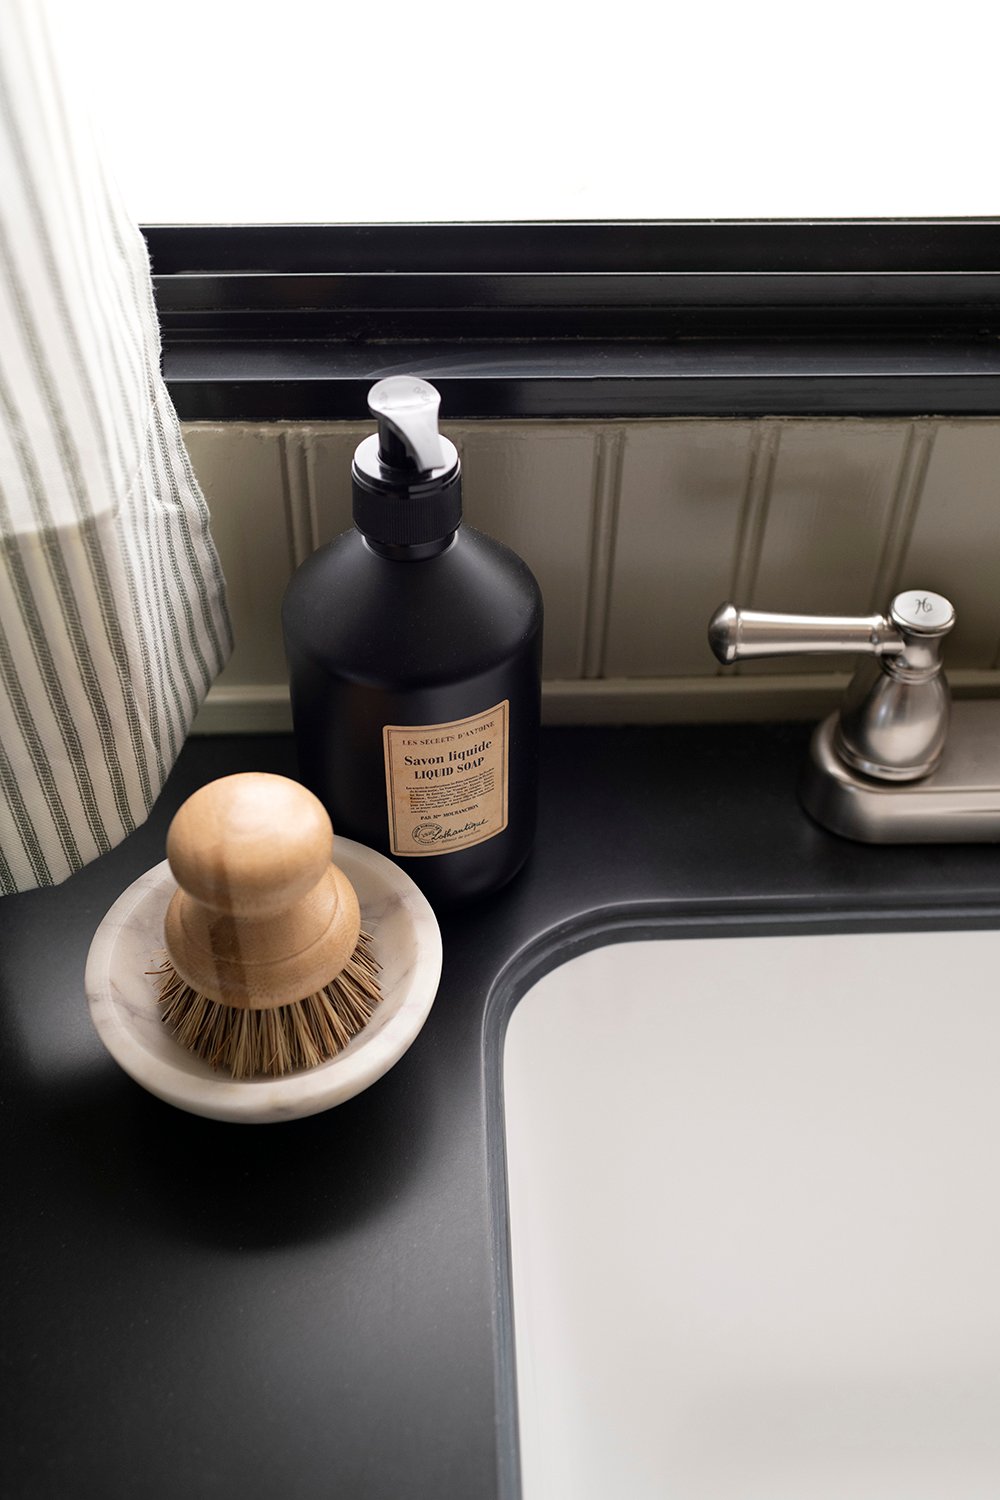 It also felt like such a luxury to be using my favorite soap while camping last weekend. Having the camper truly does bring the comforts of home along on each trip. I noticed myself appreciating little things like that- good soap, eating ice cream from the freezer, getting the dishes exceptionally clean (which never happens when tent camping), etc.
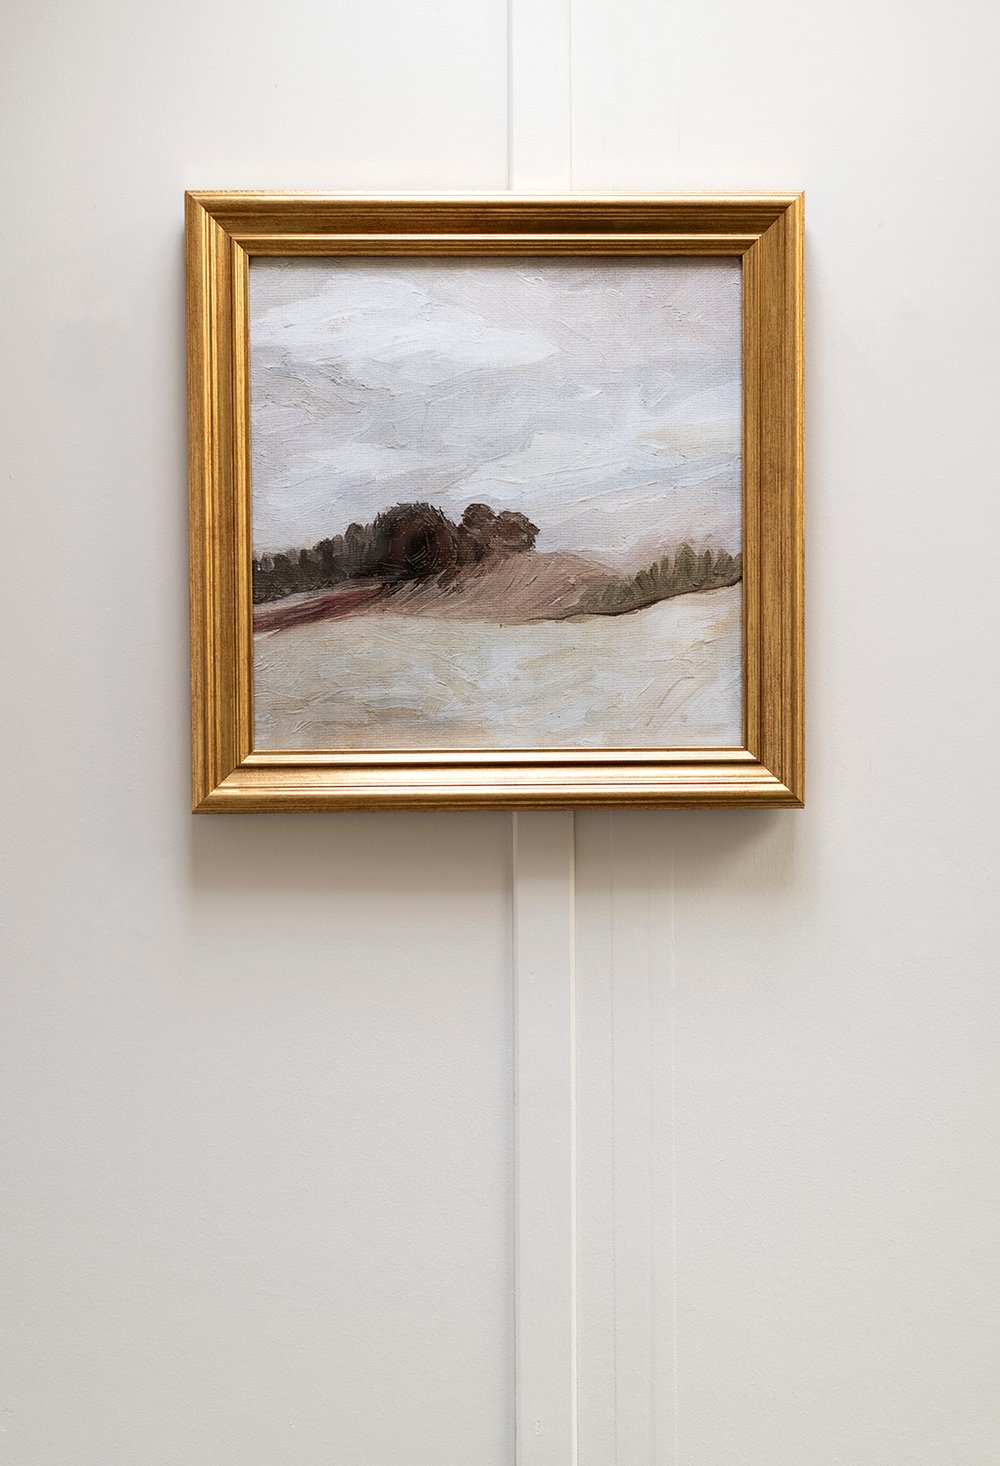
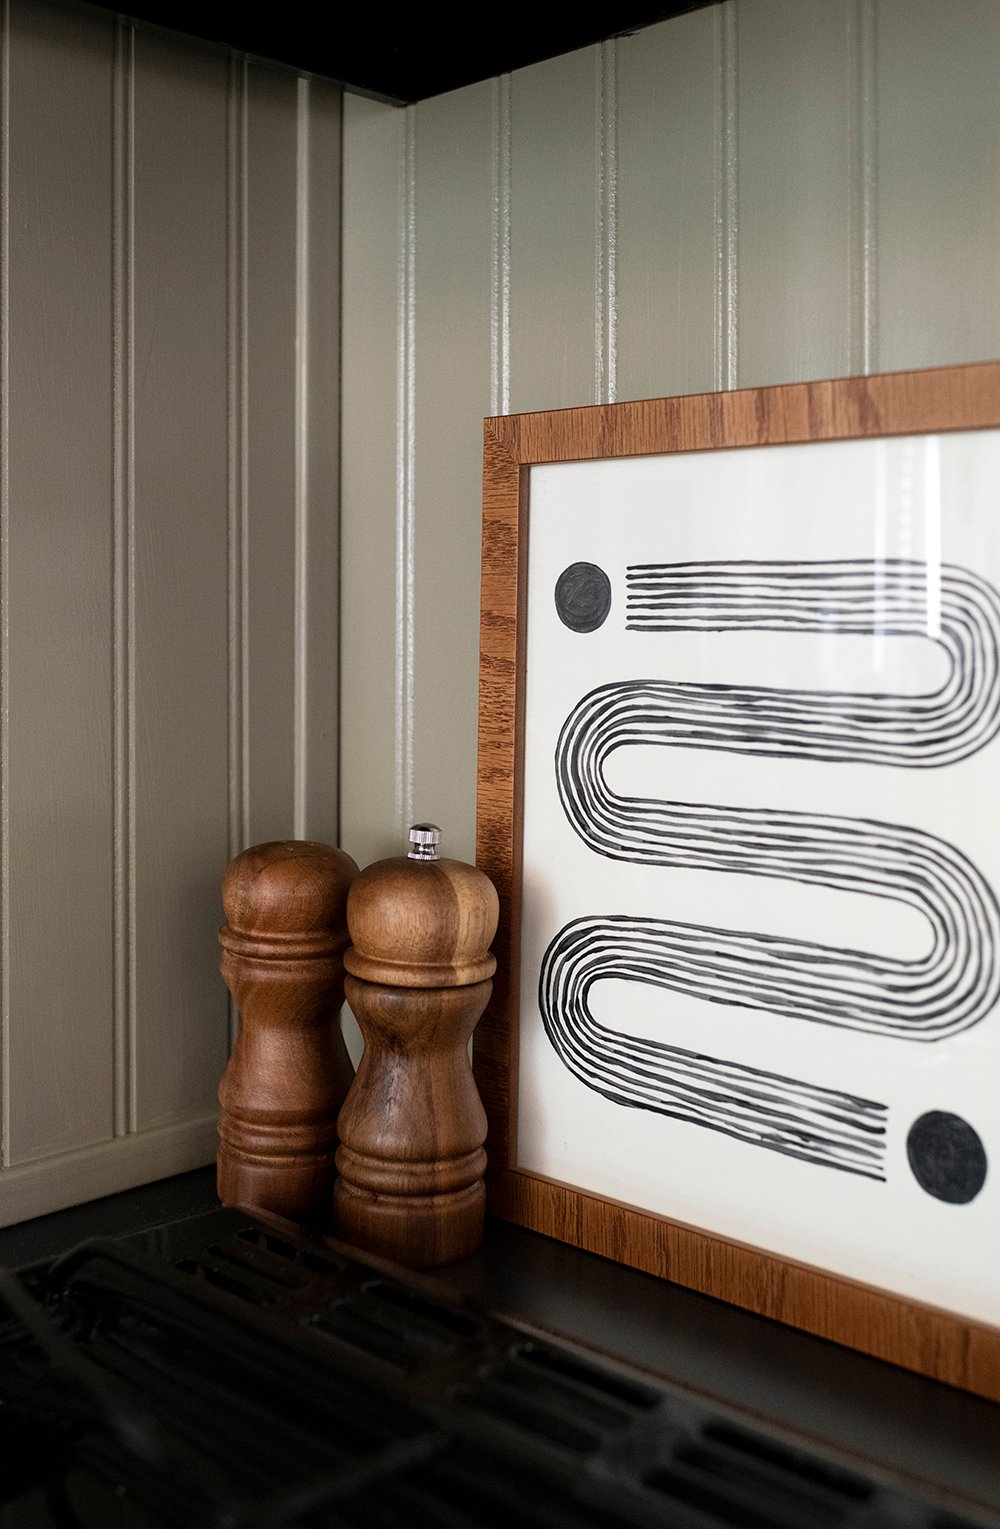 One of our friends was joking that of course we’d have art sprinkled throughout our camper… to which I say, why not?! Not a single piece of art has tumbled to the ground or shifted since installed… between hooks, nails, and lots of velcro- everything is very secure, easy to clean (wipeable), and helps this place feel a bit more like home. Again- I wasn’t going for boring.
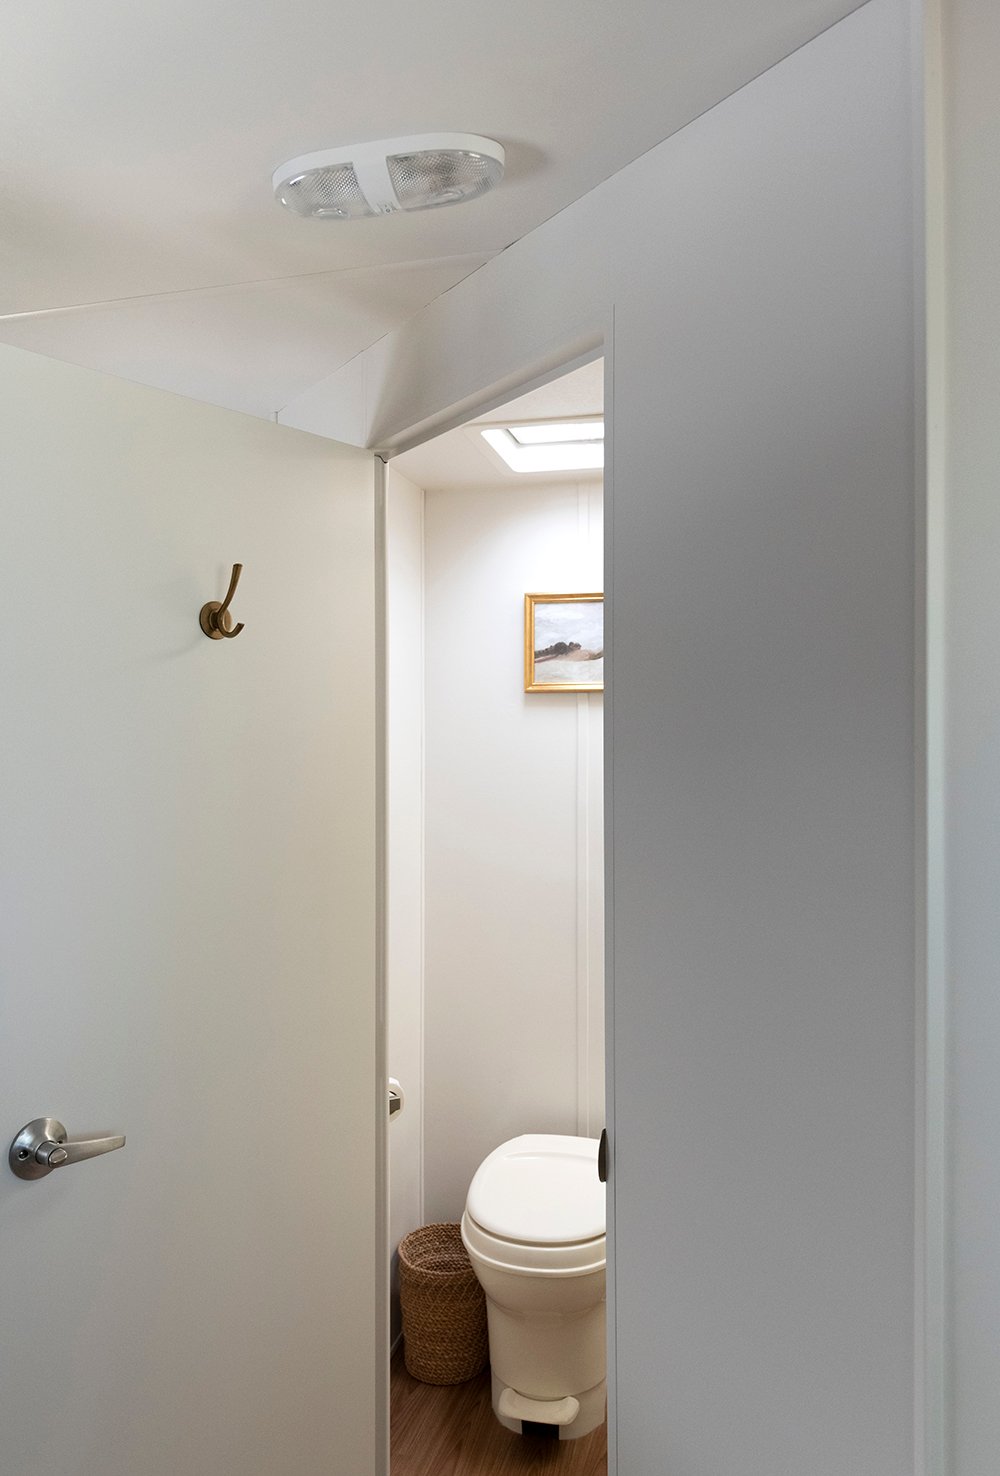 Moving along to the camper bathroom… it’s a small space, but having a flushing toilet on the road and in the wilderness- whoa! What a game changer. I joked with Emmett that as long as we’re towing the camper, I’ll never pee in a gas station bathroom again. Haha! Talk about convenient.
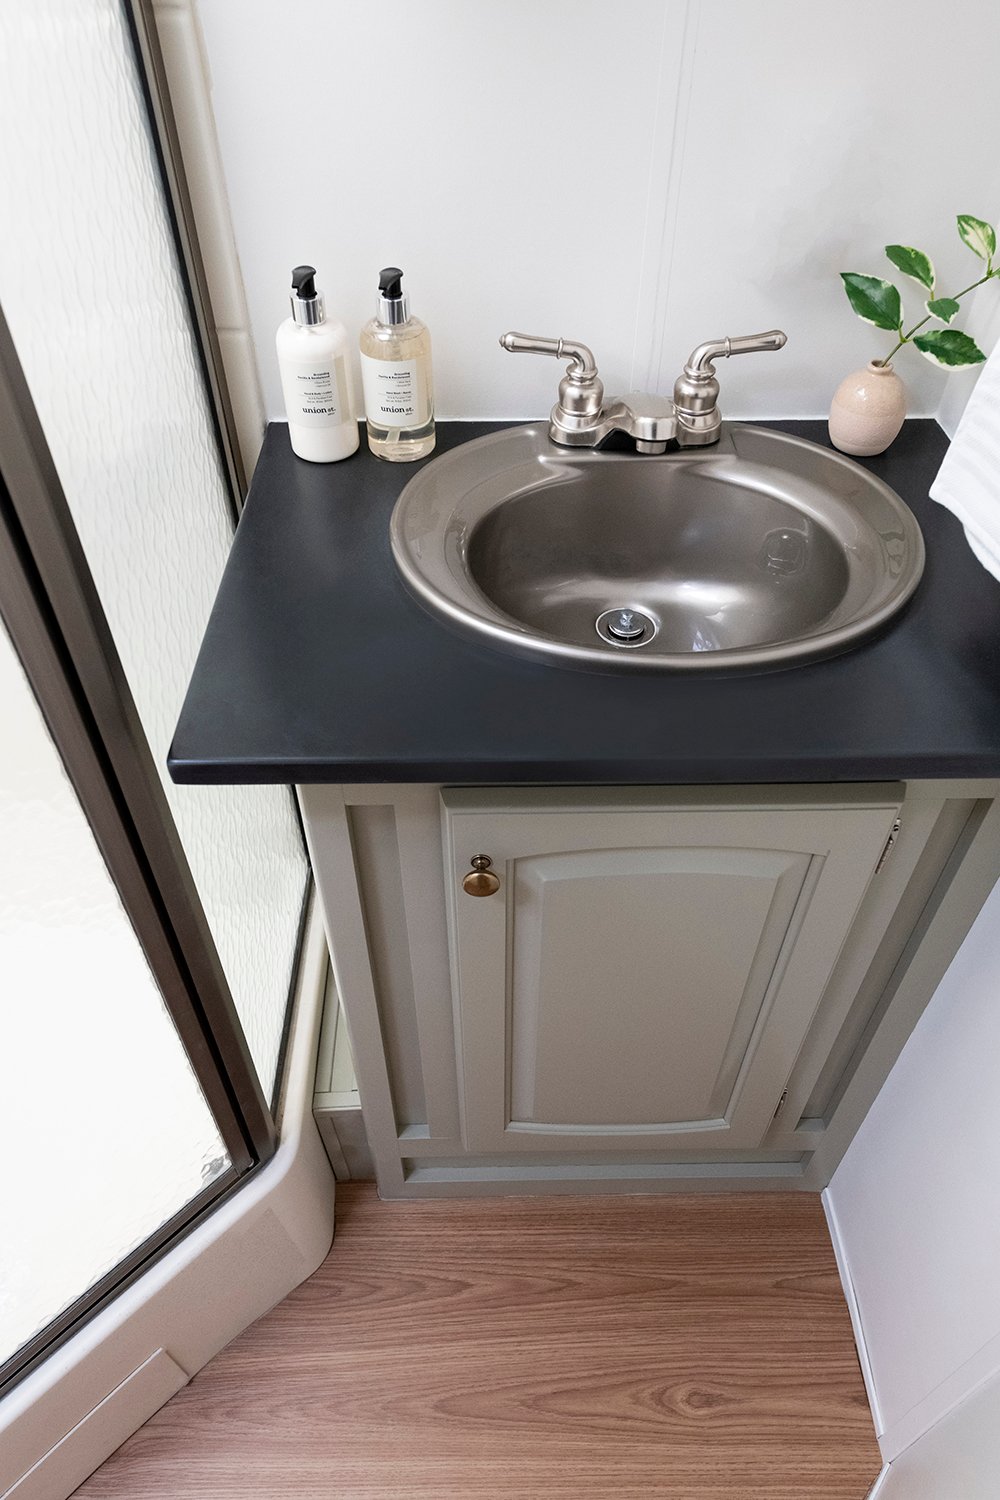
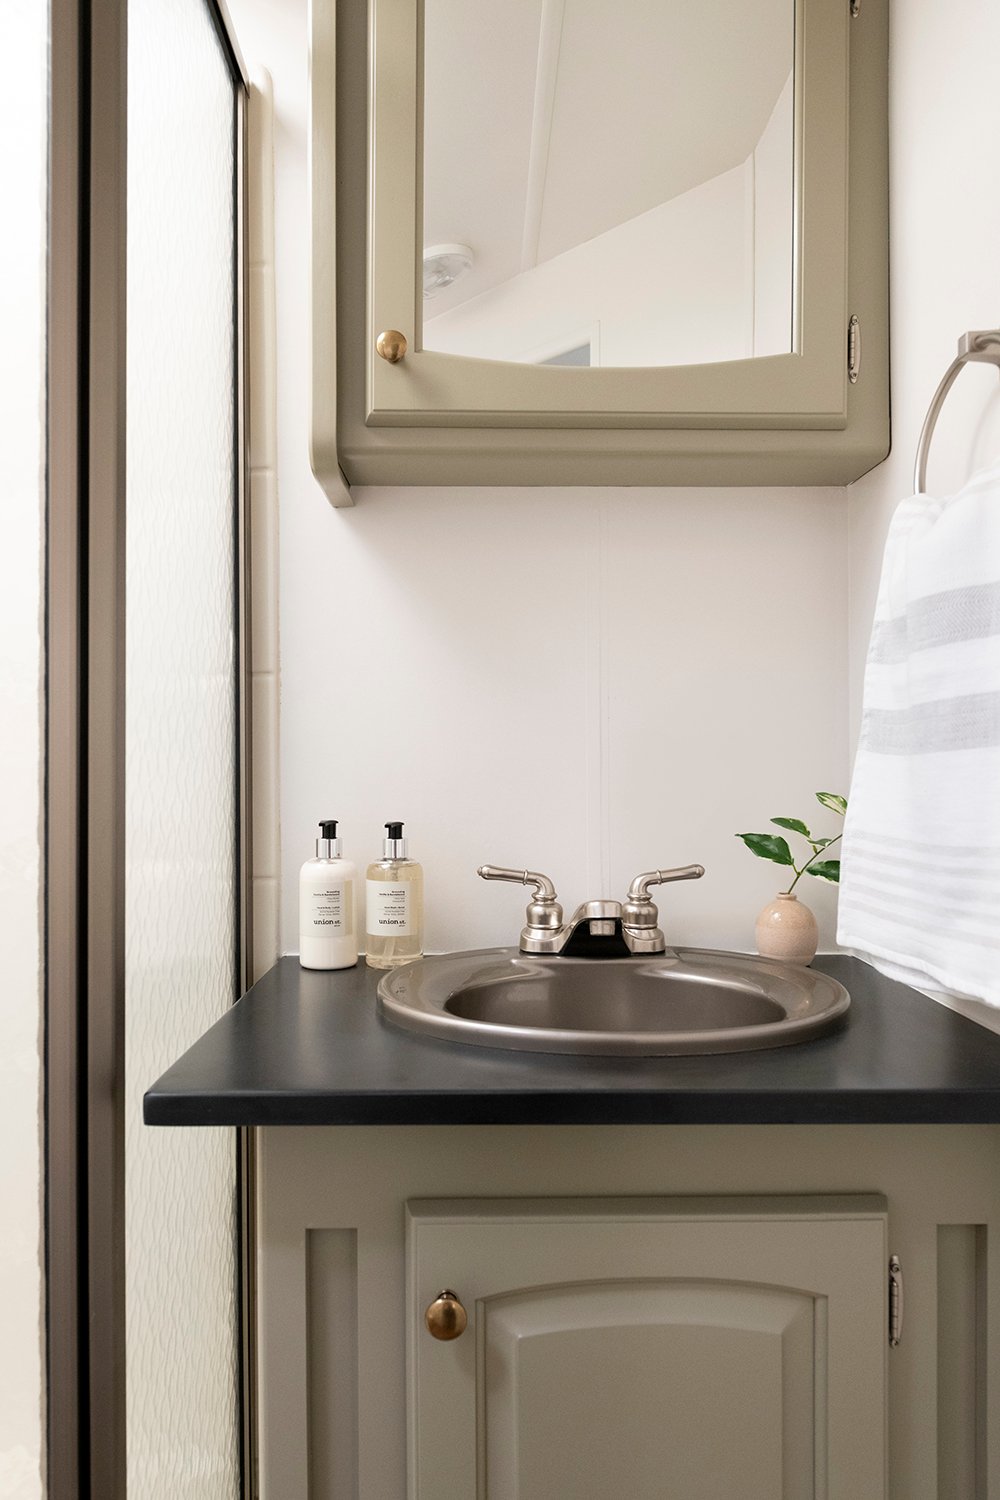 We kept the existing sink, vanity, and faucet in the bathroom… we just gave it a fresh coat of paint, swapped the hardware, and replaced the countertop.
 We used solid surface in here as well- to match the kitchen. Using remnants saved us a LOT of money, rather than buying new slabs. Check out this post for more ways to save money on major home buys (like countertops)!
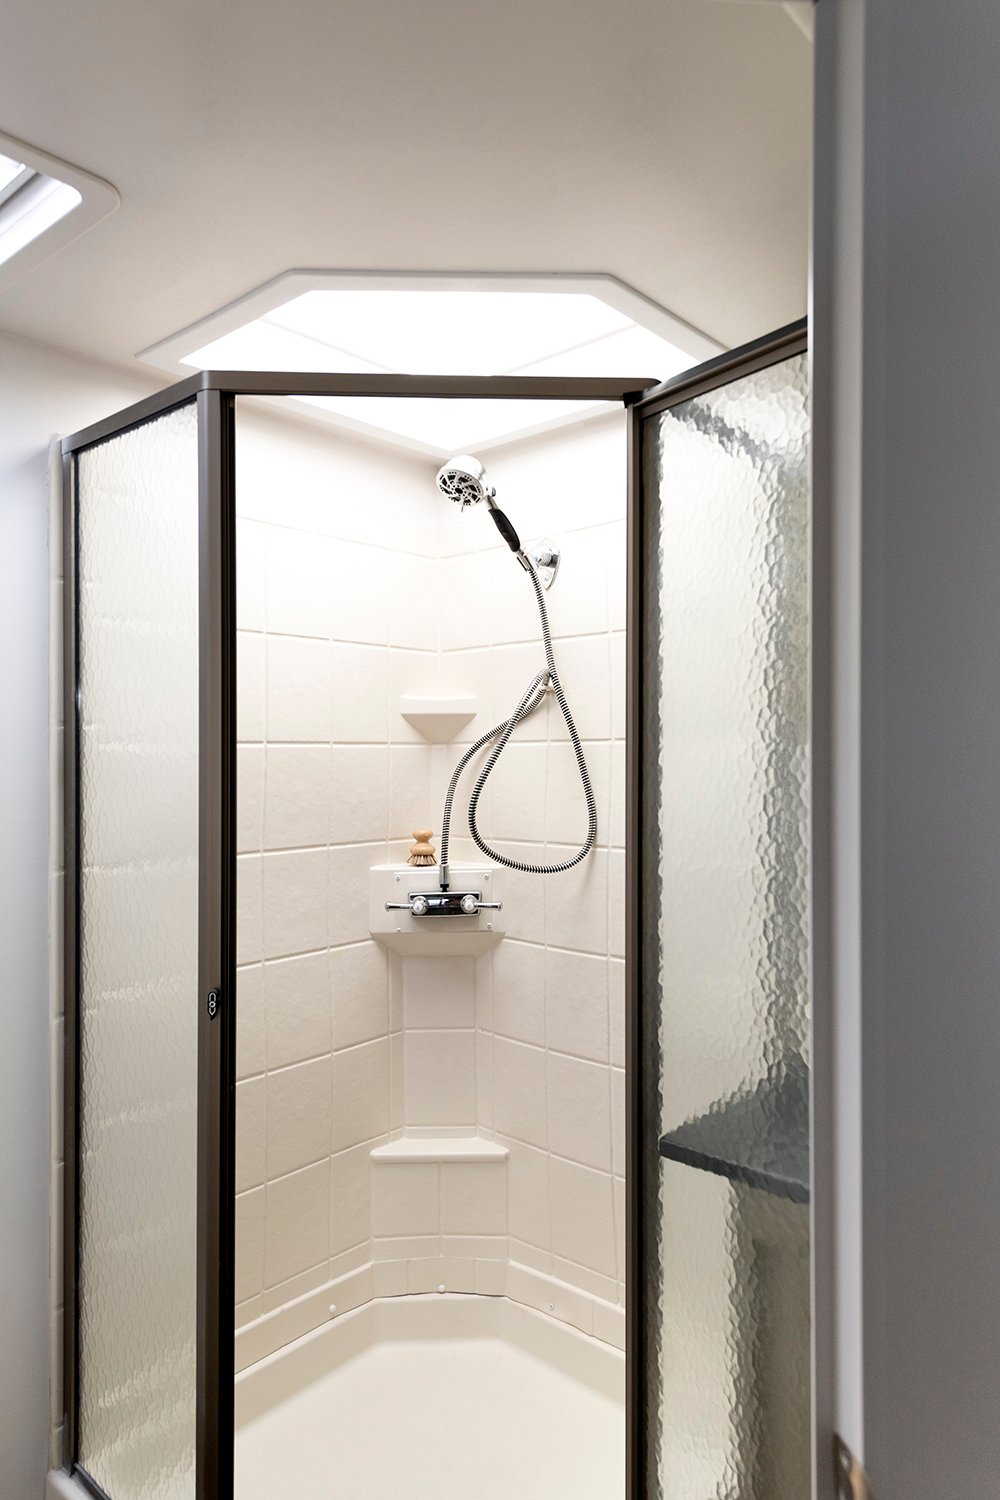 We left the shower as is- it’s pretty basic but functions great and isn’t too much of an eye sore. The shower is a nice neutral creamy white, so we opted to save money and leave it alone.
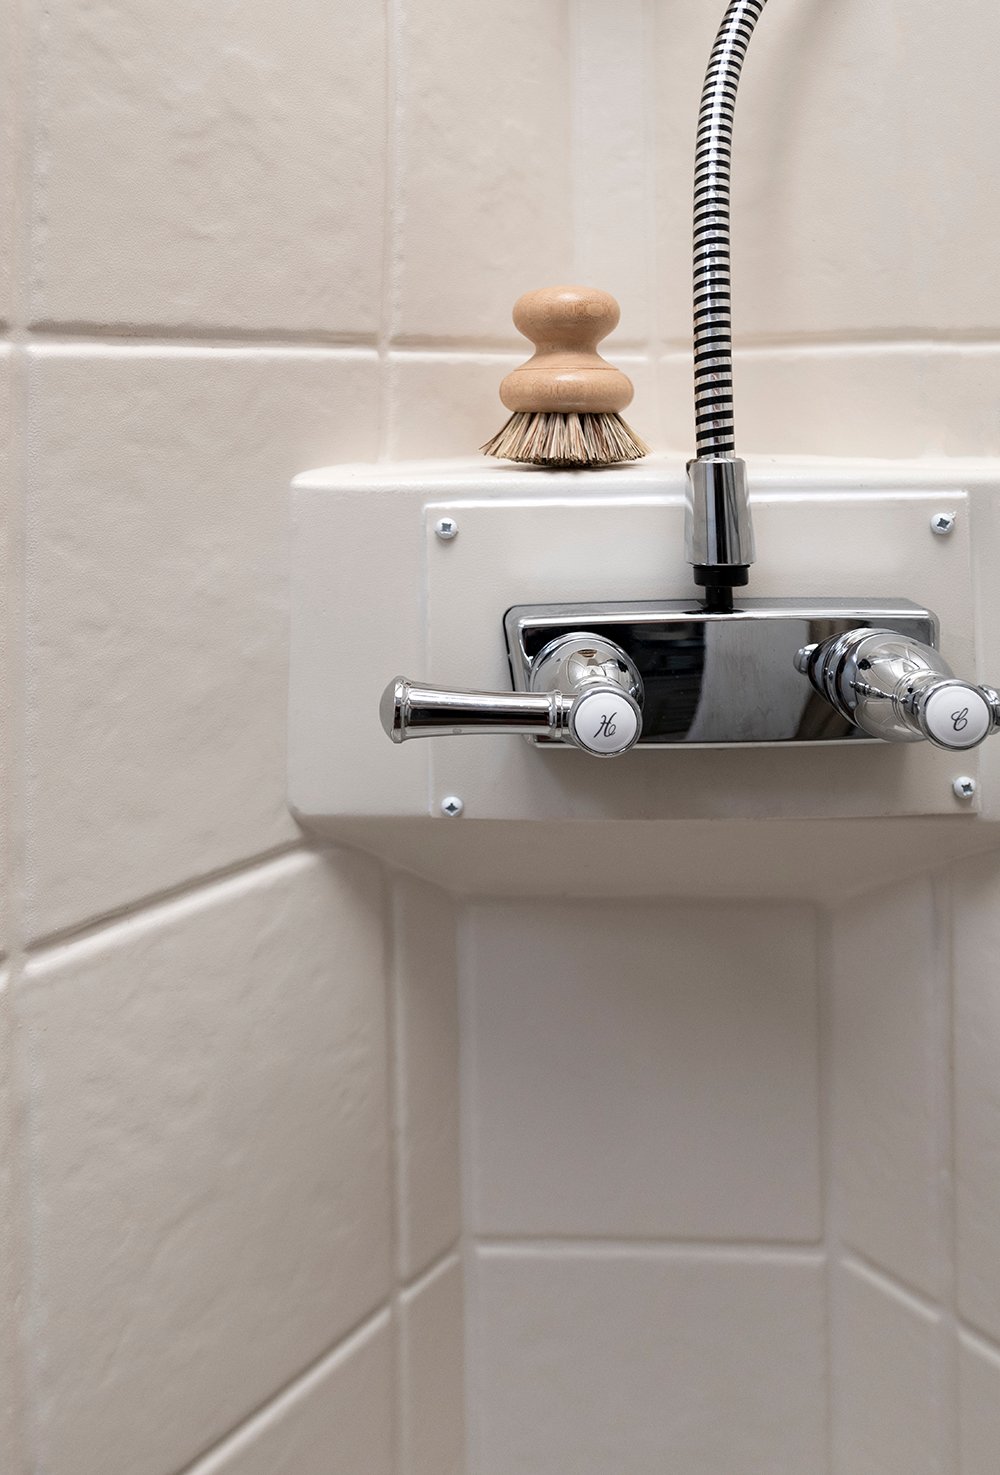 We did replace the shower head… this one had great reviews, has awesome water pressure, and I like the look of it. You know I’m a fan of hot / cold typography when it comes to plumbing fixtures- a nice traditional touch!
 We actually tried to install floating shelves above the toilet, which was a total disaster. Hanging things on the exterior walls of a camper can be very tricky. They were so small, I’m not sure we would have fit much on them anyway. I decided to scrap the idea all together (we have plenty of storage within the vanity) and opted to install art instead. I snagged this pretty piece painted by Jenny Komenda at Juniper Print Shop.
 When installing our LVP peel and stick flooring, I did continue it into the bathroom as well. There really isn’t room for a rug in this tiny space, but I did find a mini bath mat that we keep inside the cabinet or shower floor, when we’re not using it.
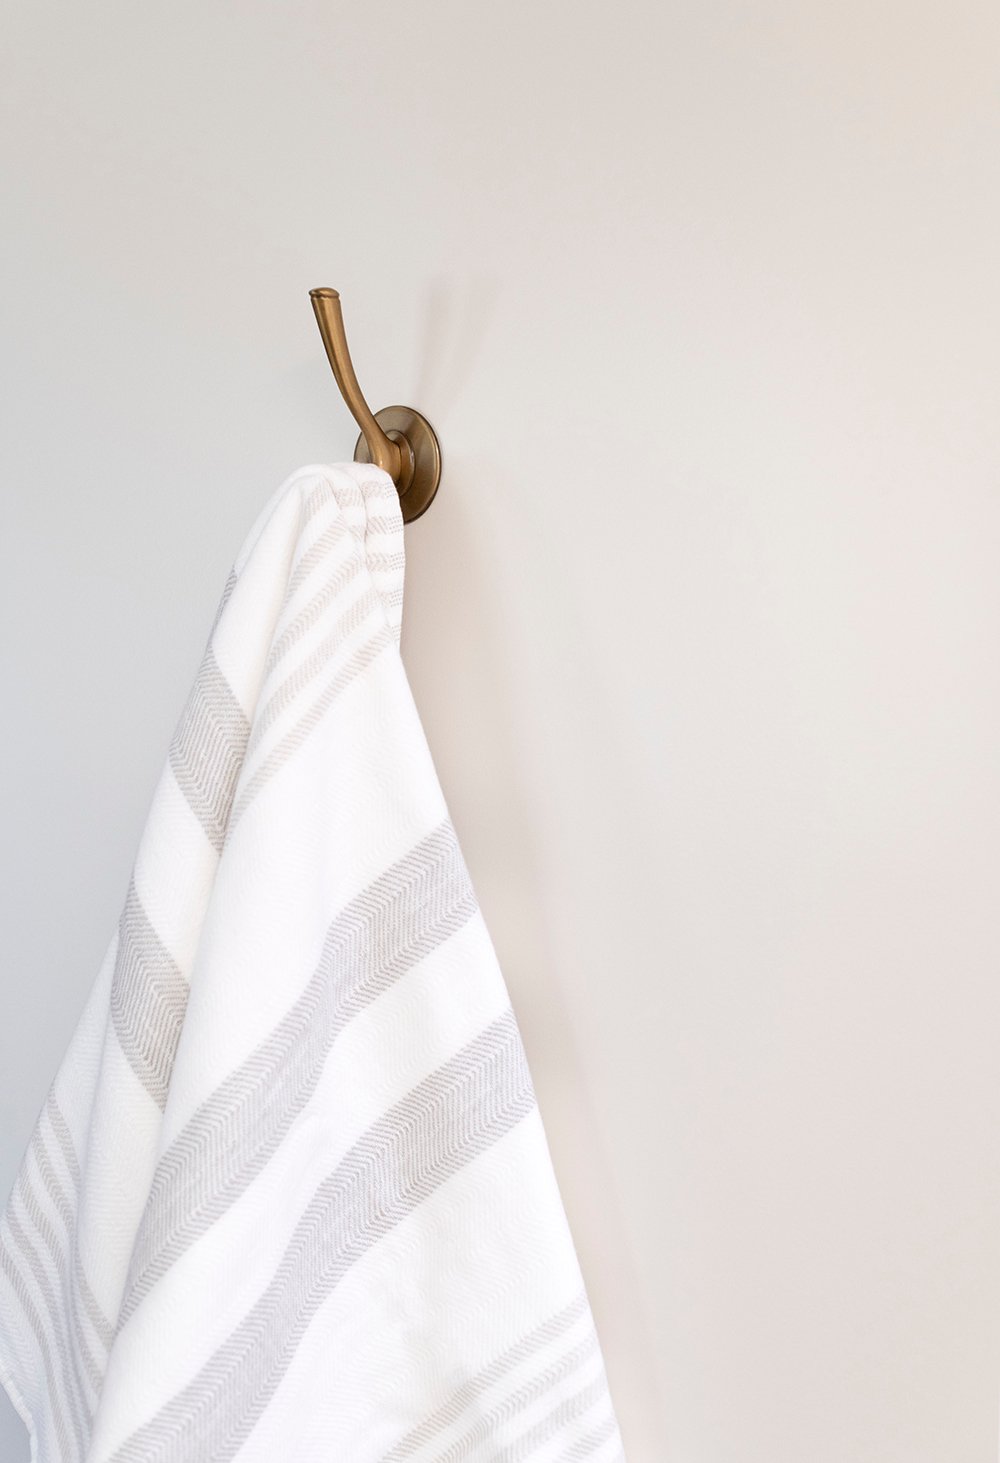 We also installed pretty brass hooks throughout! These peel and stick adhesive hooks are the easiest to install and have been wonderful for hanging damp towels, dog leashes, and keys. I sprinkled them throughout the camper. Let’s move onto the sleeping area next…
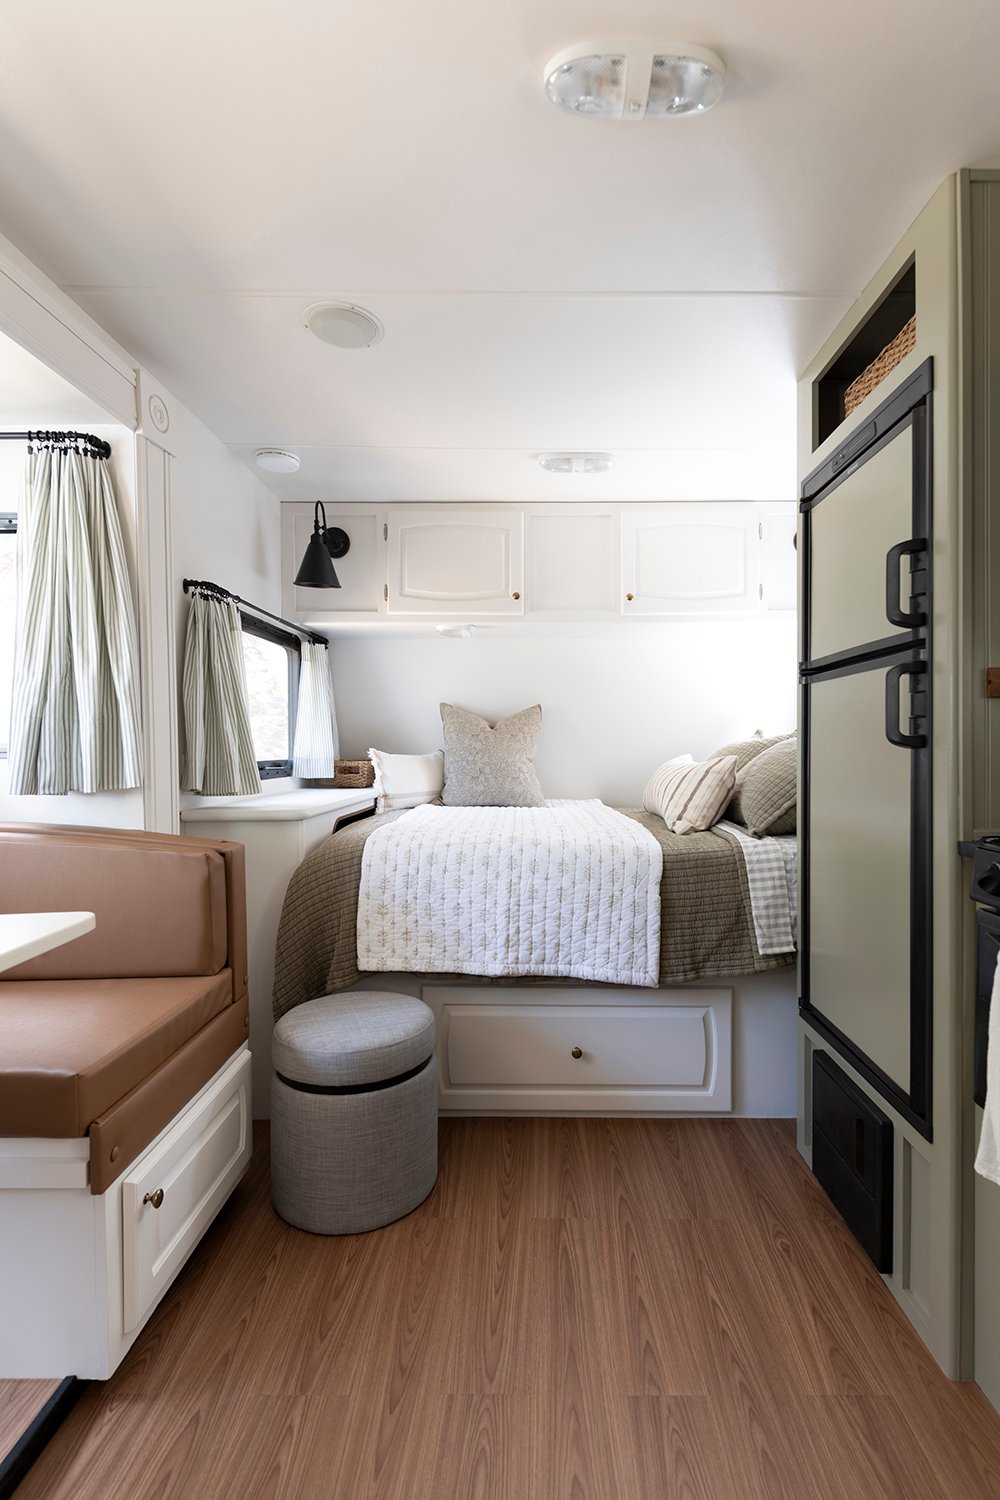 This was the exact layout we were looking for when choosing a camper. We both liked the bed location- it’s far from the door and can also double as extra seating or a daybed. The banquette seating also turns into another queen size bed, should we ever need it. That’s currently where the dogs sleep- they’re so spoiled.
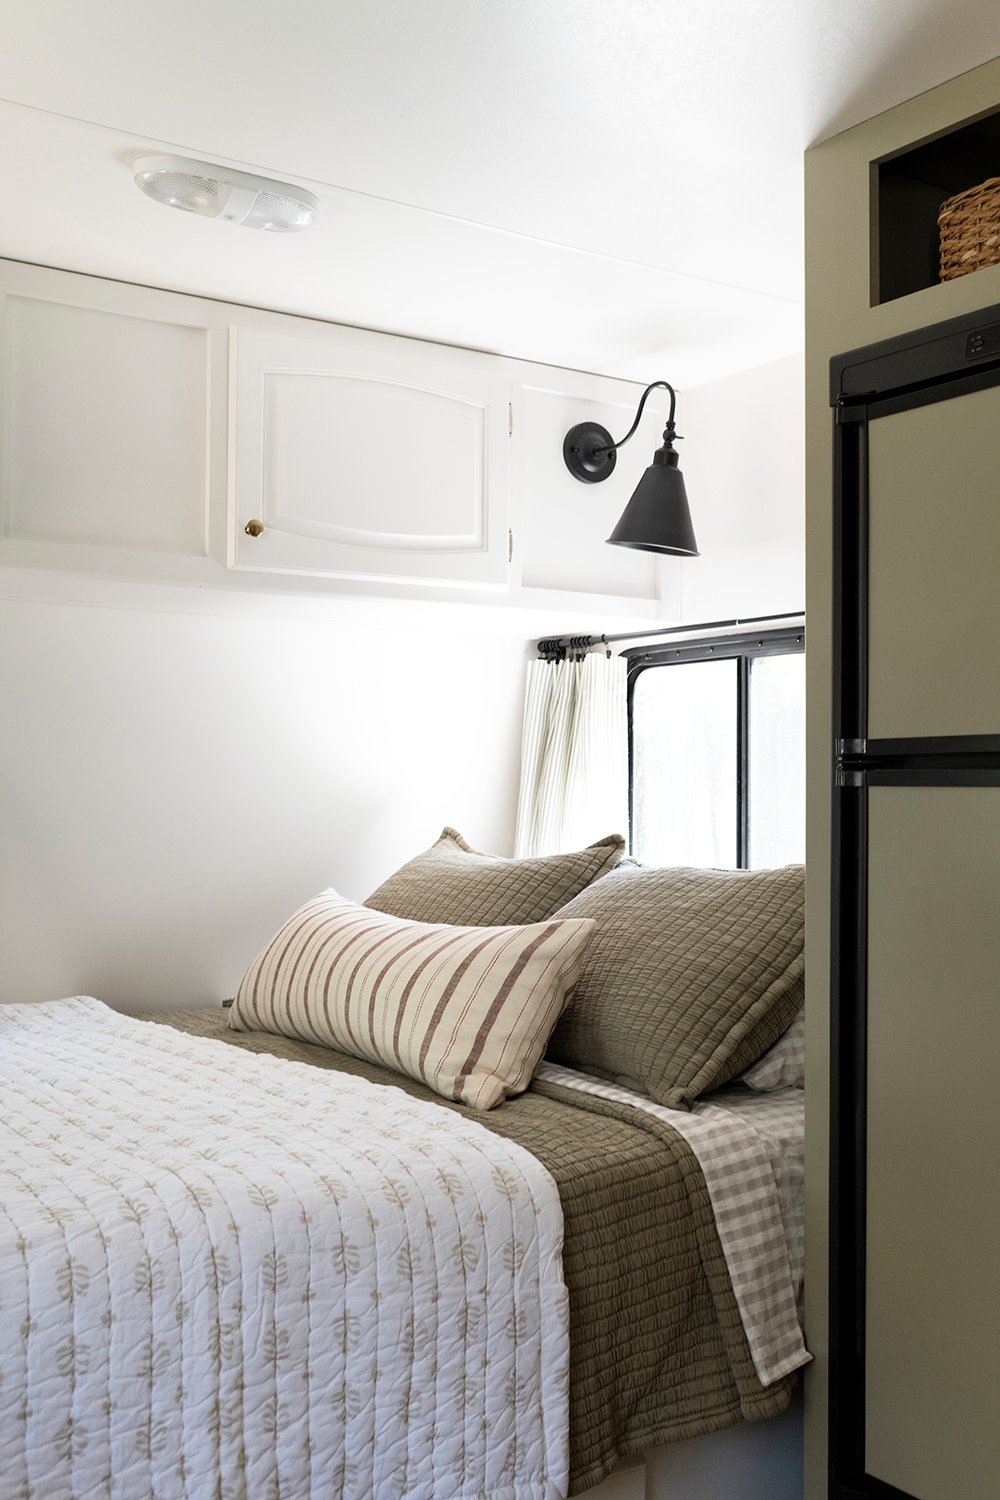 I used bedding we already had to save money, so I’m sure many of these textiles and bedding items may look familiar to you. I did buy this cotton sheet set, and layered on my favorite Annie Selke matelassé, along with a lighter quilt I picked up last summer. I love the pattern play!
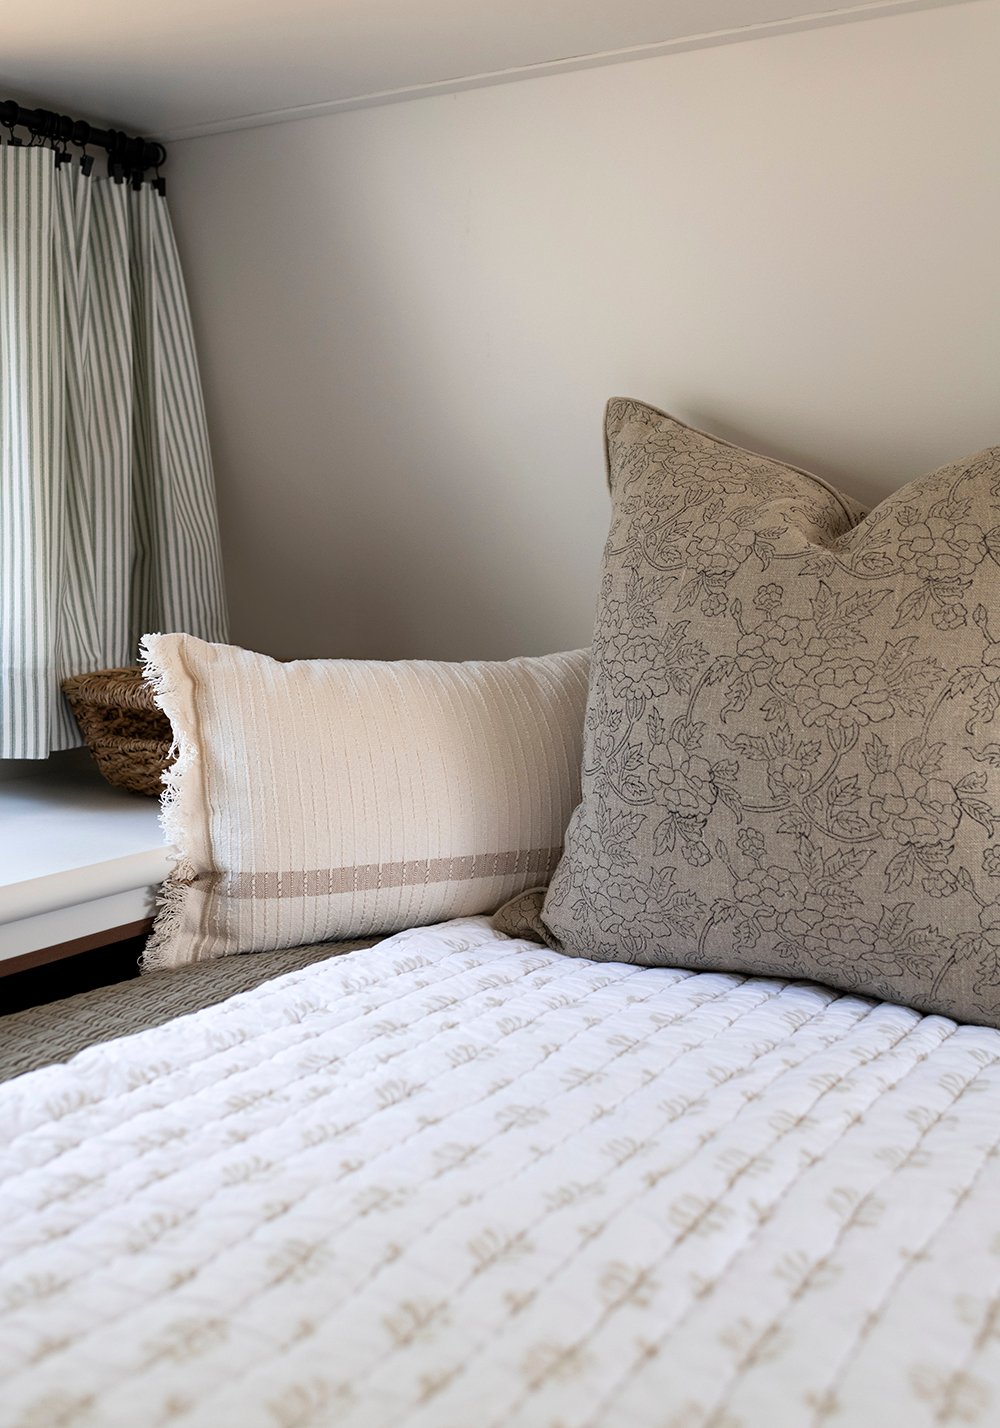 I tossed some extra pillows onto the foot of the bed because we do use this space for lounging (in addition to sleeping). Like I mentioned- it kind of acts like additional seating and functions as a daybed or big sofa during the daytime. Consider this a little sneak peek of some new fall additions to the Tuesday Made shop.
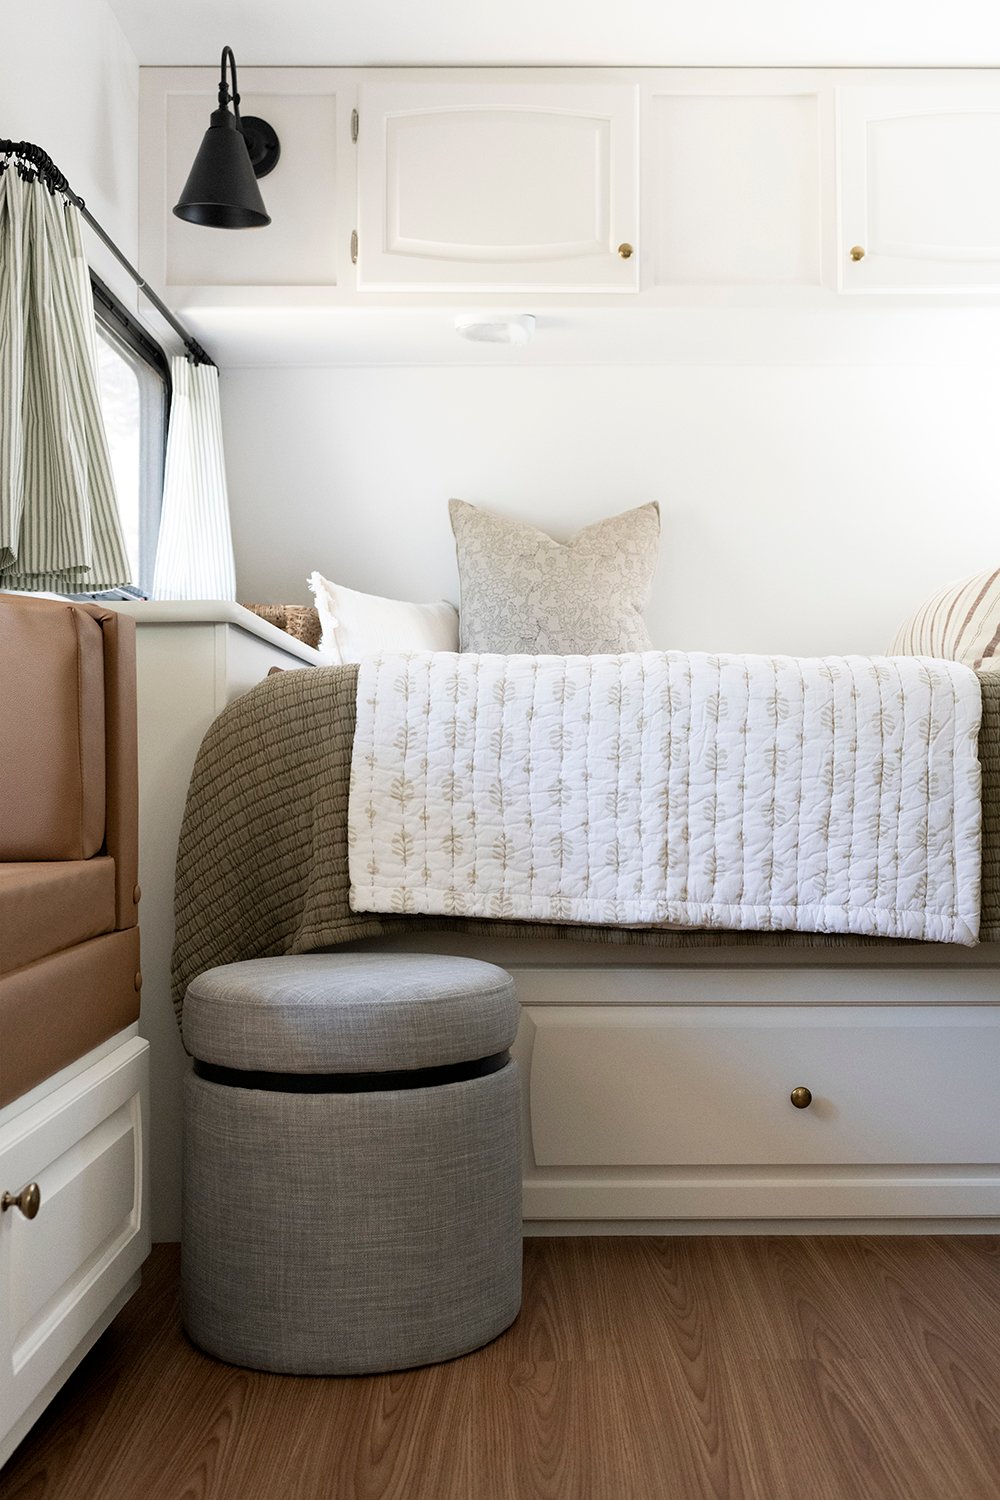 I also snagged an inexpensive storage ottoman on Prime Day. Wondering what we use it for? It’s makes a great additional seat and inside, I lined it with a laundry bag. We toss our dirty laundry in here… it’s kind of like a hidden hamper. As I begin to wrap this post up, I’ll drop all of the sources I used into a big collage below…
 To shop & explore, click on the thumbnails below- or use the numbered links at the bottom of the collage to shop… not all images are clickable.

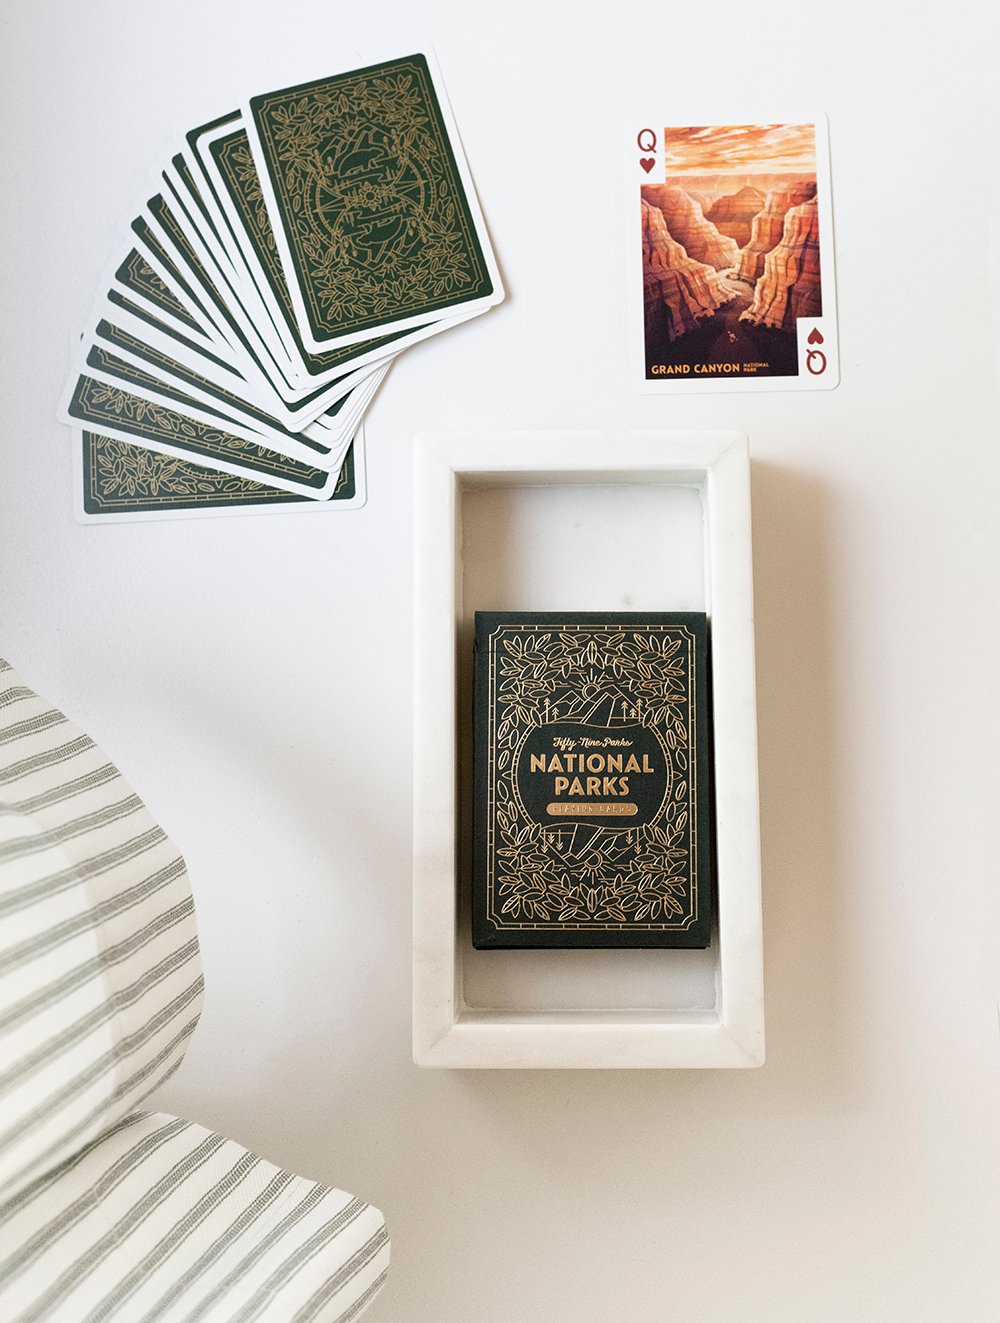
01: solar powered string lights // 02: marble brush set // 03: brass hook rack // 04: french soap // 05: rv pull-down sink faucet // 06: wood salt & pepper mill // 07: camping dinnerware set // 08: acrylic glasses // 09: cabinet color- SW featherstone // 10: pot holders // 11: brass hardware // 12: wood magnetic knife strip // 13: adjustable curtain rods // 14: peel and stick LVP flooring // 15: curtain ring clips // 16: white soft close trash can // 17: cambria quilt // 18: hand held shower head // 19: striped cafe curtains // 20: small tapered basket // 21: plaid sheet set // 22: national parks playing cards // 23: mini marble tray // 24: hanging woven basket // 25: cypress tree set // 26: storage ottoman (I painted the edge black) // 27: soap & lotion set // 28: oversized lumbar pillow // 29: textured lumbar pillow // 30: brass adhesive hook set // 31: floral block print lumbar // 32: pistachio striped pillow // 33: shower diverter // 34: woven waste basket // 35: hoya stem in stoneware vase // 36: fouta bath towels // 37: brass frame // 38: bear lake print // 39: sconce set // 40: annie selke matelassé (my color sold out) // 41: flax block print pillow // 42: vintage rugs // 43: basket bin // wall color- SW zurich white
If I missed any sources you’re curious about, just let me know! I’m happy to share in the comment section below. The majority of these items would translate well to a home… not just RV or campers.
I honestly had such a great time with this little renovation. It has me itching to tackle more small scale, budget friendly projects- that really force me to think outside the box. While we did spread out our work days (based on materials trickling in)… this project really only took us a full week or two to complete. I feel like it was a great way to try something new, in regards to design. My first camper interior project… what do you think? Did I do ok?! My mom is already asking if we want to trade campers with them and I’m tempted to say yes- just for another quick and easy gratification project. Ha! Totally joking. We have way too much going on and places to see in this cutie.
 Is the camper totally finished? Emmett is planning to swap out some switch plates for the outlets, and I still need to address the exterior. I’m going to wait until fall to focus on the outside- given it has been extremely hot here. I need to strip off the exterior graphics, and then it will be fully finished. I actually used to design & install graphics, wraps, and pinstripe classic cars during high school… that was my first job, so I have quite a bit of experience with graphic removal like this. I’ll share tips once I get to that point!
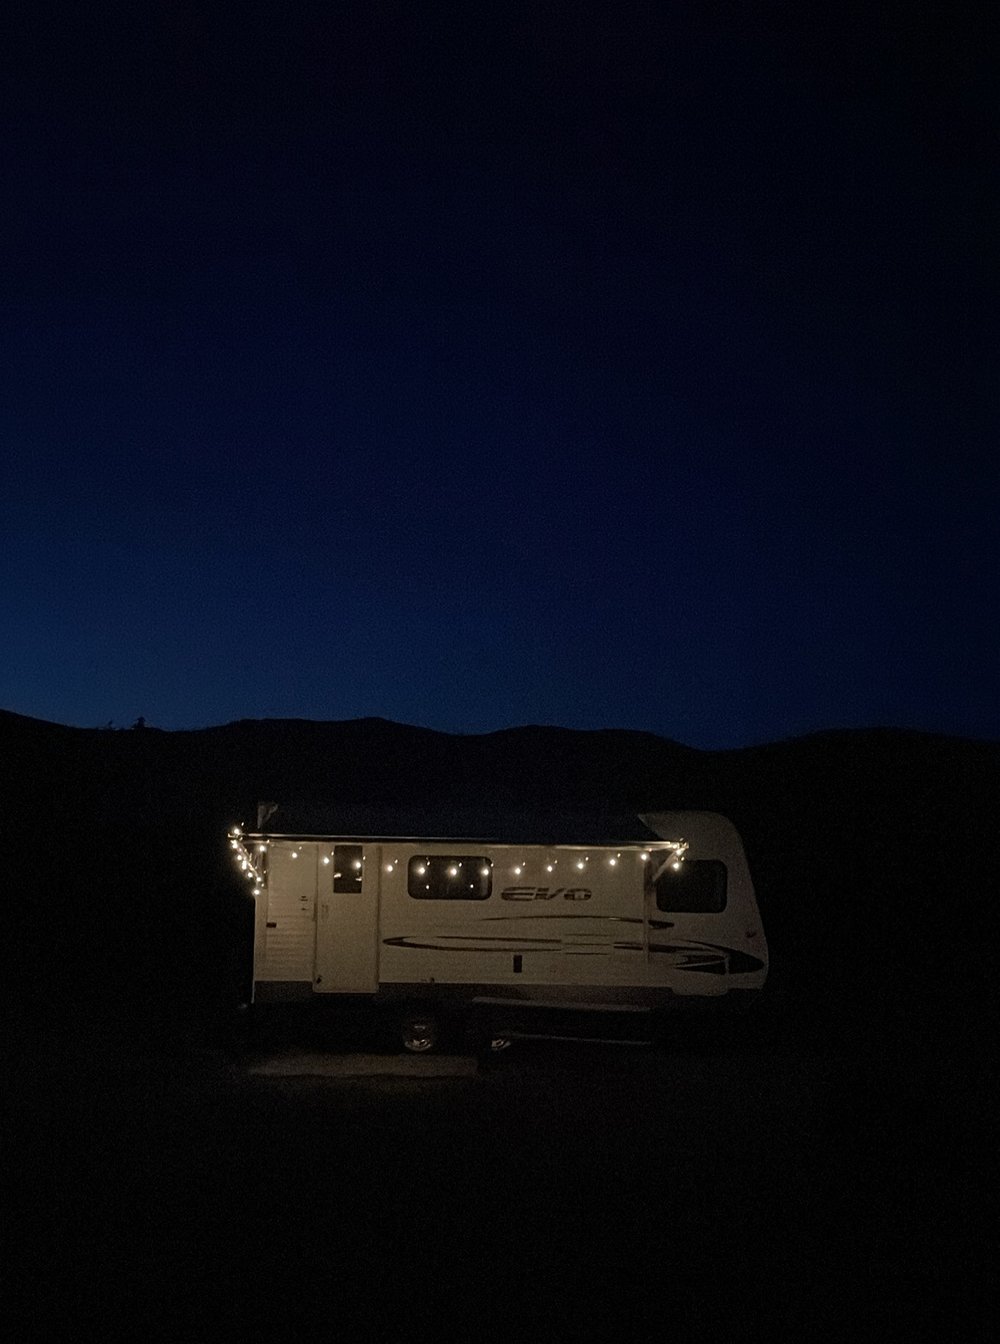 Would anyone be interested in a camper / RV post filled with organizational tips? They apply to small spaces as well. During our trip, I felt incredibly organized! Emmett even commented that I had thought of everything (maybe not exactly true, but I’m proud it worked well). Everything has a spot, everything stayed put during transit, and I felt like we comfortably fit everything we needed to bring (and then some)– with room to spare! I’d be happy to share our organizational systems, camping tips, and the little things we did behind the scenes that made a big difference. Let me know if that is of interest, and I’ll pull together a blog post for you. In the meantime, I compiled a big Amazon list containing my best RV & camper finds… much of which we purchased for this makeover. As always, let me know if you have any questions in the comment section below. Here’s to lots of fun adventures & memories in this thing! We’re already scheming more road trips. I’ll hop on IG and do a camper Q&A later this evening, once I’m back home from work.
