The Story Behind My Dog Portraits + A Peek at Crosby’s
 It’s funny- I get SO many questions and messages about my dog portraits. I’m pretty sure they were more popular than my actual One Room Challenge reveal- the laundry room. Ha! I really did enjoy painting them though and now they’ve become incredibly special and sentimental to me (remember this Domino article?)… especially after losing Finn, our giant schnauzer, last year. The portraits honestly stemmed as a result of poor planning on my part- a “happy accident”, if you will. I was in a time crunch for the ORC and the reveal date was rapidly approaching. I didn’t have art and needed something quirky, classical, and the right size to kick my laundry room up a notch. I hadn’t painted in years (since art school) and what started as a fast and “easy” idea to source artwork for my ORC space turned into something I’m really proud of and will never part with. Click through to hear more about the pieces, get a glimpse into my process, and see my newest portrait (Crosby!).
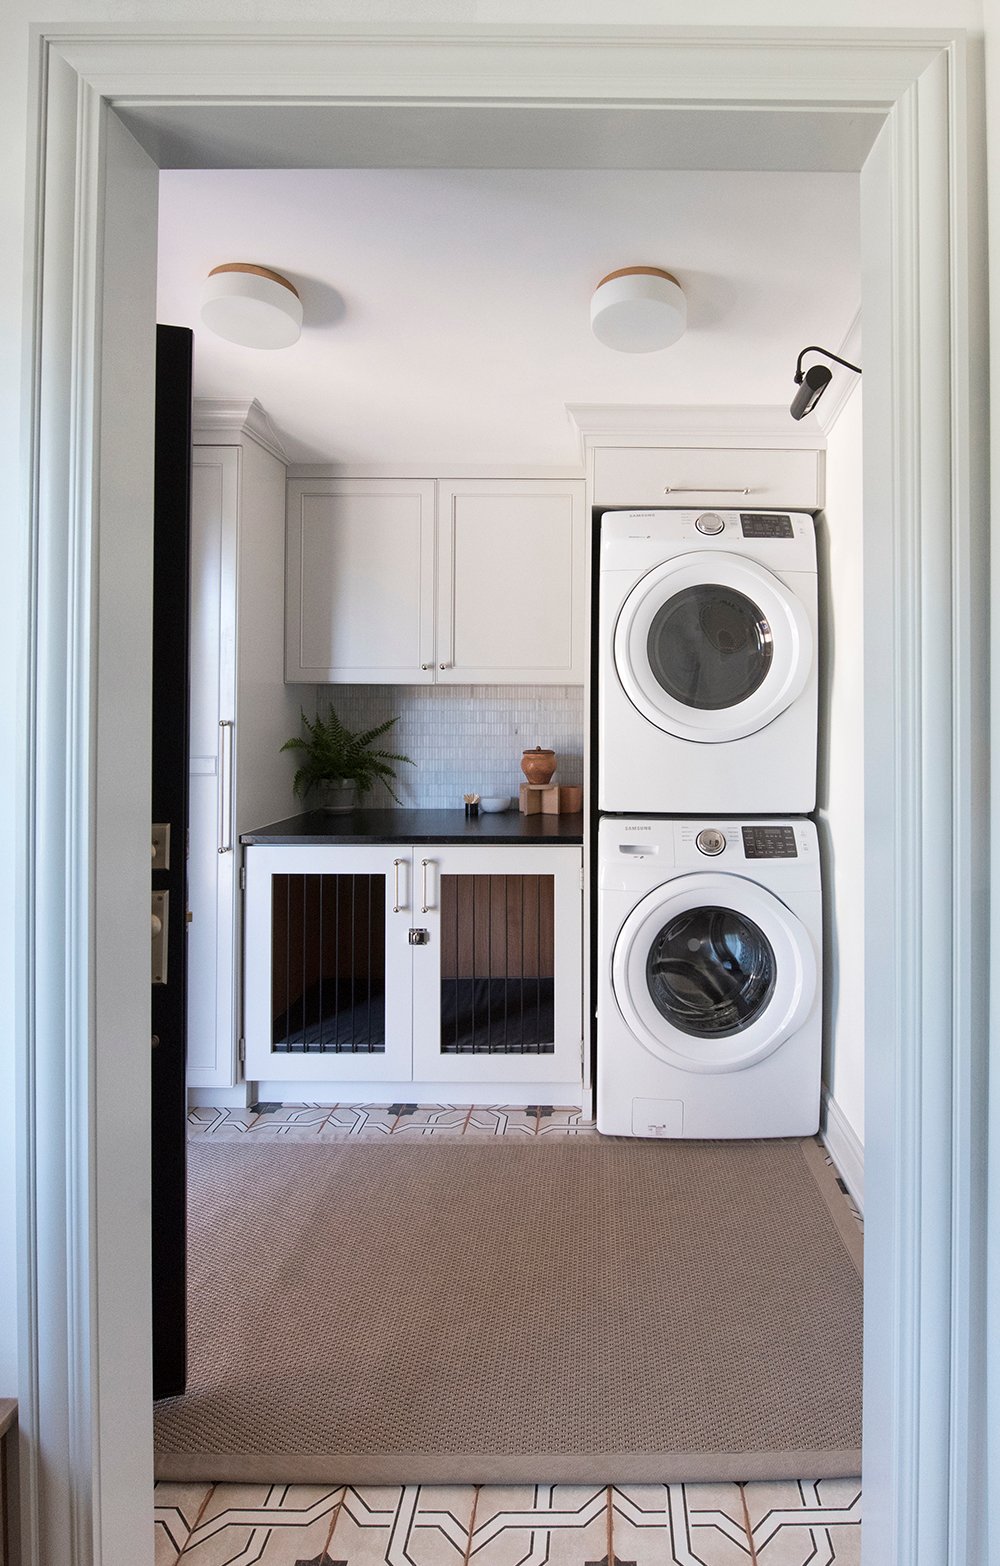
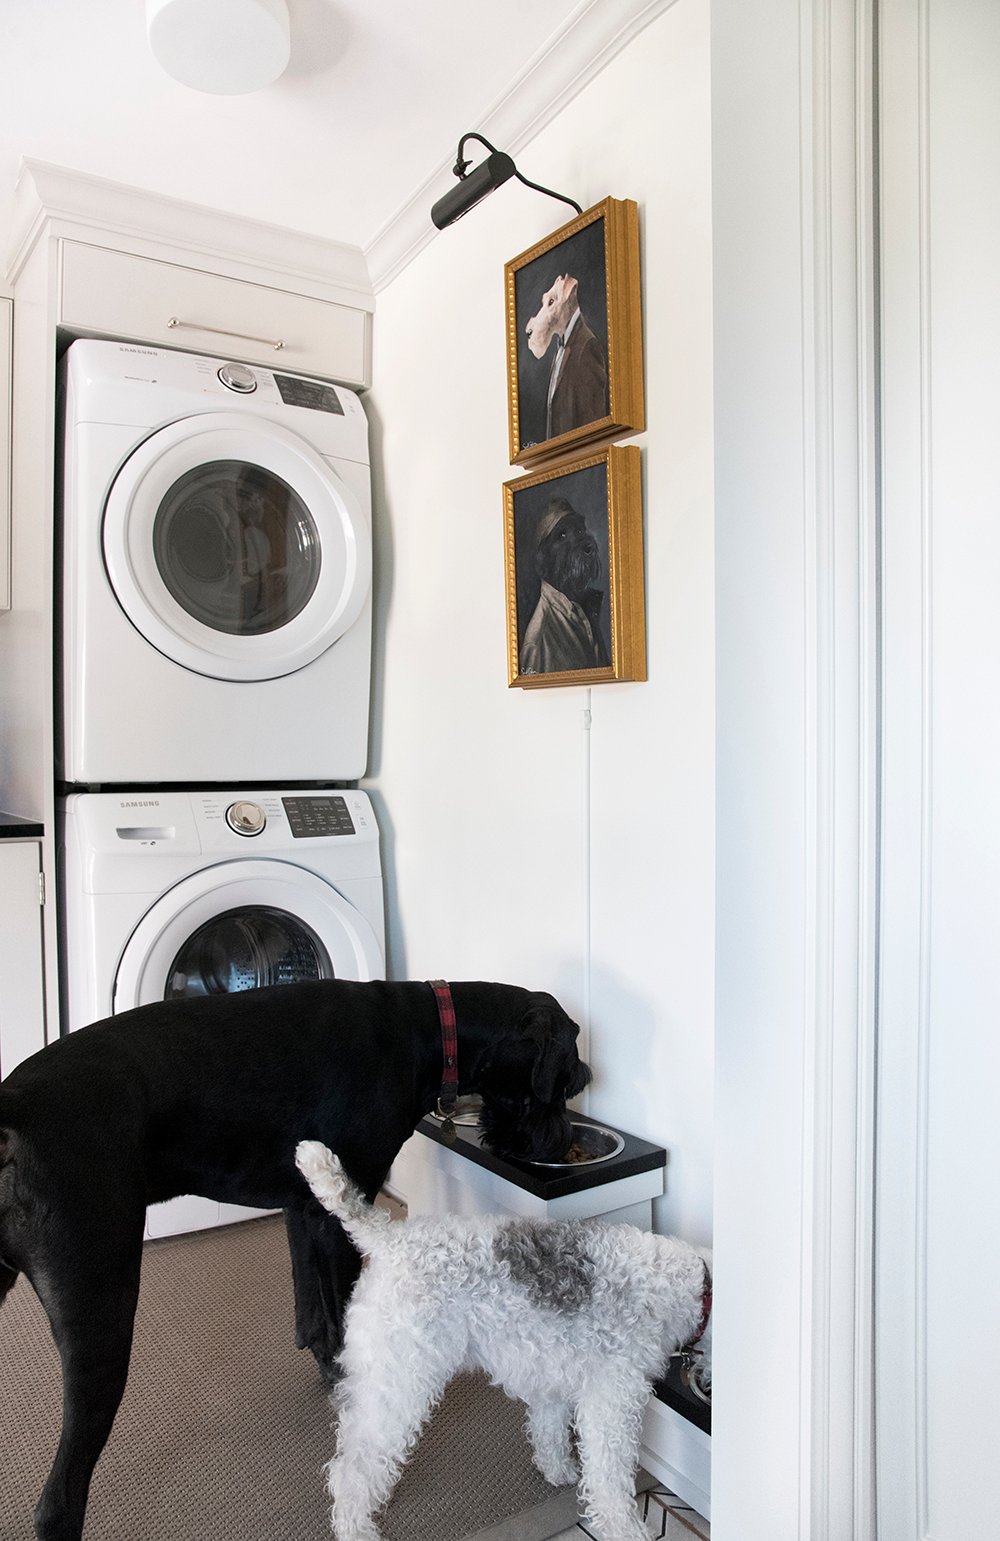
 The laundry room was the designated dog area… it is where Finn & Cash had their meals, would sleep, and all of our dog related items were stored in that particular space. It only made since to install dog-related art. Besides, there was no hiding the fact it was a space for our pets- especially given the custom integrated dog kennel.
 I really wanted to create a classical looking piece of art that was serious and comical at the same time. It wasn’t until I stumbled across a pet portrait online that I considered capturing the personalities of our dogs.
 I can’t tell you how happy I am that I ended up going that route- even though it was more time consuming and difficult. I obviously had no idea that we’d end up losing Finn months later. It’s now something I’ll cherish forever and the happy memories come flooding back each time I look at it. In my opinion, the best artwork makes you feel something. Whether it’s a memory or simply just a feeling… that’s special.
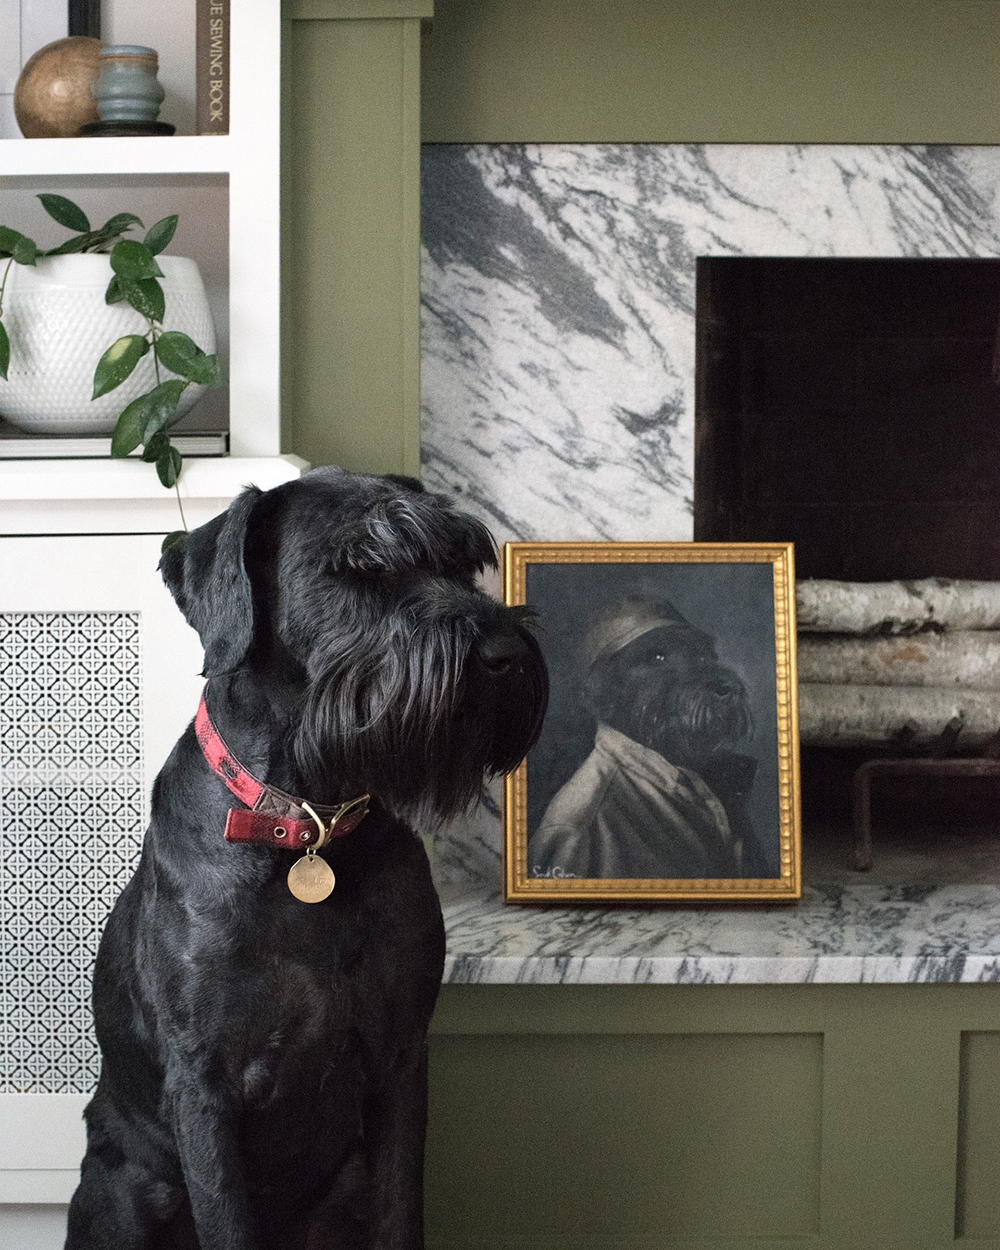
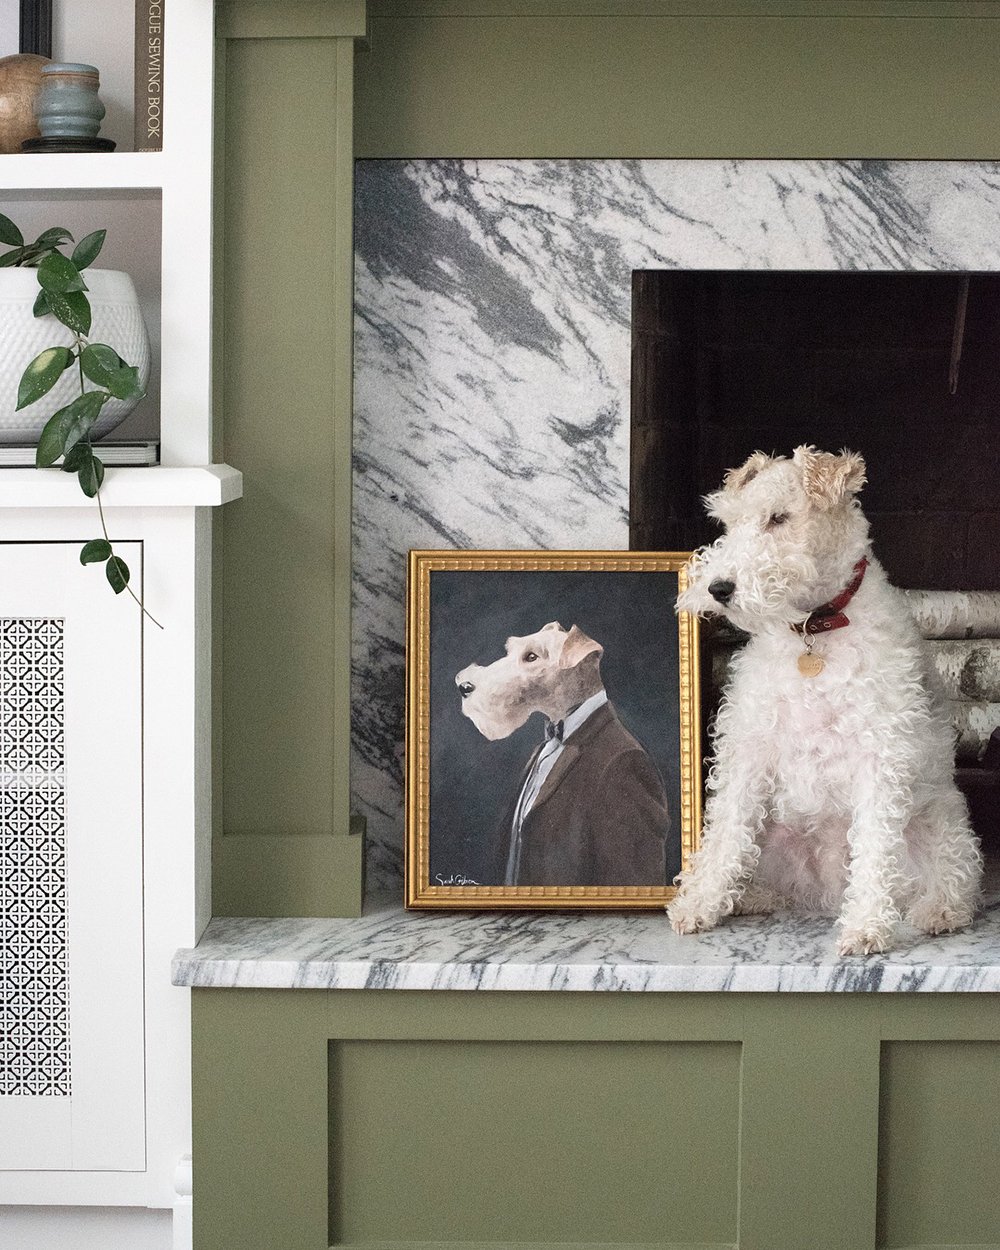
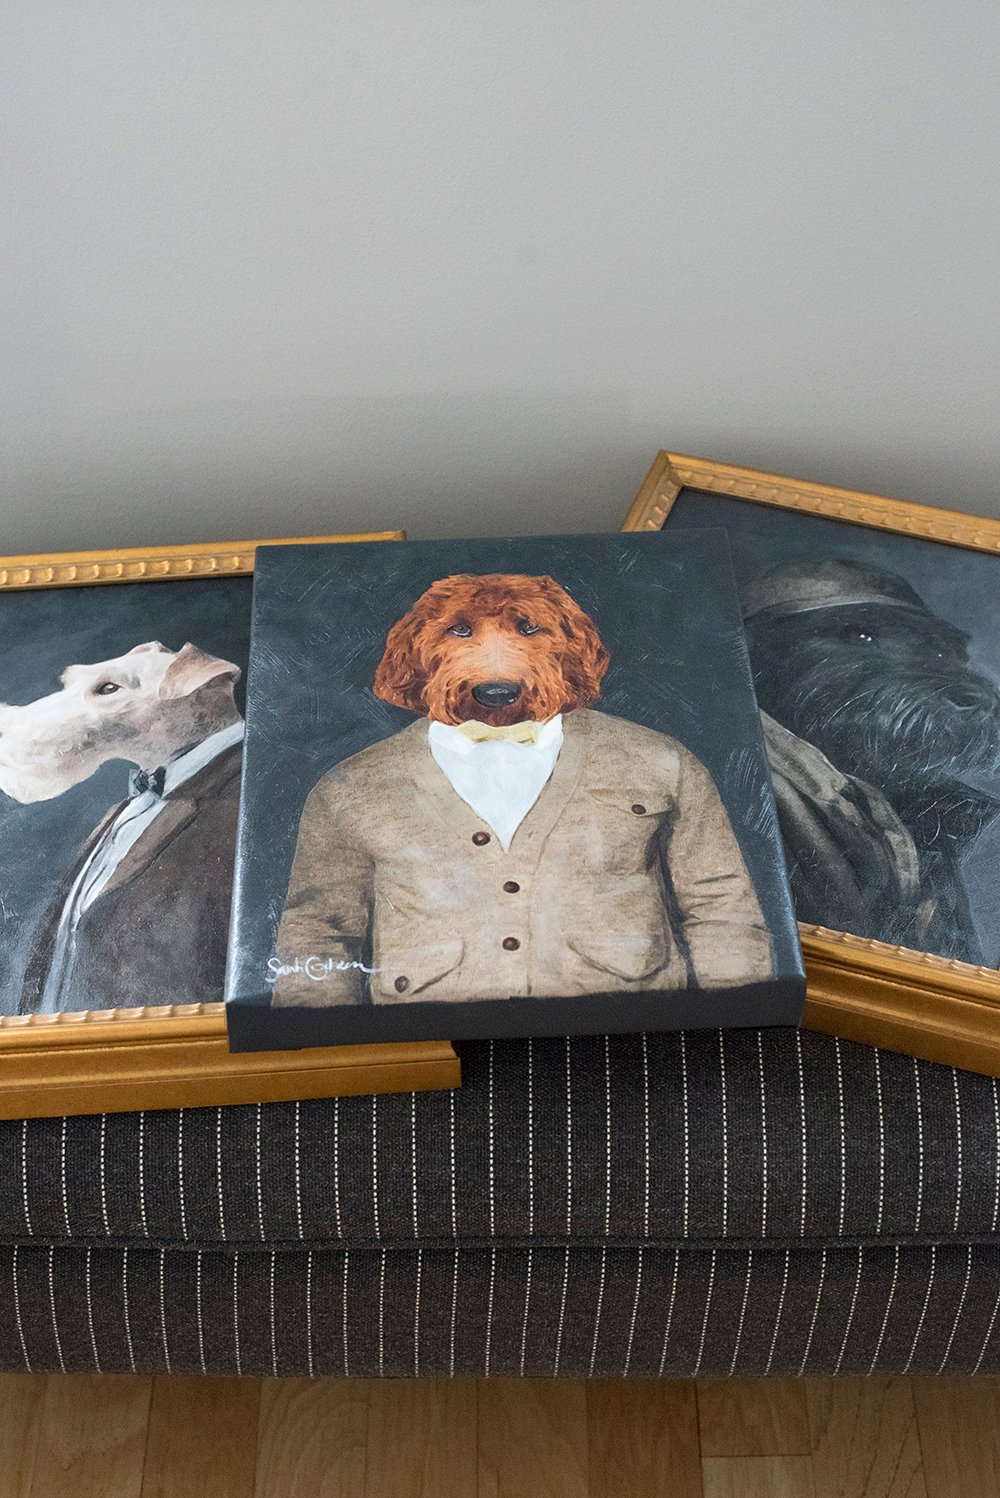
 I really tried to capture their true personality. Finn was always the big, muscular, mysterious guy. He was smart, loyal, and would always find a way to get what he wanted. His portrait definitely reflects that. I selected darker colors, gave him a hat, a coat, and opted for a profile view… because he was always giving us that “side eye”.
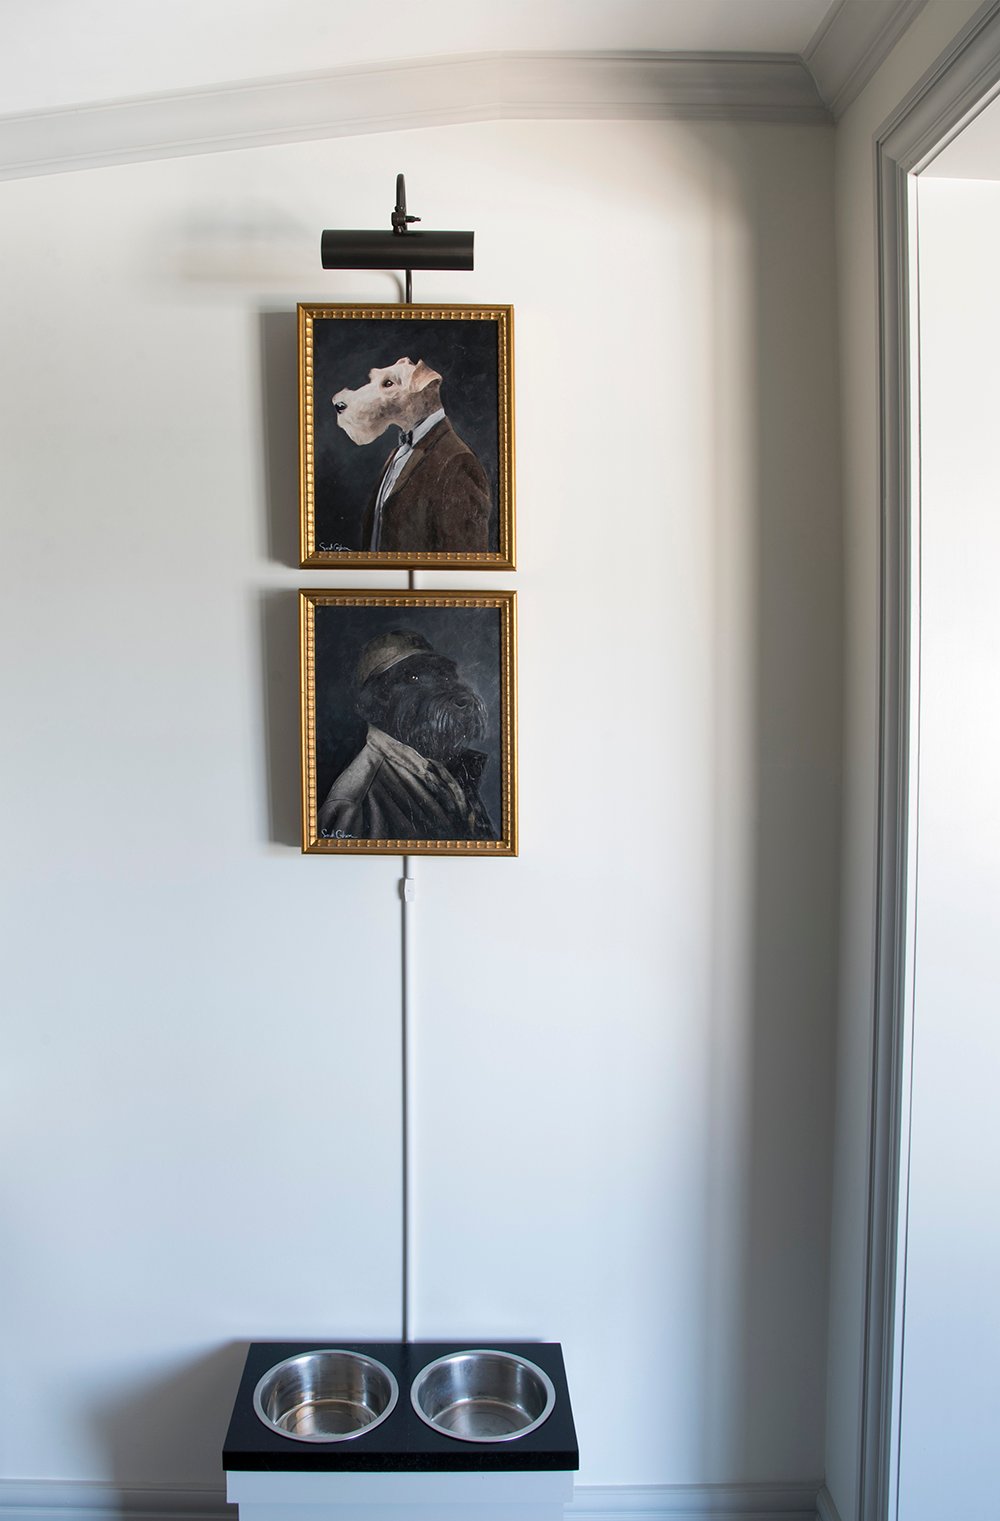 Cash (named after Johnny Cash), on the other hand, is probably nothing like the actual Johnny Cash. Haha! Emmett and I just grew up on his music. Cash (the dog), has always been the brains of our dog duo. He’s smart, quick, witty, and the star pupil. He is eager to please and is always by my side looking up at me. His portrait kind of depicts that! His gaze is upward, he’s wearing a sport coat and bowtie that somehow makes him seem smart, and the color palette is so friendly and warm… just like our favorite wire fox terrier.
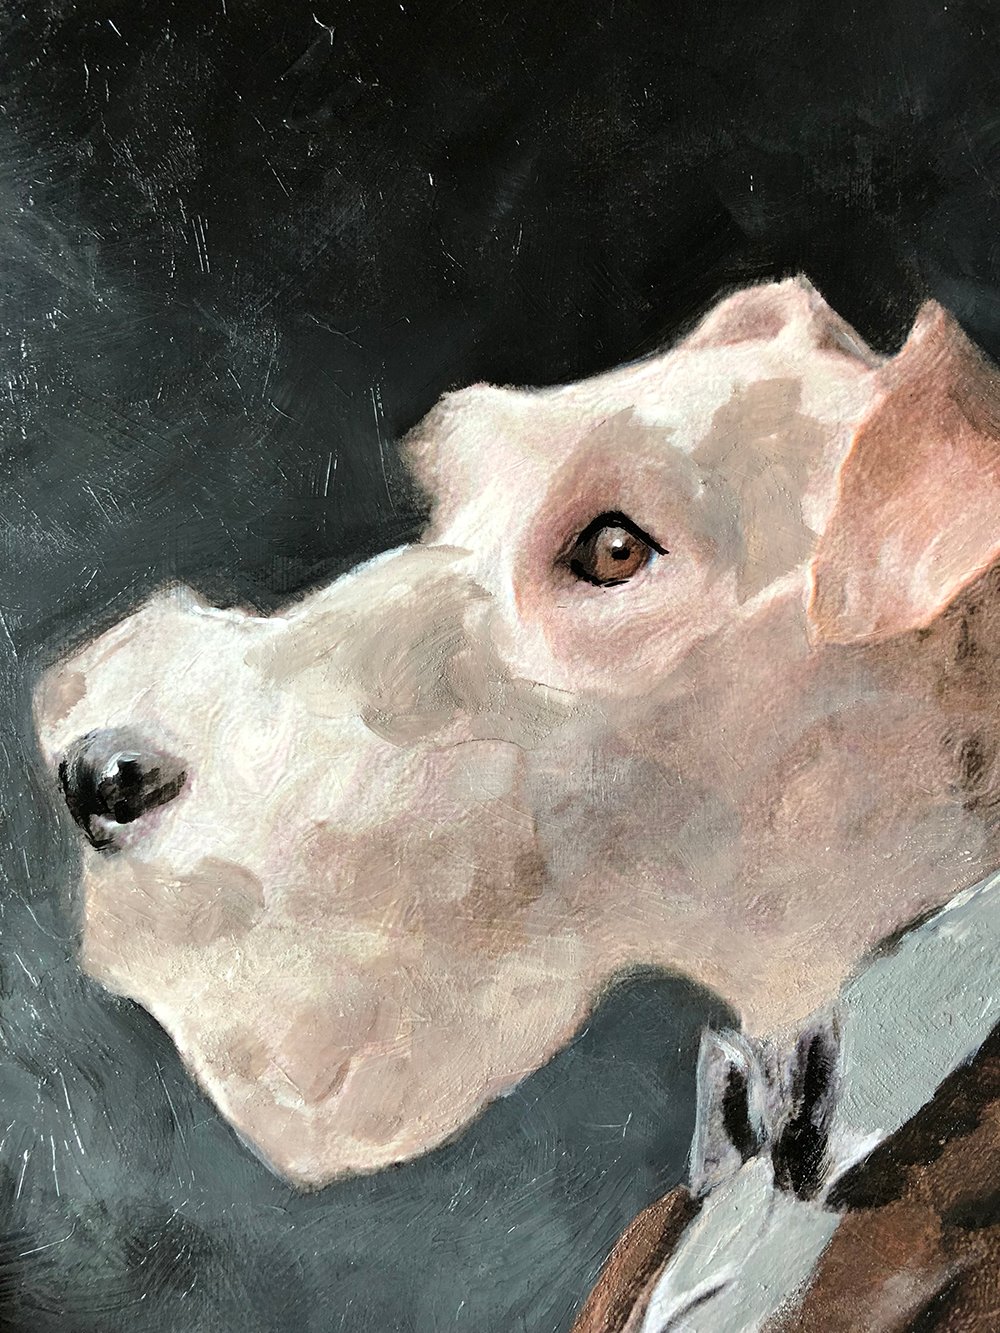
 I took this shot with my iPhone while I was painting Cash’s portrait… I tried to add realistic details in the eye area to really embody our dogs, their eyes, and expressions.
 That brings me to my next topic… the process. I’ve been asked numerous times to share a DIY tutorial on this. I kind of have mixed emotions about that… on one hand, I’m incredibly flattered. You know I get SO much fulfillment in sharing DIY projects and seeing friends complete them. That means you all trust me enough to try new things- and that’s an amazing feeling!
On the other hand, I graduated from art school. I have years of fine art classes under my belt, and it’s not something I would be able to “teach” with a single blog post tutorial. Unlike “How to Refinish Hardwood Floors“, for example, there isn’t a mathematic and or step-by-step guide that will lead you to a very specific, beautiful outcome. I hope that makes sense. I’ve been referring friends to my bestie Laurie Anne. She teaches multiple online art classes via video and does an amazing job (I’ve certainly learned a thing or two)… I just think that would be much more helpful! I’d recommend starting there if you want to learn. I did want to share my process with you though, in hopes that it might inspire or be interesting, at the very least.
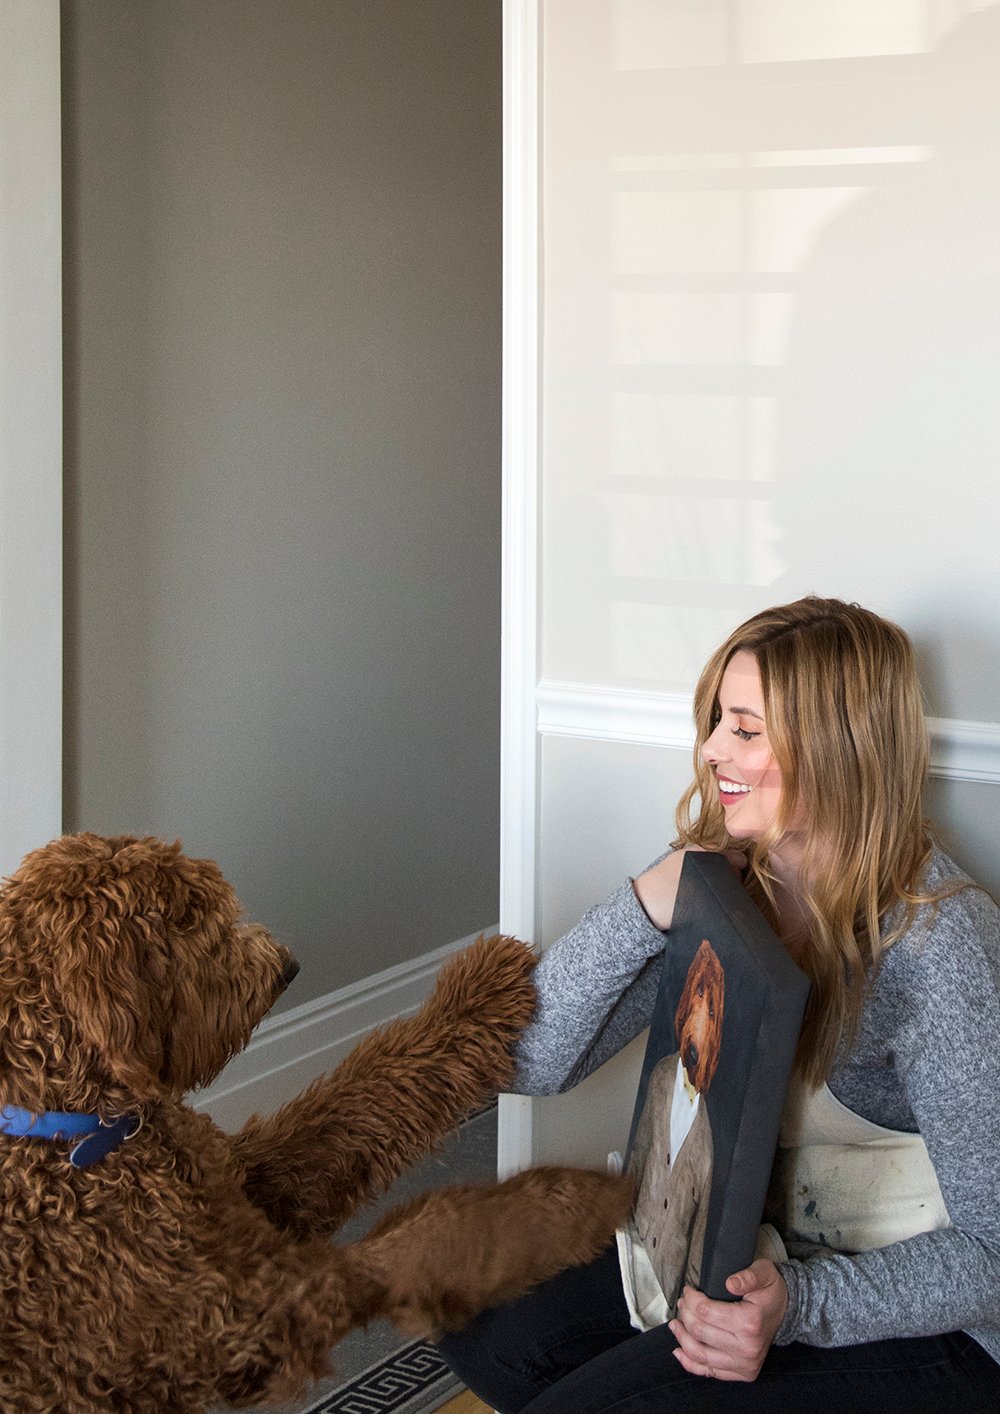
 Before I pulled out my paints, I grabbed my camera to photograph the dog. With Crosby, that required lots of treats to get him to pose how I had envisioned. Then I searched high res images on Google for the “body”. For Cros, I wanted him to have a Mr. Roger’s friendly, lovable, teddy bear sort of vibe.
 Hours later, I found a vintage Ralph Lauren ad. A man was sporting a yellow casual bowtie and cardigan. It felt right for his personality! I changed the bowtie to yellow because Crosby is our big ball of sunshine, happy-go-lucky guy, then photoshopped his head onto the body. After that, I printed the photographic image to work from and look at while I painted.
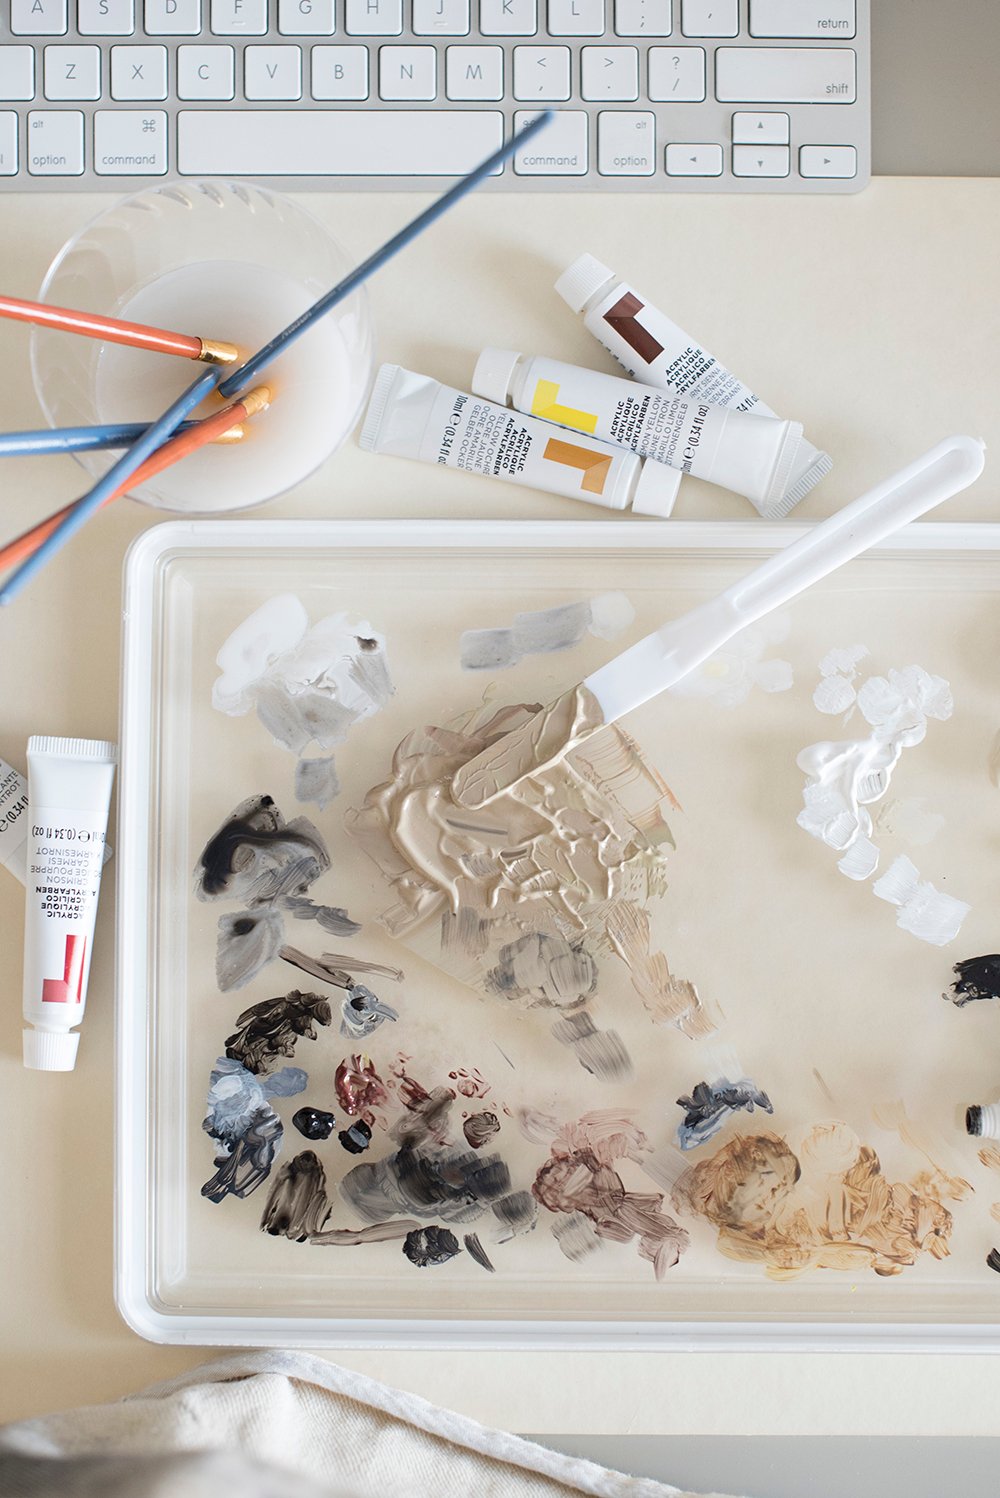
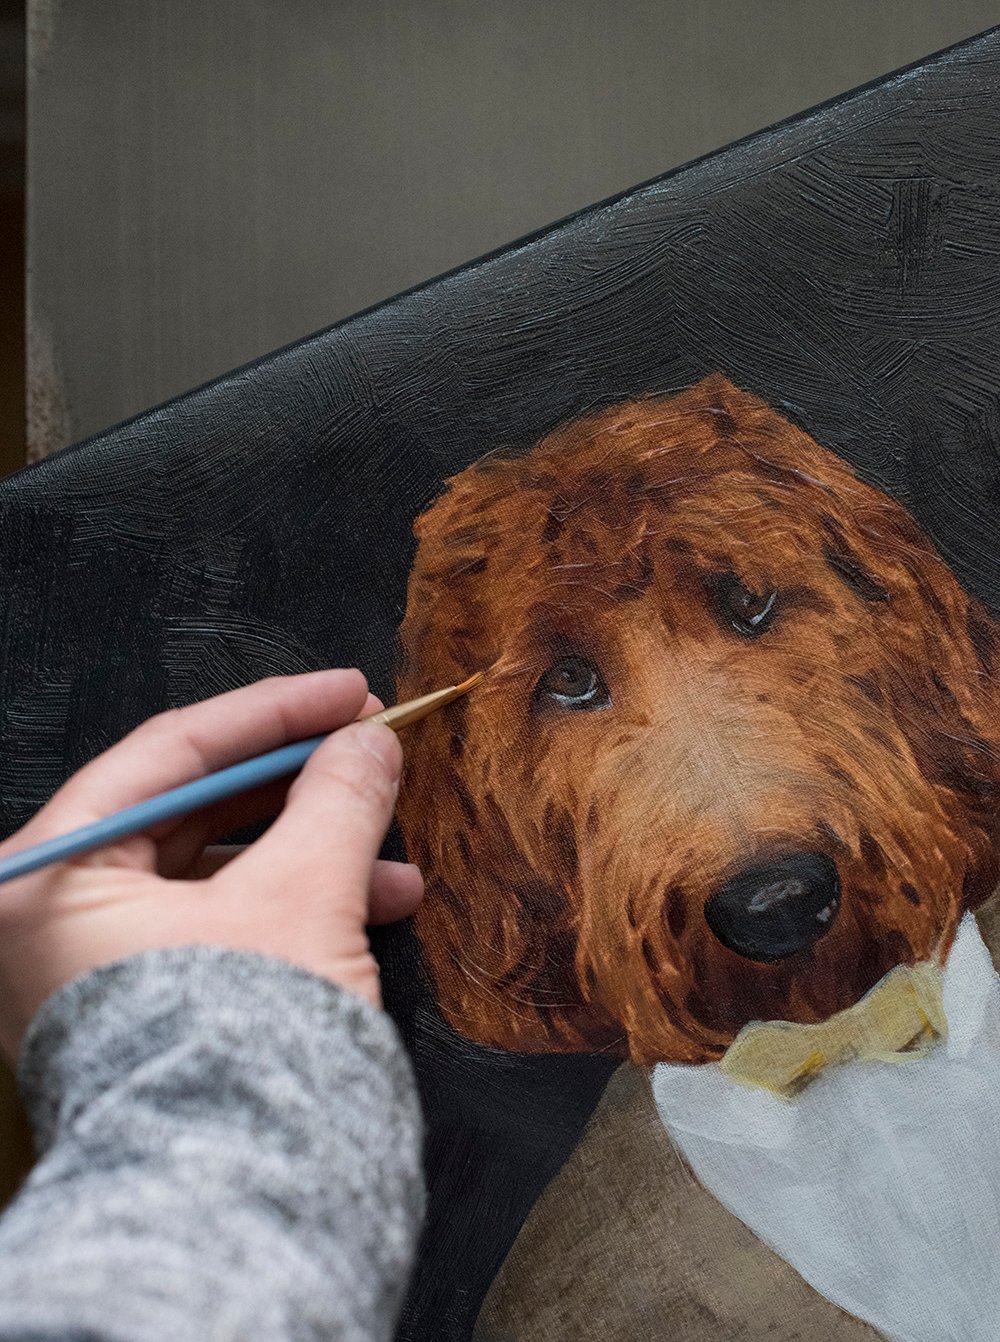 I start by sketching the subject with charcoal on the canvas… it’s just easier for me to work that way because I’m terrible at proportion. Sometimes I’ll even trace the shape. Next, I block in the basic colors. Then I’ll add detail and texture. I like to mix gel with my paint to give the acrylic brushwork more depth and a glossy look. It’s the same concept I used for this DIY painting (this diptych actually is an easy painting DIY I’d recommend)! Hours and many coats of paint later, this is how he turned out…
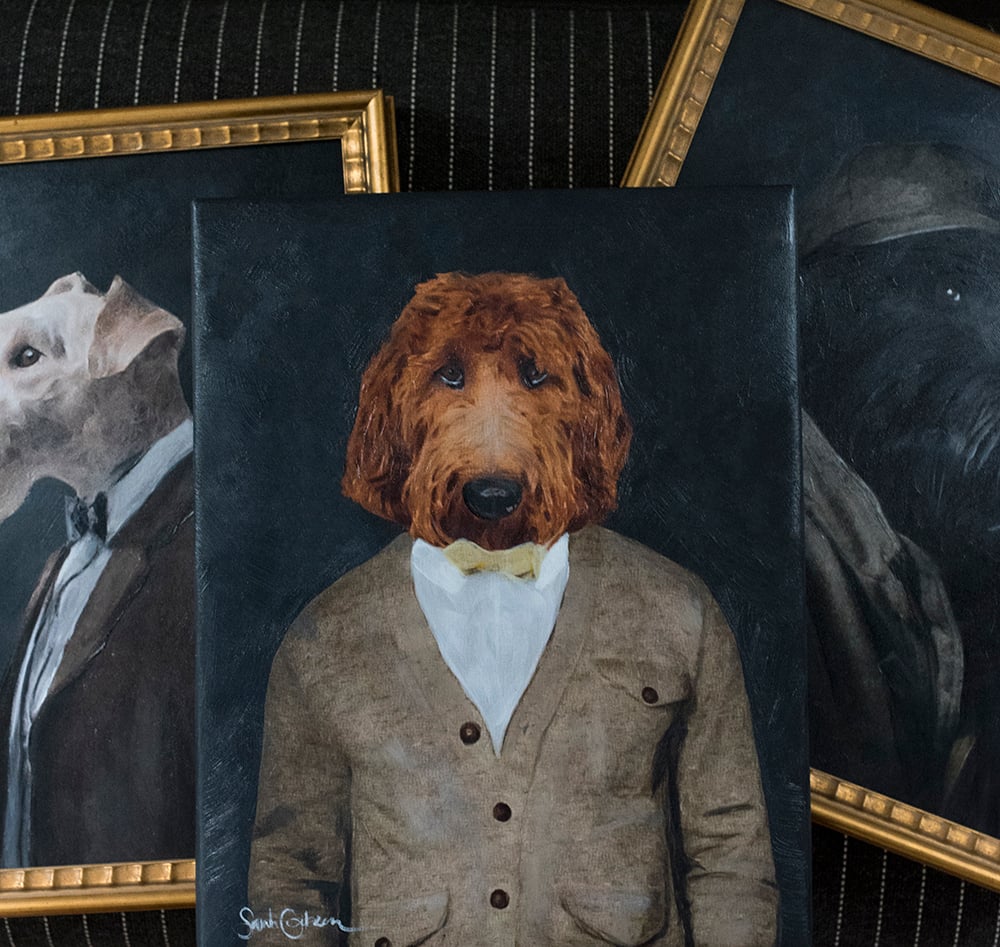 Don’t they feel like a fun family? I love each and every one of my fur babies! I’m looking forward to having Crosby framed. Now- as promised, a quick FAQ about these guys:
FAQ
- Do you take commissions? No, I’m sorry… I just don’t have the time, nor do I enjoy painting THAT much. Haha! I did find someone who replicated this and does a great job though- check out my new friend Andrea.
- Give me the DIY tutorial! I kind of addressed this in the middle of the blog post. It would just be too difficult to cover and would take multiple complex videos. If you’re interested in learning to paint, I’d highly recommend these online courses taught by my best friend, Laurie Anne.
- How long did these take you? Each one was different. Cash was the quickest and Crosby took the longest… ranging anywhere from 1 day to 5 days. Probably at least 12 hours.
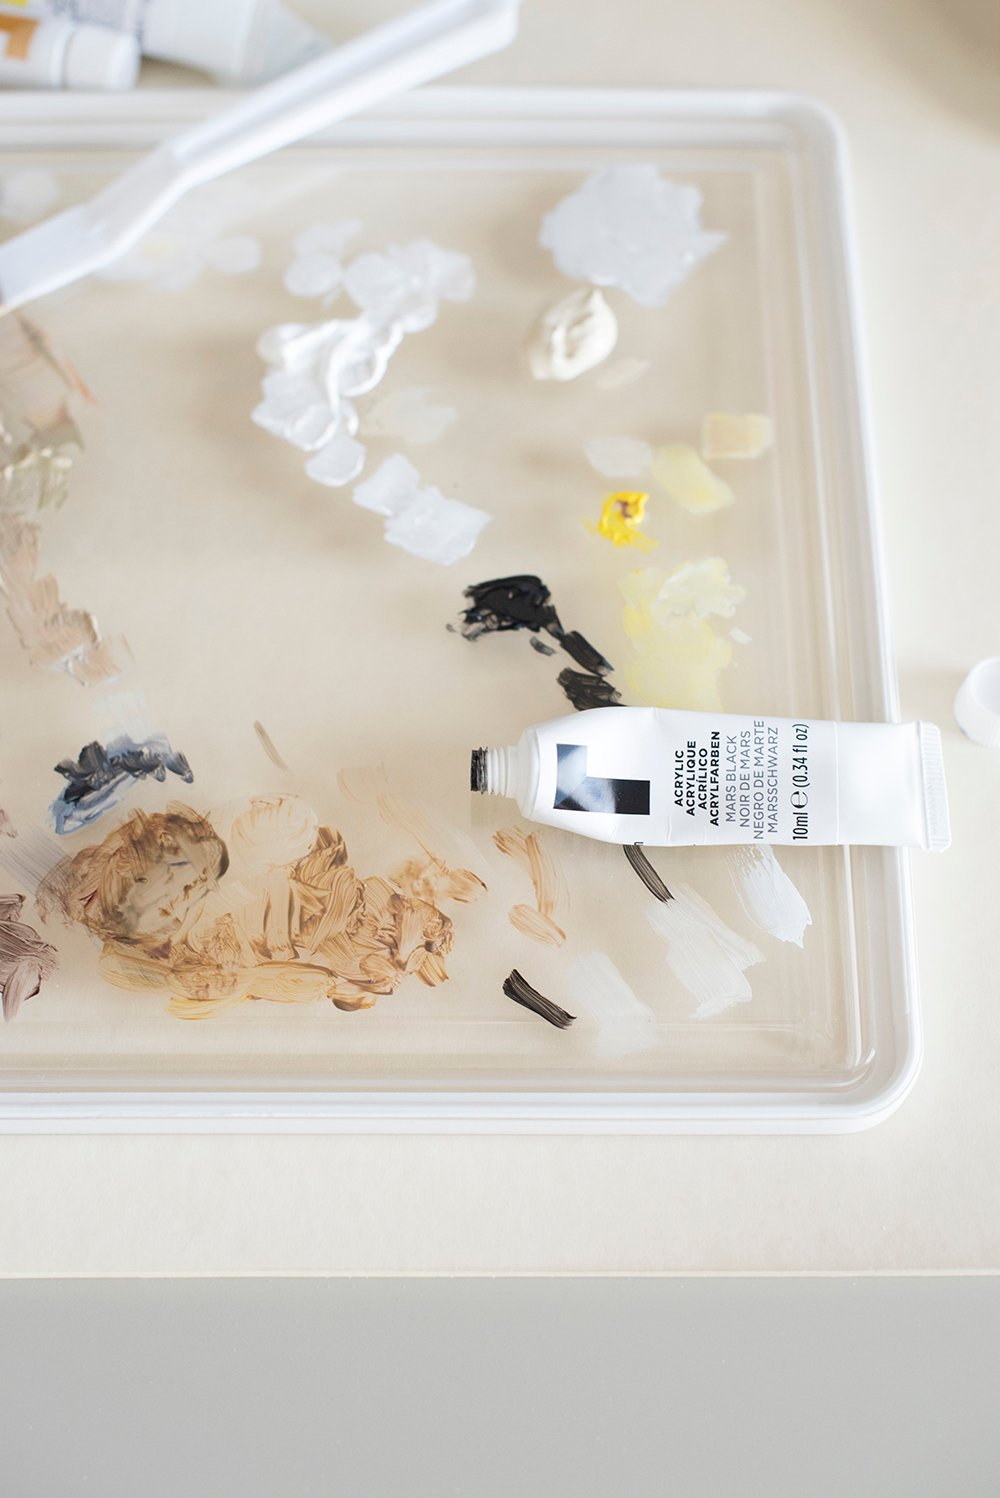
- What type of paint did you use? Acrylic and gel gloss.
- What material are these painted on? Canvas. Cheap canvas… I probably should’ve splurged for the good, sturdy stuff.
- Where did the frames come from? I had these framed locally in Salt Lake City. The frame material was actually leftover scraps from another custom order and they pulled it out of the trash for me. I just loved the thick, gold frame! It will be interesting framing Crosby though since they no longer carry this material. I’d like his frame to be different anyway.
- Who can make something like this for me? Check out Andrea at Vintage Paintbrush… she tackles custom pet portraits in a similar style.
- What made you think of this idea? I wanted a classical looking piece of art that would look great with my gallery light- and it needed to be dog-related.
- What do you love most about these portraits? Painted portraits really immortalize the subject. I realized just how special they are and the memories they evoke after Finn passed away. It feels like he is forever with us and apart of our home.
- What type of paint tools do you use? I used to have nice painting supplies in art school, but I only kept a few things… that’s the reason for using the lid of a food storage container as a palette (see below)! Ha! Trust me- you do not want my recommendations. I just bought what was cheap for this one.
 So that is basically how the dog portraits came to be… from my mind, through the camera, to the computer, to the canvas, to the laundry room.
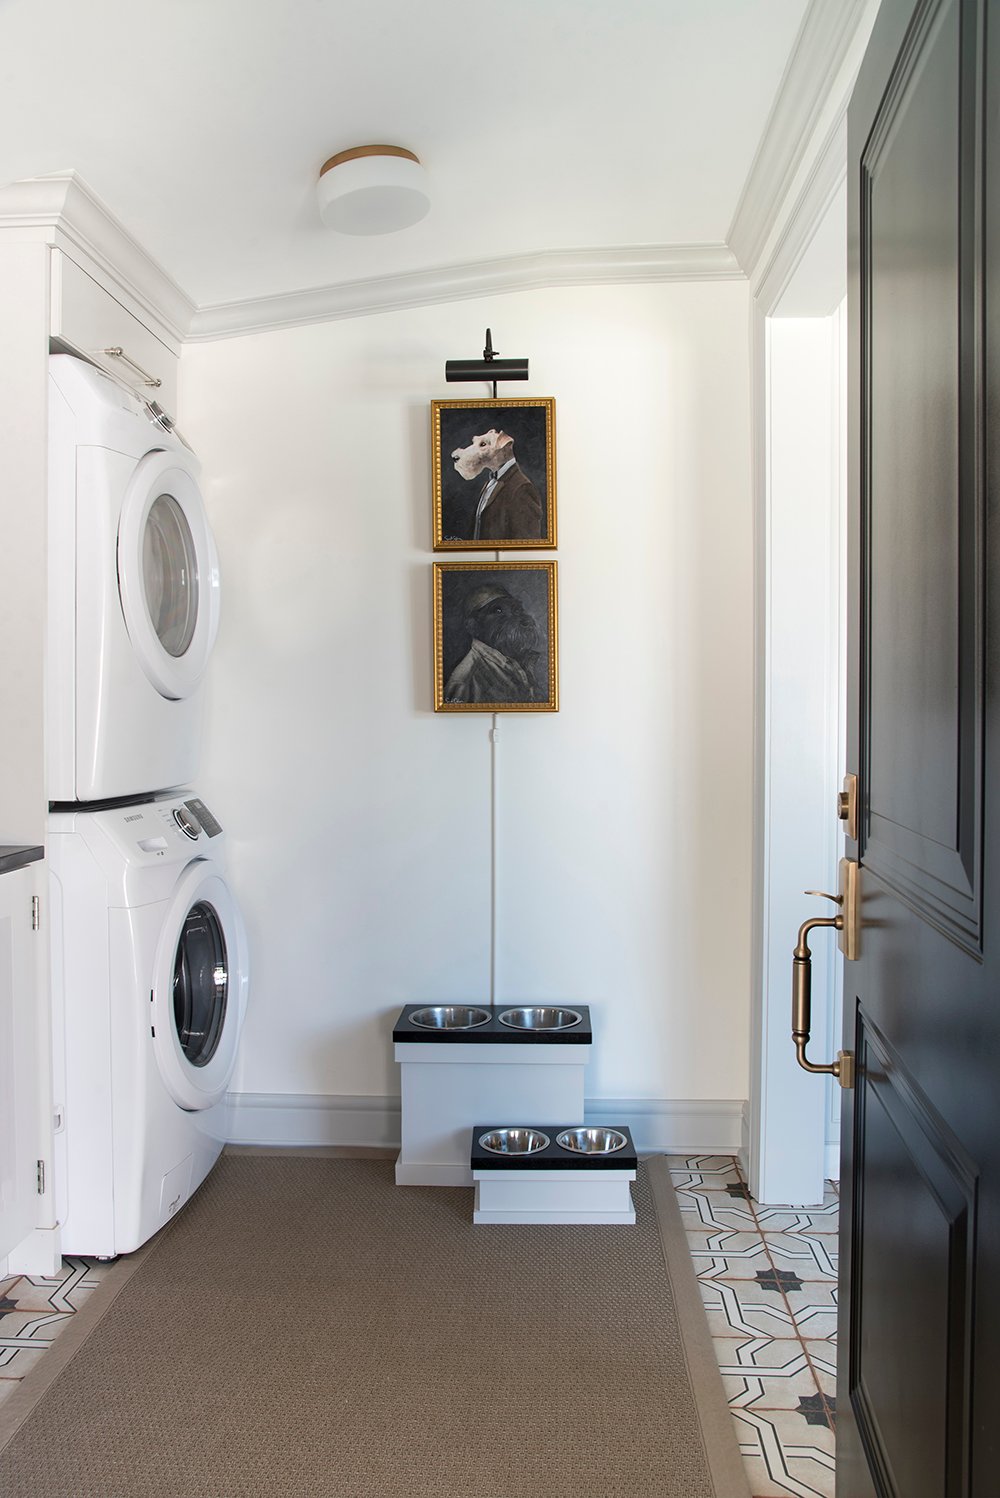 To wrap things up, I’m incredibly excited to frame Crosby and install the three dogs in our new home. They’re currently living in the prop closet until I find a place for them. Of course we’ll renovate the laundry room eventually (but I’m pretty sure it won’t be this year), and again- that will be the “designated dog room”, but until the time comes, I hate to keep them locked in a basement closet.
 I’d love to hear your thoughts on the newest art addition in the comments below! It’s going to be the craziest week as we have family coming into town in a couple of days. I’m pretty sure this painting was procrastination at its finest. Hope your week is off to a good start!