Tiny Lamp Makeover & Pleated Shade DIY
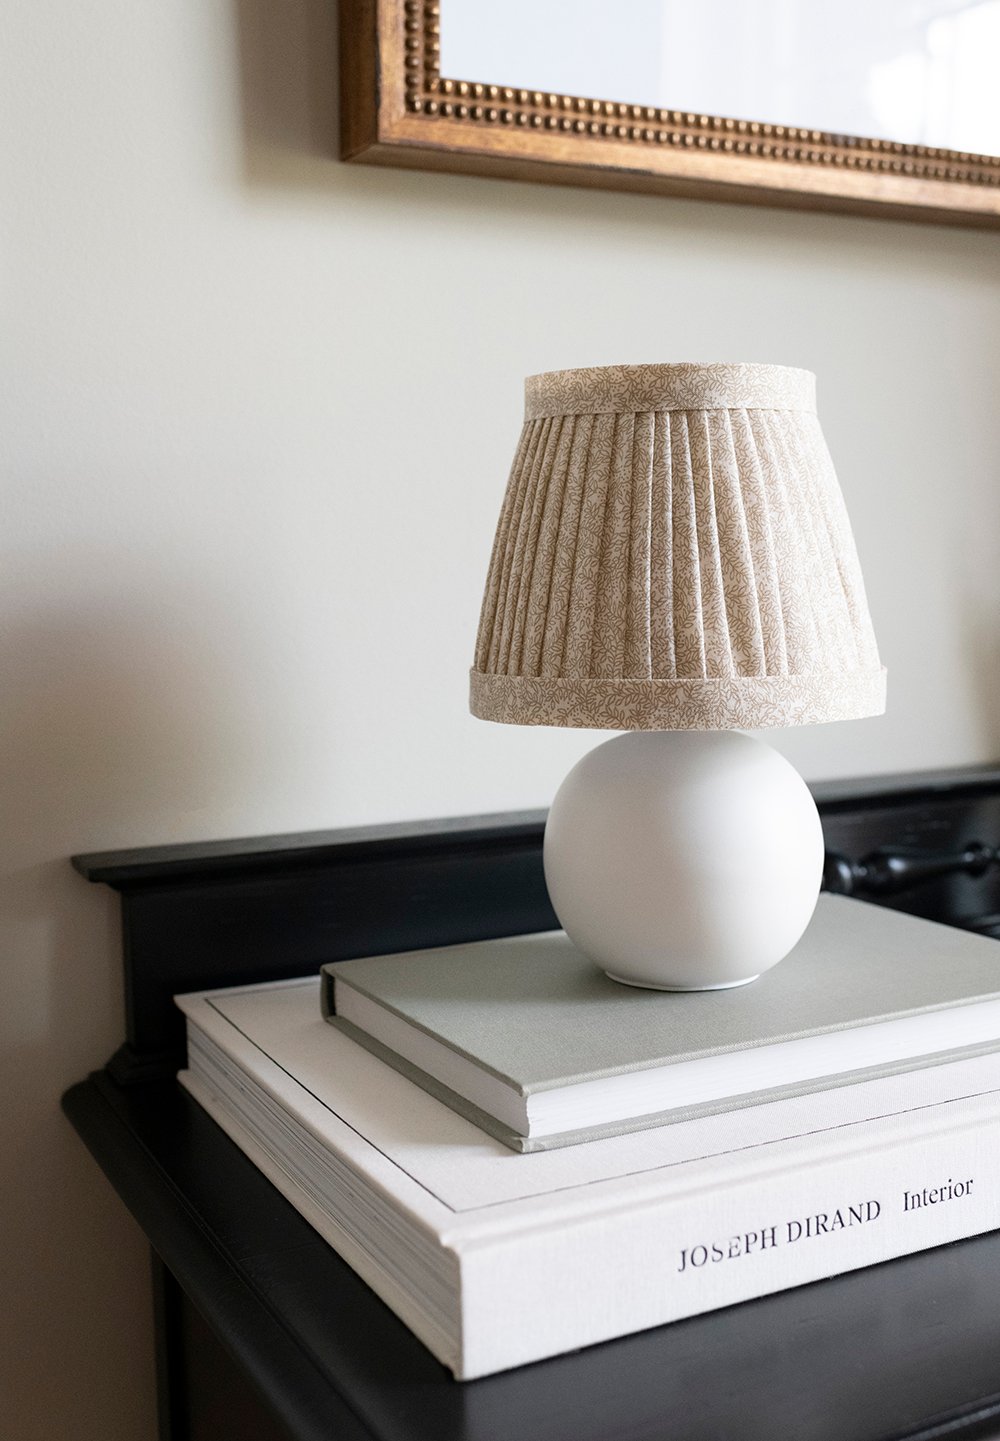
 How was everyone’s weekend? We made some serious progress on the camper– I’ll work on an updated blog post for you later this week… it will probably be the last one before it’s totally finished (exciting!). Today I have a quick & easy project to share with you. Last week I shared a big roundup of my favorite sphere based table lamps, and as promised- I ordered the least expensive option from the roundup to see how it looks in person. I’m actually pretty impressed! The small scale is nice, the shape is great, it comes in multiple colors, and it can easily be modified for a more customized look. I ordered the white color thinking I’d cut the cord out, add a puck light, and style it in our camper… it’s actually pretty perfect for that since it’s super lightweight. I gave the shade a little update, which is what I wanted to show you today. I’ve been seeing so many gorgeous pleated shades in my feed the past couple of years and have been wanting to take a stab at one myself. This felt like the perfect inexpensive fixture to try it on. I’m very pleased with how it turned out! Click through for all the details…
 First, I’ll say this- I was actually a little nervous to try pleating a shade because I’ve heard some horror stories about DIY pleated shades gone wrong and this particular project taking 6+ hours. I don’t have a lot of free time, so I definitely wanted to keep this under an hour. I also didn’t want to waste my money on something that couldn’t potentially look like crap. I’m happy to report, it was a quick (it took me about 30 minutes total), easy, and really fun project. I’m very pleased with how it turned out- I feel like it made this cheap little lamp look pretty special and higher end.
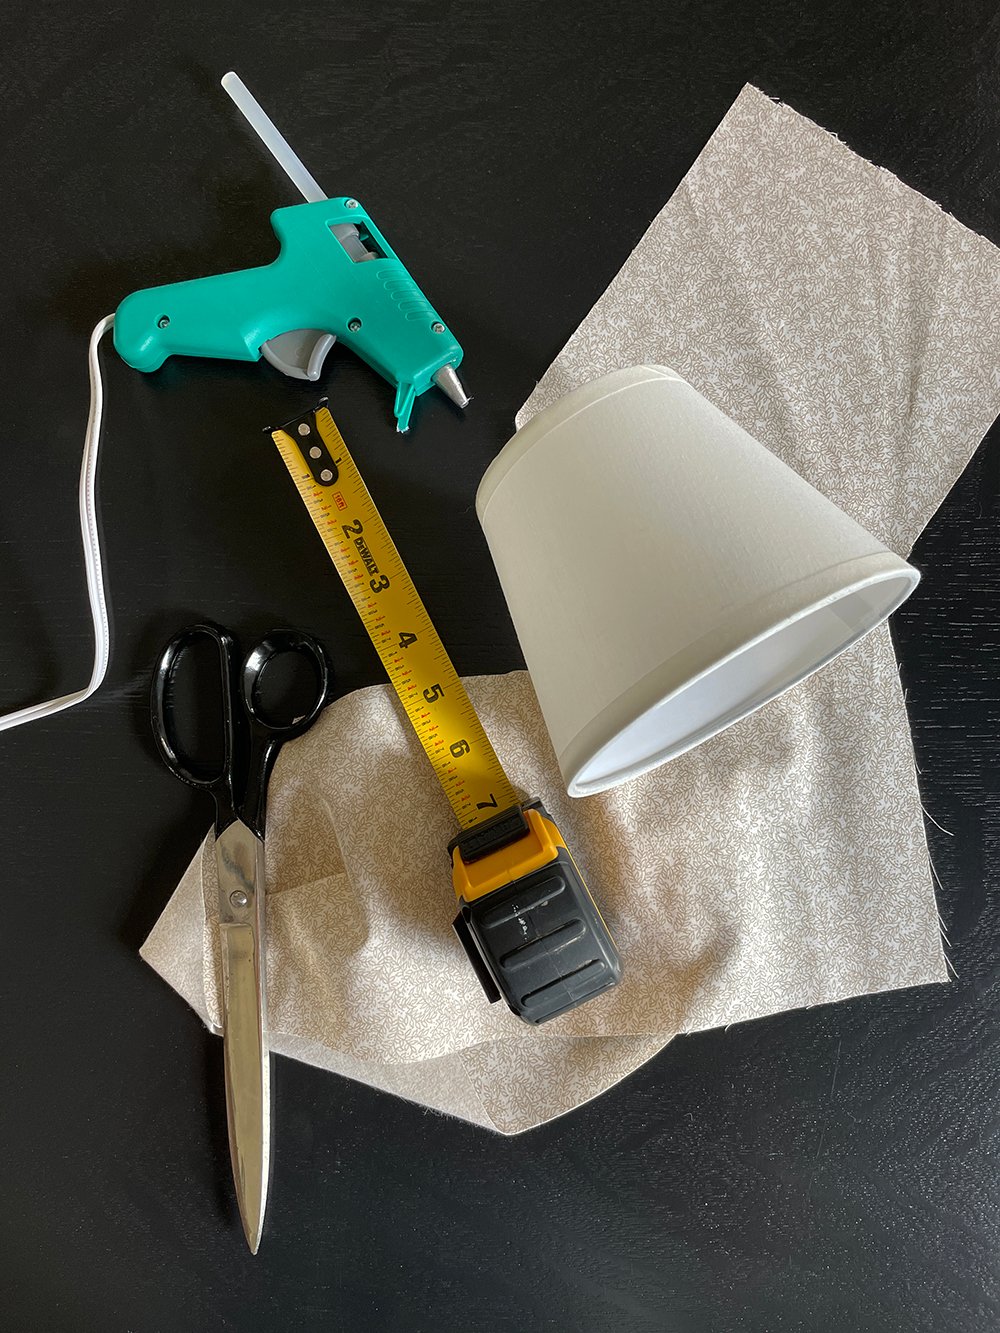
 Rather than sharing a full-blown tutorial, I’m going to link my friend Marynn’s detailed DIY- check it out here. She did an excellent job explaining the progress with close-up photos. I’ll share the progression of mine below, as well as some tricks & tips I picked up, but I’m telling you- it’s tough to mess this up. No sewing required! I just used what I had on hand:
- Hot Glue
- Tape Measure
- Scissors
- Iron
- Hemming Tape (Marynn uses bias tape, but I didn’t have any- and it worked fine)
- Lamp
- Fabric (1/2 yard- I linked a similar option)
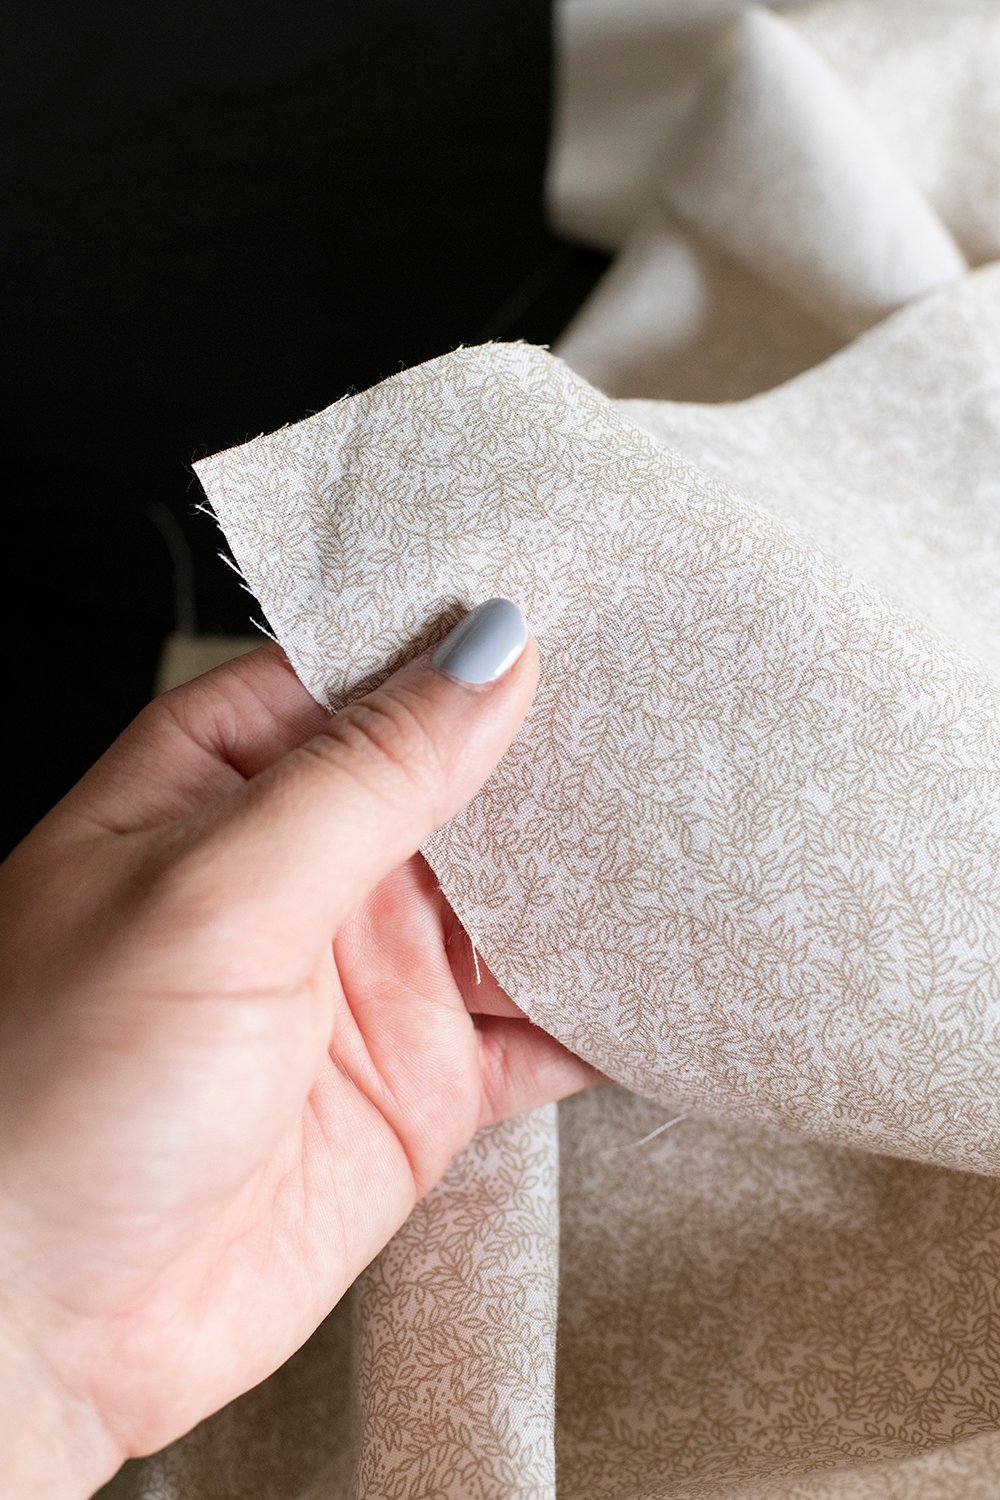
 The fabric I landed on is 100% cotton with a taupe colored floral / botanical pattern. It’s reads pretty neutral and will be great in our camper.
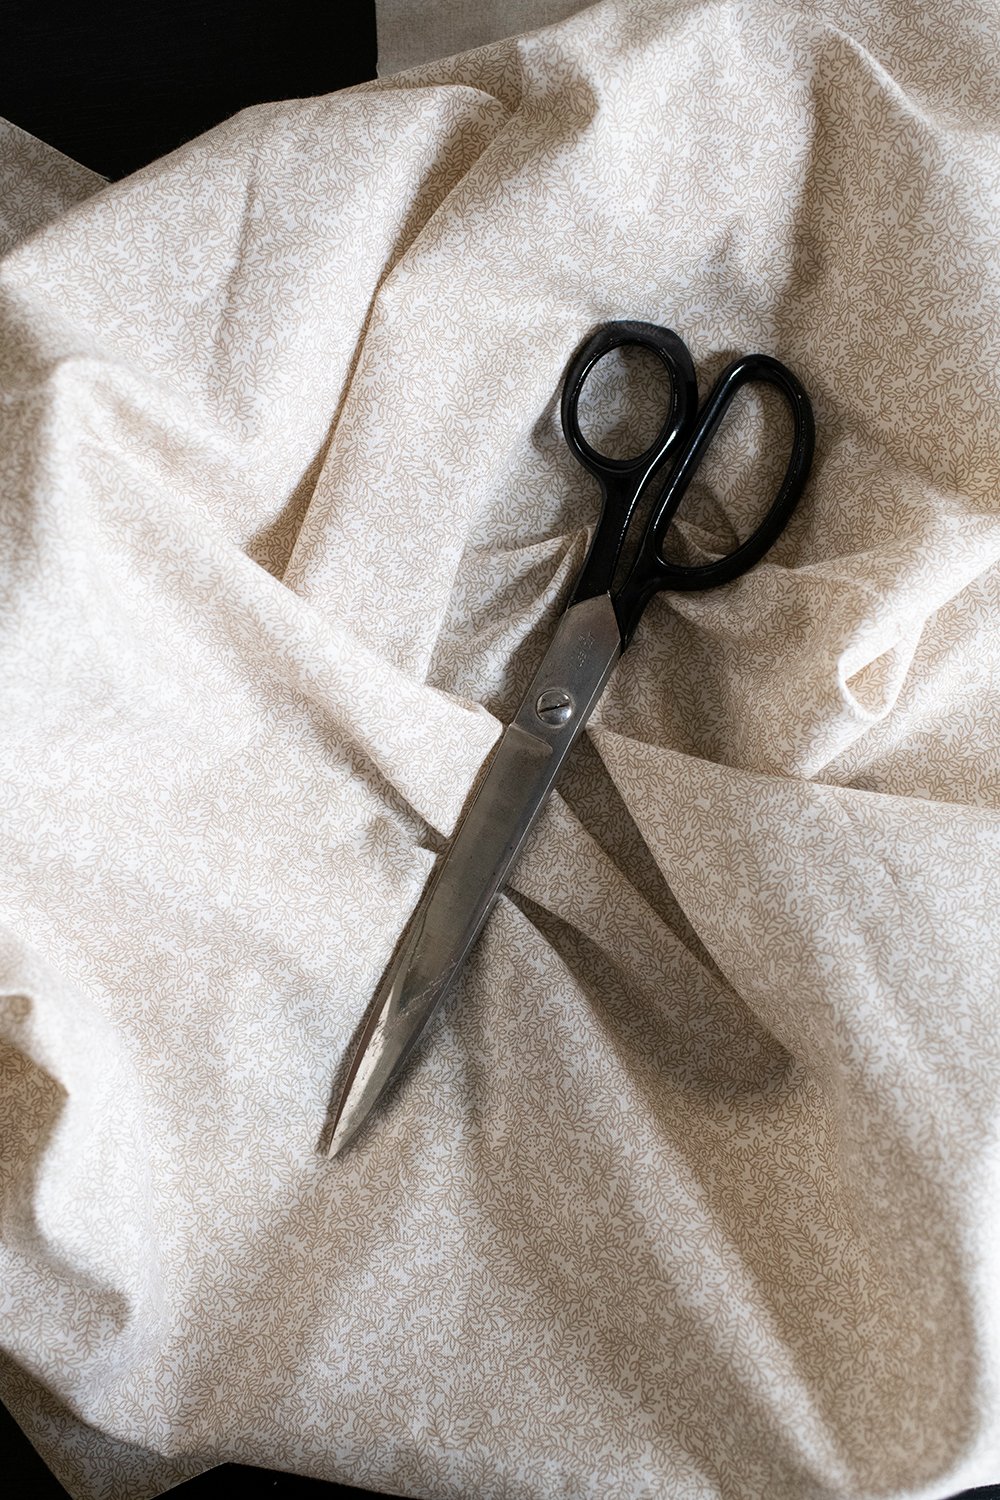 I’d definitely suggest using an organic pattern like this- it’s more forgiving for your first try. I bought a yard of this fabric for $5, but in reality- I probably needed less than half a yard.
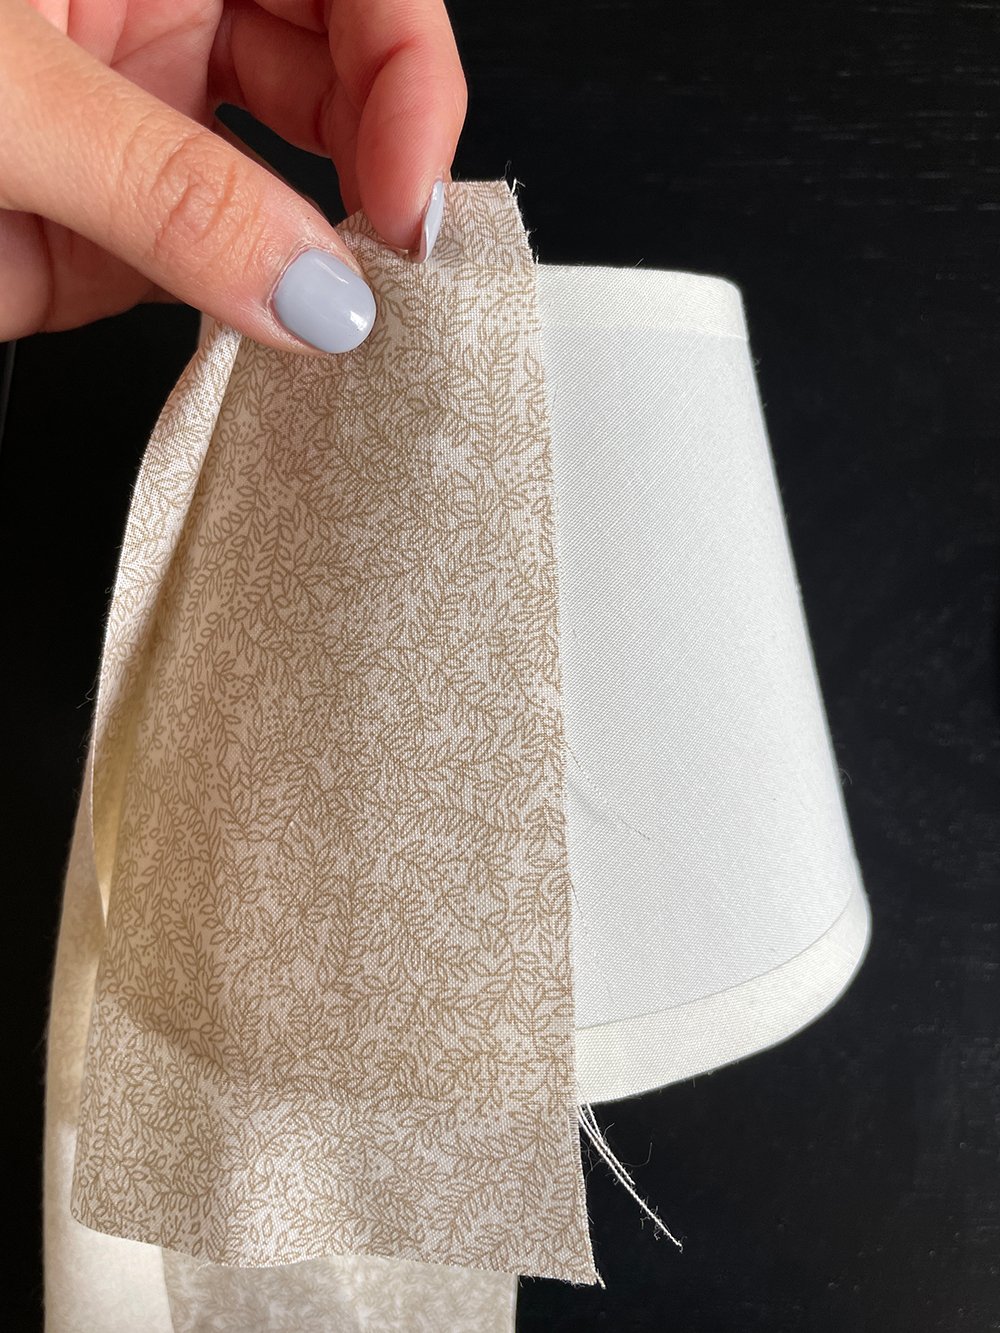 I cut my fabric to size (7″)… leaving an inch or two on either end for extra (just in case). I started by glueing the fabric onto the backside (the seam) of the lampshade.
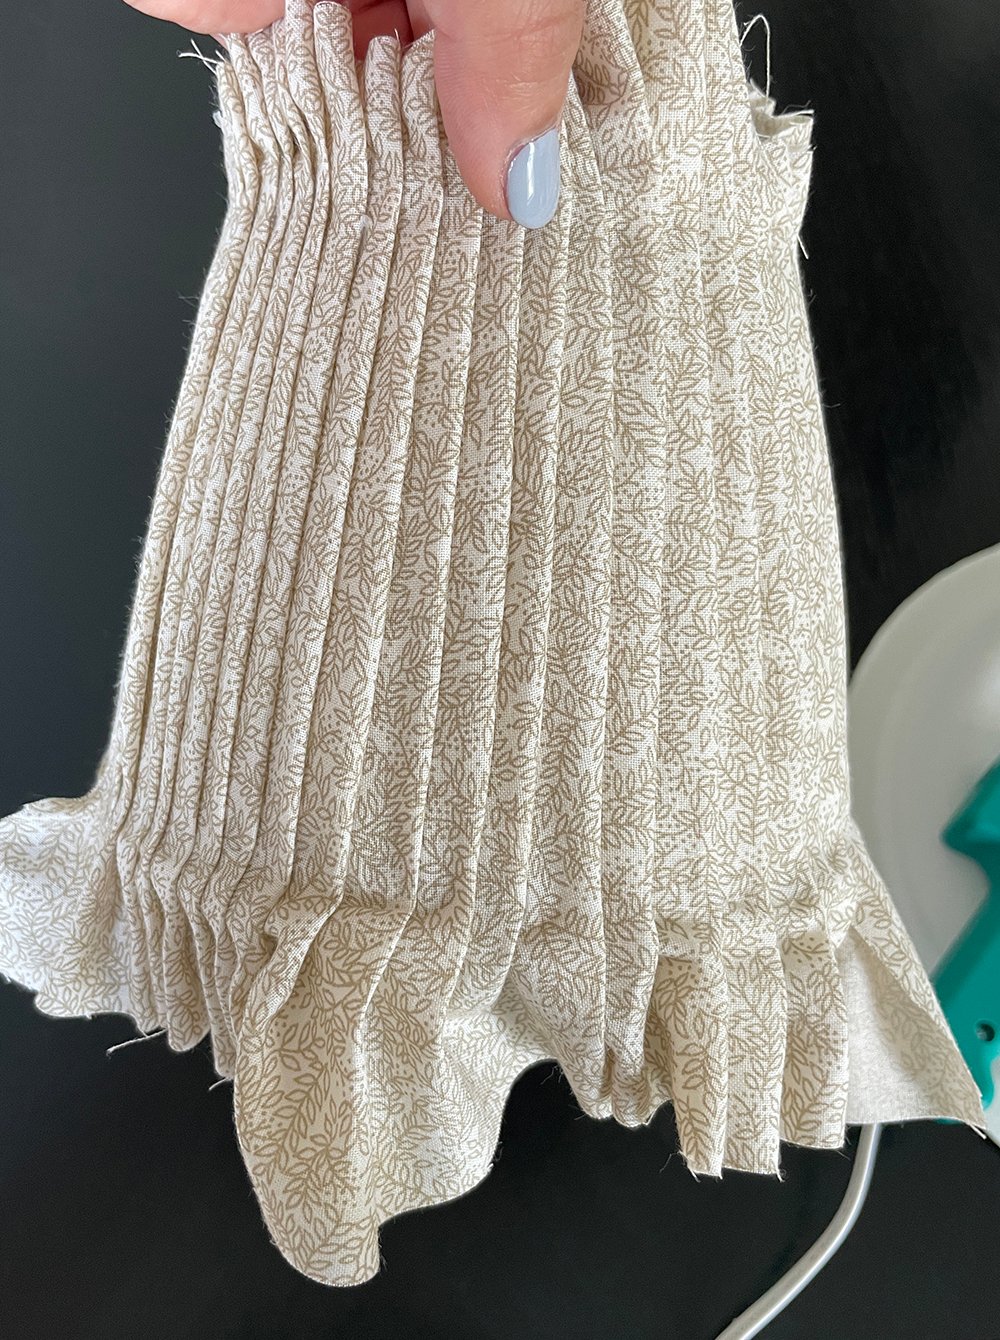 Pleating was the easy and fun part. Dab hot glue on the top and bottom, fold the pleat, press it into the glue to secure, then repeat. This part actually went pretty quick.
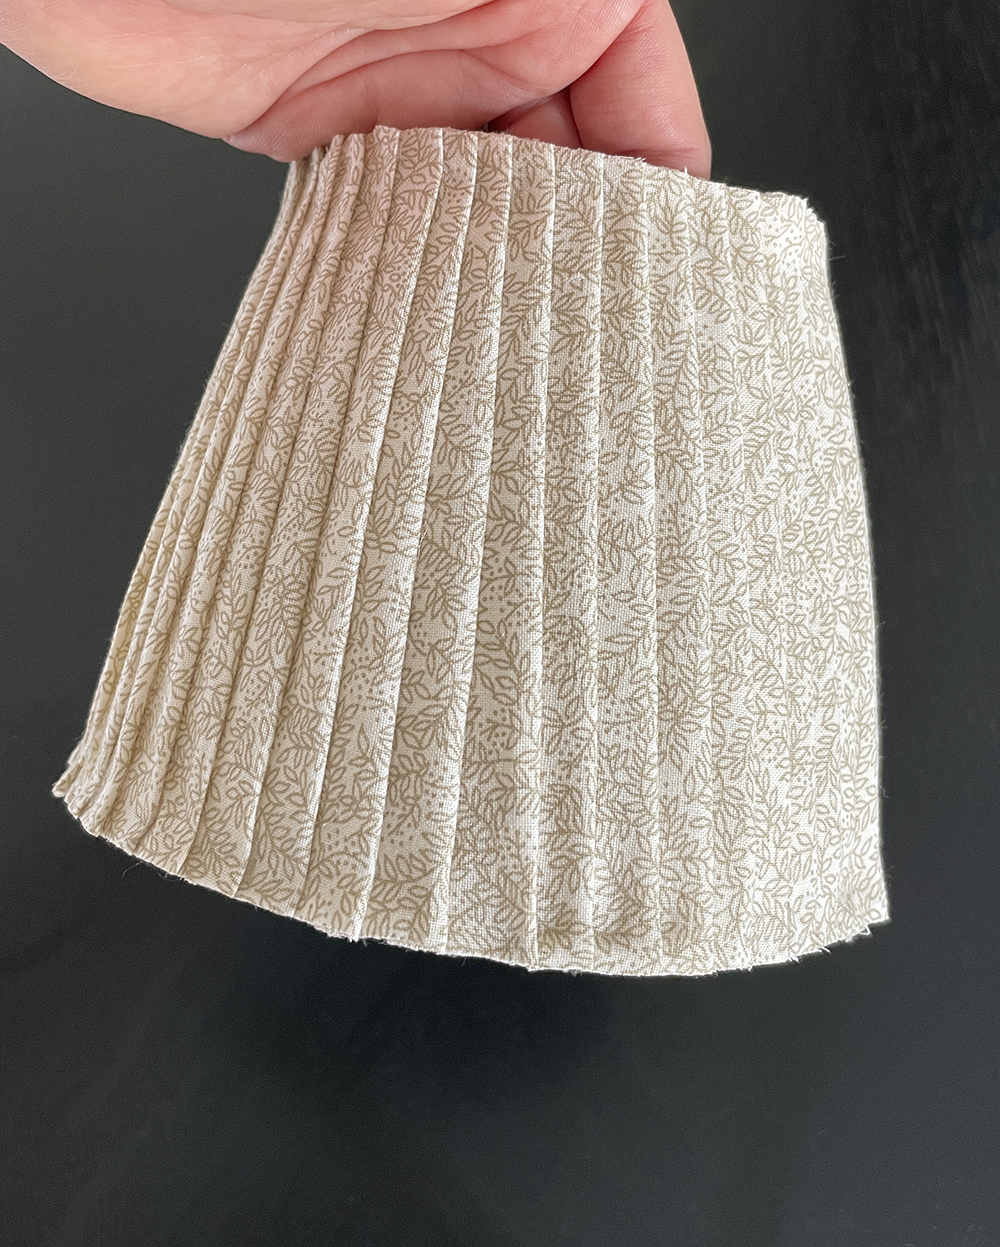 Next, I cut the excess fabric. Trim it as close to the shade as possible, in a clean straight line. I actually had to make a couple passes to get it cut completely down.
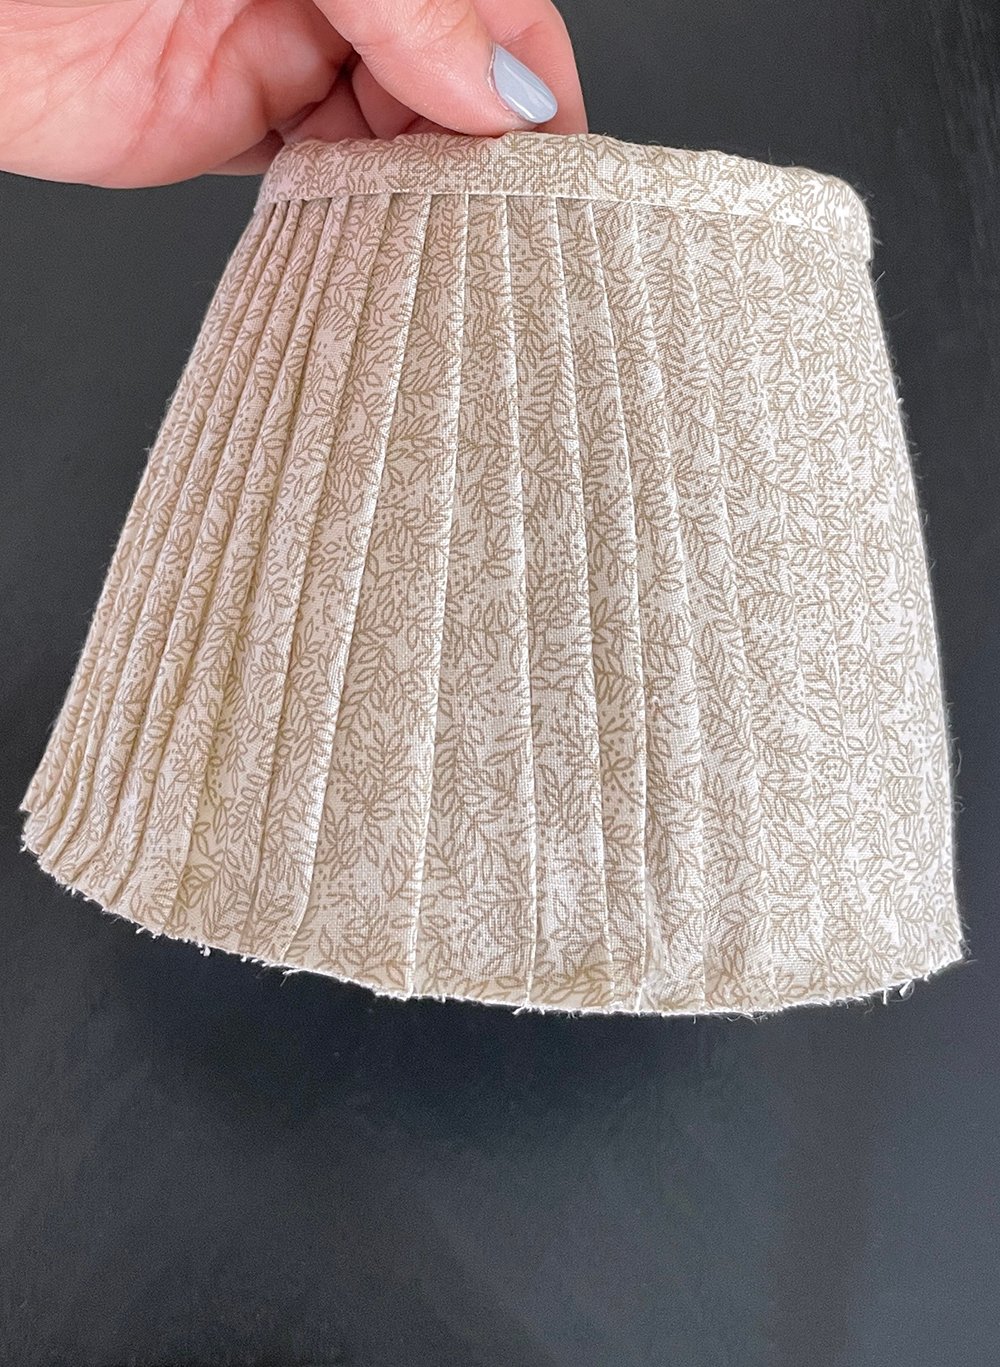 This is the part I experimented with. Marynn suggested glueing the hem tape finishing fabric straight to the shade instead of straddling the edge and folding it over. My friend Alisa also said she had bad luck with that method. I just didn’t love seeing the unfinished raw edge, so I figured I’d do both. First, I straddled the fabric and glued it down the best I could. That’s what it looks like above. Not the straightest, but not terrible. It’s tricky to bend fabric in a circle.
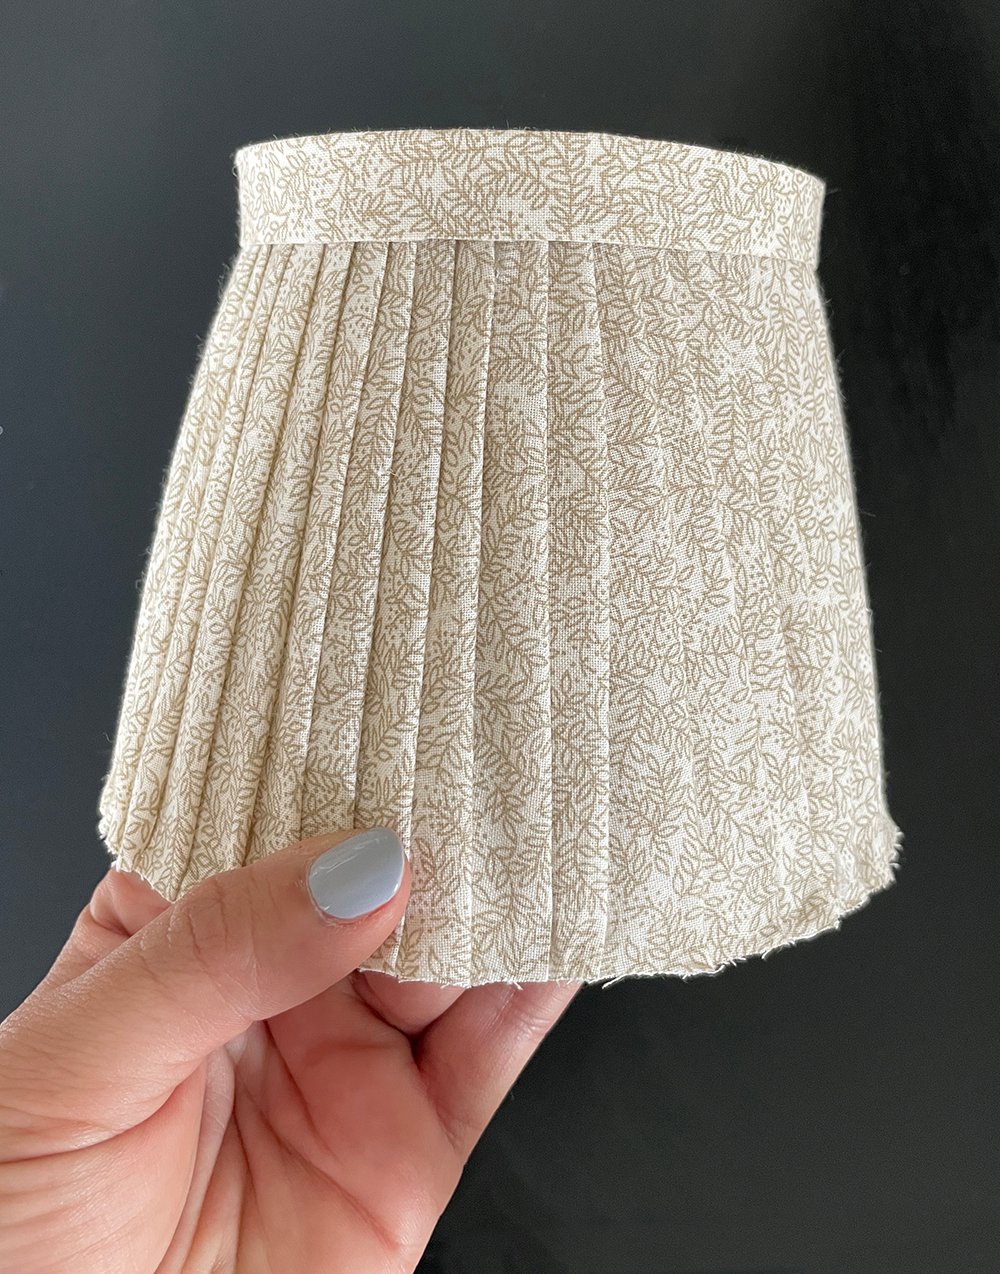 Next, I glued another flat piece over top of the straddled fabric. That felt more finished to me… you can’t see the raw pleated edge from above (it is a table lamp, after all!), and it still gives a nice tailored look.
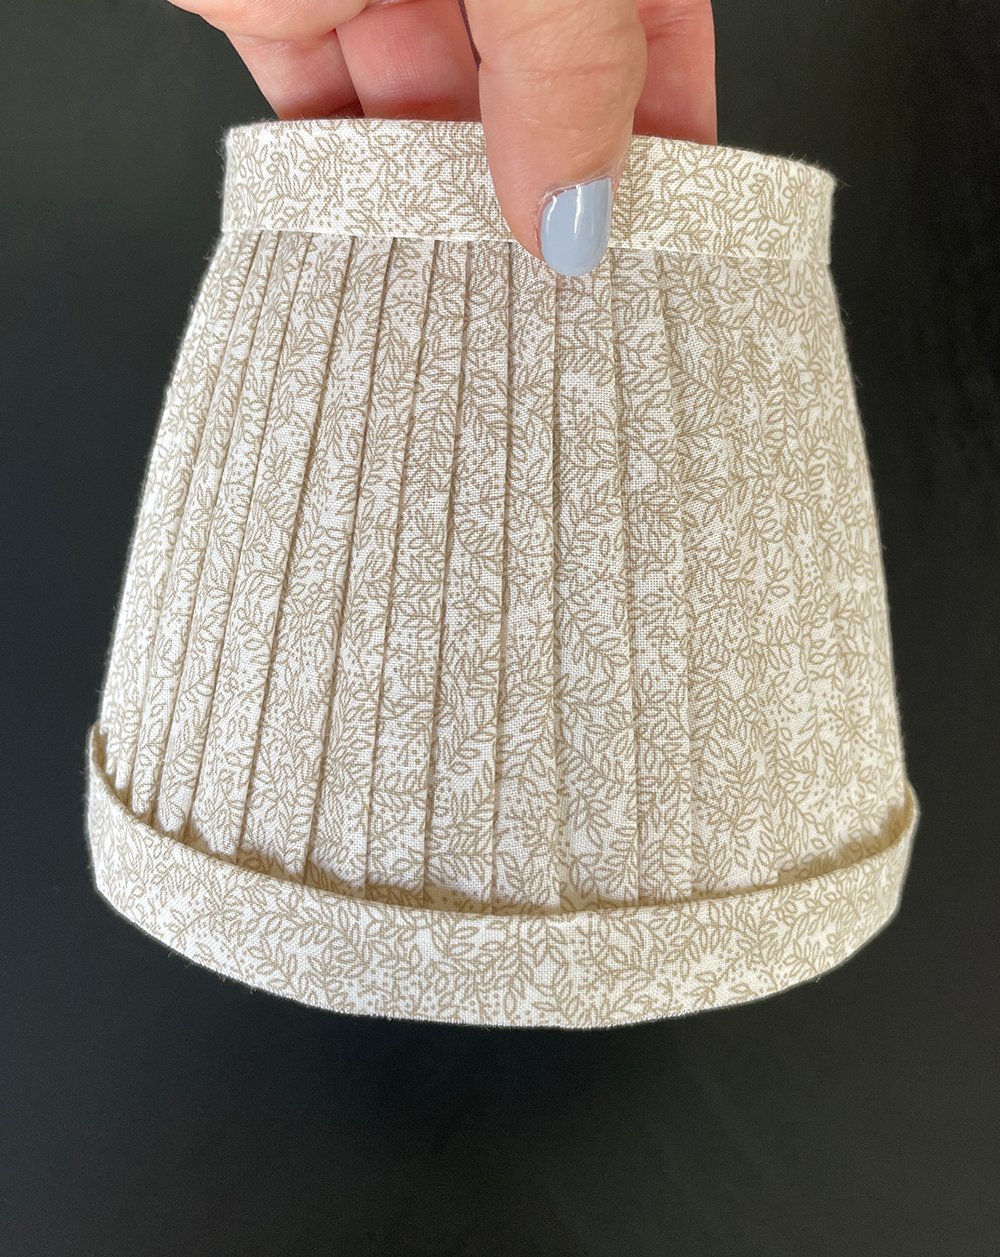 I repeated that same process on the bottom side of the shade to complete the look. Didn’t it turn out so lovely? The lamp and the pleated shade together cost me less than $20, and took about 30 minutes of m time. I feel like it looks more expensive than that!
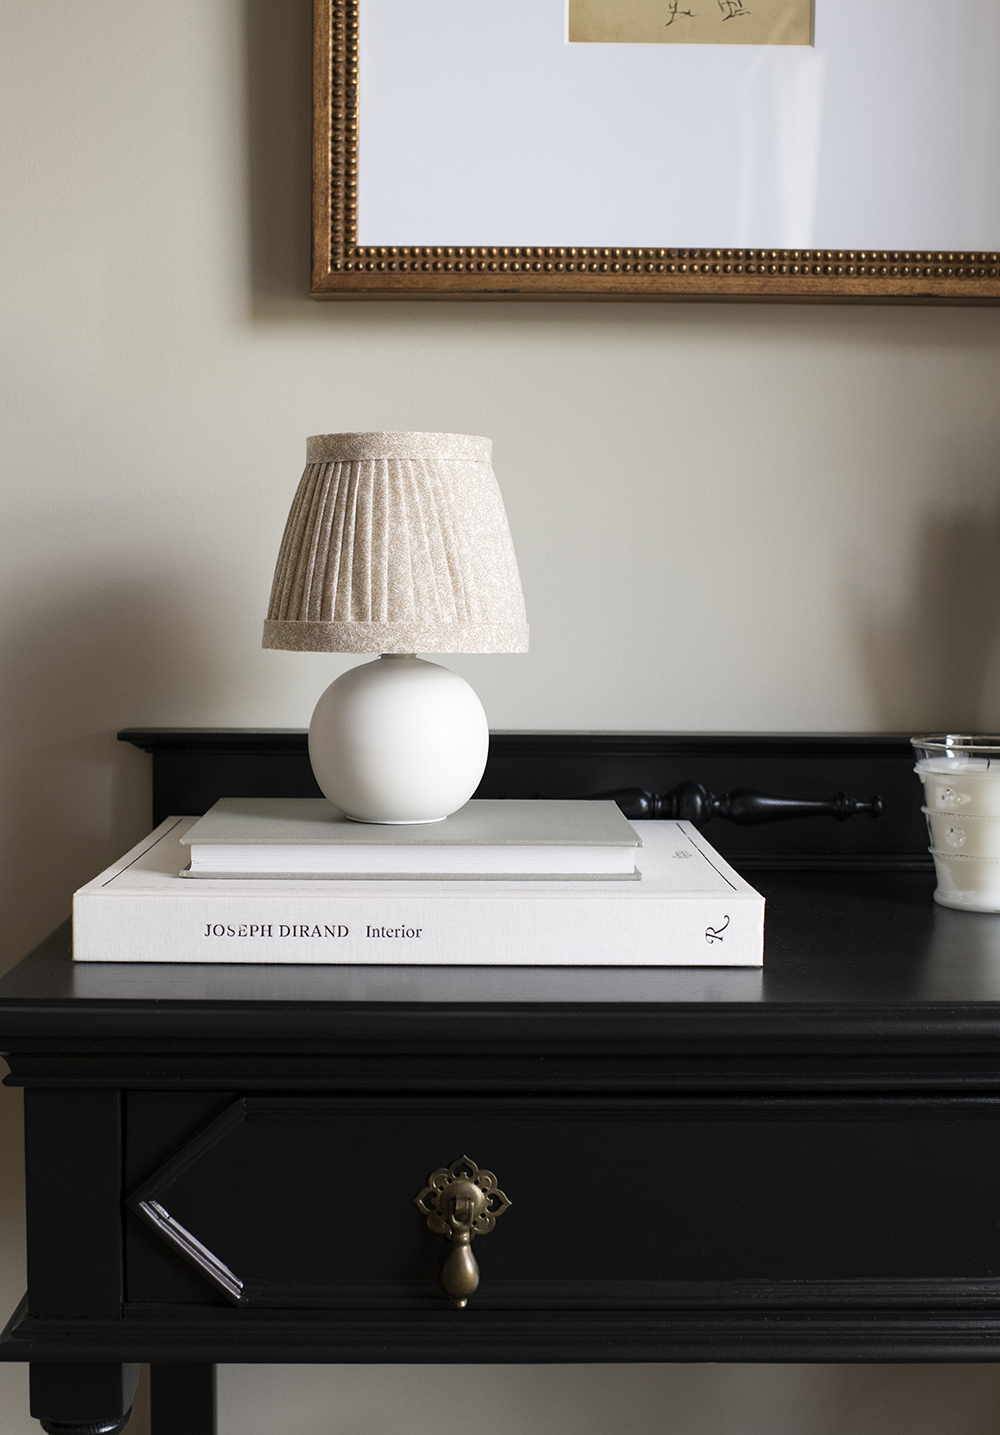 This is definitely a DIY project I’d tackle again… especially given the cost of pleated shades. These things are usually well over $100, and you can’t beat the price of that sweet little lamp ($13). I know pleated shades aren’t for everyone, as they definitely skew very traditional, but I think it’s fun to sprinkle one or two around the house for added pattern, color, or texture. What do you think? Here’s to a productive week ahead!
