Formal Living Room : One Room Challenge – Week 10
 We are officially into Week 10 of our One Room Challenge renovation, the formal living room. We’re moving forward and are getting very close! Over the weekend, we installed our ceiling treatment compromise- the beams… and I promised to share alllllll of the details regarding that decision and the specific product we used. Per usual, with these ORC updates, I just snapped some photos in real time with my iPhone, so please excuse the image quality. Click through to see our progress and get the latest update on our very messy construction zone.
If you found me through the ORC site, hi there! I’m Sarah, a designer & blogger located in Salt Lake City, UT. You can see my current home renovation here, as well as my previous home tour here. My husband, Emmett, and I are renovating our third house. Join us as we tackle the formal living room. In case you missed previous updates, don’t worry! Catch up here: Week 1 (before images, floor plan, and design plan), Week 2 (demo), Week 3 (drywall), Week 4 (fireplace and lighting), Week 5 (sneak peek of furnishings), Week 6 (built-ins and flooring), Week 7 (built-in and furniture placement), Week 8 (millwork), Week 9 (painting built-ins).
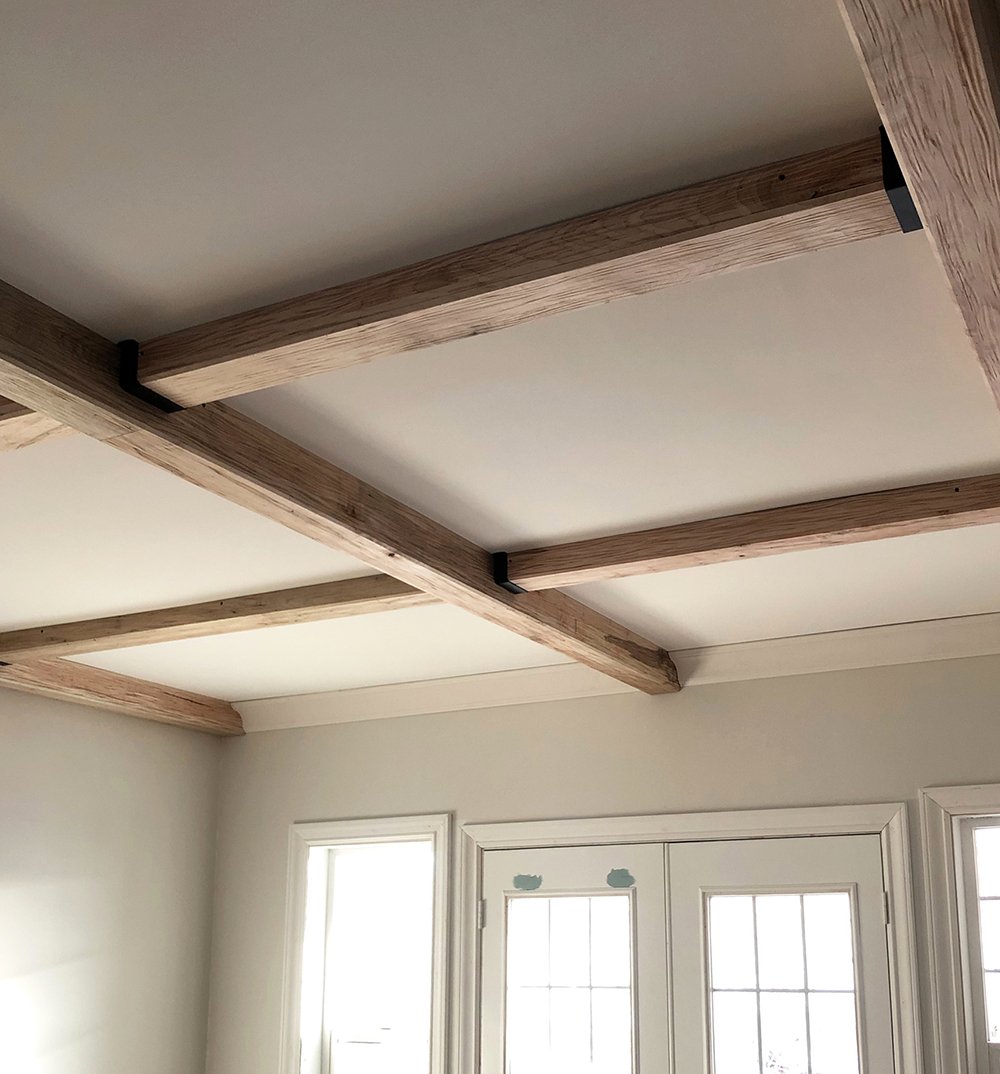
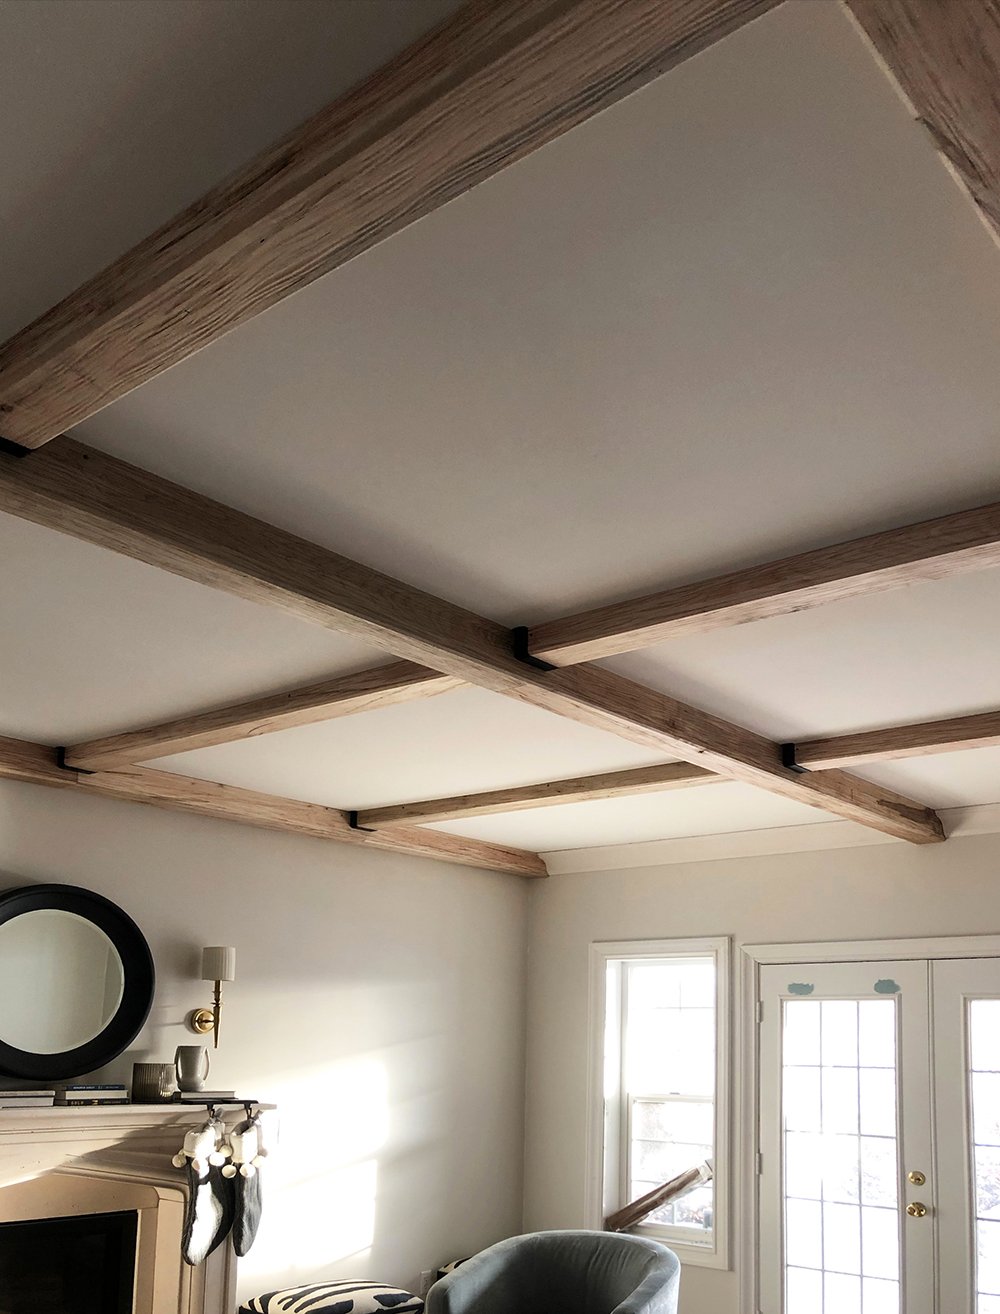
 Ok, so last week I announced our plan to change the design from a coffered ceiling to wood beams, in an effort to save a TON of time (a month of carpentry work). I’ll start by saying that plan was a good one, and maybe even a happy accident, because the beams not only look amazing- but we basically finished in a weekend. We still have to fill the nail holes and joint lines with wood filler, but the beams are installed, as well as the brackets. Emmett and I spent Saturday and Sunday installing them. TWO DAYS! Two days versus a month of what we would’ve spent building the coffered ceiling… I’ll take it.
 I actually really like the warmth and texture the beams add to the space. I think this might even be a better design fit than my initial coffered ceiling design plan would’ve been. Speaking of… lots of you wanted to know what I had envisioned for that (the coffered ceiling), so I wanted to drop an example below:
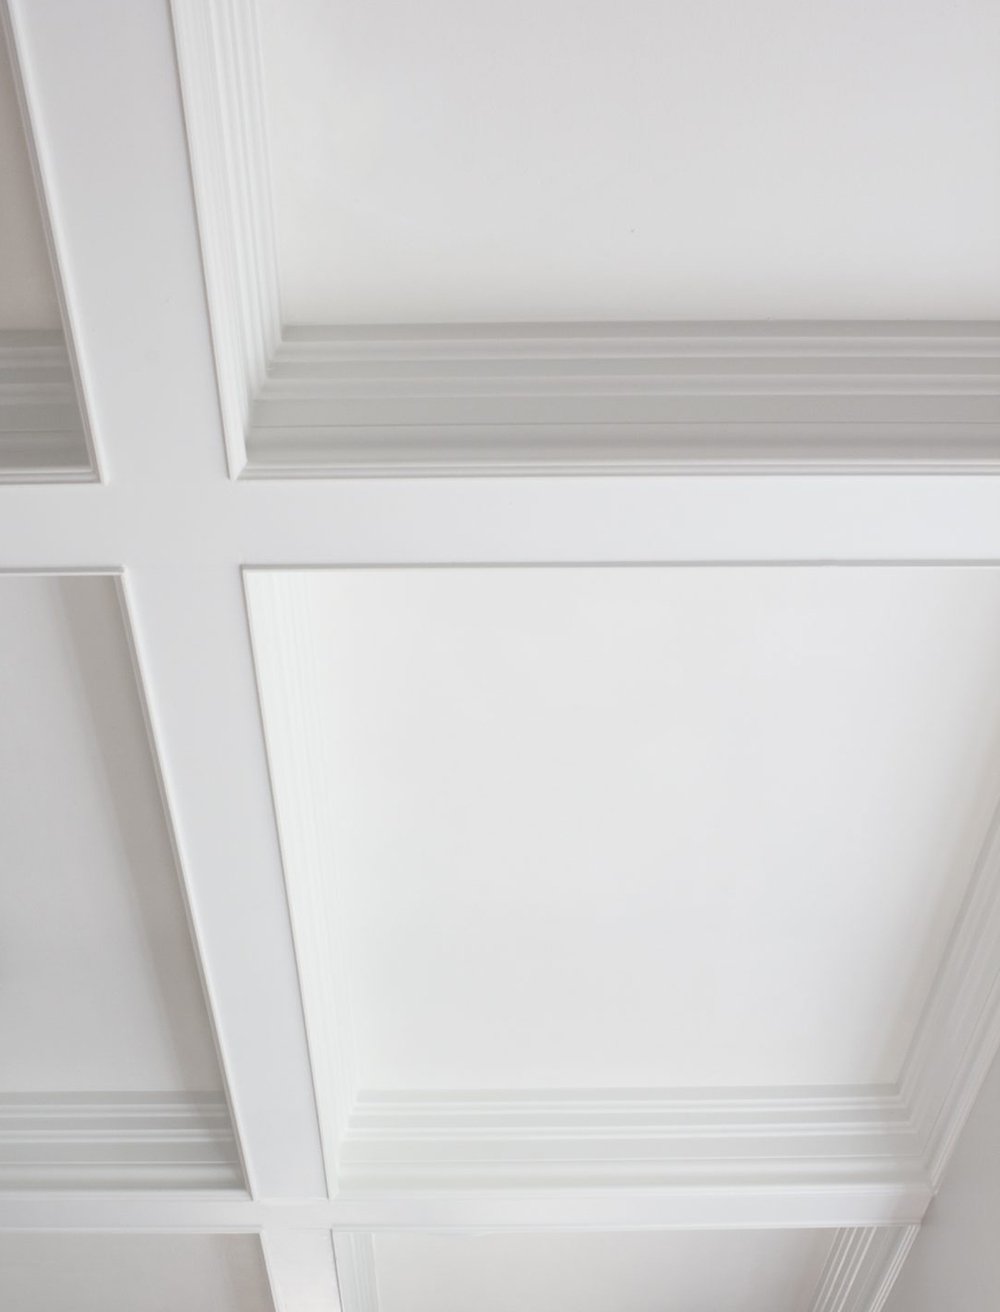 It would’ve looked something like the picture above, except maybe with beefy crown in the center. It’s definitely a more refined look that requires quite a few carpentry hours (and lots and lots of mitered cuts on the saw), whereas the beams feel more rustic and took a weekend to install. Essentially, you screw them to the ceiling and you’re finished. A coffered ceiling is building, trimming, caulking, and painting. There are multiple steps that are labor intensive and time consuming. It is beautiful though! That’s obviously the reason it was in my design plan to begin with.
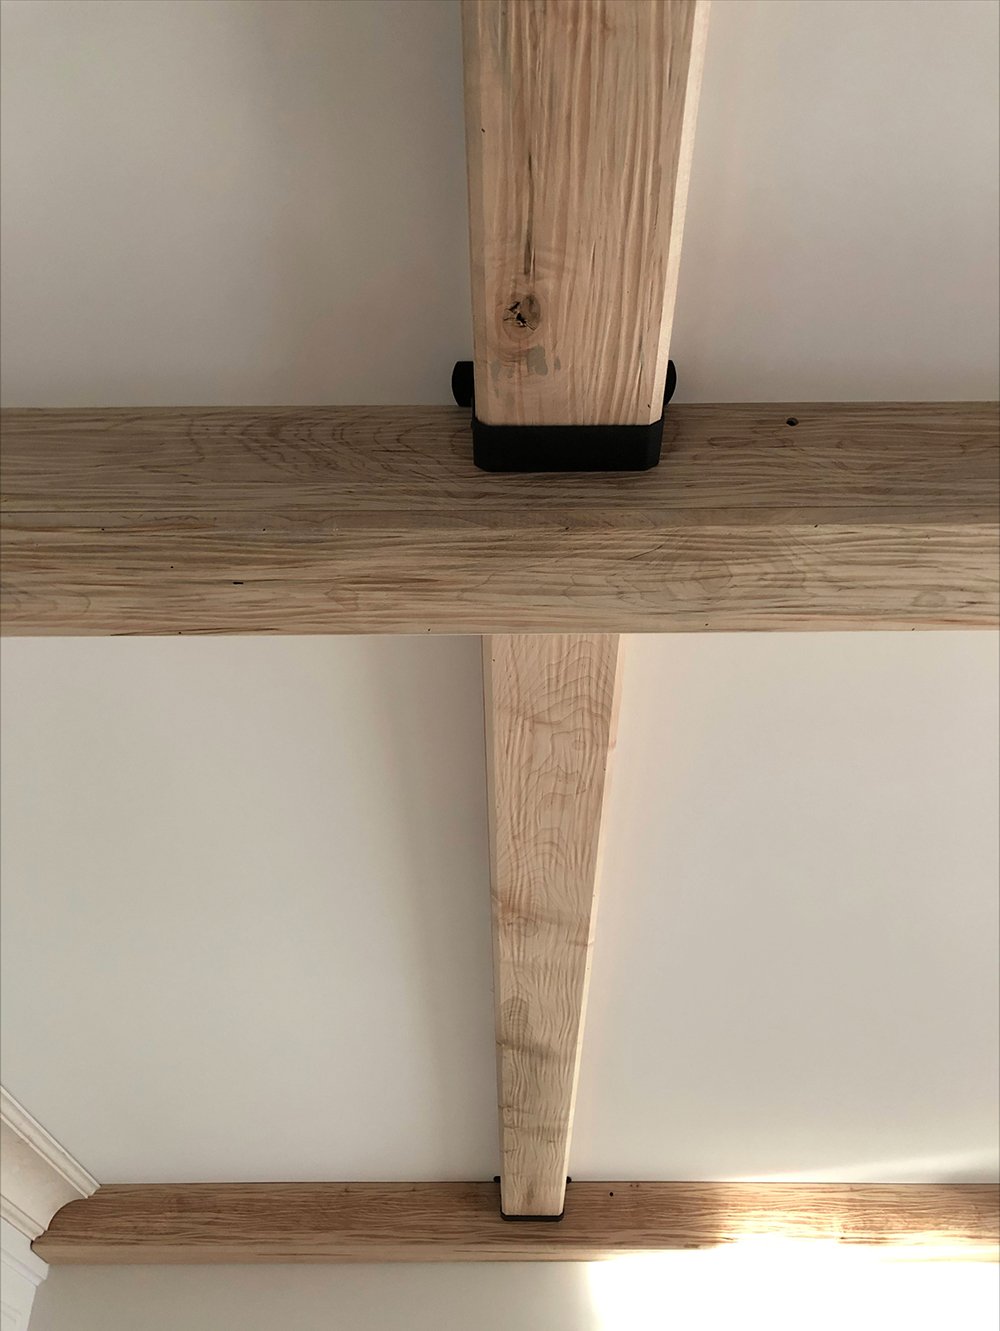
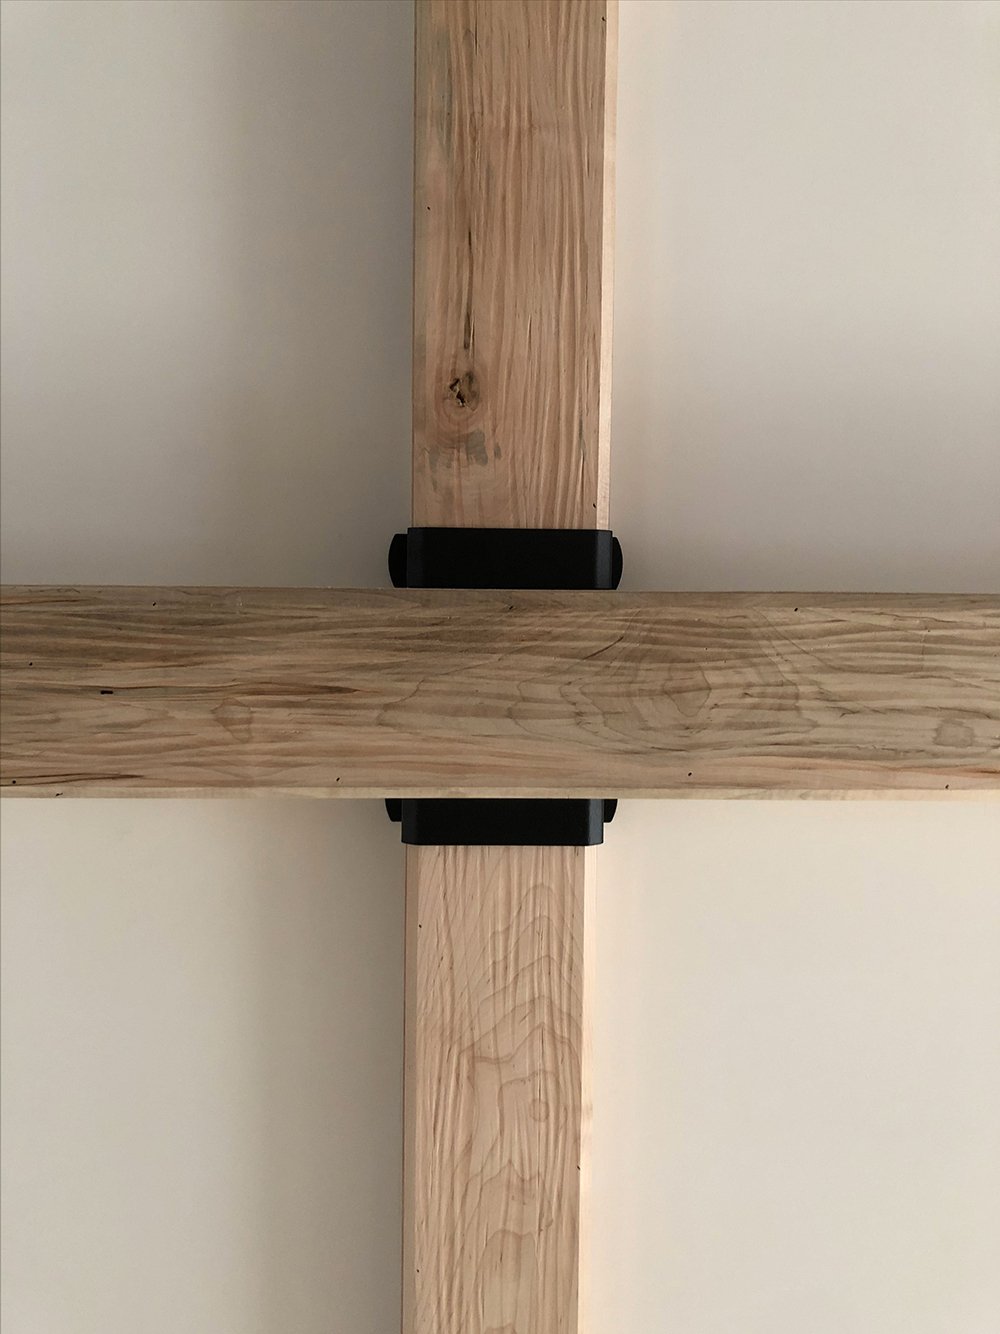
 In terms of beam installation, technically you screw up an anchor board (that comes with the beams), then the beam fits over top of it, and gets screwed in. It’s very easy! The brackets are just decorative and optional. I liked that they tied in our black palette and felt intentional in the space. You know me… I like contrast.
 I received a TON of questions, so I’m going to do a little Q&A about the beams below…
Q: Where did you buy these?!
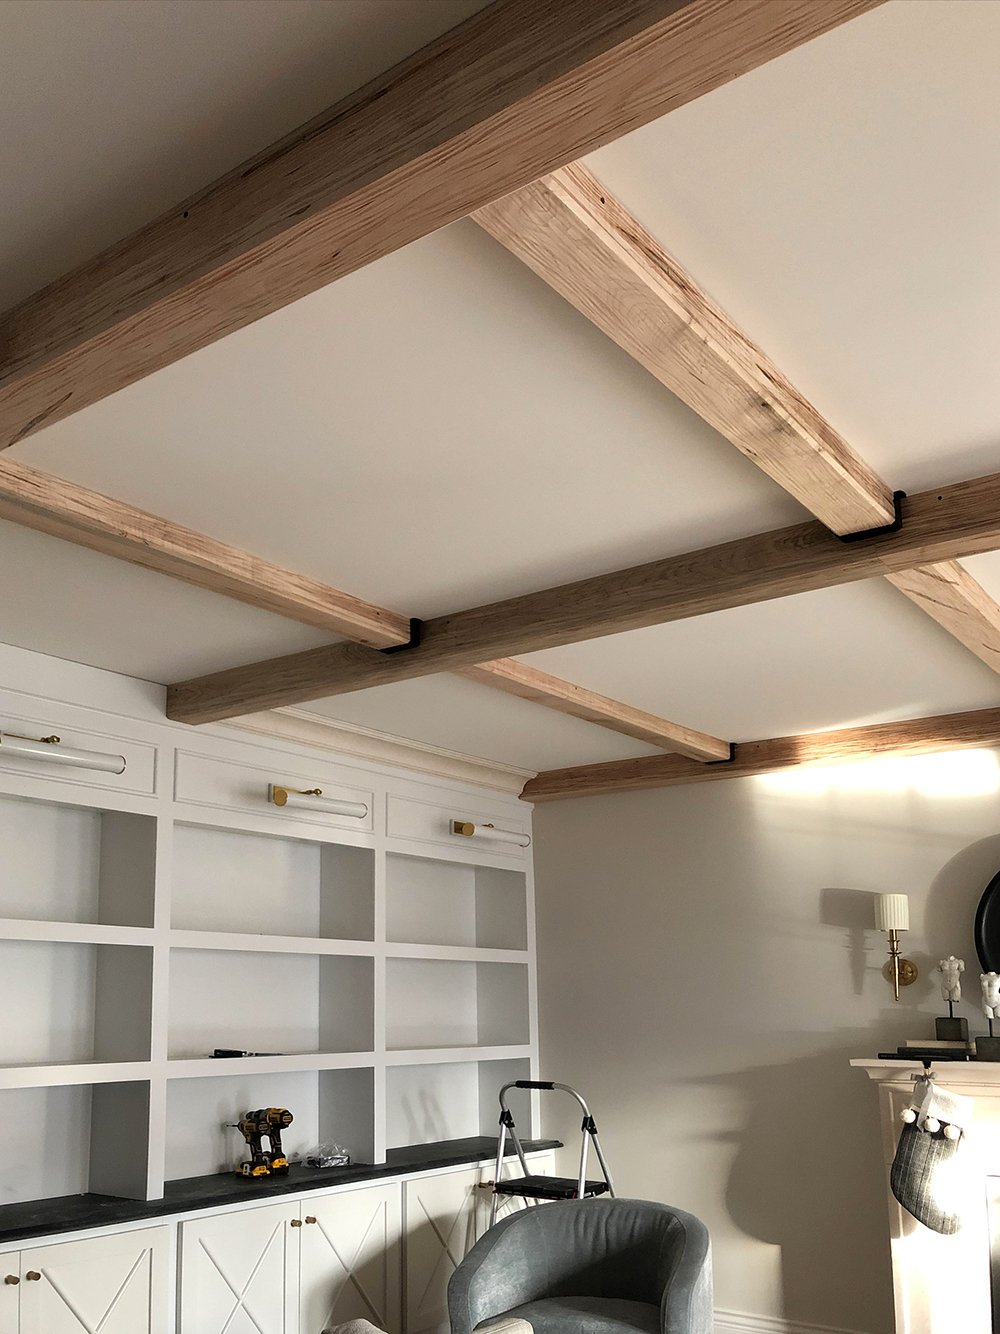
A: You can find them here. We ended up using 8 large beams (5″ x 5″ x 96″), 8 small beams (3″ x 5″ x 96″), and 12 brackets (3″ x 5″).
Q: Are they real wood or faux?
A: Yes, they are real wood- ambrosia maple, though they aren’t super heavy and are hollow inside. They are not faux wood, but they are “faux beams” because they don’t serve an architectural purpose. I suppose you could just say “real wood decorative beams” if you want to get technical.
Q: How much did the beams cost?
A: The beams range from $105 to $112 per beam (depending on the width), and the brackets cost ~$9 each. We ended up spending a total of $1,985 on all of our beams & material. We do have a large room though.
Q: Can you paint or stain them?
A: Yes! Given they are natural wood, you can stain, paint, or oil them to get your preferred color. They also come in a couple different color options. We went with the warmer tone, rustic maple, and ending up leaving them exactly as we bought them. We considered staining them or oiling them, but once we got them into the space, I thought the initial color actually worked very well. Lucky us!!
Q: Can you share a tutorial on how to install them?
A: I would, but the manufacturer actually has a detailed video (watch it here!) that is probably more helpful. I’m telling you- these were EASY to install. Rather than covering the seams with the brackets, I opted to butt the beams against one another, carefully grain & color matching so it looked seamless, then we’ll eventually fill any hairline cracks with wood filler. We still need to do that- as well as fill the screw holes. Did you notice the tiny dots? Those are the screw holes.
Q: How did you determine the pattern?
A: I took measurements and created the pattern to scale on my computer in Adobe Illustrator- that’s what I use for floor planning. You can also just sketch it out on old fashioned grid paper. I tried to balance what looked good from an aesthetic point-of-view, as well as what fit the budget, in terms of quantity (I wanted to keep it under $2k). Our living room was VERY tricky to plan because it’s not a balanced space and there are so many focal points. I opted to center a beam with the fireplace, as well as the french doors. However, that meant the beams are not centered on the built-in. Planning is honestly the most difficult part and is like a game of tetris. My biggest piece of advice? PLAN AHEAD and lay it out beforehand. It’s a must. Winging it is not a good option for this project… trust me!
Q: Was it tricky to line up the wood grain and color match the beams?
A: Yes! I’d recommend buying all of your beams at once, so they come from the same lot. It was obvious that most of them were cut from the same line because the grain matched up. It’s like a big puzzle, but with any natural product- there is variation. In wood, you’ll get variation in color and pattern. Some of them don’t line up perfectly and that’s something I can live with. You honestly don’t notice unless you’re up on the ladder looking closely. I wanted organic texture and warmth, which is exactly what I got. If you’re interested in absolute perfection with the wood grain and color matching, I’d buy faux beams instead because they’re man-made and perfect. That doesn’t occur in organic materials found in nature- like wood.
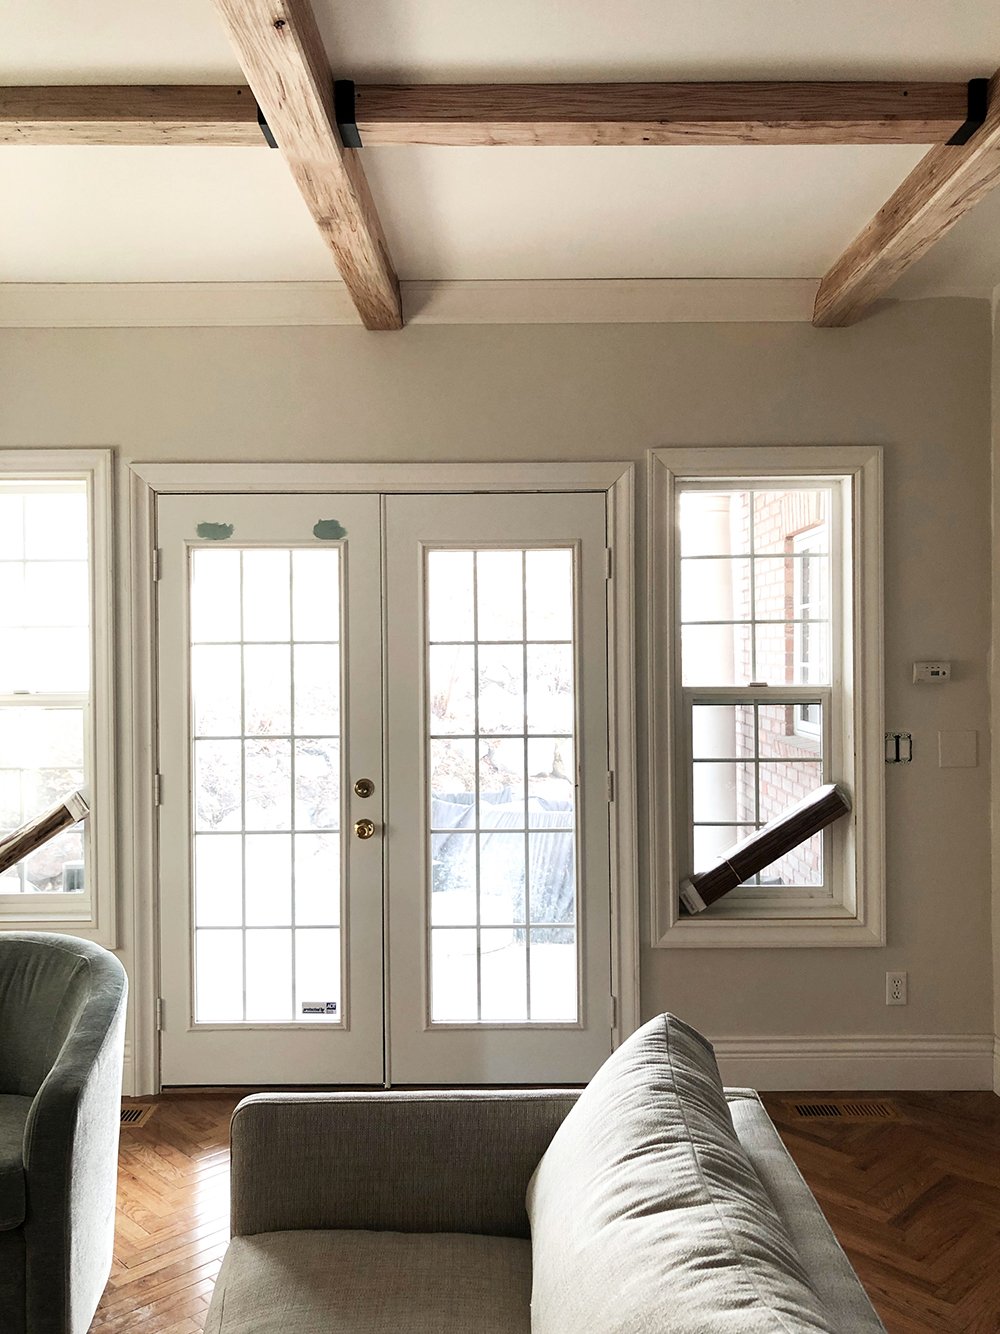
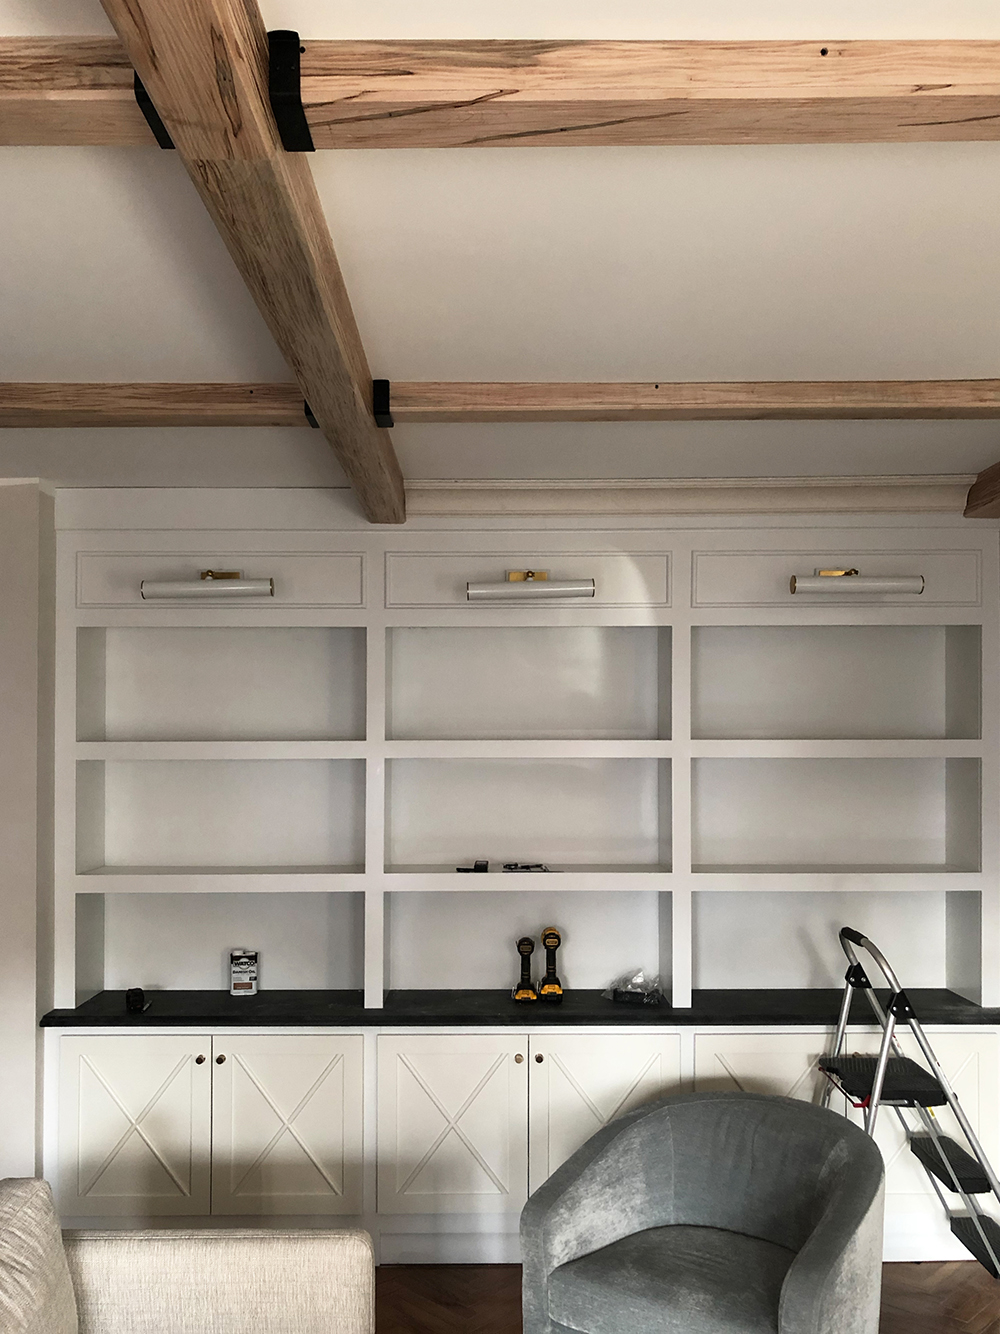 Emmett has started installing the crown moulding, as you can tell in the image above. It’s VERY dirty because it has been living in our shed. I had to laugh because Emily came over and said, “Wow!! You got limestone crown moulding?!” To which I had to reply…. no- it’s just THAT dirty, it looks like limestone or travertine. Haha! My job is to clean and paint it next week once it’s all up. Emmett is hoping to get the baseboards and panel moulding installed this week, so it’s ready for me to paint. Fingers crossed it arrives soon, so we can finish up!
 Aside from millwork, painting, and wallpapering, we just have to install and finish up the little details (like window treatments, art, outlet covers, filling screw holes, etc). We’re getting closer, but still have a lot to do. I’d love to hear what you think of the beams? Are you into them? Did you like my initial coffered ceiling idea better, or do you feel like this was a happy accident? I’m going to drop shopping links below for the beams since I received so many source questions this past week…

I say this every week, but I truly mean it… big, giant THANK YOU for sticking with us in real time- even though we’re wayyyyy late in this game called the ORC. We love & appreciate you guys and your wonderful encouragement more than you know!

linked below…
At Charlotte’s House | Design Addict Mom | Erika Ward Interiors | Erin Kestenbaum | Girl & Grey
Gray Malin | Hommeboys | I Spy DIY | Jewel Marlowe | The Learner Observer | Making it Lovely
Nicole White Designs | Old Brand New | Oscar Bravo Home | Place of My Taste | The Rath Project
Room for Tuesday | SG Style | Undecorated Home | Veronica Solomon | Media BH&G | TM by ORC
So. Much. Detail. This room will certainly be unrecognizable when you are finished! I’m wondering if this is the most intricate design you’ve created so far? A showstopper, for sure. The beams look lovely; the color and texture seem just right. I appreciate how they bring some warmth up to the ceiling, and you can’t argue with 2 days versus a month?! With each update, I get more psyched for the final reveal! I hope you are planning a holiday bash to christen the space. (Or maybe in the spring after you’ve rested a little…😉) Happy Wednesday!
I hope so! There were so many components to this space- I’m wondering what I was thinking… assuming we could finish it in 5 weeks. HAHAHHAH! I severely miscalculated the timeline, so the beams were a welcomed “quick” surprise. We do have holiday guests arriving on Christmas! Happy Wednesday :)
This floor is the longest, time consuming project I have ever tackled. By detail and square footage. But overall there is more millwork and a whole lot of stuff happening in the room!
I adore the beams! The coffered ceiling is beautiful as well but I vote happy accident on this one.
Thanks Brianna! I’m also team “happy accident”
I love the wood beams and quite honestly prefer them over a coffered ceiling but my favorite part of this renovation are the built-in bookcases 😍 They are beautiful and I hope you fill them with tons of books. You guys are so close…..Exciting!
So close! And thank you- I spent forever designing and sketching the built-in bookcase. I can’t wait to style it :)
I love a coffered ceiling but the beams are definitely right for this space. I feel like they also make your home feel more “Utah” too! Definitely the right choice to go with the beams!
Thank you Sarah! I love hearing that it feels “Utah”. I didn’t even think of that, but the rustic vibe was right for this one :)
Wiping the drool off my face! The beams add so much warmth! The ceiling is like another wall that needs to be decorated! I like a coffered ceiling but really loving beams in rooms. You have just made me want these…bad!
Just an idea but what if you did a video reveal of this room like we were all there seeing it with you?
Have a great day!
I like the warmth too! They’re so beautiful in person. I love the idea of a video tour / reveal… I can definitely do that :) thanks for the idea Danna!
How tall are your ceilings? How did you decide how many and where to place the beams?
Our ceilings are almost 10 ft tall (technically, in between 9 & 10, but I don’t have the exact dimension).
Loving the beams and the warmth they add.
Thank you! Me too. It was definitely a happy accident.
The beams turned out amazing, and I think they really lend something special to this space! I’m team happy accident all the way- this looks incredible!
Thank you Kaitlin, and same! xo
This is awwwwwesome. They look so great! I really prefer them to the white coffered ceiling which feels too formal – these have more of a relaxed, welcoming vibe. And the crown moulding coming in displays that traditional trim detail to fancy them up a bit from totally rustic. Yeah!!
Thanks Julie! The beams are definitely more rustic, casual, and warm / inviting. I think that’s probably more of the vibe in our house anyway. Thanks for pointing that out. Emmett was anti crown- he wanted either beams or formal millwork, but I think mixing the two was the right way to go. After he started installing the crown, he admitted it looked really nice. ha!
If you had a 70’s contemporary house then yes just the beams would be good, but with the traditional house style, combining the crown with the beams looks very in keeping.
Anxiously awaiting the full reveal and I appreciate all the hard work you guys are putting into this! I’m curious if there’s a reason you haven’t started painting and wallpaper already? I know how impatient I can get to do anything I can to move the project along so I was just curious if there was a reason you were holding off!
Thanks Bracey! It’s just a time thing… this season has been SO busy, I just haven’t had time to paint. The rest of my wallpaper should be here next week, then I’m going to get started :)
Love this! Exactly what I was thinking for our remodel.
Was surprised to follow the link to Wayfair!
Yes!! So convenient and easy. They shipped via UPS, so there wasn’t a crazy freight charge either. Although… I did help my delivery driver unload 12 giant boxes of beams (I felt sorry for her carrying all of those up to my porch in the snow). ha!
Well, THIS was a happy accident for sure! Maybe the coffered ceiling can come into play somewhere else during your reno. I’m anxiously awaiting this reveal!!
I think so too! I’m thinking maybe the coffered ceiling can live in my office when it comes time to renovate that someday :)
Count me in as team beam. These beams are gorgeous. I hope you and Emmett are taking the time to bask in their glory. Cheers, Ardith
Team beam!! I love it. Thank you so much Ardith :)
Good work Sarah! I think the beams are a great choice here. The room is really starting to take shape!
Thank you Liz!
These details are truly amazing Sarah and Emmett! I can’t wait for the reveal, especially what that (is it robin’s egg blue)!
Thank you for sharing your thoughts on the process and installation of these beams! Will these be carried out though the house in any other room?
Thank you Christine! I really appreciate that and great question about the beams- I do think I’ll need to tie them in elsewhere, but I’m not sure where yet… probably another “cozy” space. Potentially our master bedroom? TBD!
Beams all the way, Sarah!! Oh my goodness!!!!!
Thanks Susie!! xo