Kitchen Shelving Update
 Happy New Year, friends! I missed everyone and it feels great to fall back into my blog routine. I’m eager to see what the year ahead will bring and I’m embracing a fresh start, as we kick off 2023. I’m not big on resolutions, but I do love the excitement, creativity, and optimism a blank canvas brings. This spring will mark four years since we finished our kitchen renovation, which is honestly hard to believe! Time flies! This is actually the longest we’ve ever lived in a home (another crazy realization)… we’re typically accustomed to moving often. That said, Emmett & I love it here and while big renovations are still in the works- sometimes those small changes can make the biggest impact. Our kitchen is still my favorite, but one particular area was feeling bothersome or forced and I wanted to update it before the year came to a close. I had always planned for and have enjoyed the open storage above our coffee bar, but the existing floating shelves just weren’t working for me anymore… strictly from an aesthetic perspective. Click through for my thought process, reasoning, and installation for a quick, yet impactful update in our kitchen. I thought it would be fun to kick off the year with a tiny makeover. Shall we?
 At the time of our kitchen renovation, we were working to transform the space with Lowe’s… which was a dream partnership and our largest sponsored project to date. I designed our custom cabinetry, made finish selections, and worked through every single storage detail using items found at our go-to home improvement store. I was able to find everything I needed at the time, excluding traditional style floating shelves for our coffee bar. I landed on a modern wood option that nearly matched our herringbone hardwood floors as a compromise. The style and color wasn’t exactly what I had initially envisioned, but with proper styling- I knew they would work. That was really our only option at the time, so we committed… check them out them below:
 Fast forward a couple years later, it became obvious to me that the floating shelf situation could definitely be improved, though it was never my intention to update them (my designer brain is a double edged sword). Apparently, I was still clinging to my original design plan that felt more traditional, better matching the aesthetic of our home and kitchen. Other projects took precedent and it wasn’t a pressing matter, so we didn’t make any moves to update the coffee corner that was functioning just fine. Finally, last summer I decided it was time to make the swap. I sketched out my idea, Emmett built the shelves with a beautiful swooping ogee edge, and they sat in our garage for six months collecting dust. Ha! It happens to the best of us.
 By the time I got around to ordering brackets and hardware, the holidays had rolled around. However, I was determined to get them switched by the end of the year, and after a quick evening swap- I’m wondering why we waited so long. It only took Emmett a couple hours one evening to remove the existing shelves and install the new ones, and our kitchen instantly felt better and lighter.
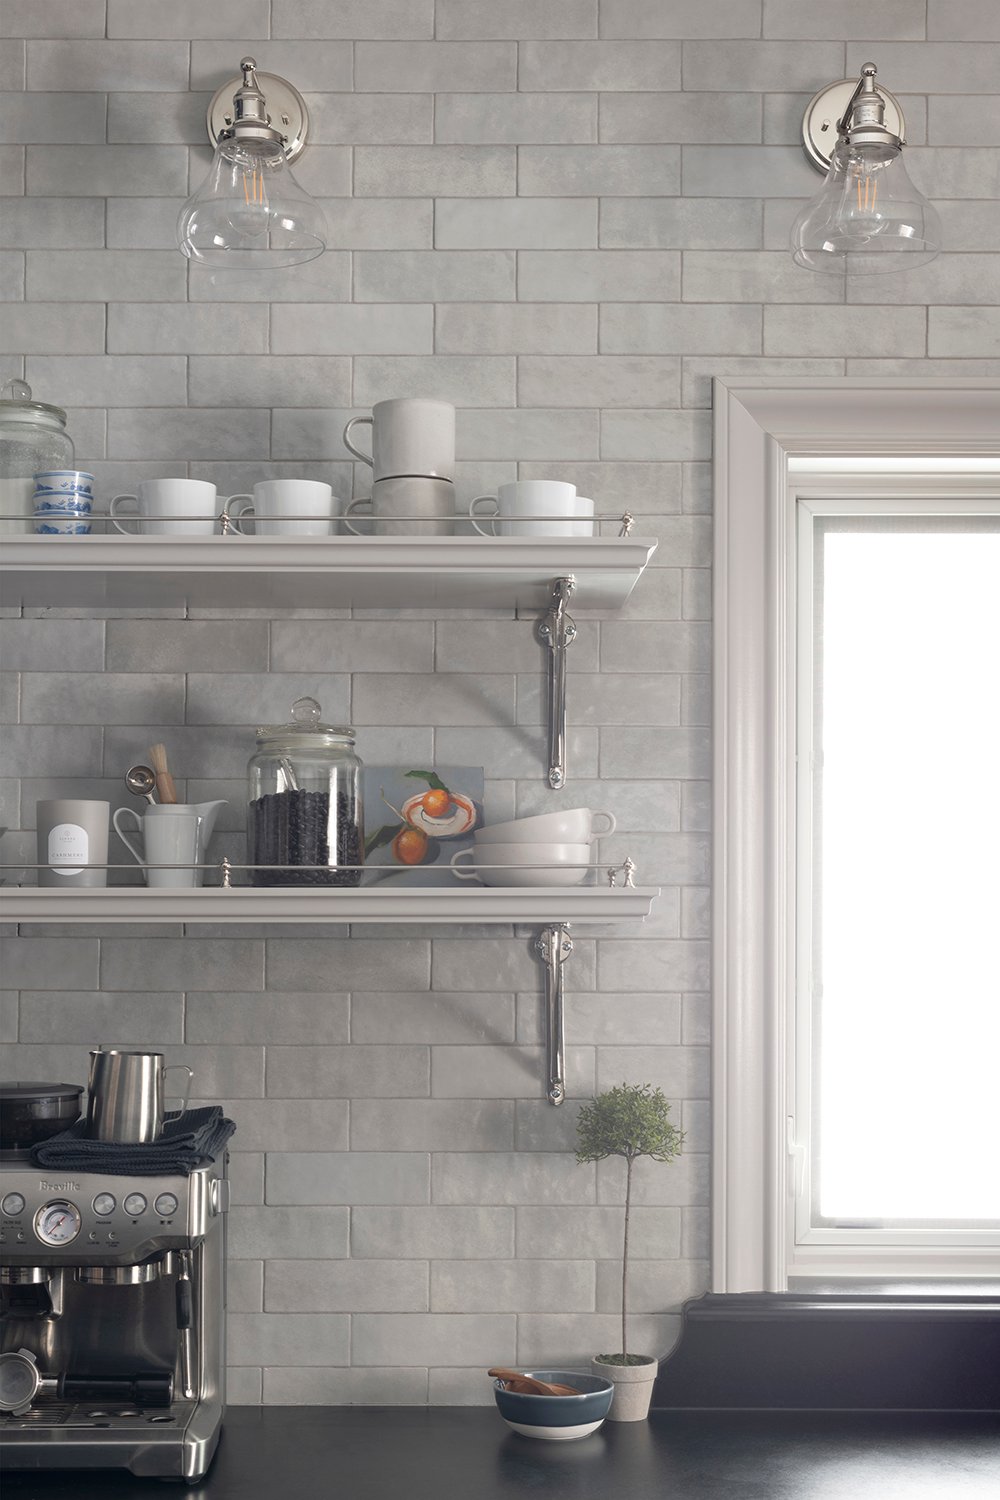
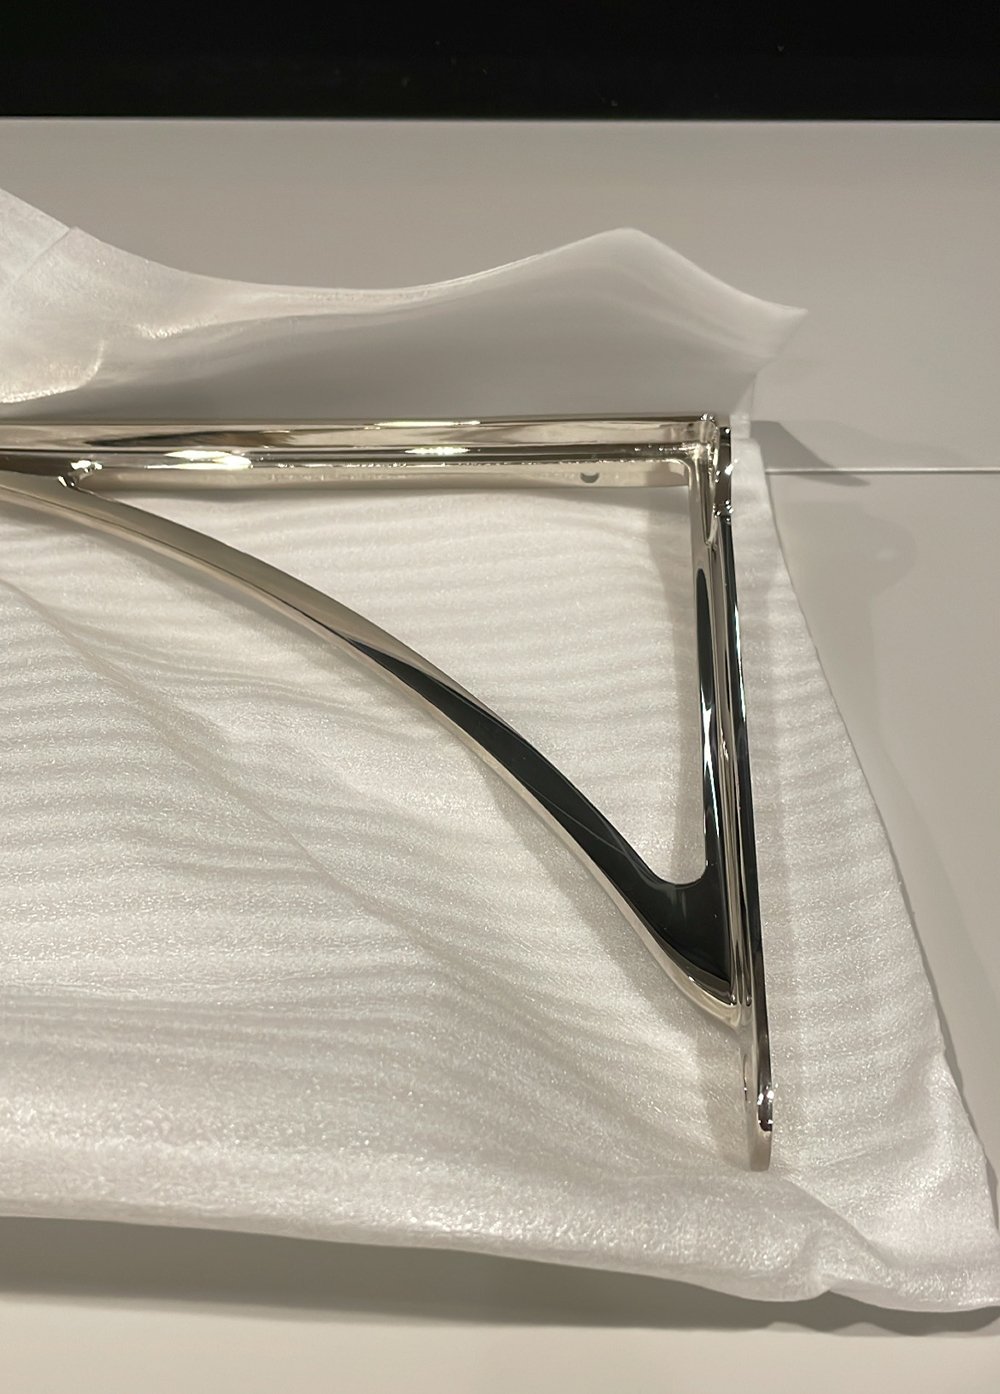
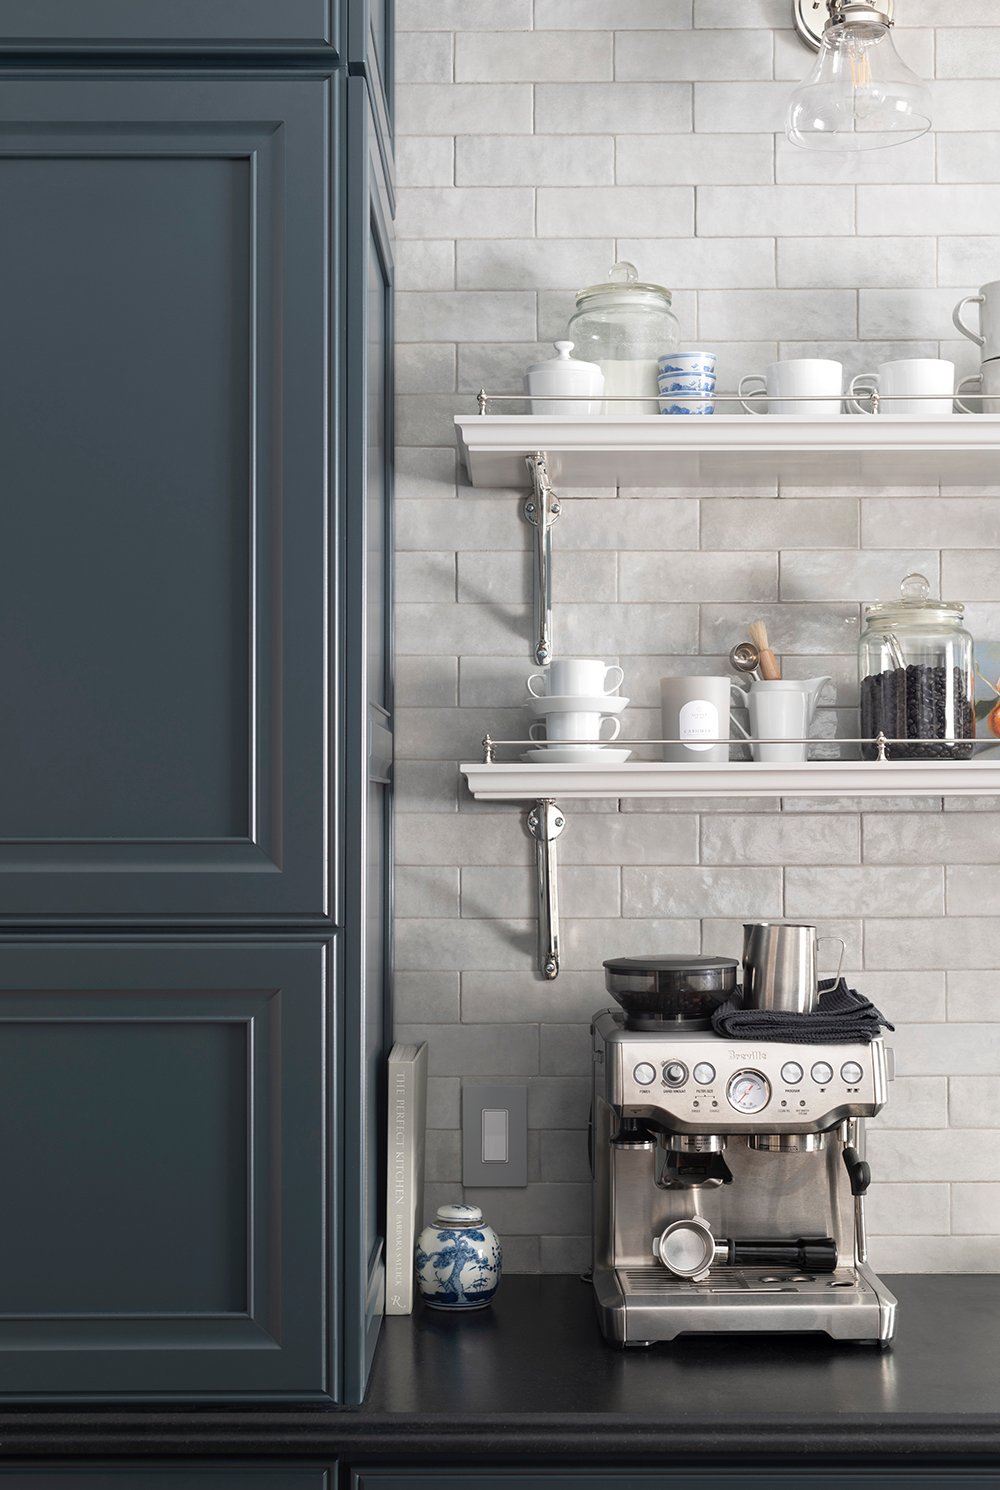
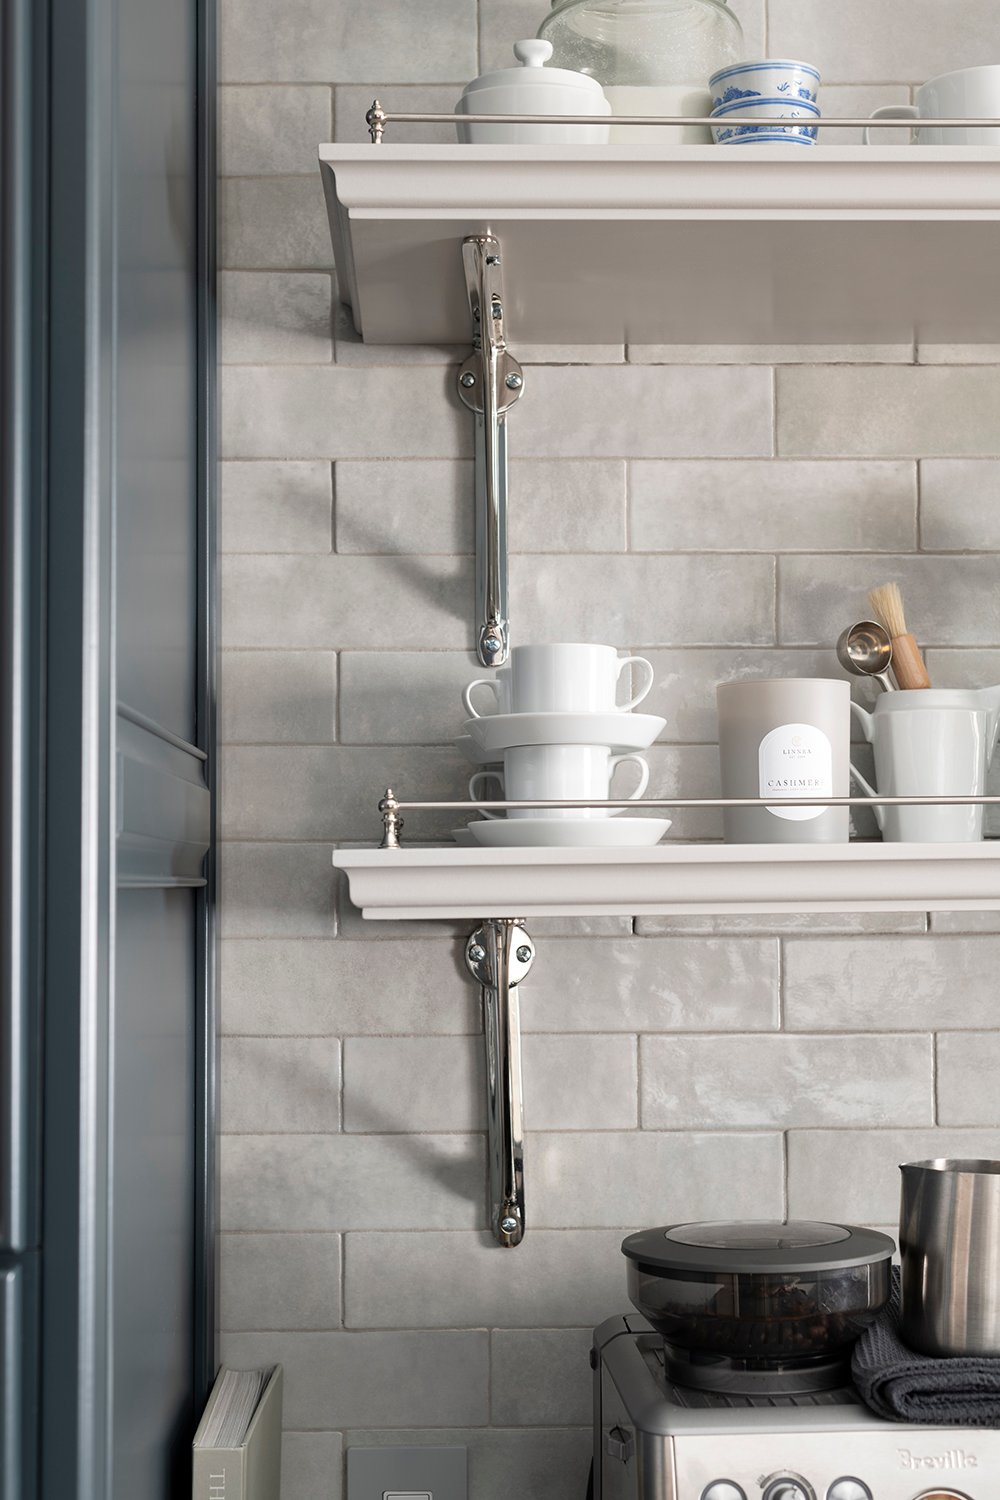
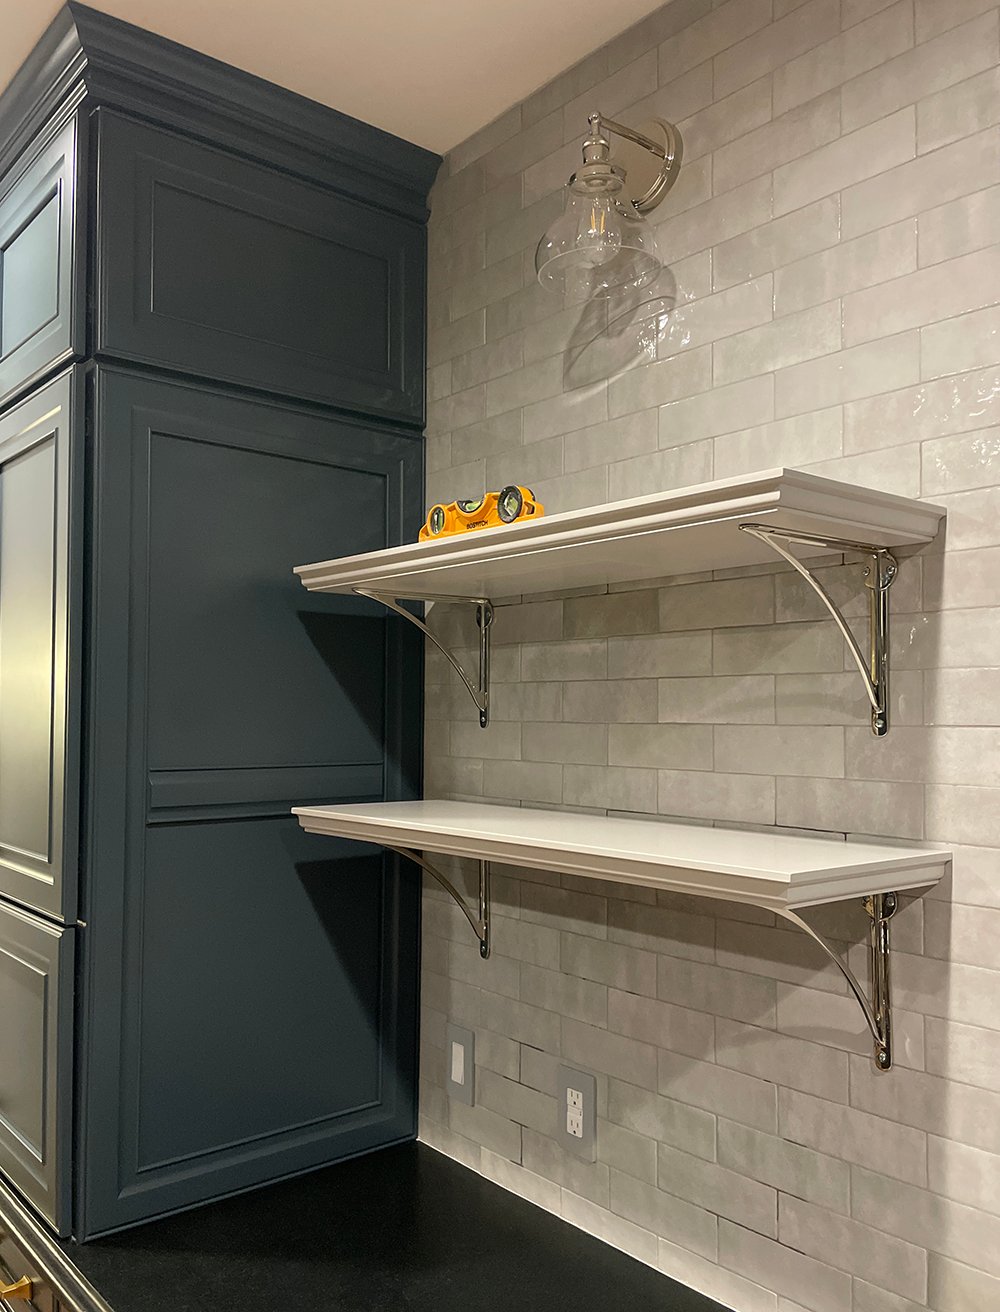 Let’s talk details… I opted for polished nickel brackets and gallery rails for a classic traditional look. Our lighting and plumbing fixtures in the kitchen are all polished nickel, so it made sense to match the hardware. I also think the vignette feels better balanced, visually.
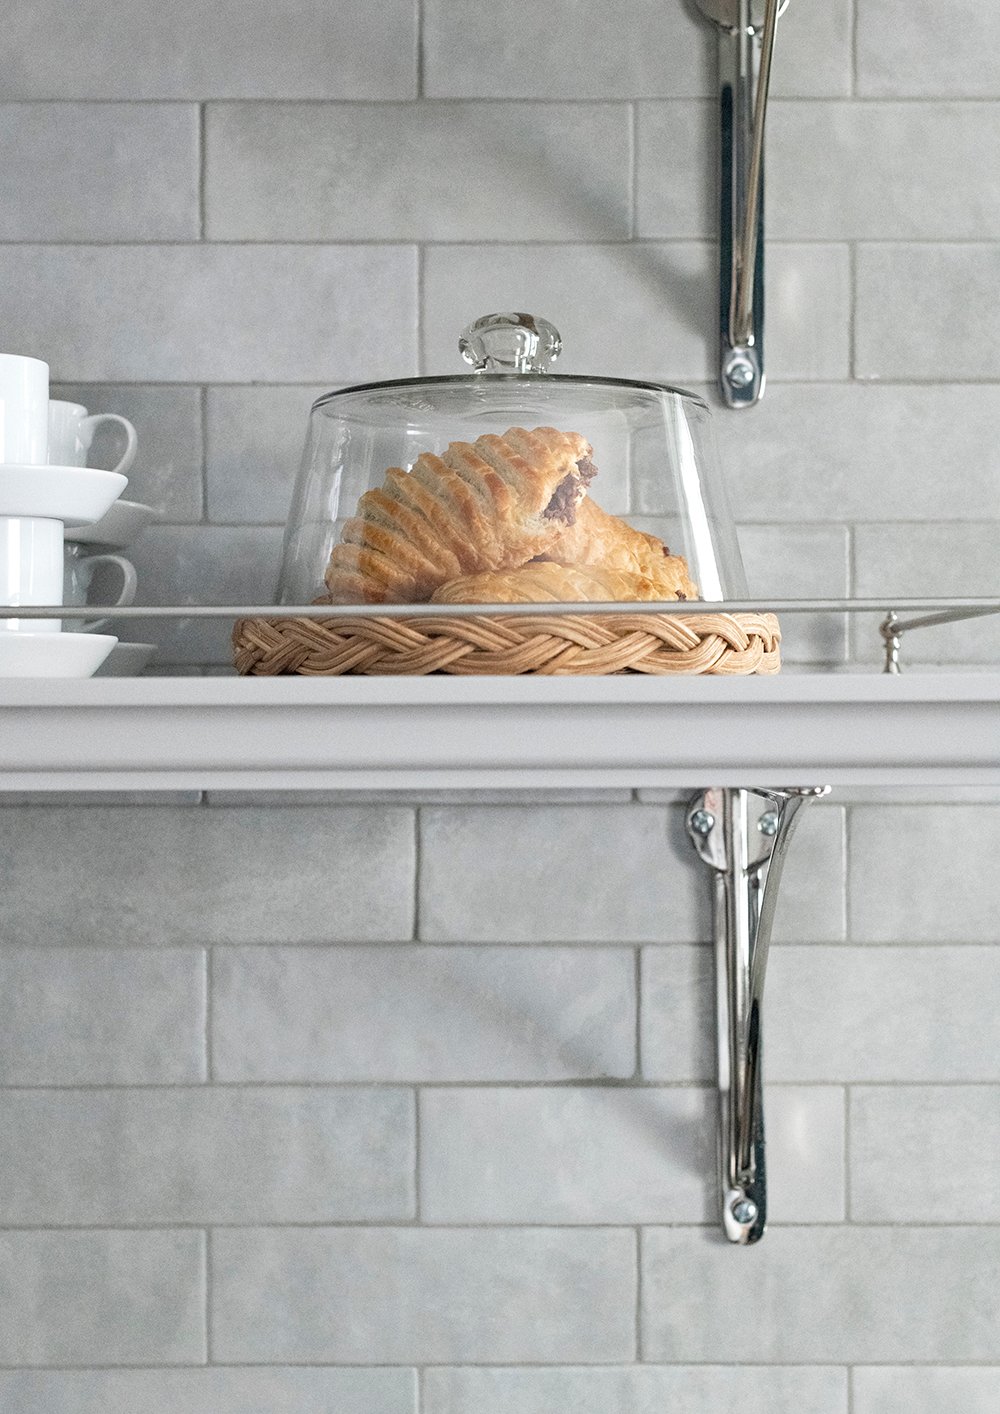
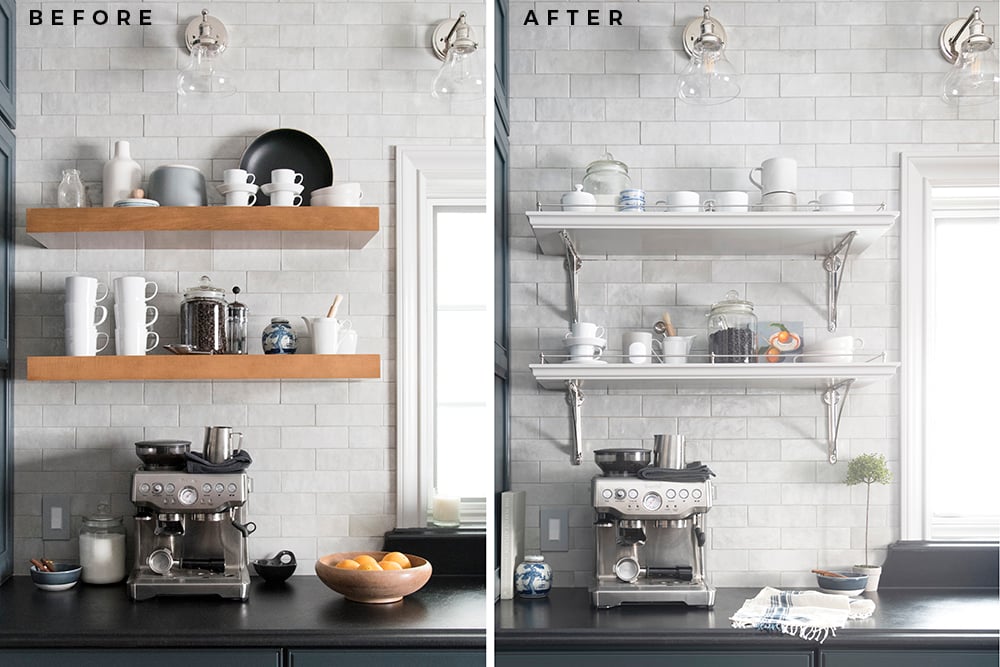 We pile the shelving high with coffee items, so having the brackets and rail makes the floating shelves appear more stable and comfortable. The rail also keeps our coffee items from getting too close to the edge, but mostly it’s there for aesthetics. I like that it took on a bistro sort of look. I also pared down the styling items and used the shelf space for coffee items we use on the daily, only. As much as I’m drawn to maximalist styling- sometimes taking the minimalistic or functional approach is best.
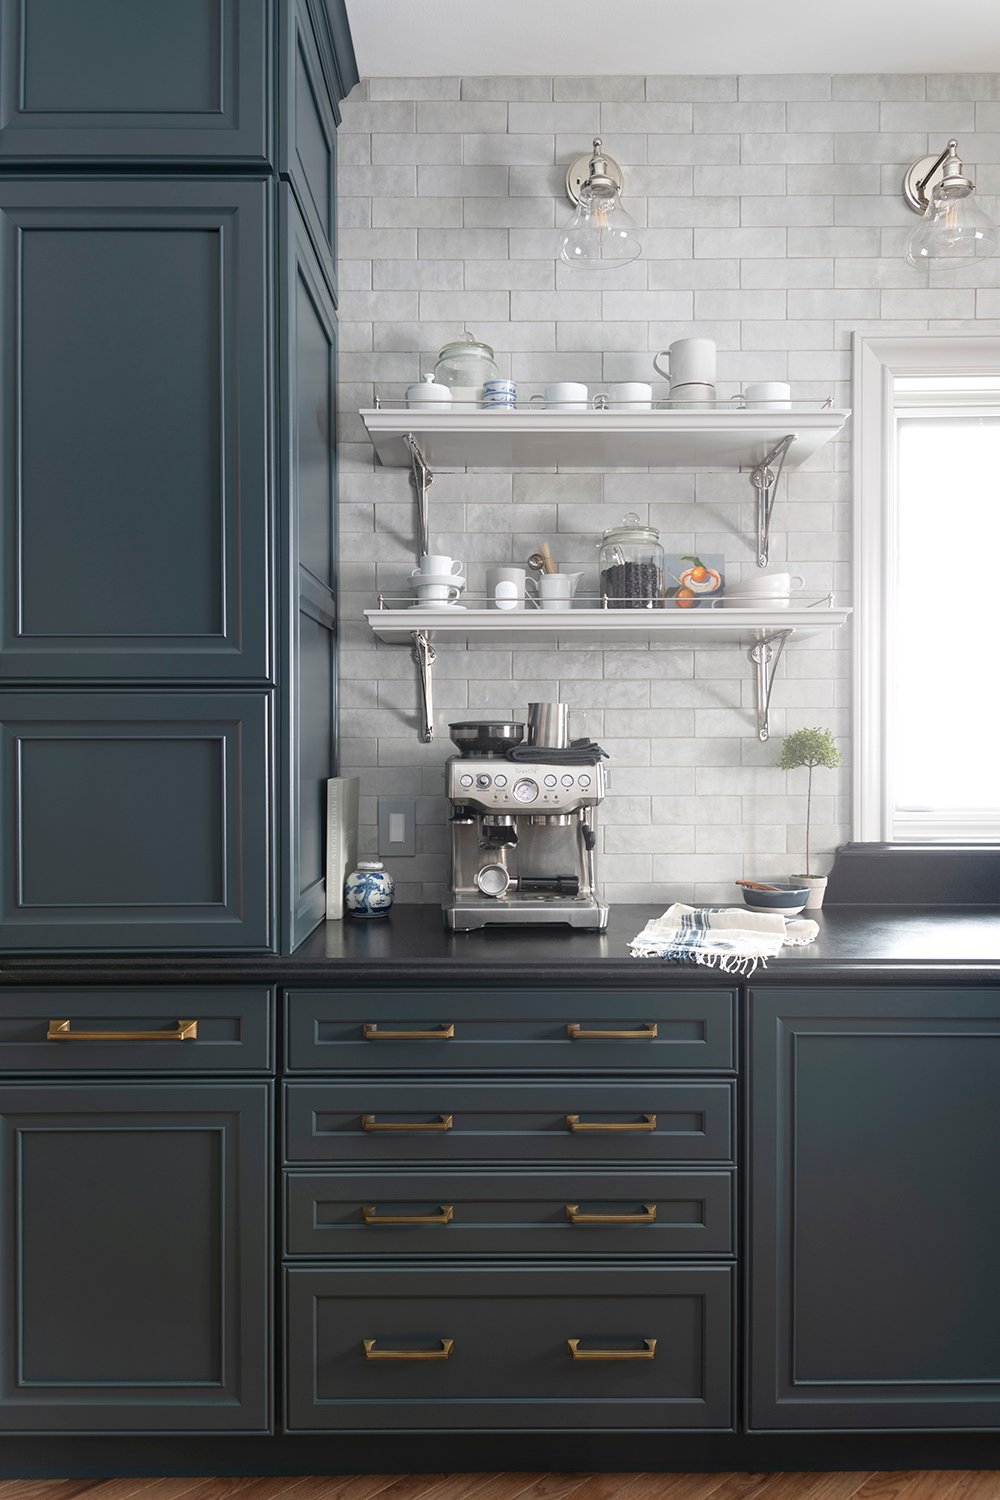 I painted the shelves themselves the same color as the window casing in our kitchen, which is actually a light gray that matches our backsplash tile. The don’t feel as heavy or cluttered in a monochromatic palette. I did want to address a few frequently asked questions I received after sharing a quick before and after on Instagram before the holidays…
Why and how did you drill into the backsplash tile?
Drilling into the tile was the only way to install heavy duty floating shelves (capable of supporting plenty of weight for our coffee items)- for both our previous and existing shelves. We’ve never been afraid to drill into tile… whether it’s to hang shelving, artwork, pizza peels, or cutting boards in the kitchen, I’d encourage you to do that over using command hooks that easily and often fall. I’ve had too many things break. They’re just not reliable for permanent situations. You will need to use a masonry bit, screws, and anchors depending on the weight of what you’re hanging. We’ve never had a tile or grout line crack. It seems more scary than it actually is.
Where did the shelves and brackets come from?
I’ll be sure to link all of the items we used in a slider below, but Emmett built the shelves- so sadly, I don’t have a link for those. I’ll drop in some similar readymade options. The gallery rails can be found here (in nickel)– the source website wouldn’t let me link those below.

Do the new shelves hold more weight than the previous ones, with the brackets?
No- they actually hold the exact same; it was purely an aesthetic and visual upgrade. The previous modern floating shelves had hidden brackets that the shelves slide over, so it’s the same weight distribution.
 For more kitchen posts, feel free check out or revisit the following. I’ve shared a LOT in the 3.5 years since renovating our kitchen…
- Color Matching Our Kitchen Cabinets (+ Painting Tips)
- Amazon Finds : Classic Kitchen Essentials
- Design Discussion : Hardwoods in the Kitchen
- Kitchen Design : Panel Ready Appliances
- My Dishes, Glassware, & Kitchenware (+A Printable Registry Checklist)
- Kitchen Cabinetry Video Tour
- Our Dark & Moody Kitchen Reveal
- Guide for Properly Lighting a Kitchen
- Classic Kitchen Linens to Love
- Roundup : Non Permanent Kitchen Islands
- Our Kitchen One Year Later (Post Renovation)
- Roundup : Kitchen Countertop Lamps
- Refrigerator and Kitchen Organization
- Kitchen Must-Haves for Hosting Family & Friends
- Breaking Down My Kitchen Cabinetry Hardware
- Look for Less : Our Moody Kitchen
- 5 Things Every Kitchen Needs That You Might Not Think Of
- The Kitchen Budget
- Why We Used Soapstone in Our Kitchen… Again
- Kitchen Windows : The Selection & Installation Process
- Tips for Designing a Functional Kitchen
- How to Mix Metals and Choose Kitchen Plumbing Fixtures & Hardware
- My Last Kitchen Renovation Update
- Kitchen Demo
- The Kitchen Design Plan
 I hope this post encourages you to make little changes you’ve been itching to tackle in the year ahead. If something in your home is no longer serving you or feeling balanced, it’s ok to make a change… no matter how recently it has been updated. Our coffee bar and corner of the kitchen have been a bright spot for me these past few weeks, and I’m glad I decided to swap the shelving. That tiny change really impacted the entire room. Emmett couldn’t believe the difference. I’m very pleased with our new floating shelves and Jordan was able to repurpose our previous ones in her laundry room, which better fit her beautiful home. It was a win / win. Here’s to more quick & easy changes that make our homes continue to feel like our favorite place!