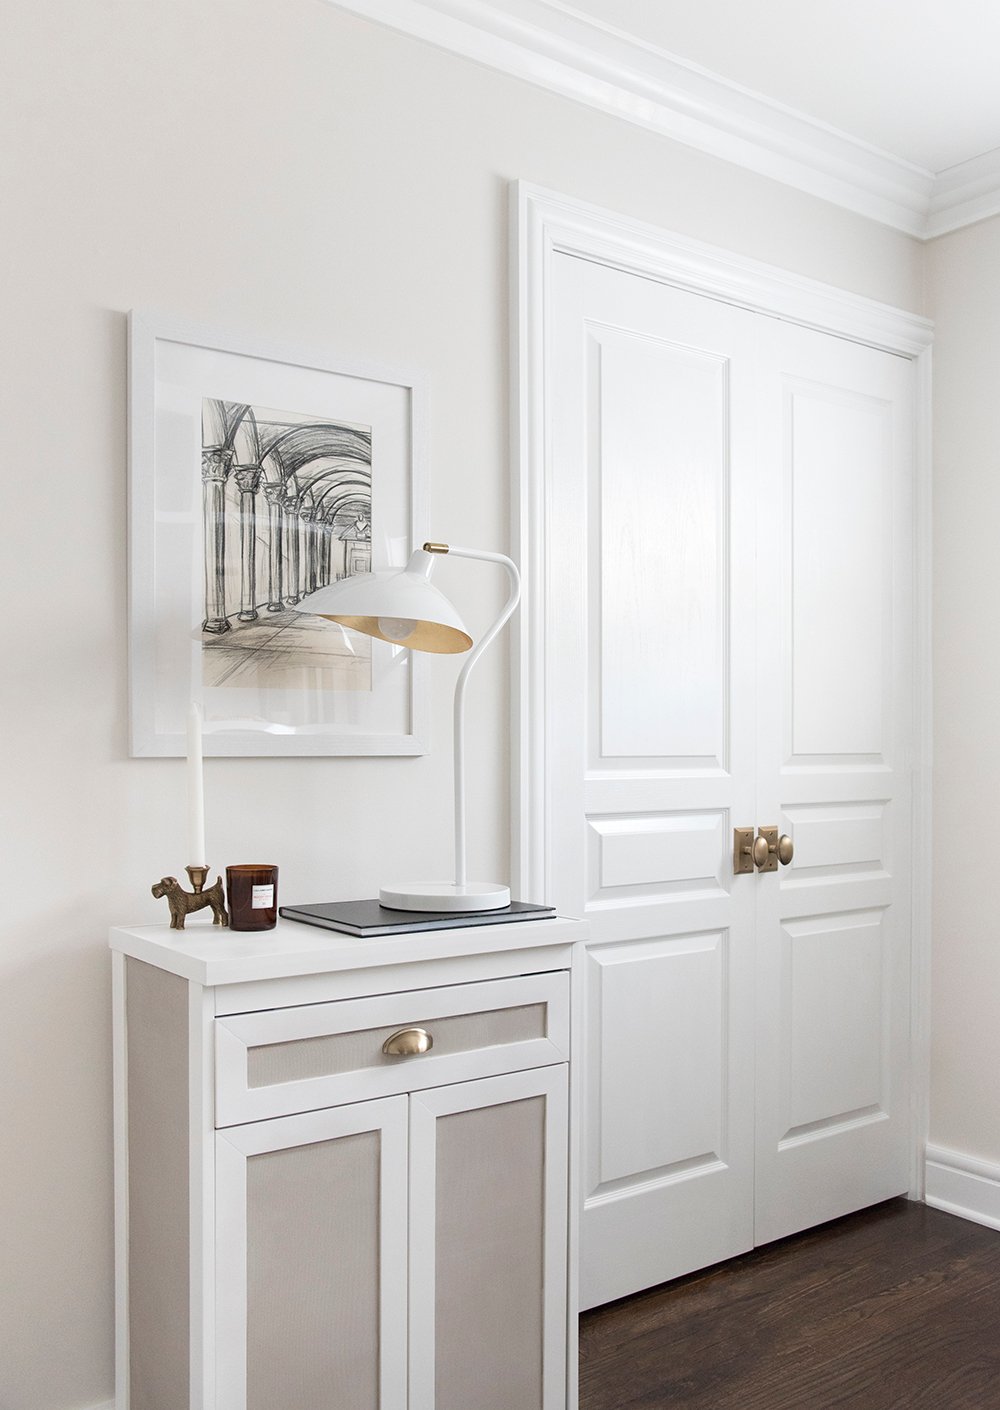
Murphy Dog Bed DIY
 I’m pretty excited about this DIY because you guys know I’m a dog person, but I hate the associated junk that fills your home when you have pets. With my office reveal coming to the blog later this week, I was tired of looking at the ugly dog bed shoved into the corner of the room. The boys like to hangout with me while I work during the day, so it only made sense to keep a bed in the room. However, I wanted one I could easily hide… the perfect solution? A doggy murphy bed! It’s as cute as it sounds. Click through for the easy DIY.
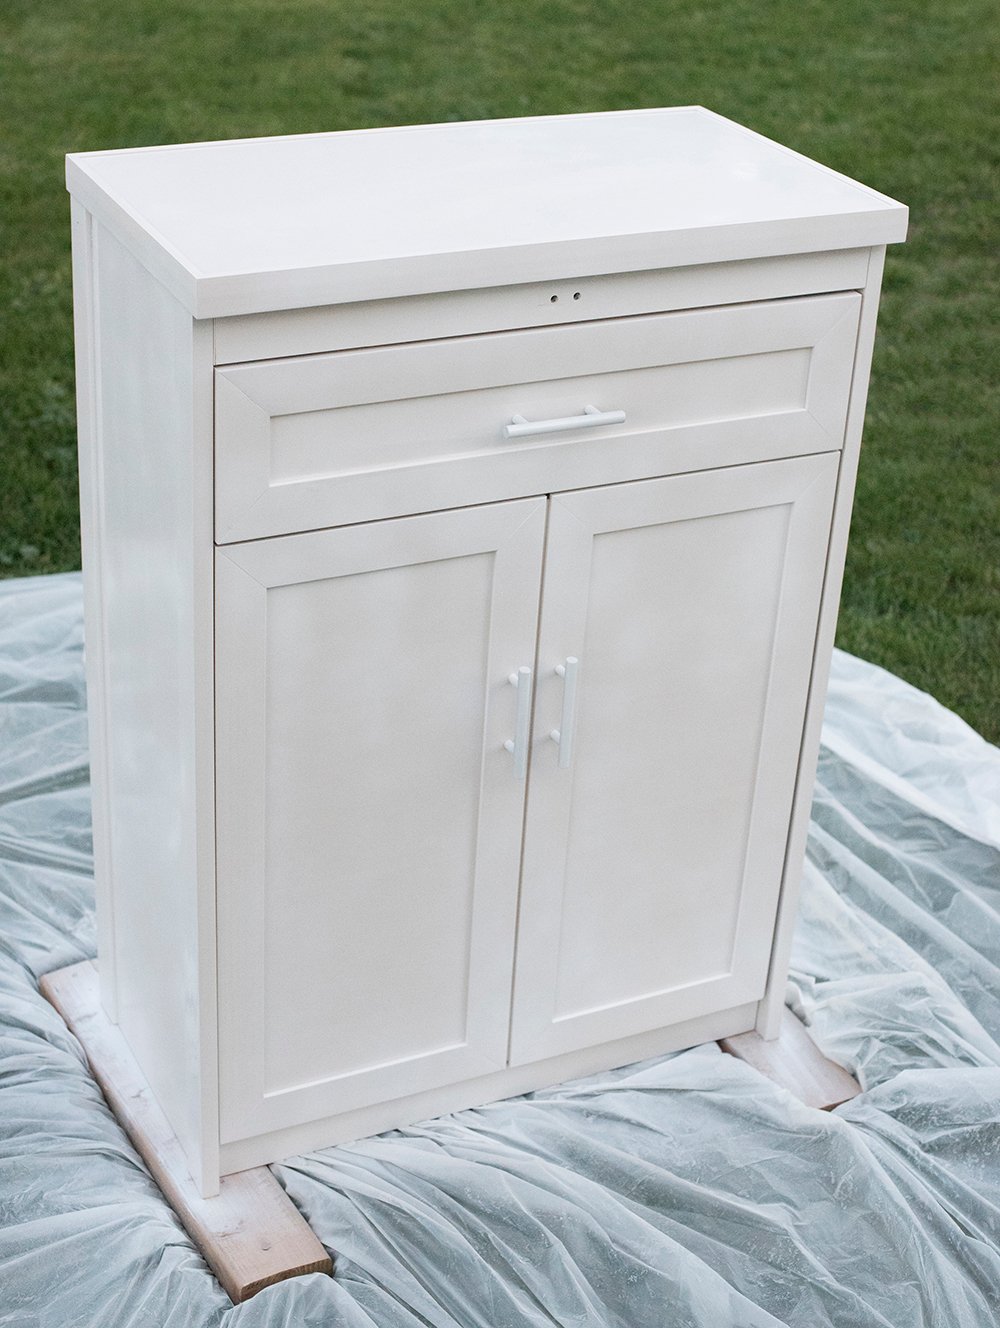
 This DIY isn’t a “from scratch” project in terms of building, but I knew I could enhance the aesthetic of the existing murphy dog bed to better fit my interior style. It’s really just simple cosmetic fixes that anyone can do! It’s also very easy to customize. This is what it looked like before I transformed it…
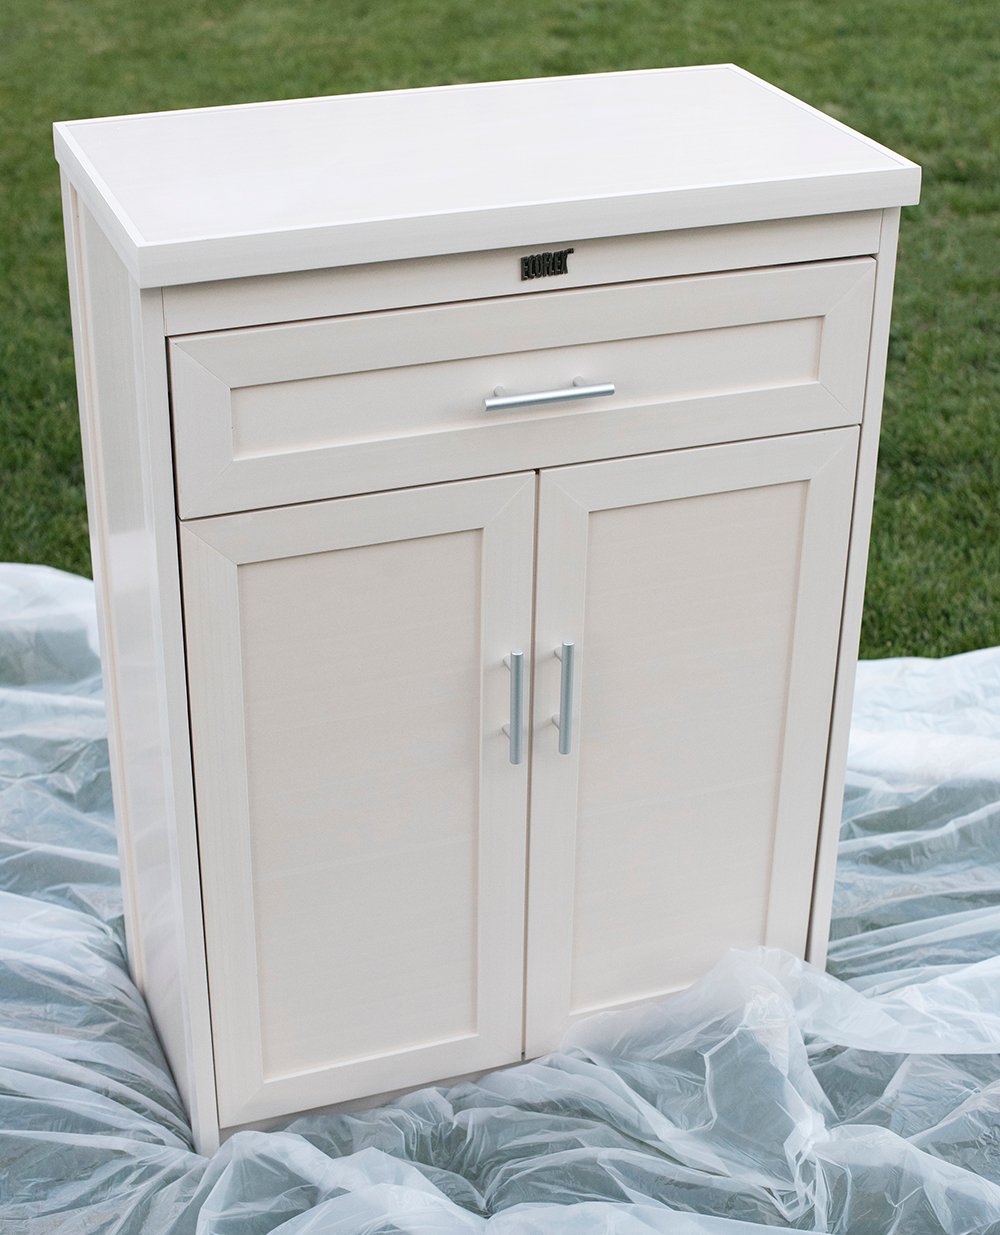 It’s made of 100% recycled materials, functions nicely, and is very well made- I just didn’t love the way it looked. Here’s what I used to make it my own…
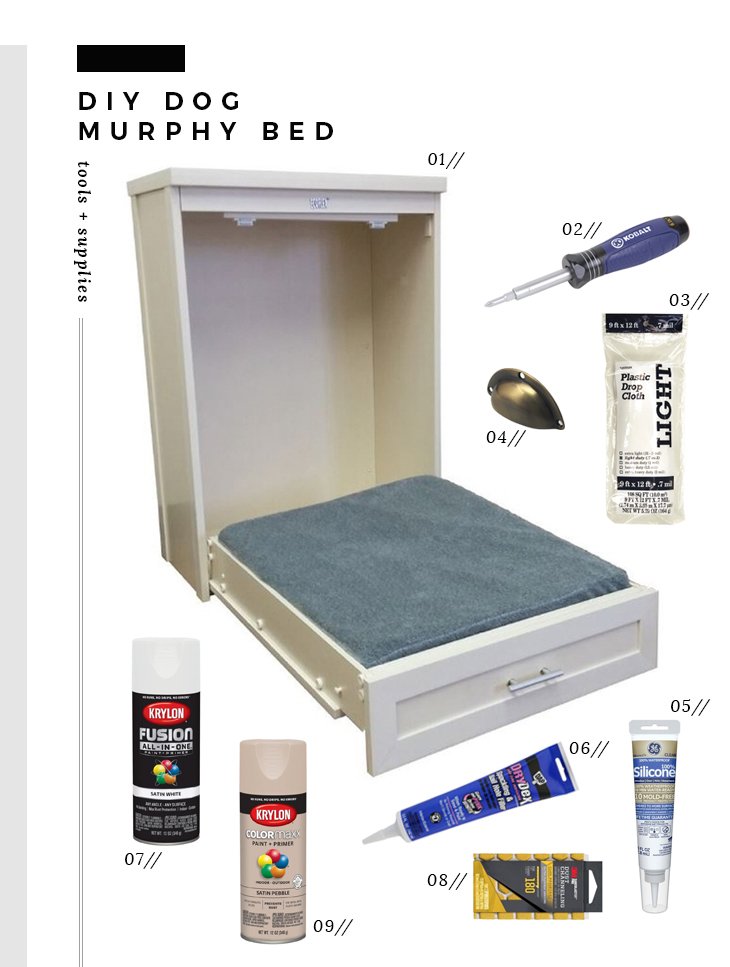
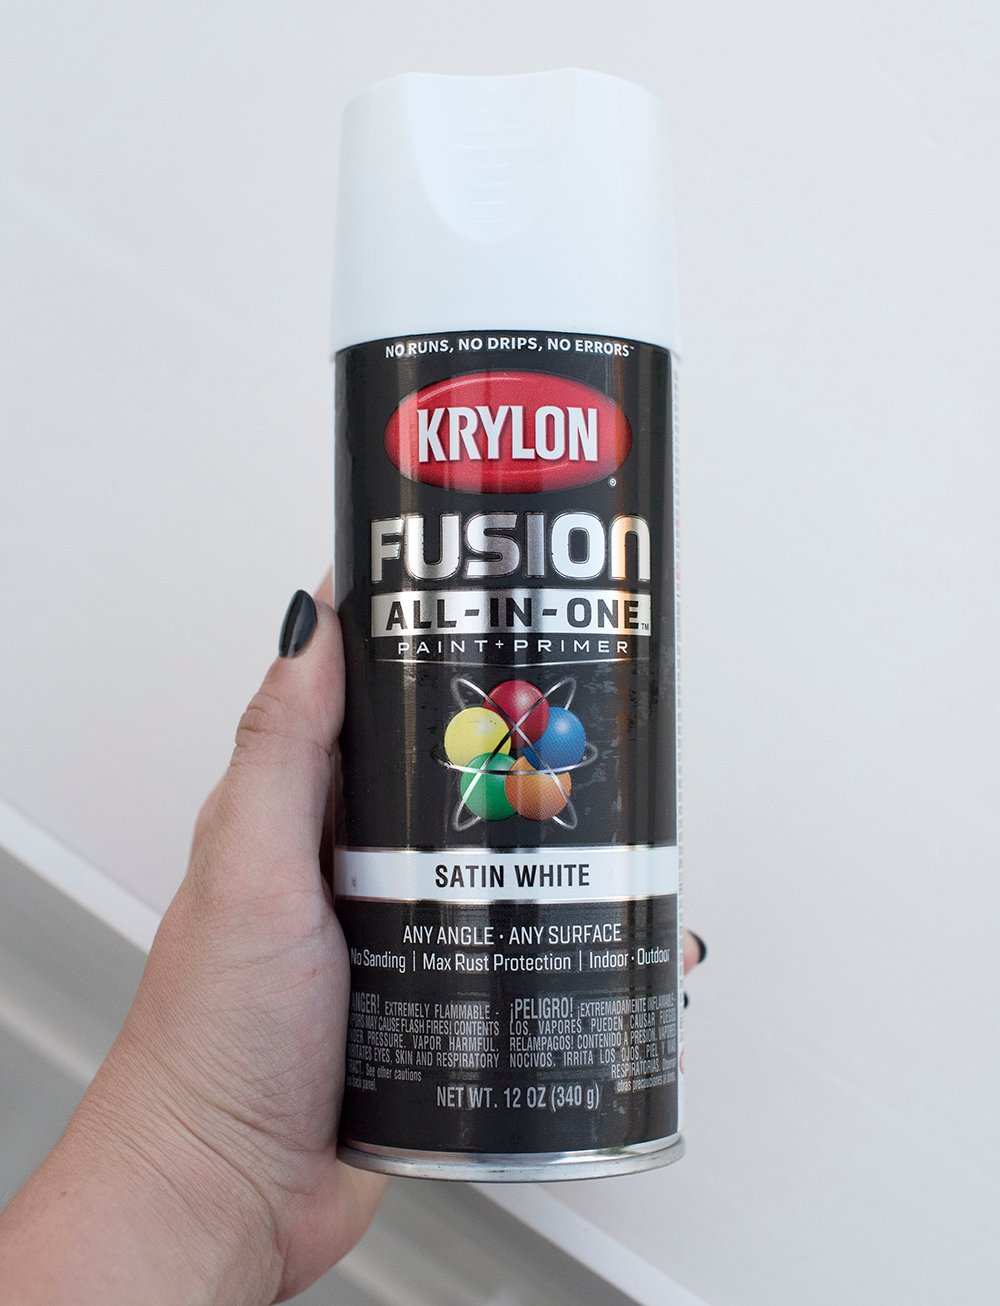
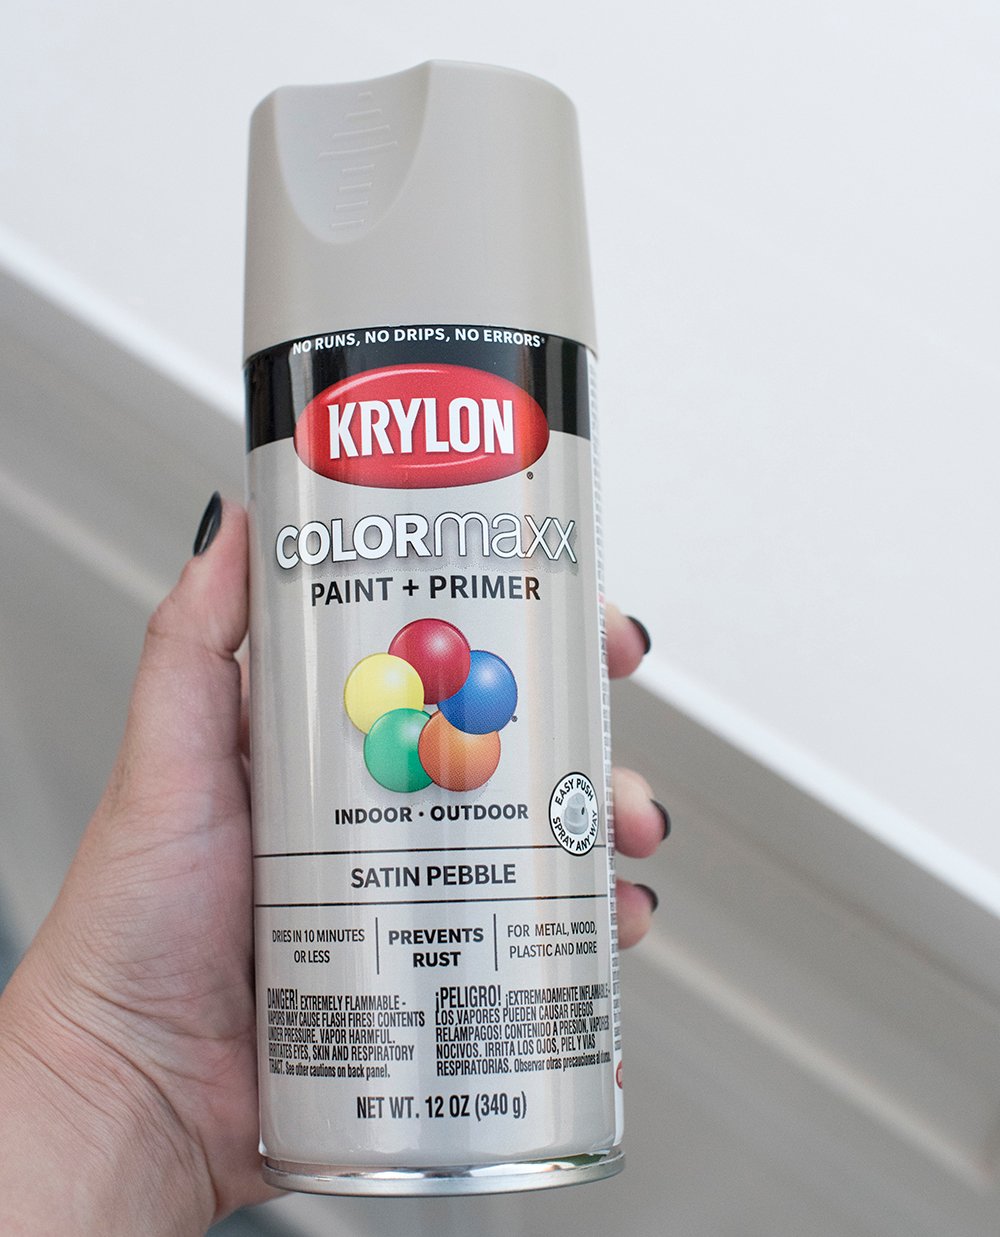
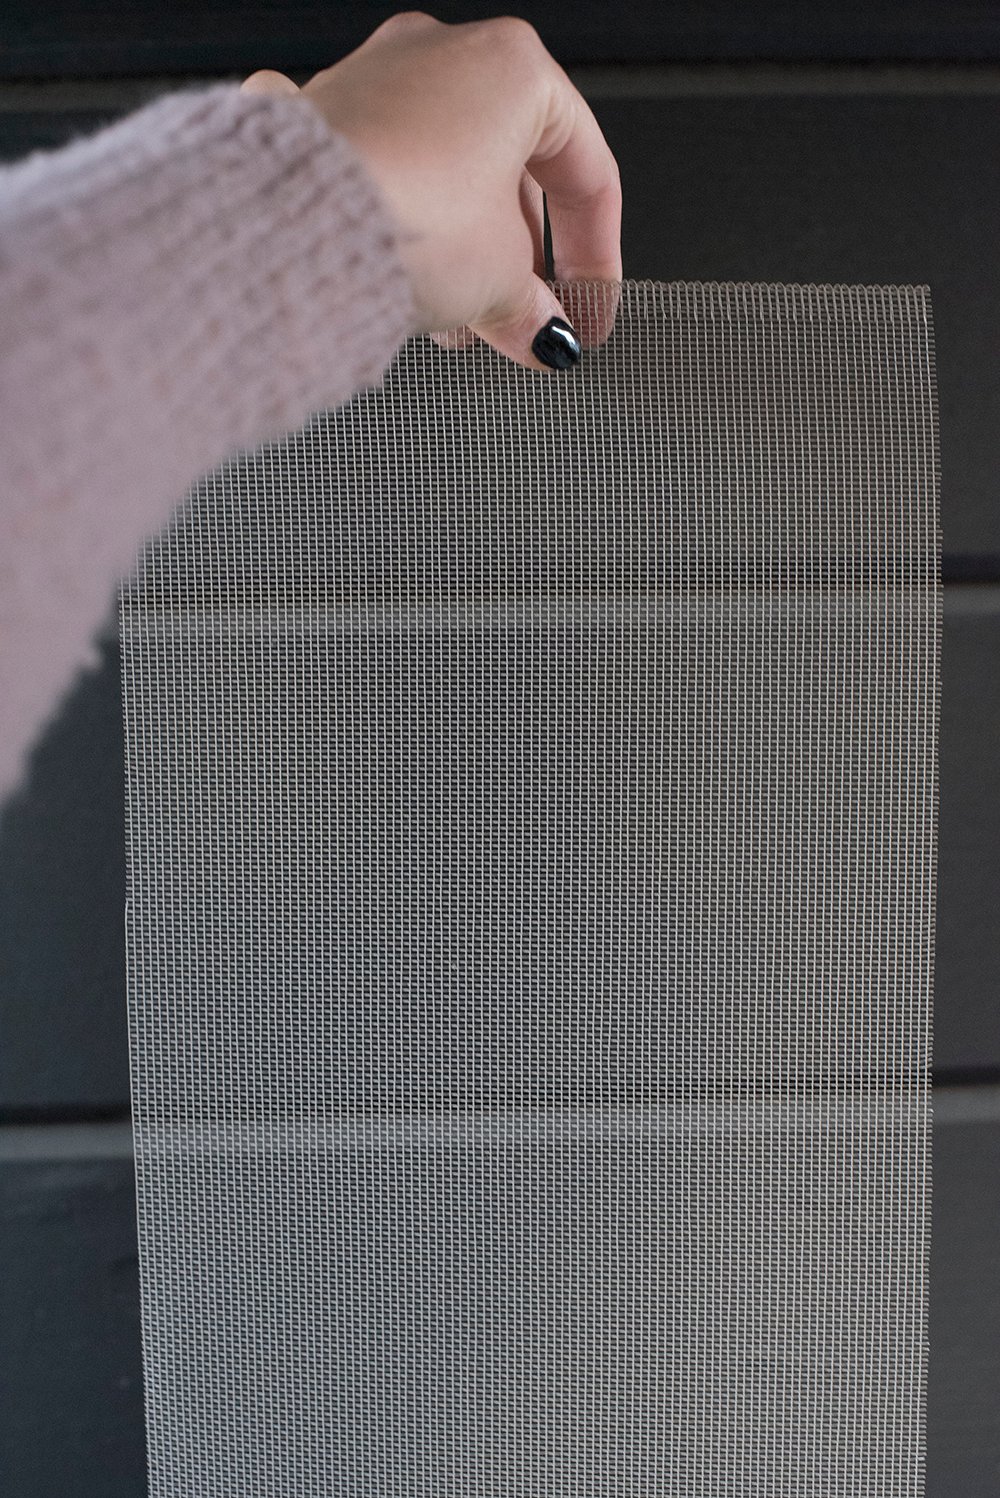
01: murphy dog bed // 02: screw driver // 03: light drop cloth // 04: brass bin pull // 05: clear silicone // 06: spackling // 07: krylon satin white // 08: 180 grit sanding block // 09: krylon satin pebble // *the copper mesh came from my local fabric store
 Step 1 // Setup the workspace. Even though I spray paint in my backyard, I prefer to use a drop cloth to protect the grass. It also makes the bottom of the piece easier to paint by pushing down the individual blades of grass.
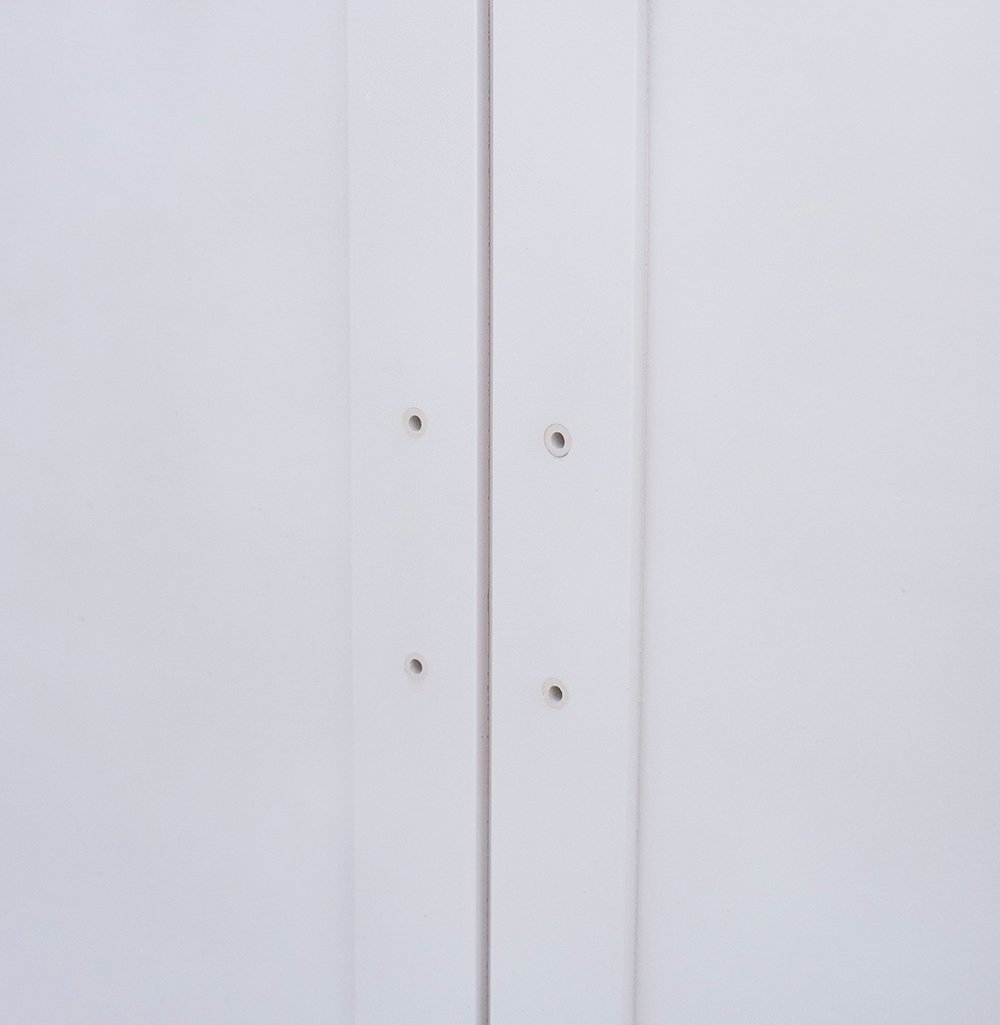
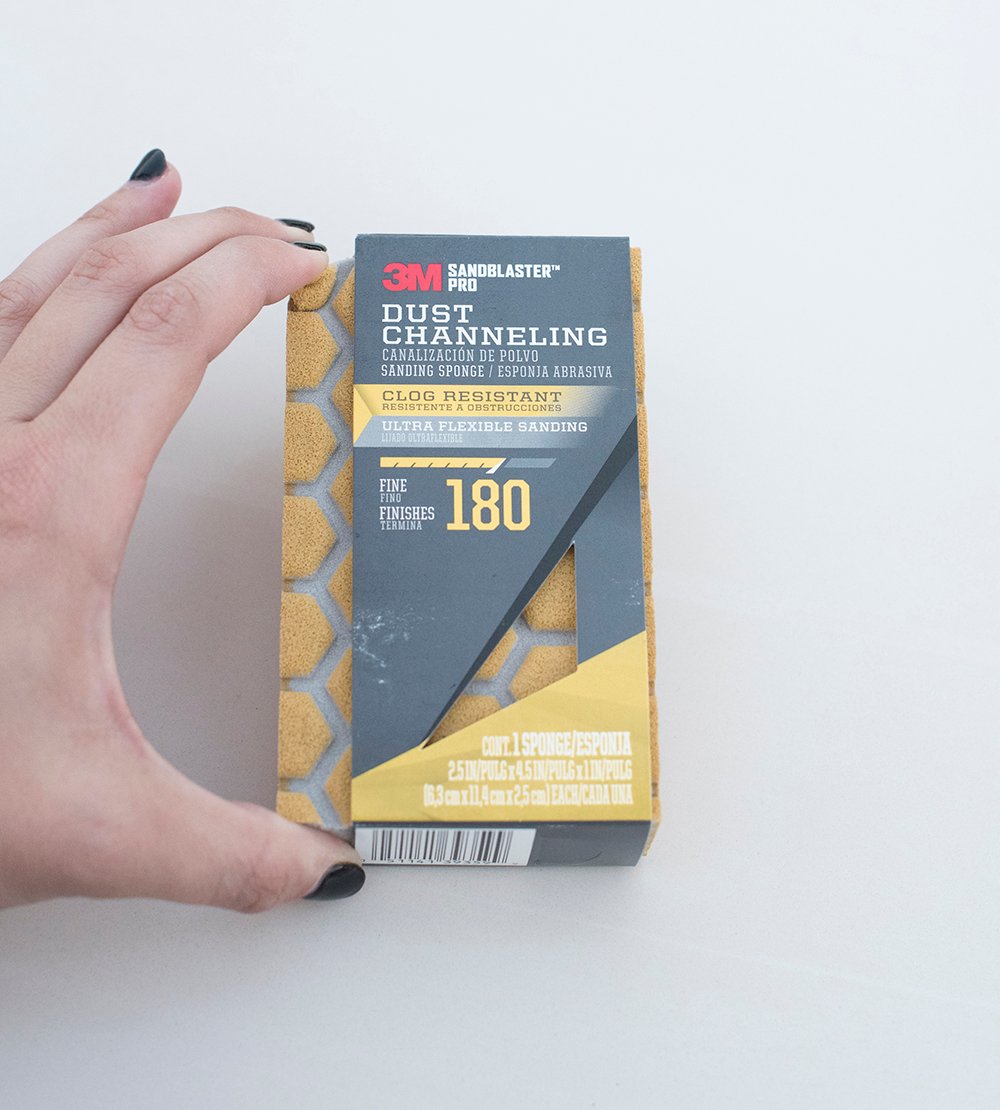 Step 2 // Sand. Honestly,I didn’t spend too much time sanding, but I did take a moment to rough up the surface with a sanding block. Once everything had been lightly sanded, I wiped the surface removing all debris and sanding dust. I also removed the emblem logo at the top- notice the two holes pictured below?
 Step 3 // Paint. Next I applied the first layer of paint using Krylon white satin– a paint and primer combo. You’re probably wondering why I have yet to remove the hardware. I wasn’t sure if I was going to keep it or toss it… you’ll find out next that I ended up replacing it.
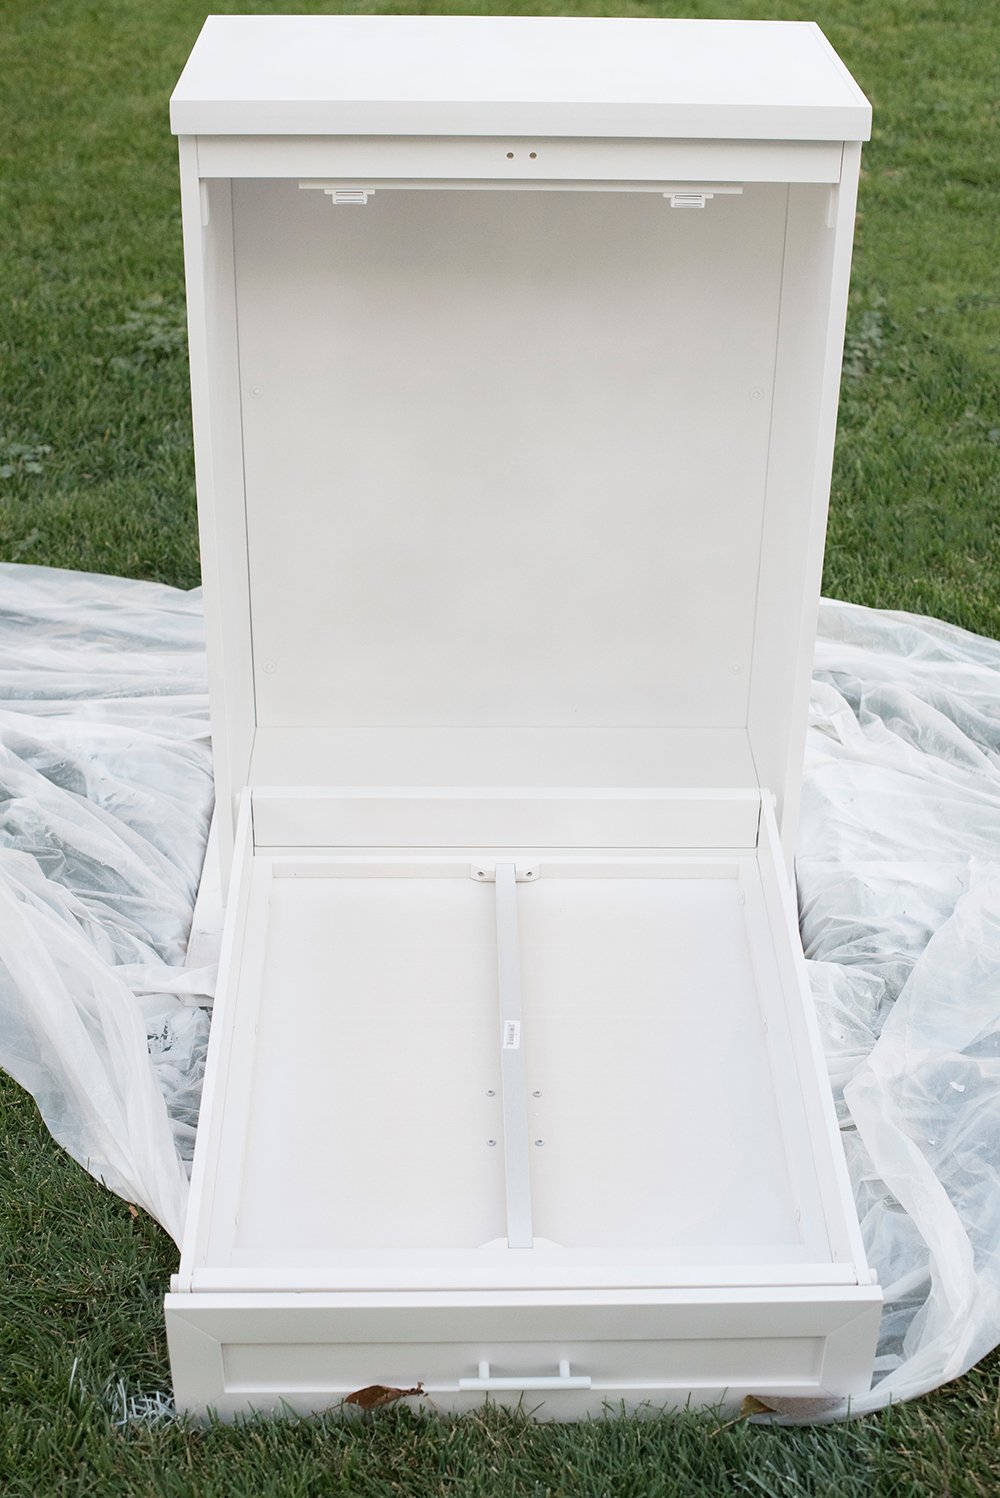
 I ended up spray painting four coats total- inside and out… it took three cans of white. The image below was taken after coat three.
 Step 4 // Remove hardware and fill holes. As I mentioned, I was on the fence about replacing the hardware because it was an odd size and I didn’t want to drill new holes, but I ended up finding a replacement option. Therefore, I filled the lower holes, lightly sanded that area, and gave it one last coat of spray paint.
 Step 5 // Cut and paint mesh. I wanted to stylize this piece in a way that made it feel higher end. My initial plan was to use some sort of cane webbing or cork, but I found copper mesh material at my local fabric store and ran with that idea. I used Krylon’s Satin Pebble taupe color for the mesh that would attach to the inner panels. Although the metallic natural, copper color would’ve been cool- I’m already mixing metals in the room. Spray painting it the color I wanted only took five more minutes. That was well worth it, in my opinion.
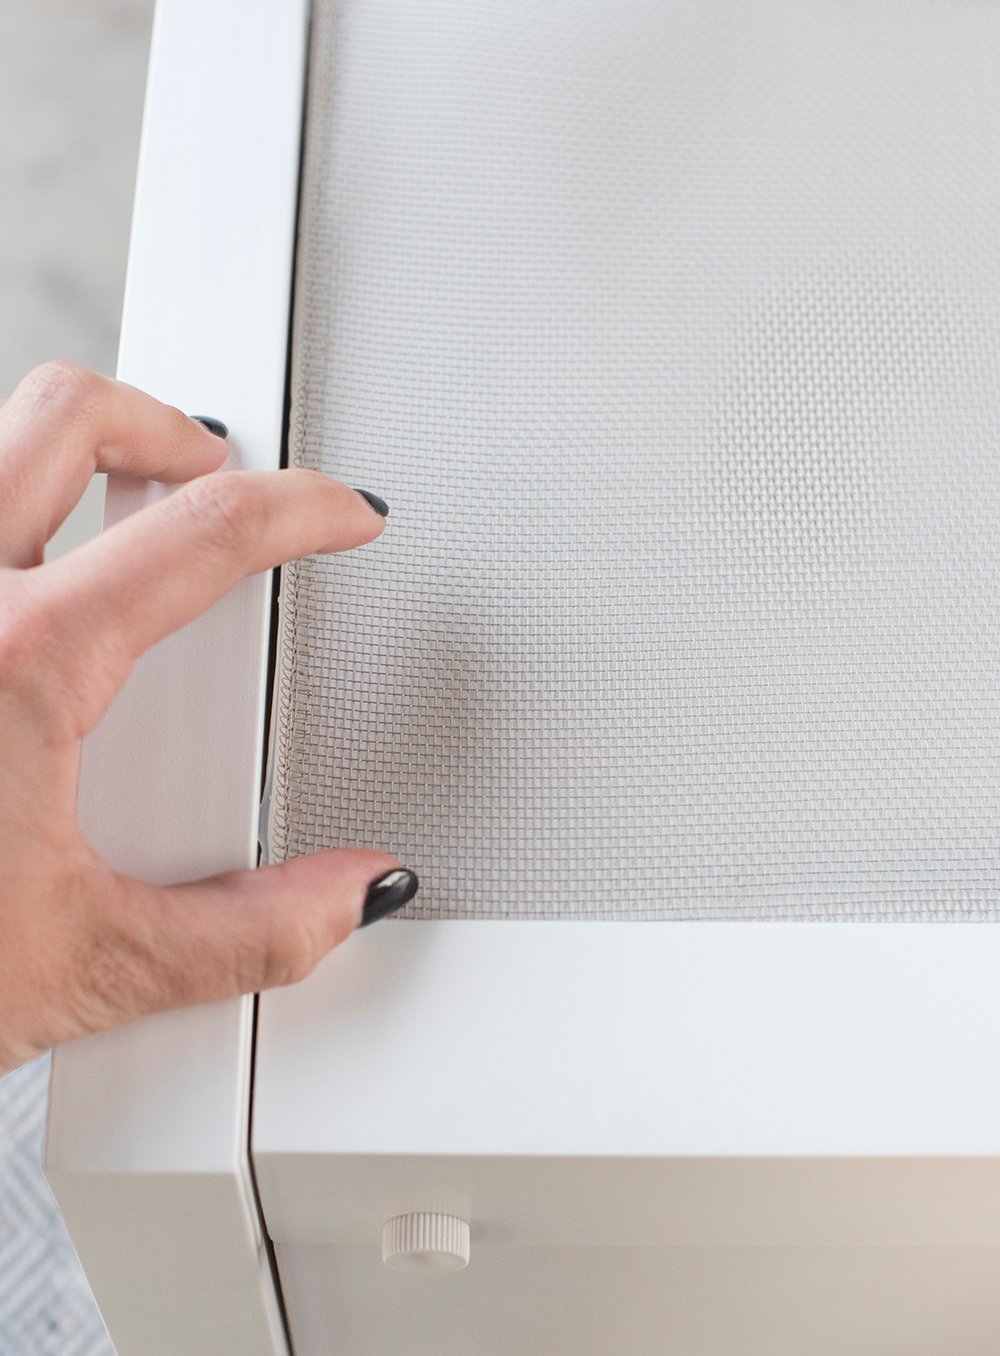
 Step 6 // Install mesh. Once the copper material was totally dry, it was time to install it to the inner portion of the panel. Using a thin bead of silicone around the perimeter, gently push the mesh in and allow it to dry completely before proceeding to the next panel.
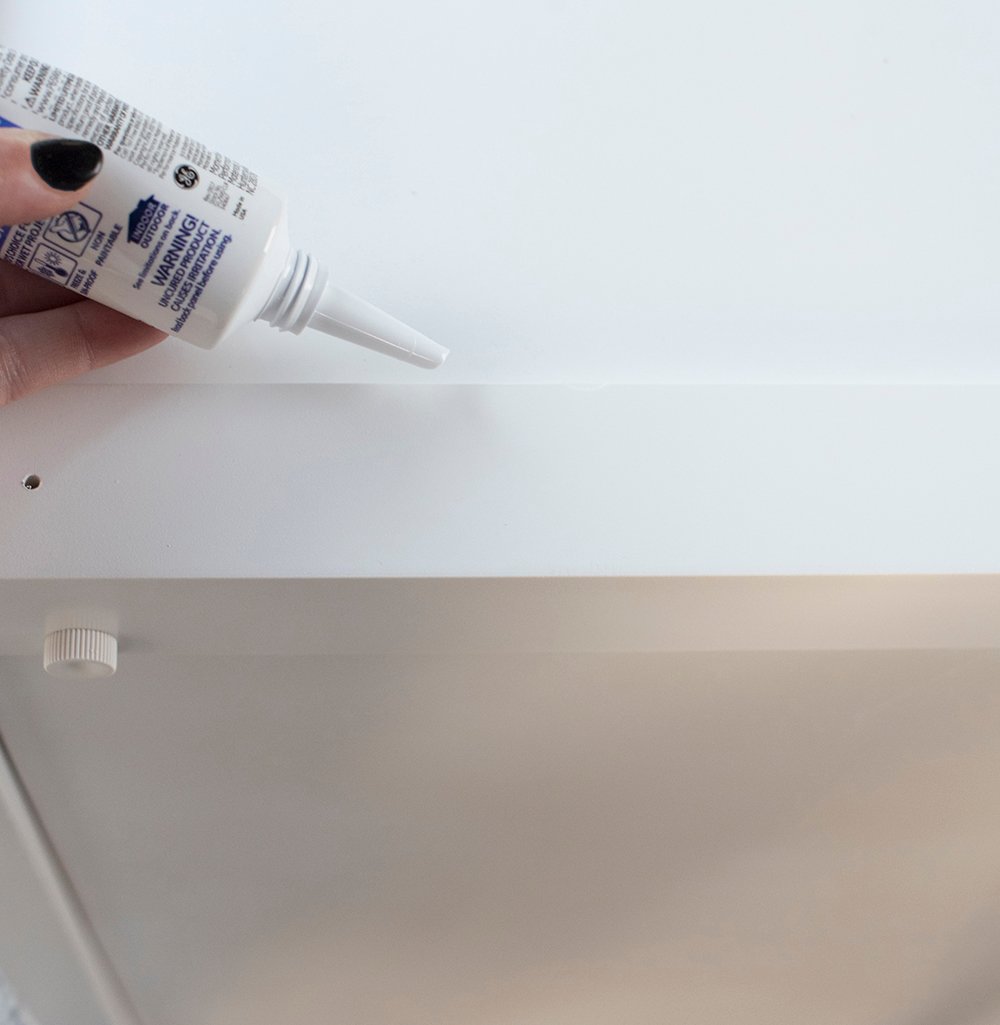 I let gravity do the work and rested the drying side of the cabinet up, while the silicone cured… that way it stayed perfectly in place without sliding.
 Step 7 // Replace the hardware and reupholster the cushion. I took the existing cushion to my seamstress and had her reupholster it with my specified fabric. However, that’s totally optional! I just wasn’t into the gray existing bed.
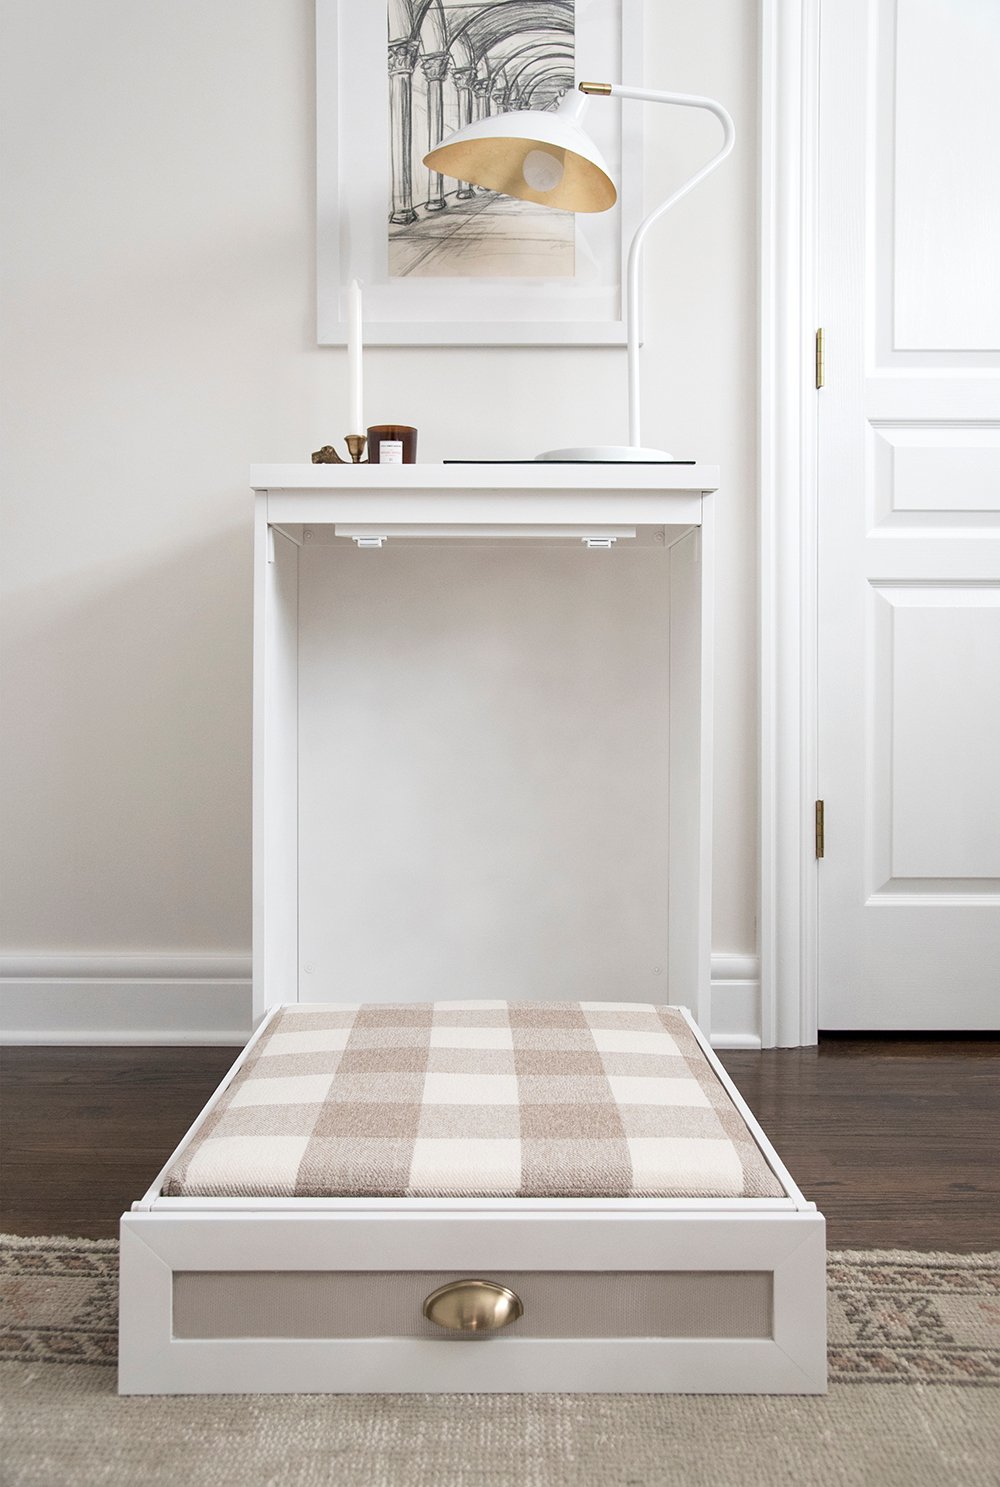
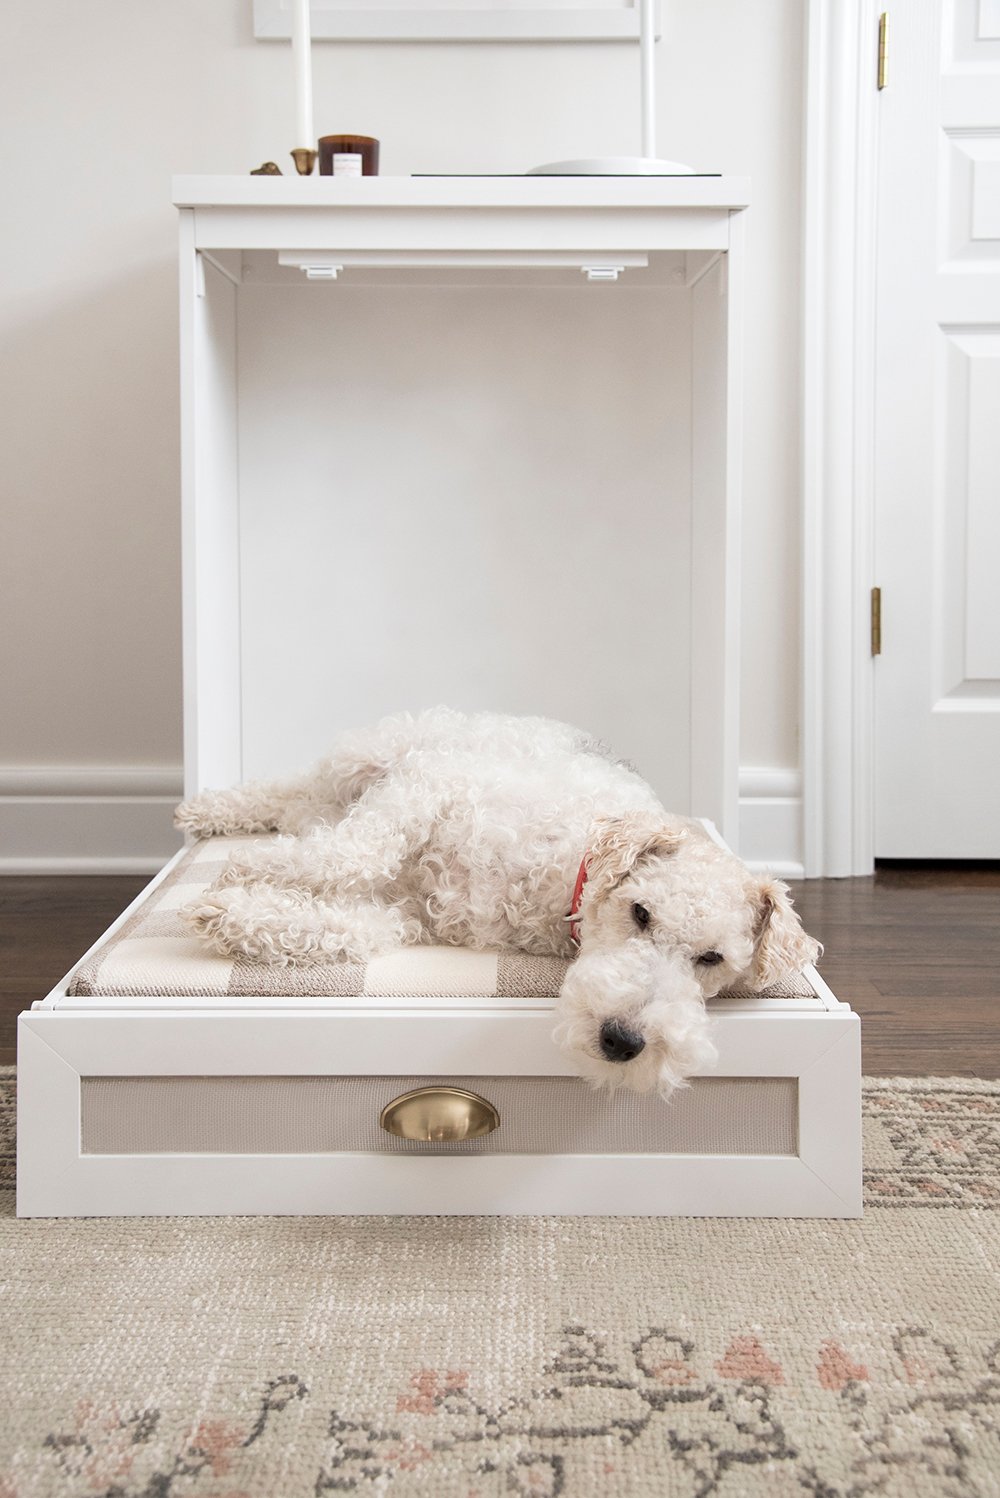
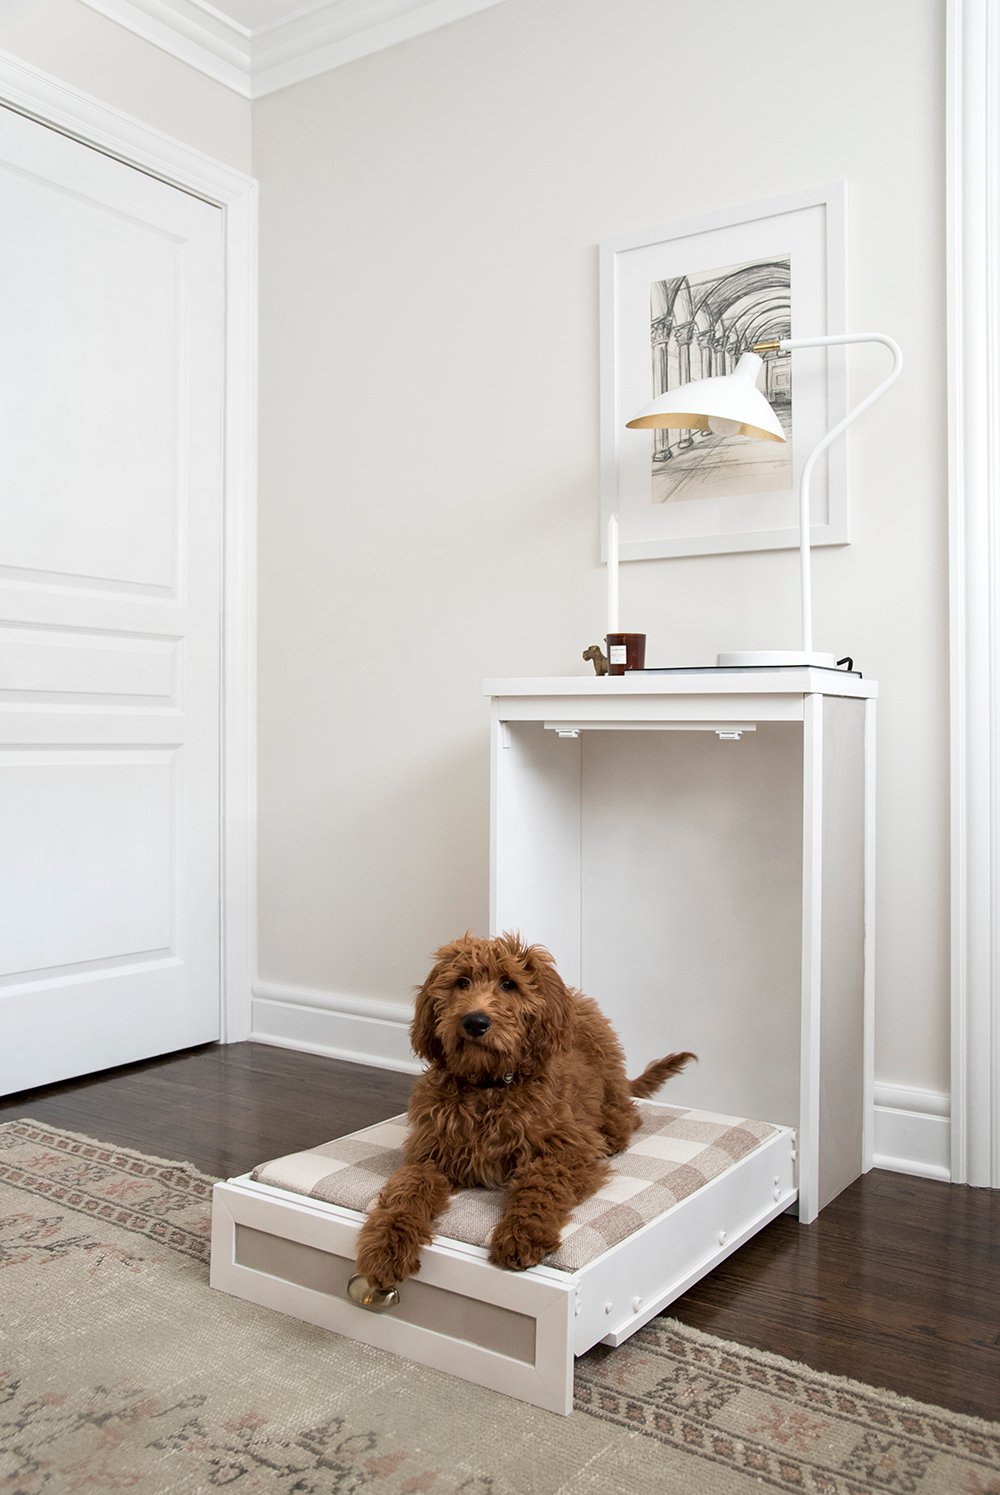
The last step is installing new hardware or reinstalling the previous hardware. It should screw in easily, then you’re finished! This is how the final outcome should look- cute dog not included…
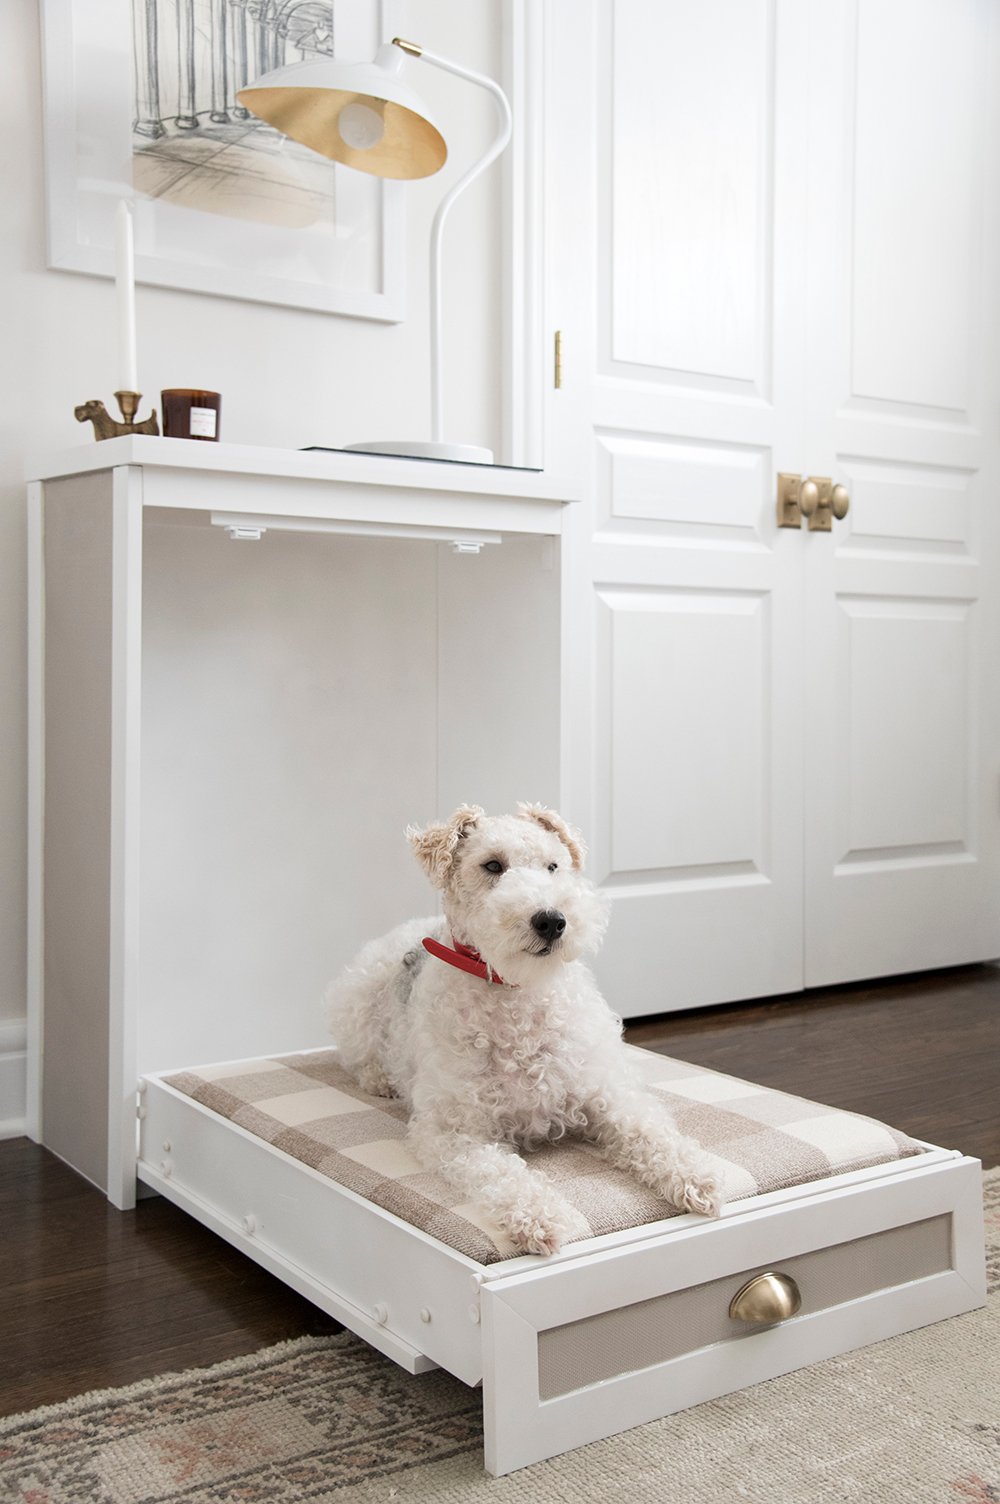 My intention was to make this bed for Cash, because he’s the one that never leaves my side. He hangs out in my office with me all day long and I was tired of looking at his ugly dog bed shoved in the corner. I loved the idea of a murphy bed and being able to close it up when I’m finished using the space or when guests come over.
 It’s really a great small space solution, but I didn’t want to go to the trouble of building one from scratch. That seemed like a ton of work, we don’t exactly have time for right now since we’re house hunting. After finding the readymade option, I knew I could make it better! I’m really stoked with the result and the dogs seem to like it too.
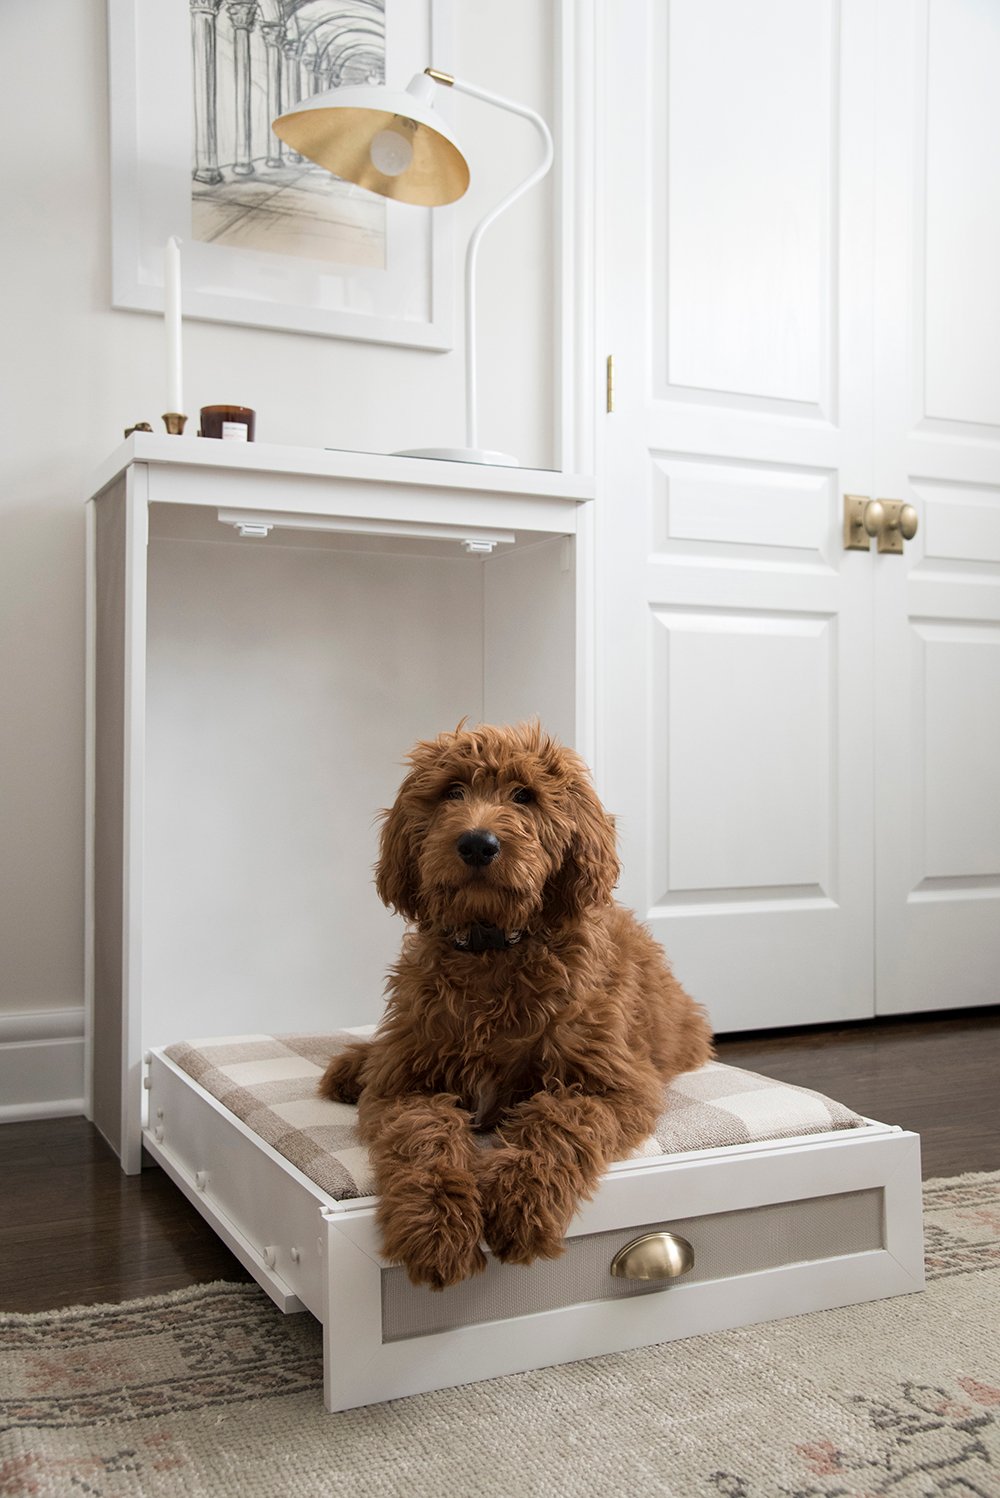
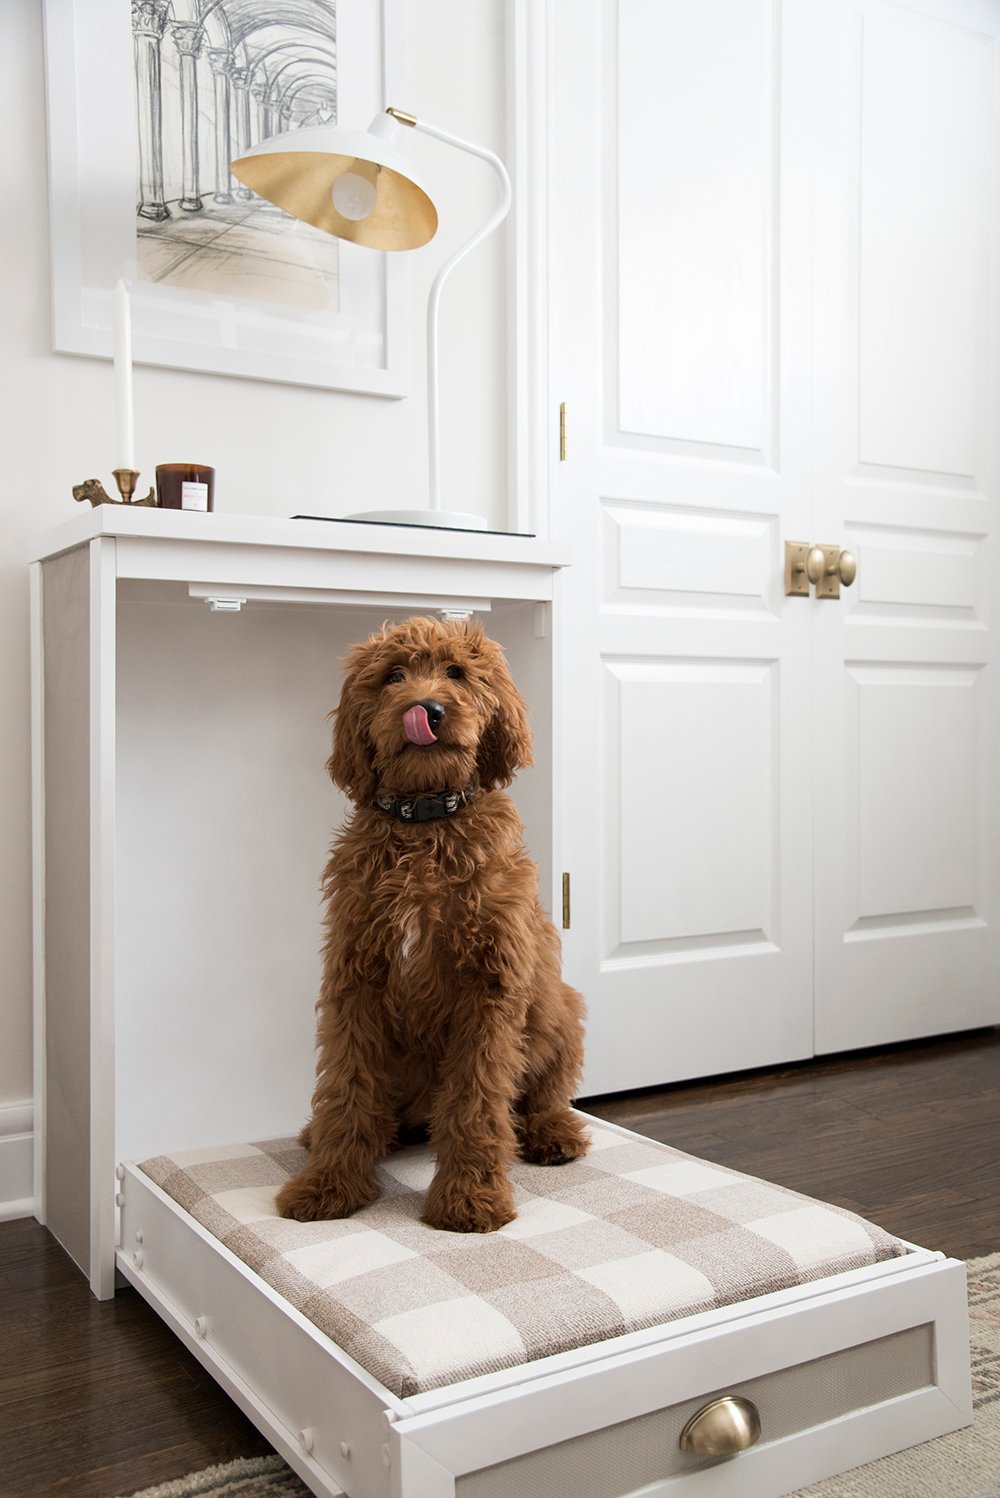 Crosby (that goofball!) has also claimed the bed, although I know he’ll eventually grow too big for it. Who knows… our previous dog, Finn- the hundred pound schnauzer, used to curl up in the tiniest ball. Maybe Crosby will do the same and make himself fit. Ha! Maybe someday, I’ll even make another larger murphy bed.
 This was the last DIY project Emmett and I tackled for our current home. We’re looking forward to taking this murphy bed to our next place, wherever that might be! I know it’s something I’ll love for awhile because it’s so functional.
 If you want to see this project live in action, check out my Insta highlight titled “dog bed DIY”. I’d love to hear your thoughts on the doggy murphy bed in the comments below! This was a fun one that I got to get creative with… I love these types of easy projects. For even more DIY projects, click here. I’ve done a lot over the years and there are some fun ones filed away in the archives.
Sarah, that looks a hundred times better! Much classier. The pups are obviously pleased. Joe really likes to sprawl; luckily most of our rooms have a doodle-sized love seat. Looking forward to seeing the entire office-love that lamp!
Happy Monday!
Thanks so much Peggi! Happy Monday to you too :) xo
Love the dog candlestick-where did you find it?
Isn’t that so cute?! Jacqueline gifted it to me for my birthday. You can find it here: http://bit.ly/2CQsKGs
What a clever idea and spot on transformation, Sarah. Best of all, the kids seem to love it. I hope the house hunting is going well, that you and Emmett are having fun with it. Cheers, Ardith
Thank you so much, Ardith!! They do seem to love their cozy new spots. Thank you for your kind words :) xox
What a clever solution to the traditional dog bed. My only question is do you have to mount this to the wall? Thank you.
I didn’t, but you can! I think it comes with mounting hardware (but I misplaced it). We haven’t had any toppling issues- it’s pretty heavy and secure.
This is so incredibly CUTE! I really want to make a cute dog bed for the pup I babysit – if I can get him off my lap – so this is great! Why did you choose to spray paint the box instead of brush/roller/paint it? Is it something to do with texture?
Thank you so much Naomi! I opted for spray because the piece is plastic, and this type of paint bonds better to the material. I also didn’t want any texture. I hope that helped to answer it :) xox
Where is the DIY advertised in the title? It looks like you just bought a murphy bed and sprayed some paint on it.
Actually, in addition to paint- I also installed a decorative wire mesh for each panel inset, swapped the hardware, replaced and designed a custom cushion, and basically reinvented the entire look so that it better fit my aesthetic.
Where did you buy the Murphy bed?
It’s linked in the post! From Lowe’s :)