Our Backyard Plan
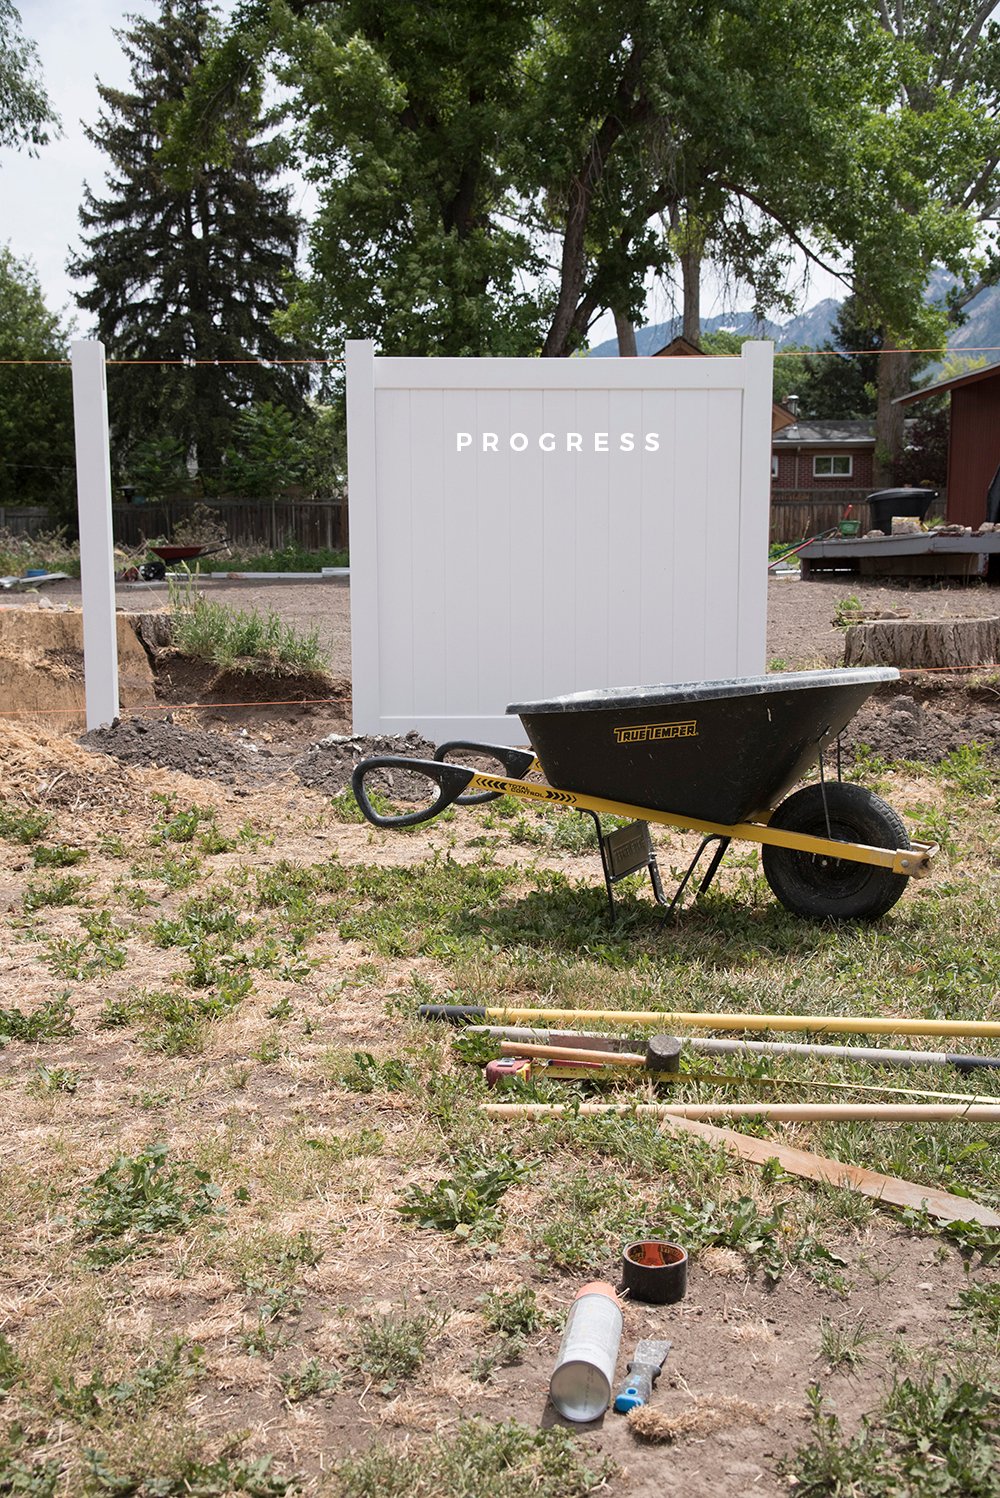
 Although I’m really missing having a finished house, indoors AND out (shown above), we’re finally getting somewhere with our yard! We’ve been working diligently the past month on our backyard and are finally starting to see progress. If you follow along on Insta stories, you’re probably tired of seeing the fence installation and me shoveling dirt. I’m happy to report, the fence is 100% finished and the dogs are officially contained. They’re happy to have their yard back. However, that’s just the first step in our backyard entertaining area plan. Click through for the entire project plan, a progress update, and for the challenges we’ve already addressed.
Here’s how this ginormous yard project came to be… although we’re renovating an entire interior, we were really upset after selling our previous home. We spent a few thousand dollars on the exterior, landscaping, and our garden only to sell it two weeks later. We didn’t really get to use and enjoy it, and that was a major downfall. Therefore, we’ve put the interior projects on hold for a month, while we address the backyard. This time around we want to have plenty of time to live with it! Our goal is to have everything completed before the 4th of July. Might as well start entertaining and making the most of it this summer, right?
After making the decision that now is THE time, I reached out to Lowes to see if they wanted to get in on part of the backyard makeover action, and I did a happy dance when they agreed. I feel like we’re in there at least once a day anyway picking up tools for the renovation, and they’re our go-to big box store for materials, so the collab felt organic and pretty perfect. The entire family (being Emmett, myself, and the mutts) used to make the Lowes supply run trips, but after Finn peed on an end cap and Cash pooped in the center aisle by the cashiers (true stories), it’s a wonder they still let us shop there. Ha!
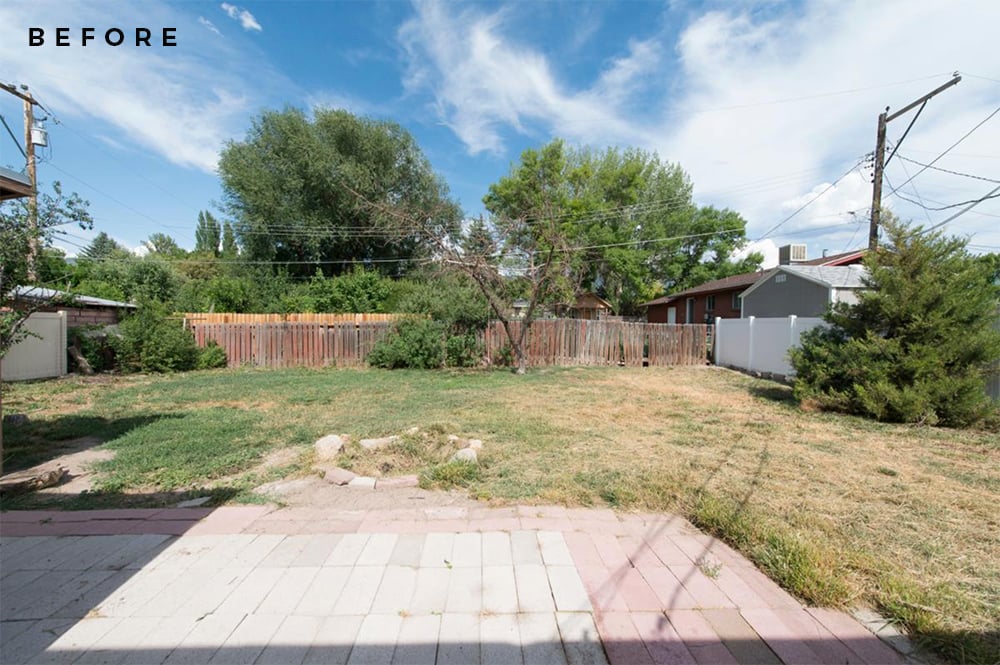
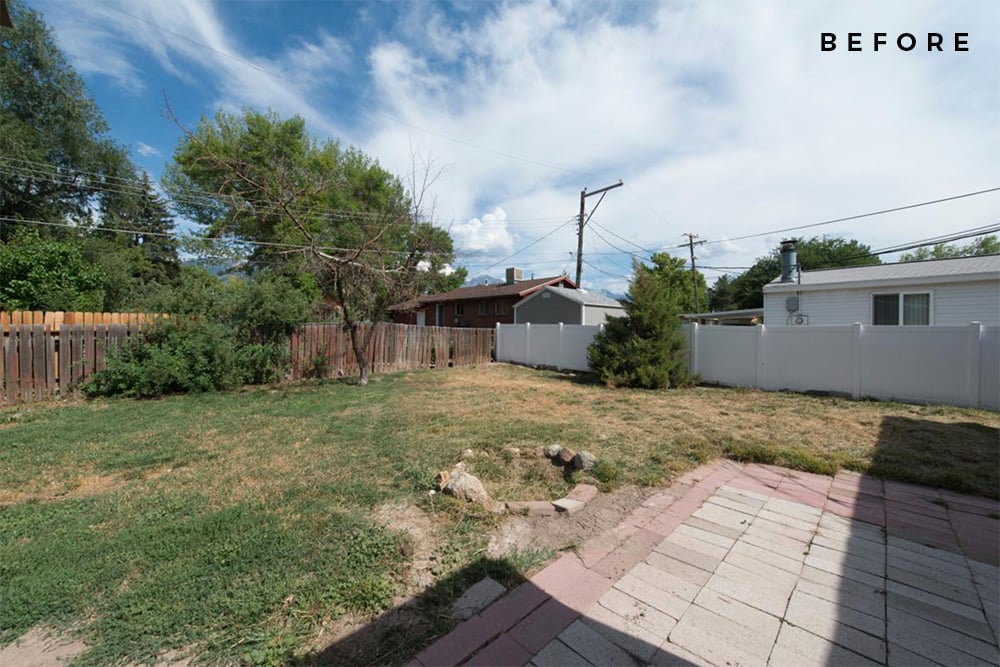
Alright, I got off topic there for a second… back to the yard! Here are the before images from last September when we bought the place. The neighbors told us the backyard used to house nine or ten chihuahuas and I can only wonder whhhhy. I’m not sure if that’s a stretch, but there were holes ALL over the place from dogs digging. The fence was mismatched, deteriorating, and basically falling down in spots.
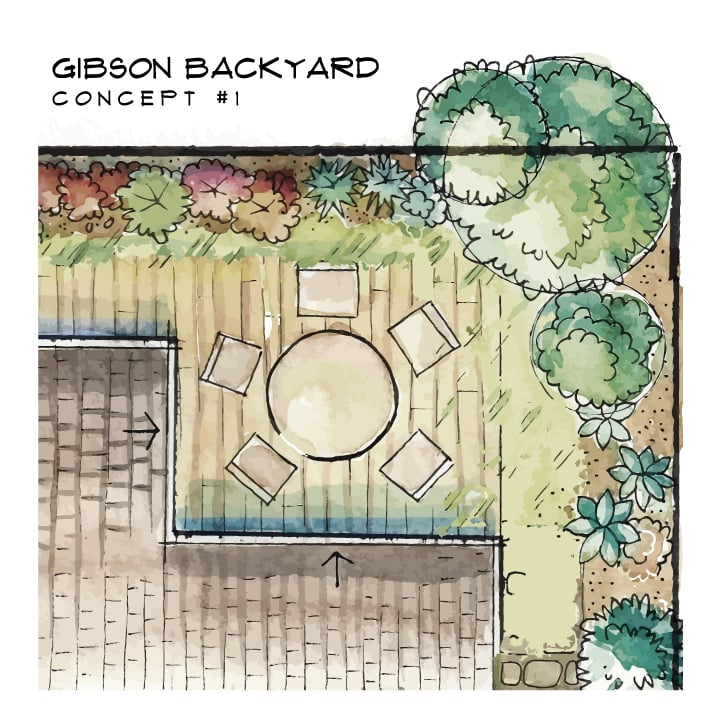
 Our plan is to eventually build an addition because we love our neighborhood, but that really limited the backyard plans. If we add a garage in the future, it would eat into the left side of our yard. Therefore, we opted to create an entertaining area in the righthand corner, far away from our potential add-on. We’d hate to have to re-do anything when it comes time to build. After the location was set, we made a wishlist:
- Pergola or some sort of shade structure
- Paver patio to break up the grass
- Nice landscaping
- A fire pit
- Built-in seating under the structure / pergola
- A new privacy fence to keep our dogs safe
- A sprinkler system (in Utah they’re necessary)
- Sod (Emmett’s values a nice lawn)
After about 80 (I wish I was kidding) sketches and renderings, we finally nailed down the best way to DIY the backyard project. Our very first plan looked like this… and has since evolved into something a bit more complex.
 After reworking the budget and tweaking the design plan, this is where we have now ended up. I put together a more realistic collage to share my vision with Emmett. It’s much easier for us to communicate this way- if I show him what I’d like him to try to build.
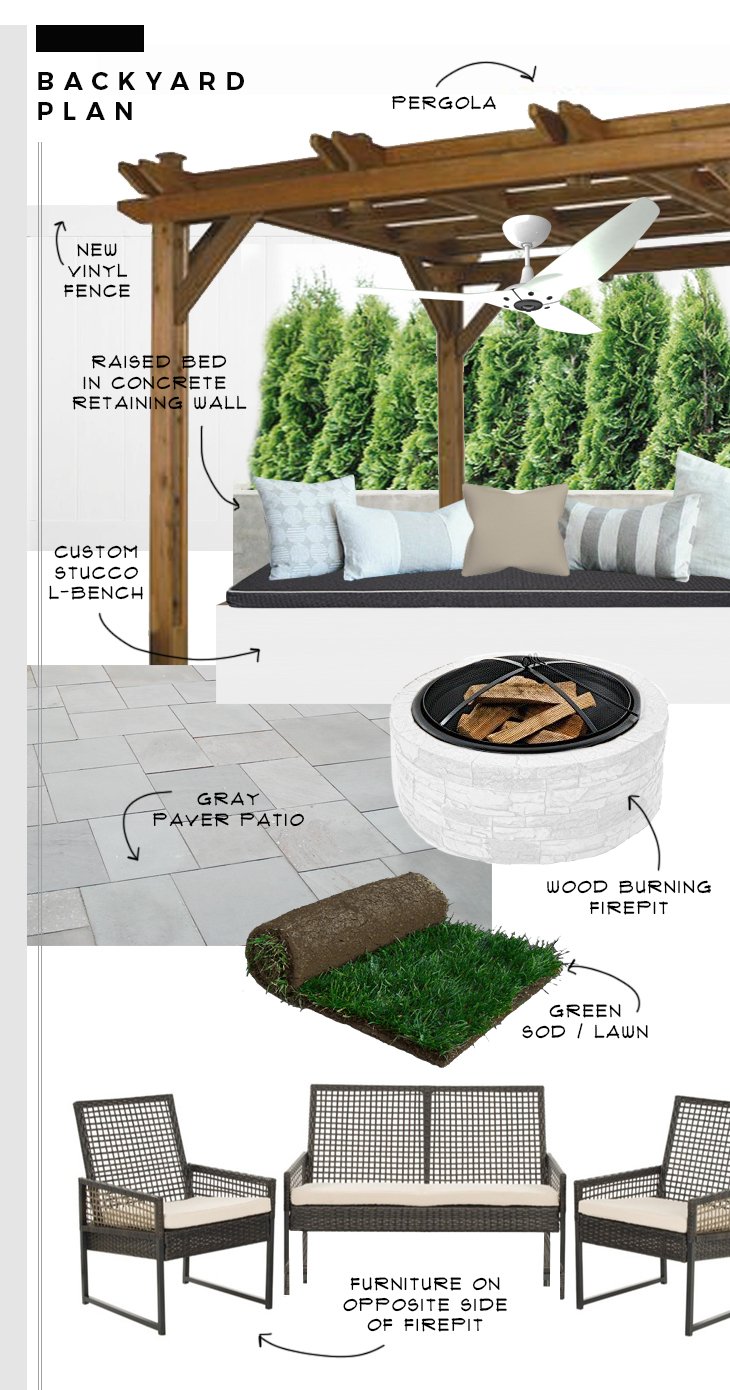
If you’re wondering about any of the materials, everything is linked in the above collage (just hover over the image). This is our daunting to-do list and how we plan to execute and bring this vision to life:
- Demo & remove existing fence, rocks, pavers, landscaping, etc. DONE
- Rent a stump grinder and remove existing tree stumps. DONE
- Dig post holes and install new vinyl fence with gates. DONE
- Till and rake the entire yard, removing grass and rocks. DONE
- Lay piping and install the sprinkler system.
- Dig and install a custom paver patio.
- Build and stucco custom L-shaped seating.
- Assemble and install the pergola.
- Add electrical to the pergola and install lighting and an outdoor fan.
- Paint the wood burning fire pit.
- Lay sod and hook up the sprinklers.
- Plant and landscape.
- Bring in furniture and decor – style everything!
- Have a giant margarita and admire our yard!!
So far we’ve checked numbers one, two, three, and four off the list and we only have a couple weeks left to meet our deadline. I just really want this outdoor space to be a place we can relax, enjoy, and entertain for years to come.
 I’m excited to spend lots of time outside- especially since moving from Ohio to Utah, where there is zero humidity. People say it’s hot here and I just can’t relate because the Midwest feels hotter and everyday is a bad hair day.
Well, there you have it! Wish us luck. My arms are already gelatinous from digging fence post holes and moving dirt around. Speaking of, would anyone be interested in a vinyl fence install / tutorial? It was honestly much easier than we expected (besides the physical labor part)! I think I’m going to share that one tomorrow. Thanks for being such amazing cheerleaders and helping to push us through the hard work. It honestly makes a difference. I’m pleasantly surprised that so many of you are interested in the backyard project and are cooking up yard plans of your own. I’m excited to show you a complete transformation when it’s all said and done! I’ll be breaking some of the outdoor projects into smaller DIY posts as well.
*This post is brought to you in collaboration with Lowes. All content, ideas, and words are my own. Thank you for supporting the sponsors that allow us to create unique content while featuring products we truly use and enjoy!