Powder Bath Makeover Design Plan
 I know it probably feels like we have a million bath projects going on right now (and we kind of do), so I figured a blog post was probably a good idea to add some separation and differentiate the powder bath makeover from the basement bathroom renovation. First I wanted to explain my thought process behind using the words “makeover” and “renovation”. A renovation, in my mind, is a full scale remodel for a room- ripping out walls, totally transforming a space with new materials. Whereas a makeover, in my mind, is more of a room refresh– easy updates, cosmetic fixes, styling, keeping it quick and budget-friendly. I’d consider our kitchen to be a “renovation”, and our laundry room to be more of a “makeover”, or short-term solution. Now that we’re on the same page… the powder room is definitely a makeover. Since it’s actually attached to the laundry room, I’m going to be using similar, cohesive treatments… and once again, I’m keeping it quick, simple, and budget-friendly. Click through to see the before images, what I’ve accomplished so far, and what you can expect to see once my little makeover is complete (including the design plan).
 Before I start sharing images and design details- our longterm plan is to knock down walls and change the powder room completely. The laundry room will eventually become a mudroom and the powder bath will have a separate entrance. We’ll eventually take the space down to the studs and “renovate”, but I’m not sure when that will happen. It could be next year, it could be three years, it could be longer… I just don’t know. In the meantime, knowing this isn’t a project that will happen anytime soon, I wanted to make the space feel better and more representative of our personal aesthetic. This bathroom honestly gets used a LOT because it’s on the main level of our house. It’s in close proximity to the kitchen, the newly finished formal living room, the patio (where we often entertain), and the dining room (which is currently empty). All of that to say- for a room that is a total workhorse in our home, it looks pretty blah and I’d feel happier if it felt more like us.
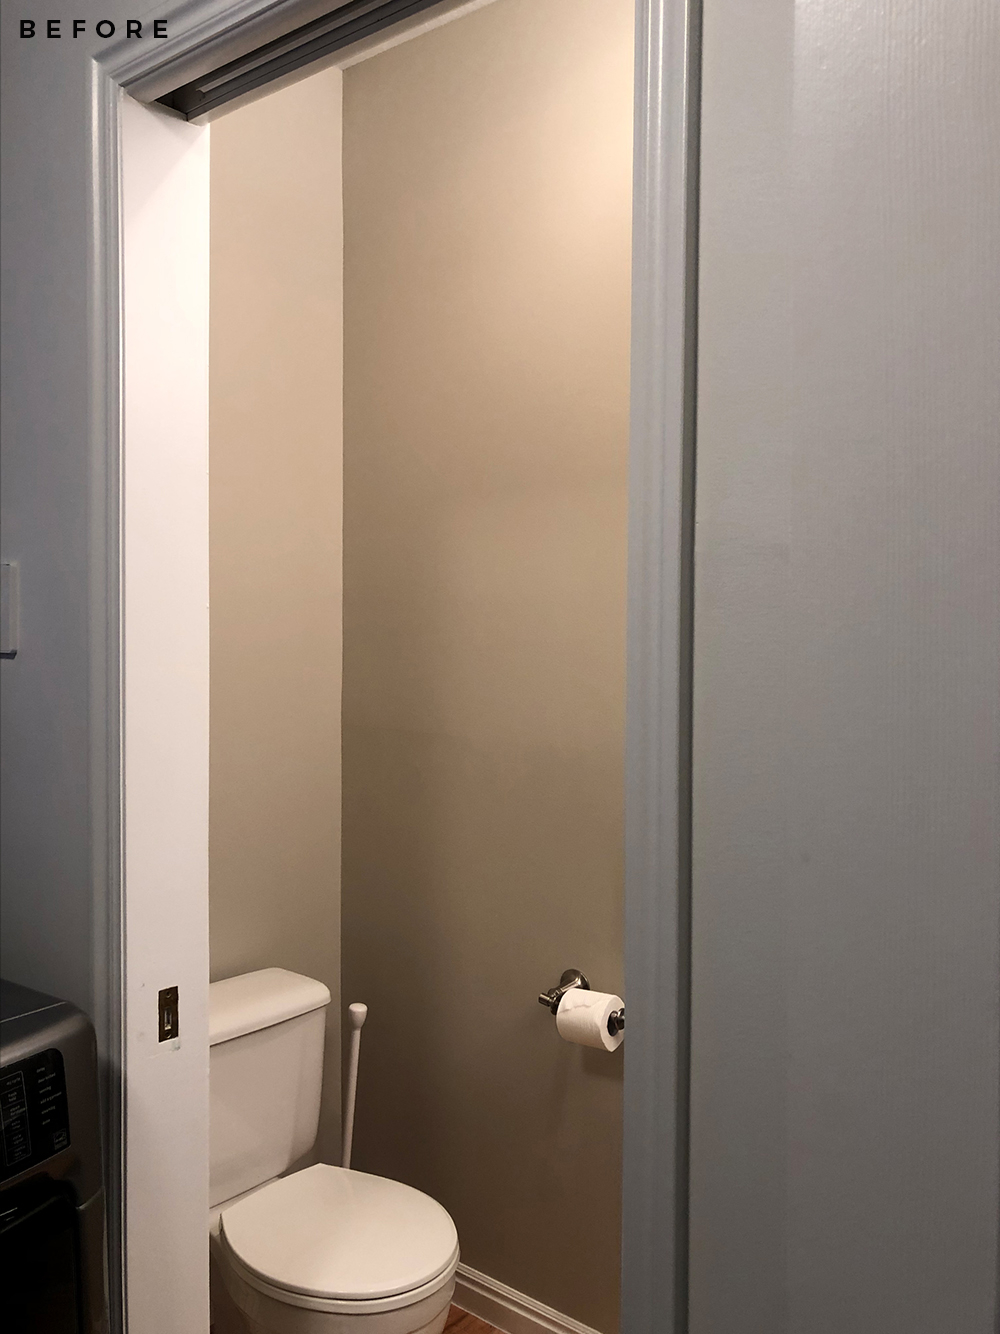
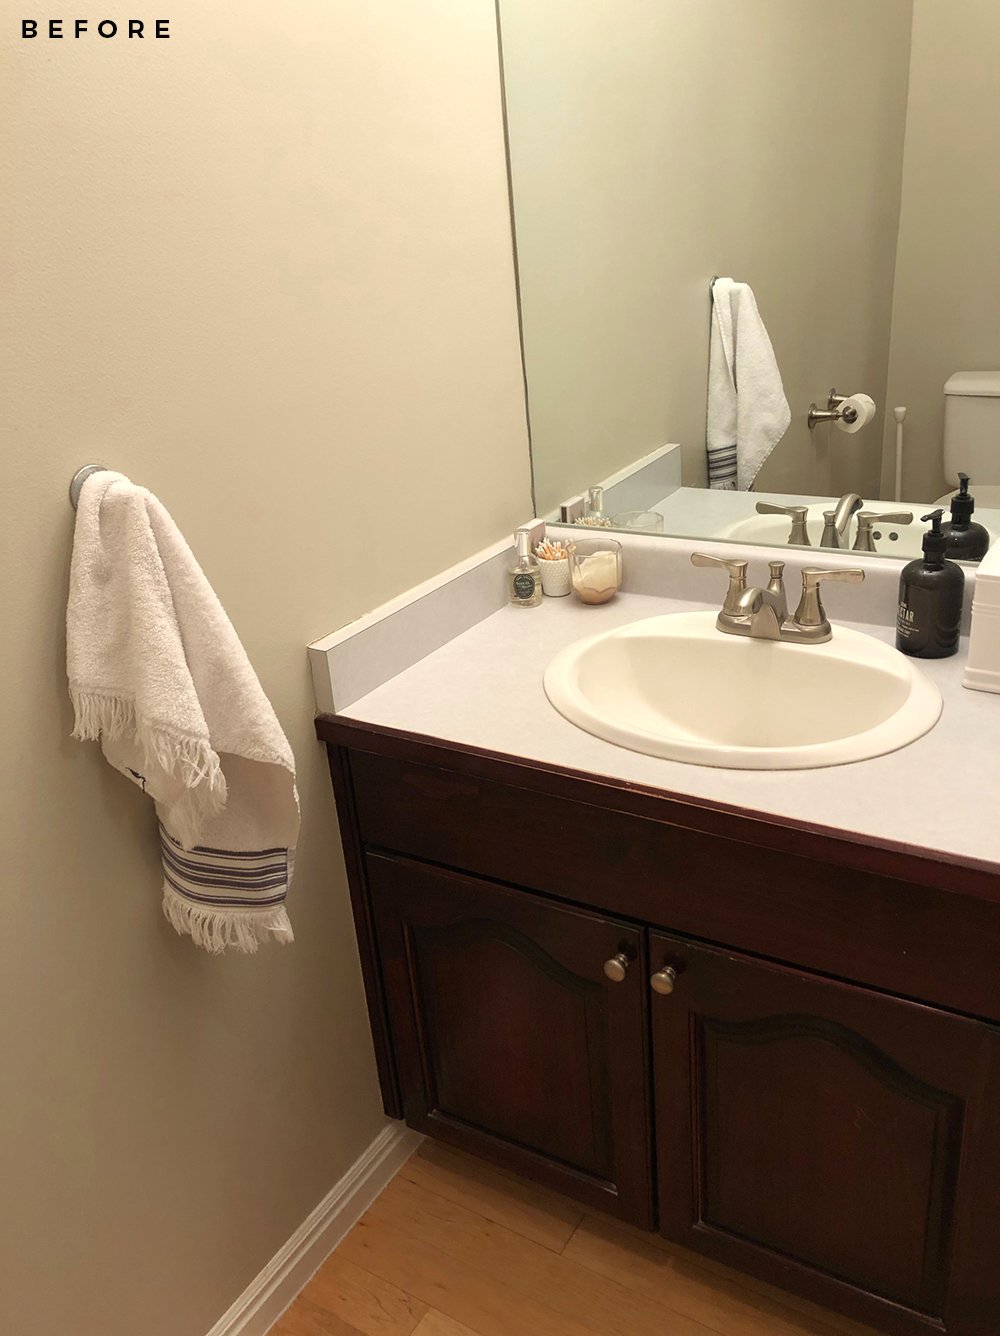 Right after finishing the laundry room in November, I created a budget-friendly design plan, and slowly started making updates. This is what it looked like before I did anything (above and below)…
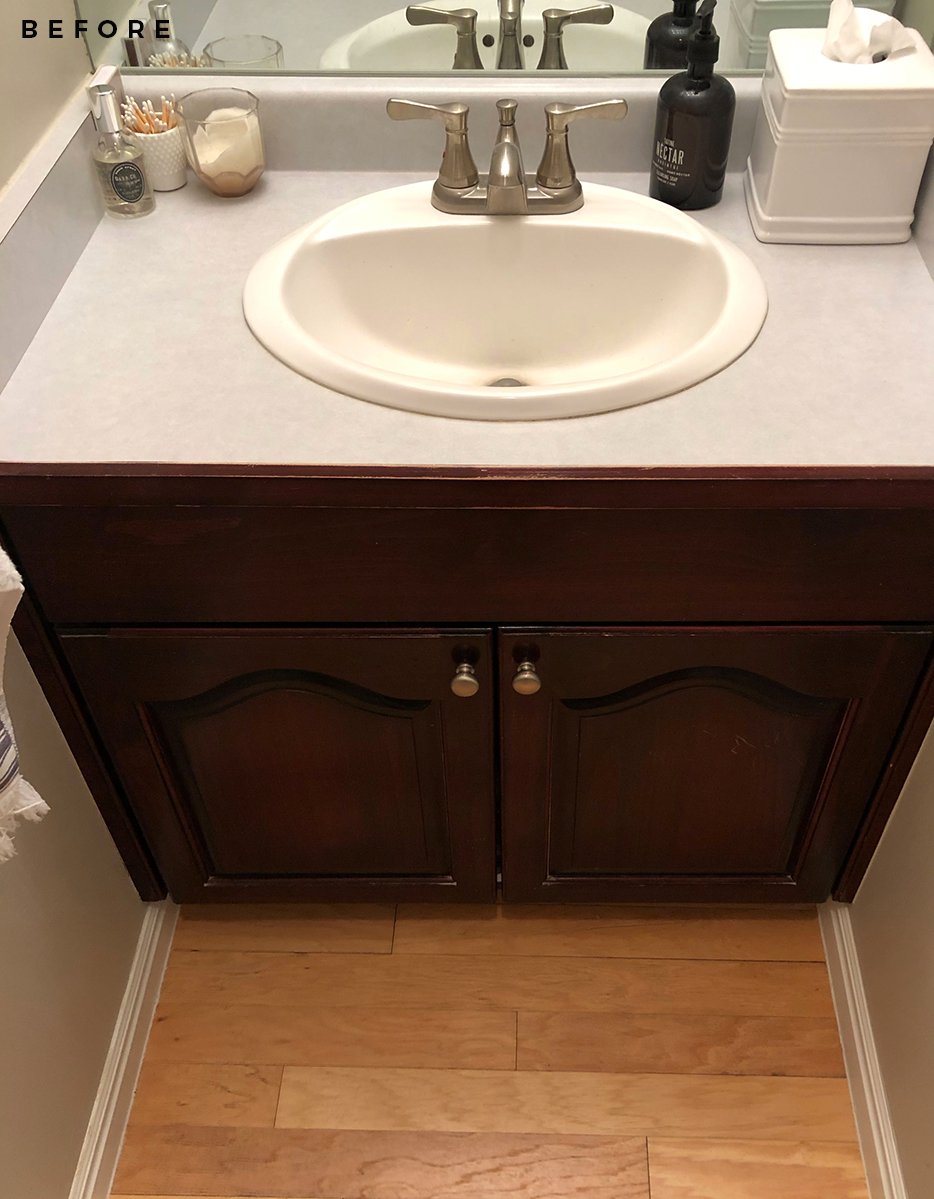 It’s not terrible and I know it could be worse, but it just feels dated, a little beat up, and pretty boring. Our home was built in the 90’s and this tiny room certainly reflects that.
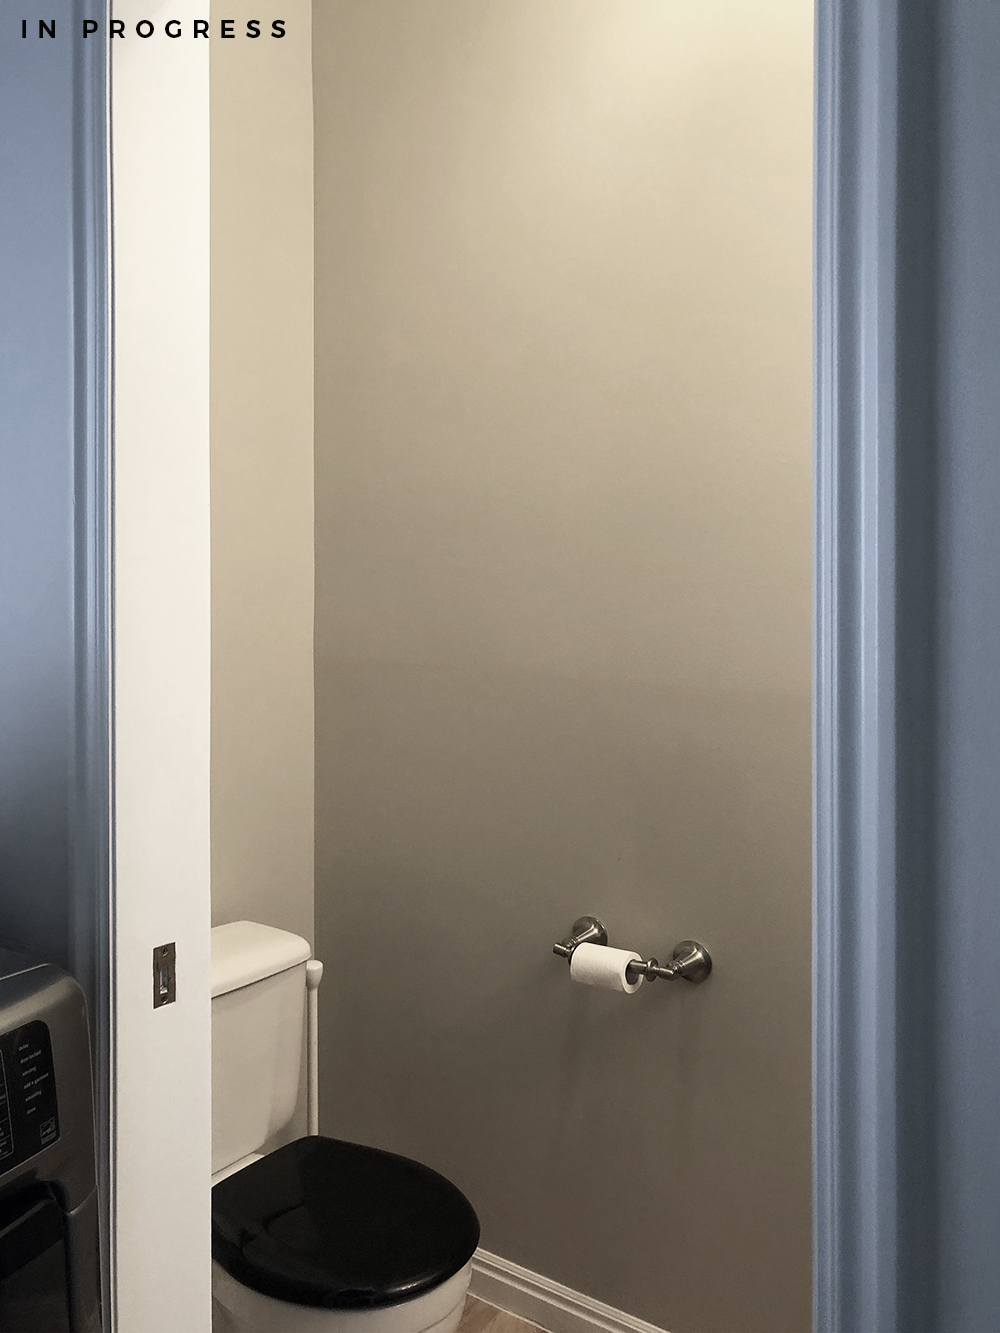
 Before our holiday guests arrived, I went ahead and swapped the toilet seat and lever because the existing seat was cracked, yellowed, and it was really grossing me out. I opted for black again, just like in our guest bathroom. Swapping toilet hardware is really easy and makes a big difference. Check out this post for ideas on upgrading your toilet without spending a ton of money! Catch the before image above, and the after image below… it’s better, right?
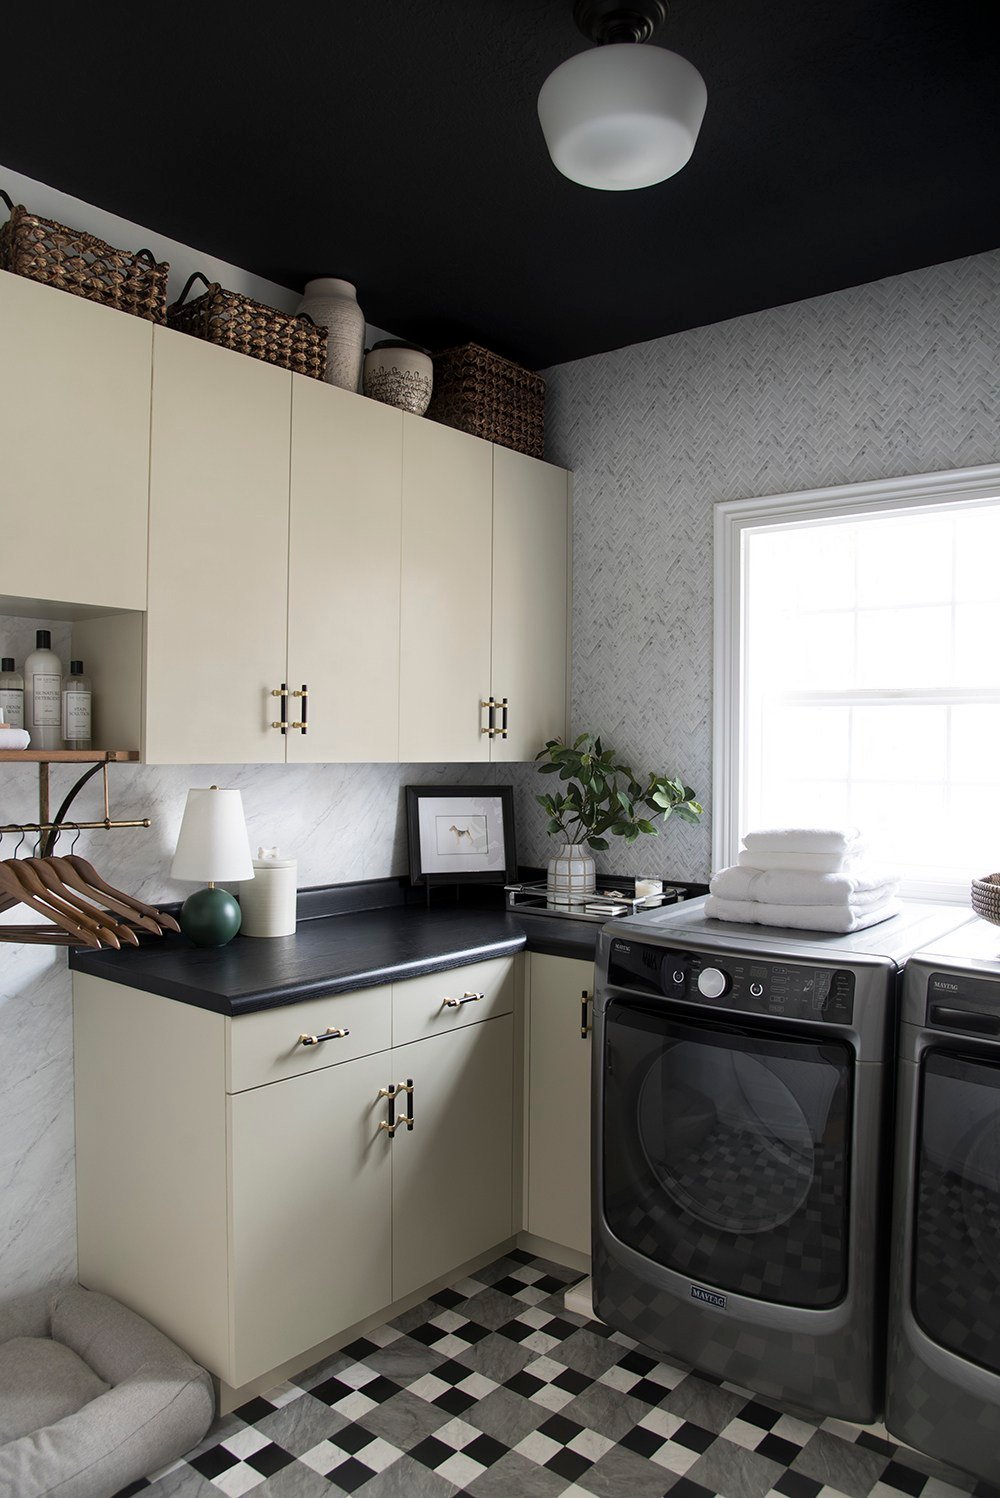
 In the laundry room, I used a lot of peel-and-stick materials, and although those are holding up splendidly so far- MUCH better than I expected honestly (I’ve only had to replace one floor tile), I worried about durability in a bathroom setting. With that said, I figured it was easier to modify the vanity and replace the sink, rather than using a peel and stick countertop material this time around. The shape of the original sink also felt pretty dated, so for $300- it made sense to swap the entire thing.
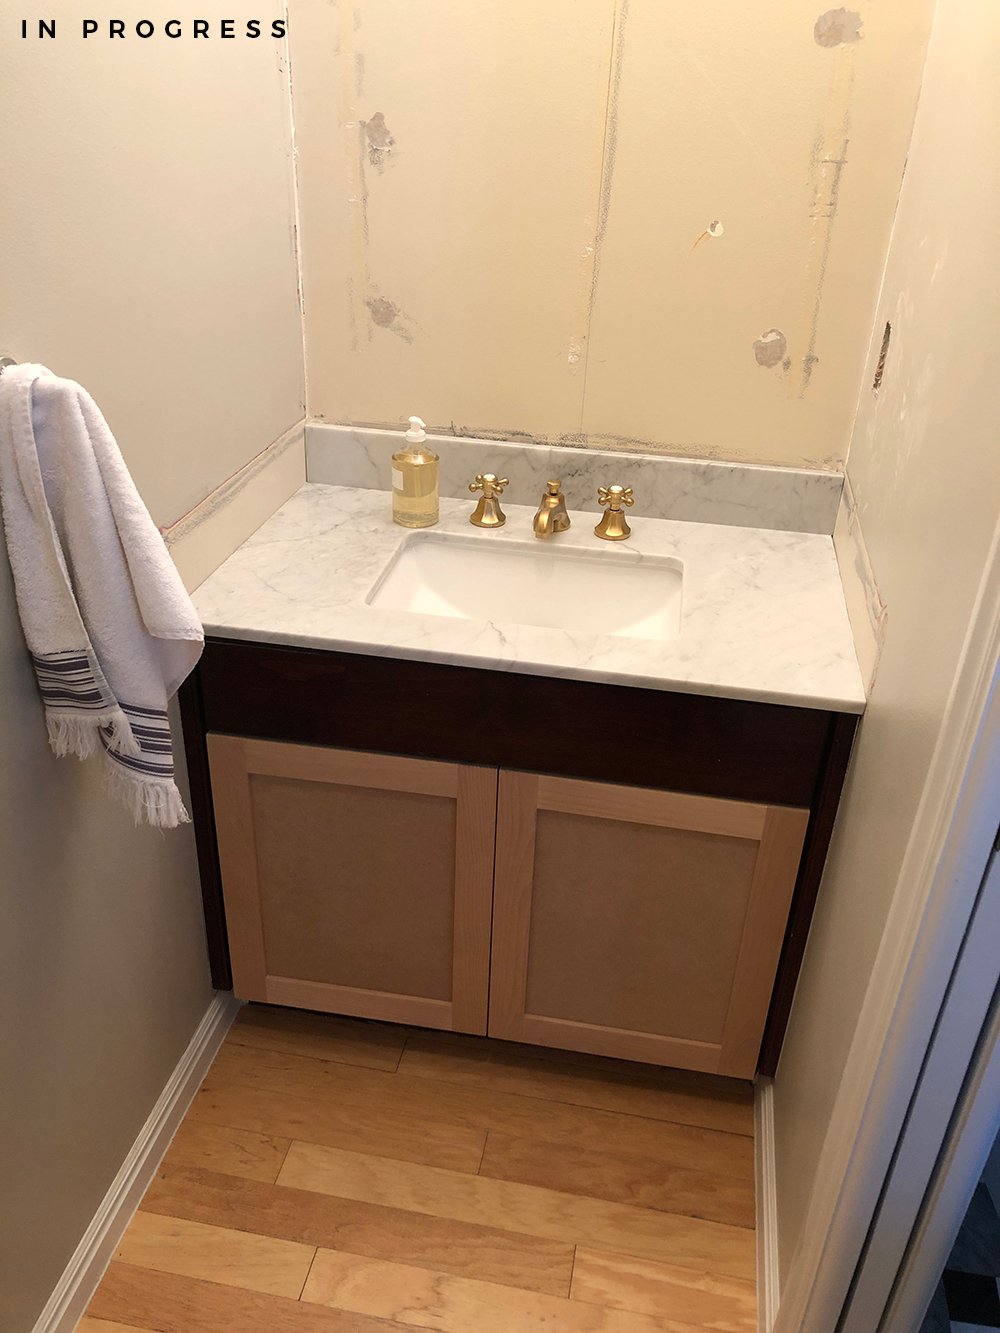 As you can see, I removed the mirror, swapped the sink, and traded the dated, arched cabinet doors for inexpensive shaker style panels. I used this website to order the doors– I believe they start at $13 and you can customize the panel style, wood species, size, and all sorts of things. It’s a great solution for updated cabinetry on a budget!
So far this powder bath has been a breeze and has been pretty cost effective! Some of the items were a bit more pricey for a temporary makeover (in comparison to my laundry room), but I figured I could use them elsewhere in the house when it comes time to actually demo this entire room. I also didn’t want to skip in a bathroom setting. Like I previously mentioned, I don’t want to take any chances when it comes to plumbing fixtures or the sink. We already have leaking issues in our master bath!
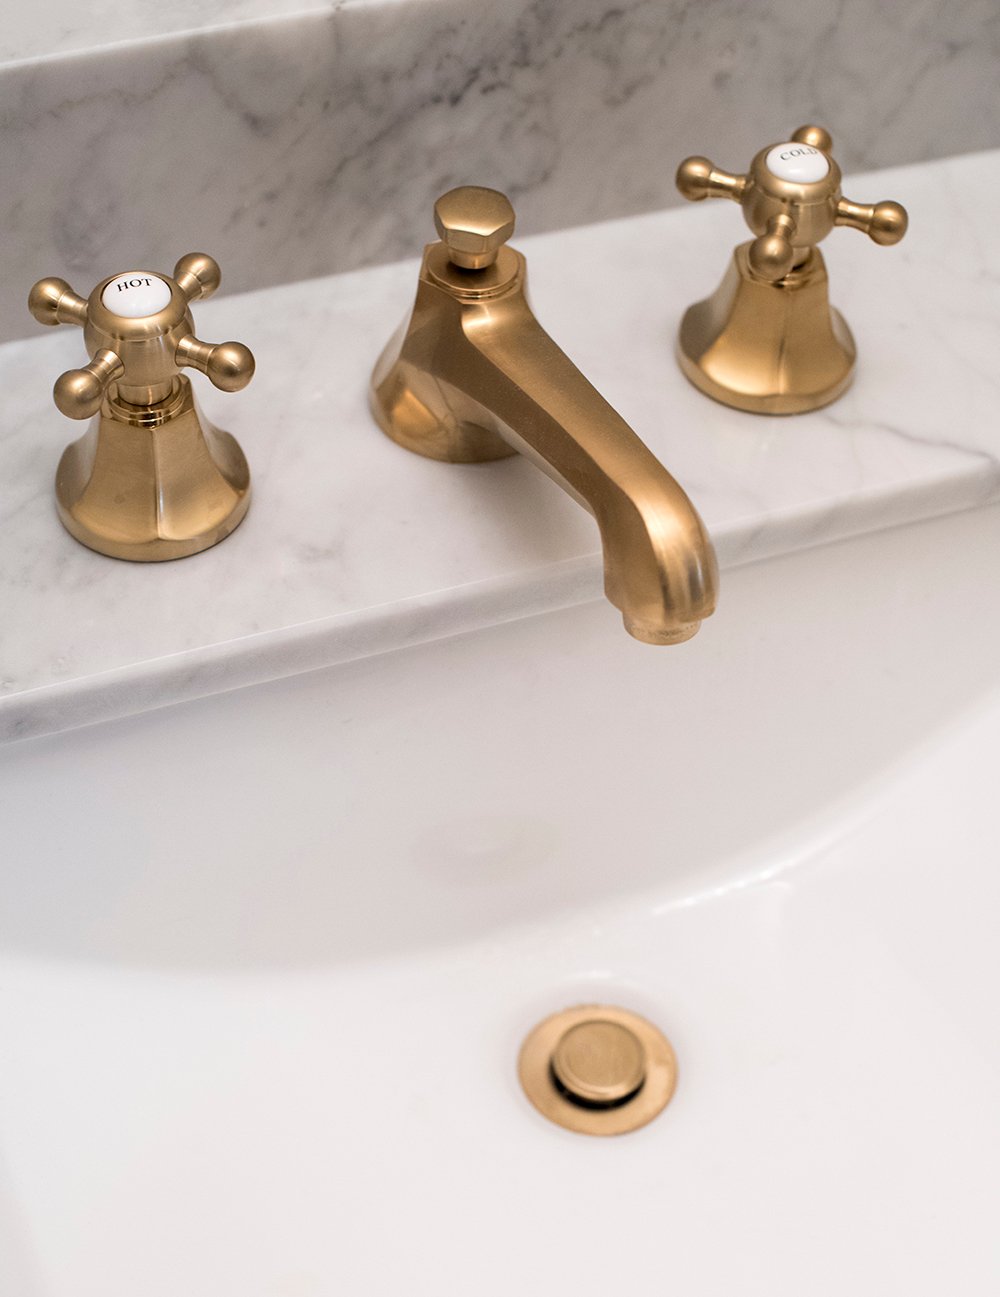
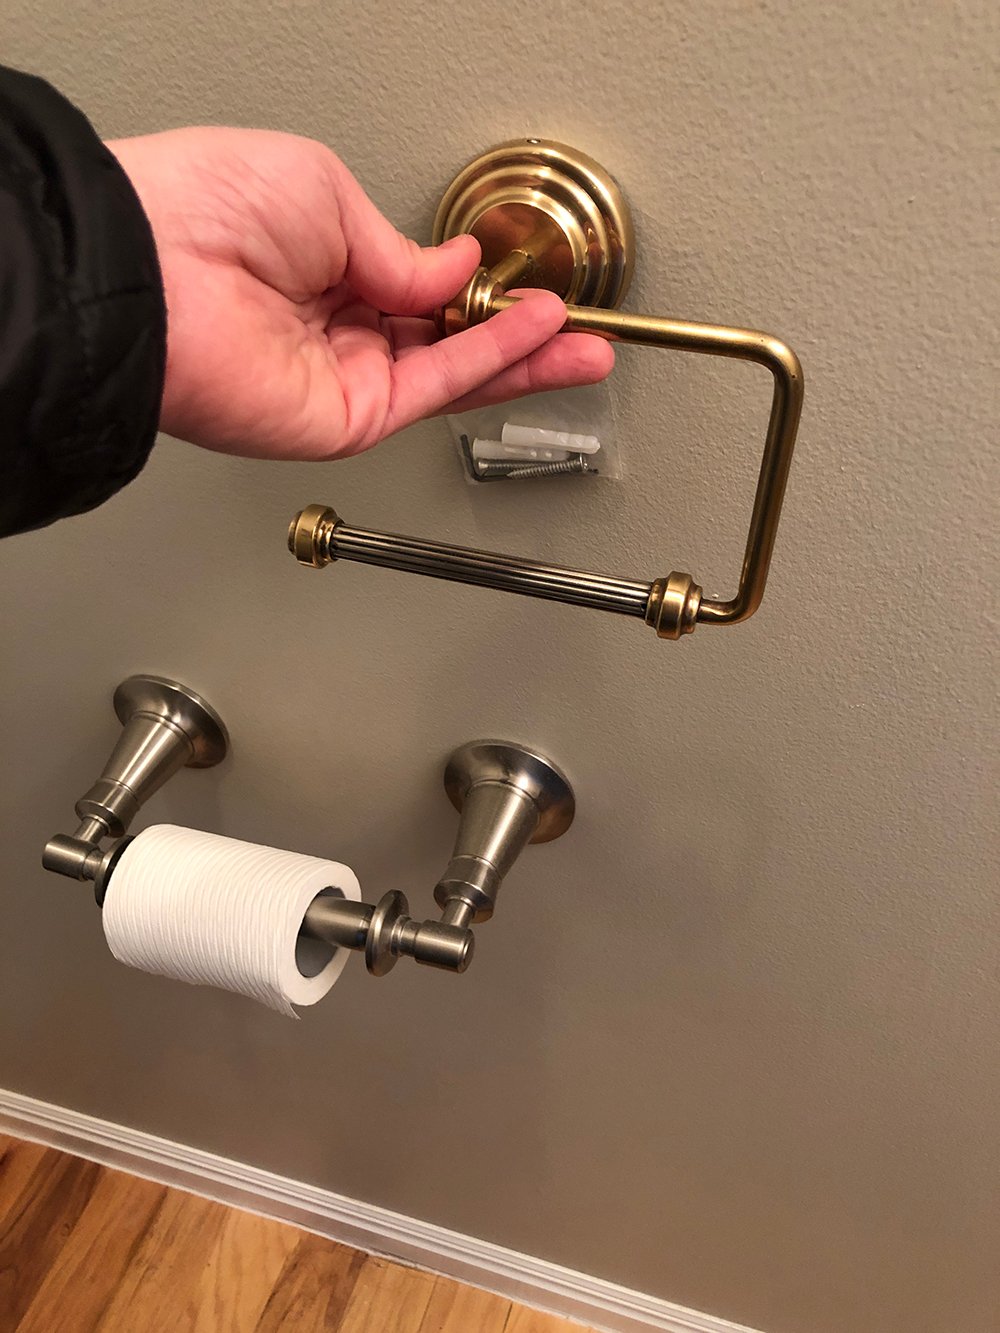
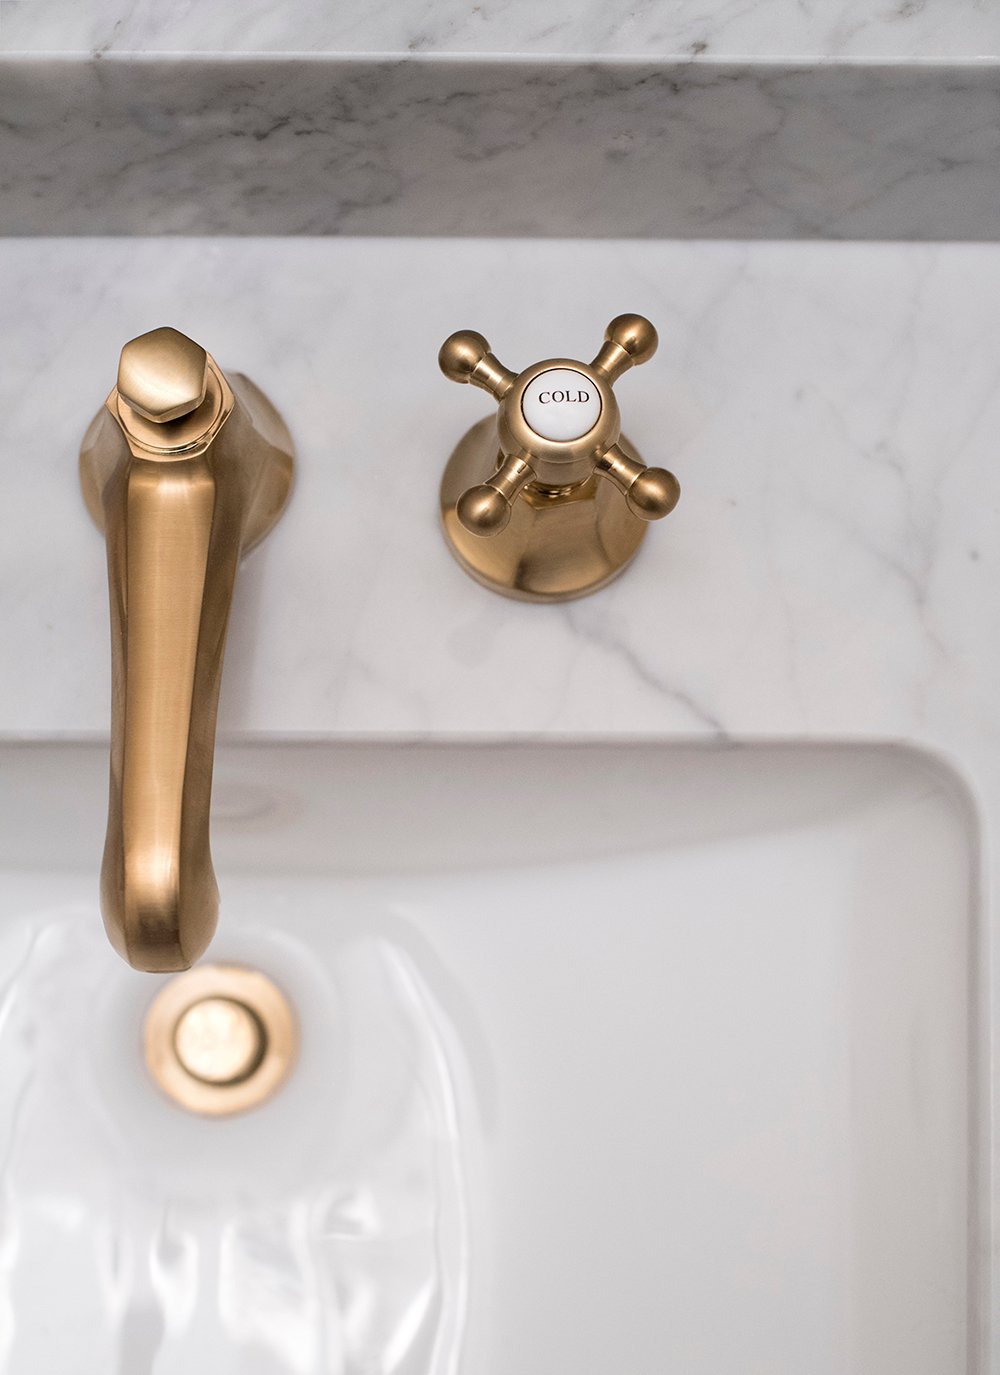
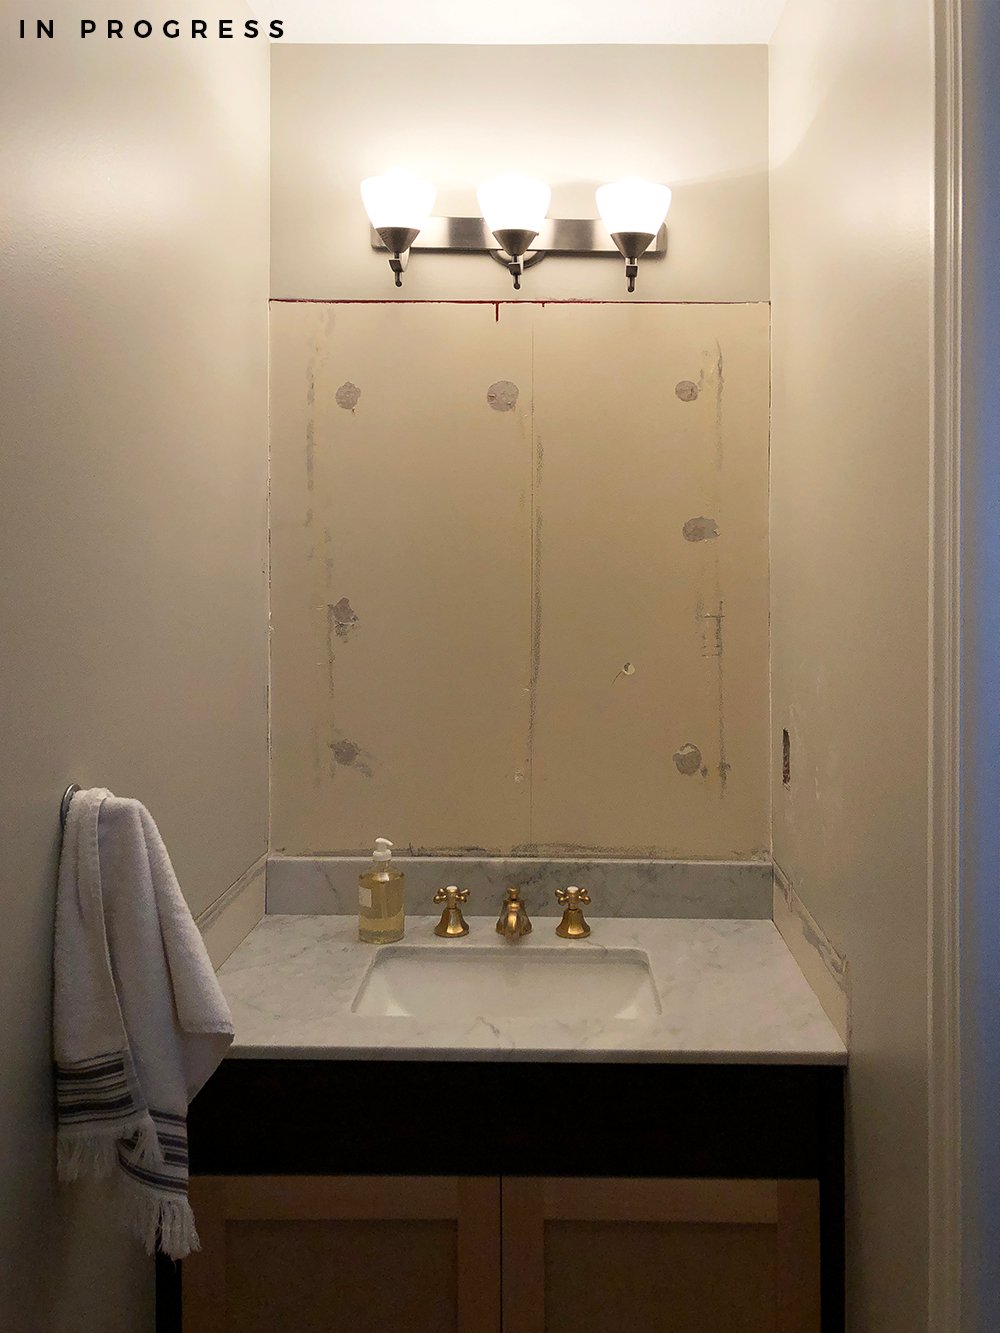 In addition to the sink and cabinet doors, I also swapped the faucet. Other things on my to-do list? Install the wall mirror, swap two light fixtures, install peel-and-stick wallpaper, paint the vanity, install peel-and-stick floor tile, replace the toilet paper holder, as well as the towel hook and art.
 I’m pretty much tackling this space on my own without Emmett’s help (since he’s busy working on our basement bath at the moment)– except for plumbing because our pipes are really fragile at this point and I didn’t want to mess them up. He installed the faucet for me, but I’m moving at my own pace and the room is already looking a lot better.
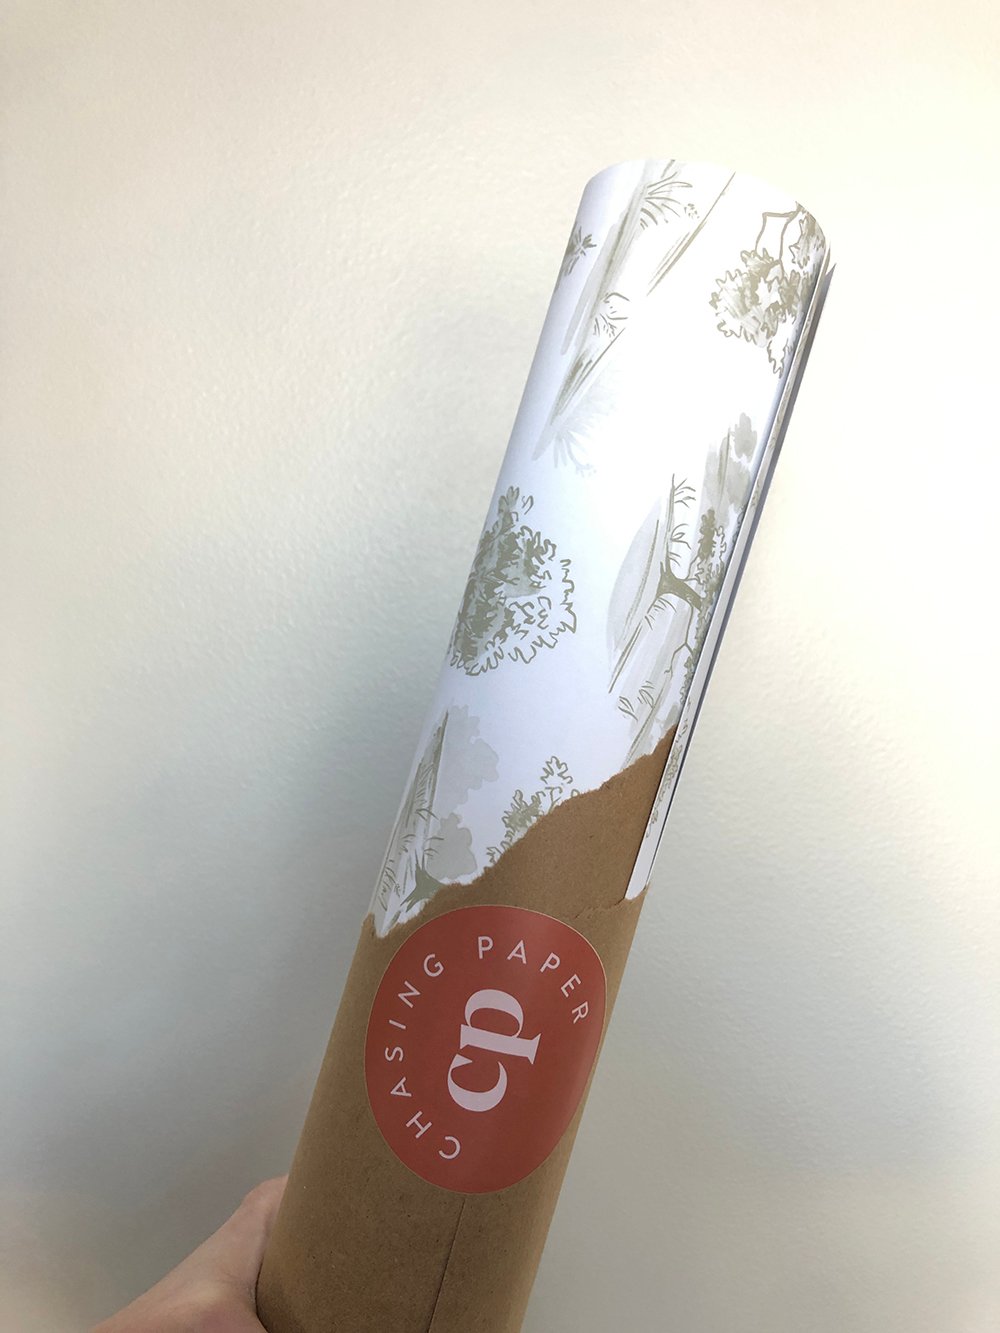
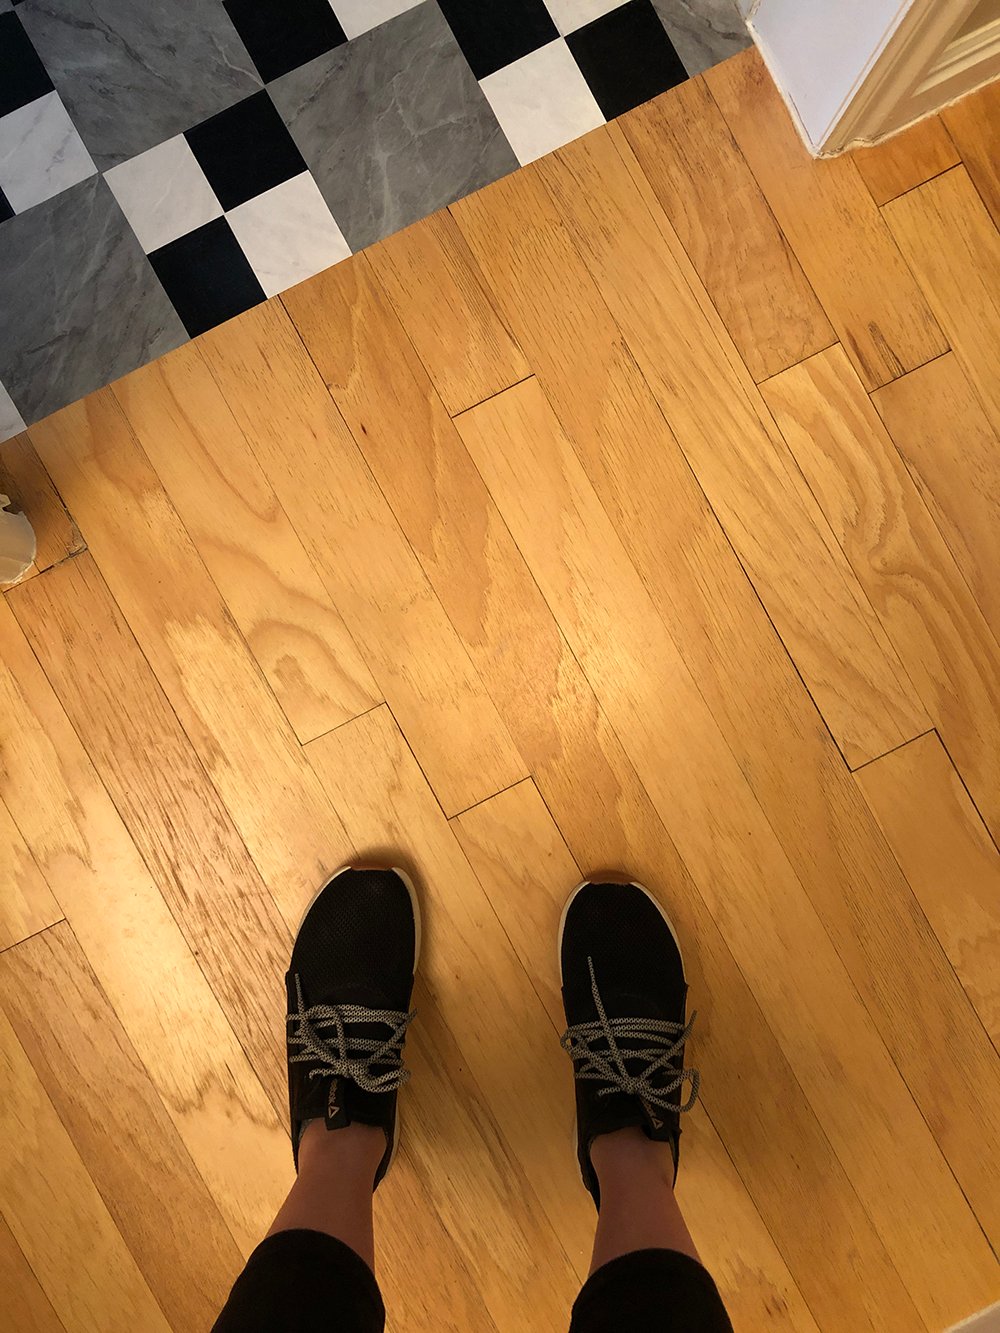 I’m excited to tackle some peel-and-stick projects once again because it’s fun and fast! I like watching a room totally transform in a matter of minutes. I opted for a pretty toile wallpaper (pictured below), and I’ll be continuing the graphic floor “tiles” from the laundry room, so the spaces will flow together nicely. Would I use peel-and-stick flooring for a longterm solution? Absolutely not- but I’m pretty impressed so far and while we’re waiting to fully renovate, it’s a wonderful solution!
 Click directly on my resources below to be redirected to the source, or use the numbered links below to shop…

01: semi flush mount light fixture // 02: peel-and-stick toile wallpaper // 03: vanity light // 04: wall mirror // 05: nude art one // 06: nude art two // 07: brass widespread faucet // 08: carrara sink and countertop // 09: nude art three // 10: nude art four // 11: peel-and-stick floor tile (light marble / dark marble / black squares) // 12: toilet lever // 13: toilet paper holder // 14: black toilet seat & lid // 15: towel hook // 16: hand towel // 17: waste basket
What do you think of the design plan? Are you into it? I think it will look pretty cohesive with the laundry room, which is important since the bathroom is actually inside of the laundry room. I’m reusing some things I already had (recognize the art from our previous bathroom?), I tried to source budget-friendly products, and I also considered other places I could use these items once the time comes to take this space to the studs. I think it’s going to be good! I’m excited to pull together the finished outcome.
 Are there any projects you want to see as I wrap up the space? Do you have any specific questions? Would you be interested in a separate post on how the laundry room is holding up three months later? I’d be happy to share! I also hope this post helps to clarify the different bathroom projects we’re currently juggling… there are two separate rooms (both baths) and I know that can be confusing. Thanks for sticking with me, friends! Have a great week.
